Introduction
With all that ends, something new starts
After the series "Crafting 4 Christmas" has ended for 2020, I will continue to share my crafting tutorials for other cool projects as well. I started to really enjoy the crafting and creating the tutorials, the response was great, so let's continue in another form.
I will start using another template for the posts, to make them recognizable and unite the different parts. This one is still in a trial form when it comes to layout.
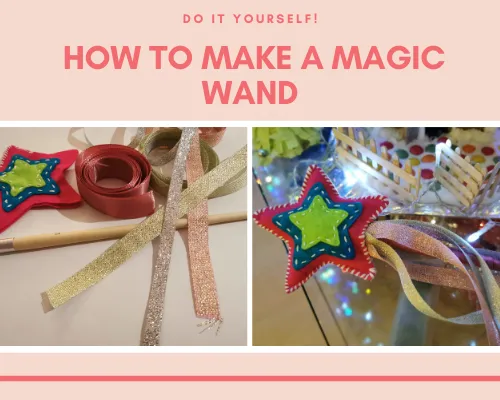
The story behind the magic wand
Back to the magic wand tutorial. My daughter had a pretty big wishlist for Christmas, and although we could fulfill quite a few of them, I wasn't too keen on buying a few of them in the store. Simply because I hate buying bad quality products that aren't even interesting if you get them for free. In the past, she has gotten a magic wand + crown set to dress up.
She has used it until they broke, I was surprised it took that long, but she was quite sad about it. I told her we'd find a decent one, and then I forgot until her request to Santa. While I was already crafting a lot, it was the perfect time to see if I could make a cool wand for her.
This project had to be done in secret, and I made sure that she never saw the ribbons and brush I bought for this project. She never questioned if it was mine, she is just totally in love with it and that makes me super happy. The only thing missing is a crown, which I was planning on delivering for Christmas as well, but I ran out of time so I told her after she said Santa forgot the crown that I'd try to make one for her. Problem solved. :)

Shopping list
In case you need to buy all the material, here's a list of everything I used to create this magic wand:
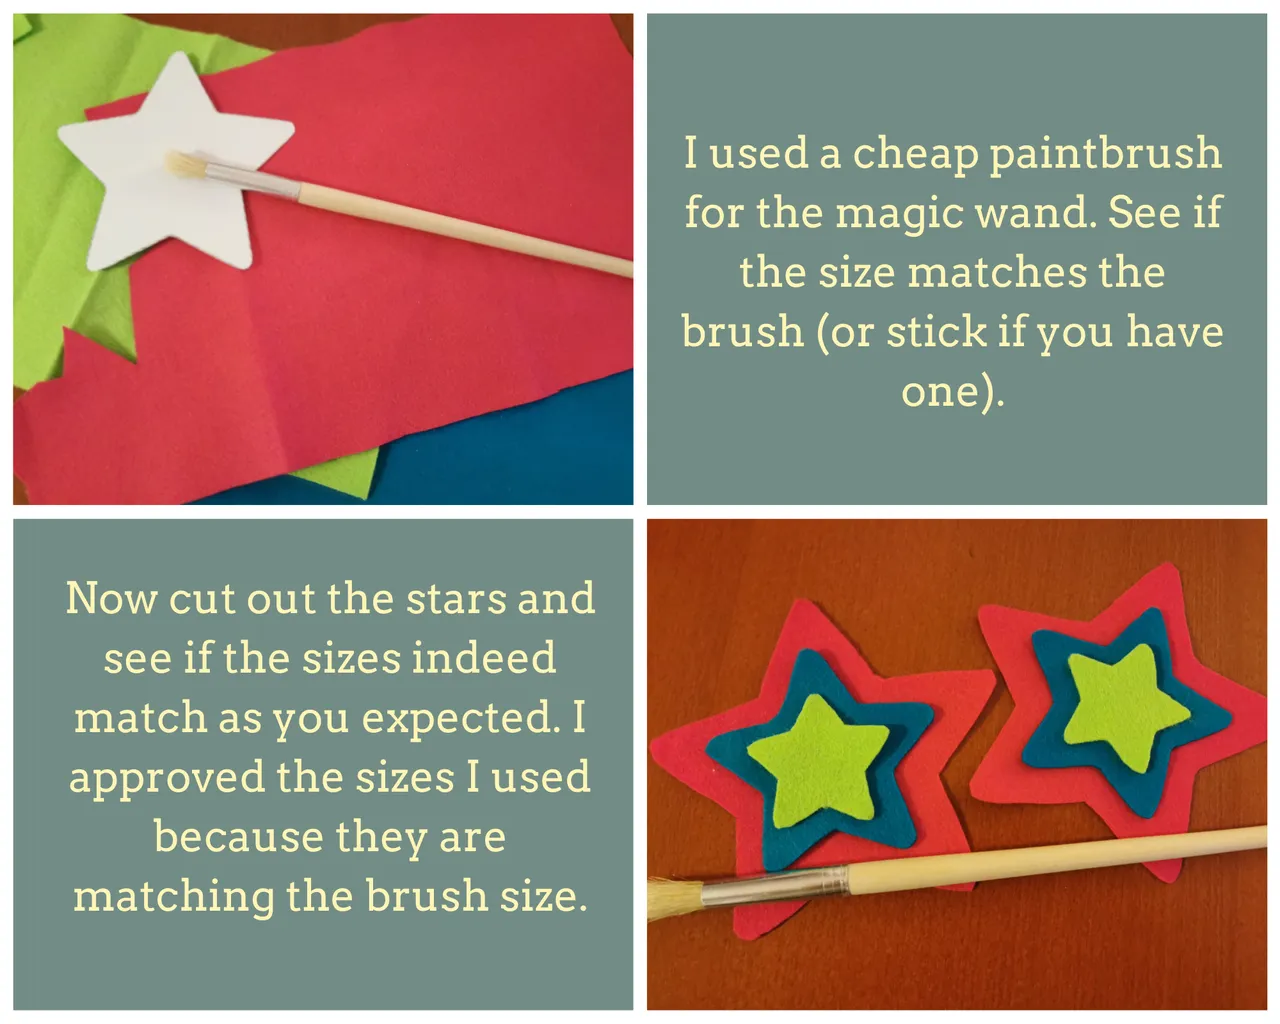
- Cheap paintbrush (decent wood that won't break easily)
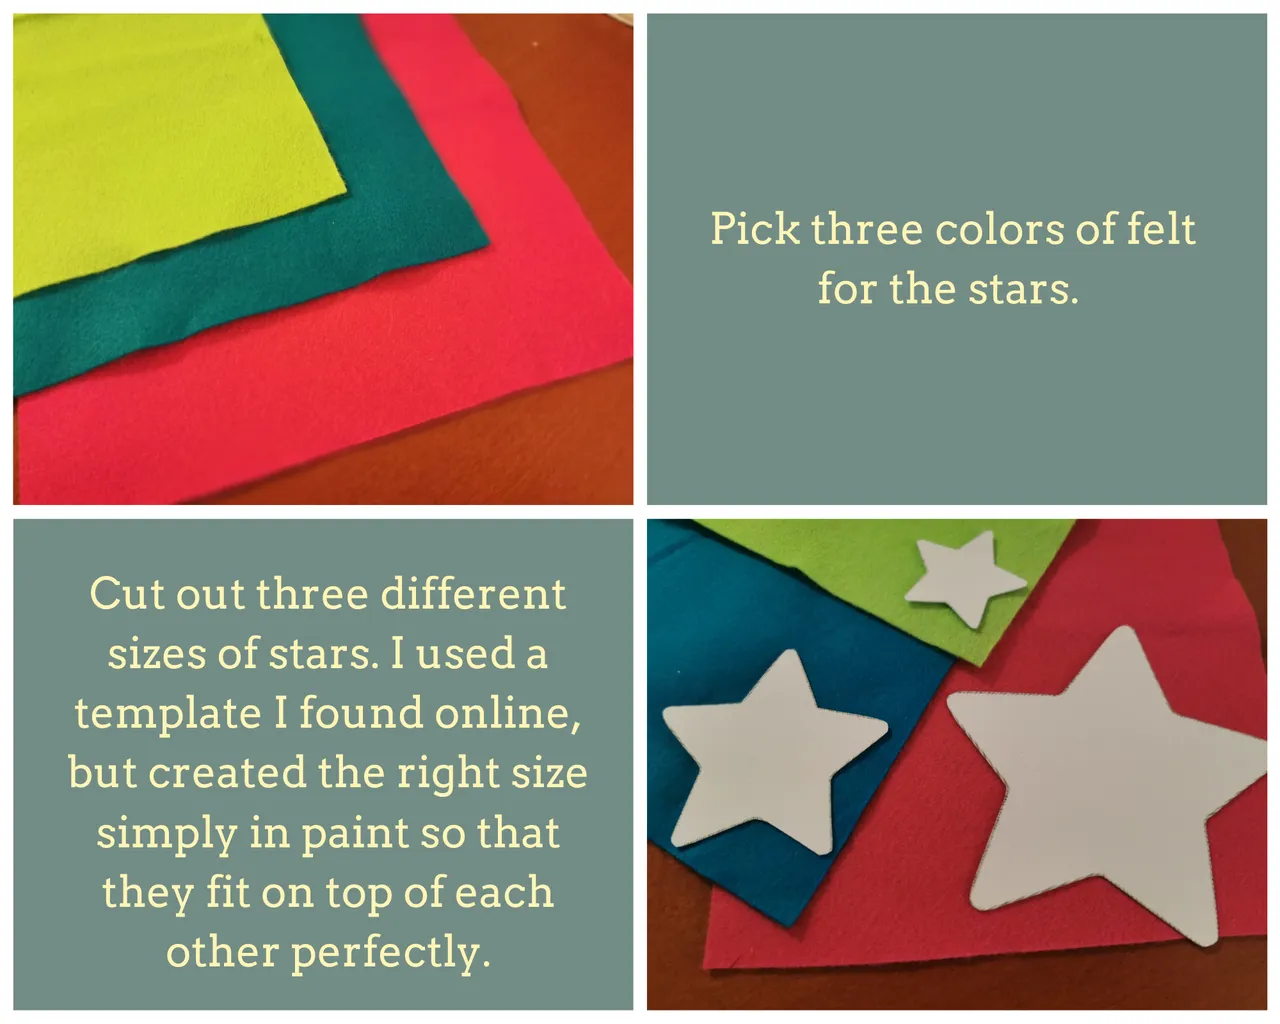
- 3 different colors of felt
- White thread
- Needle
- Scissors
- Glue gun
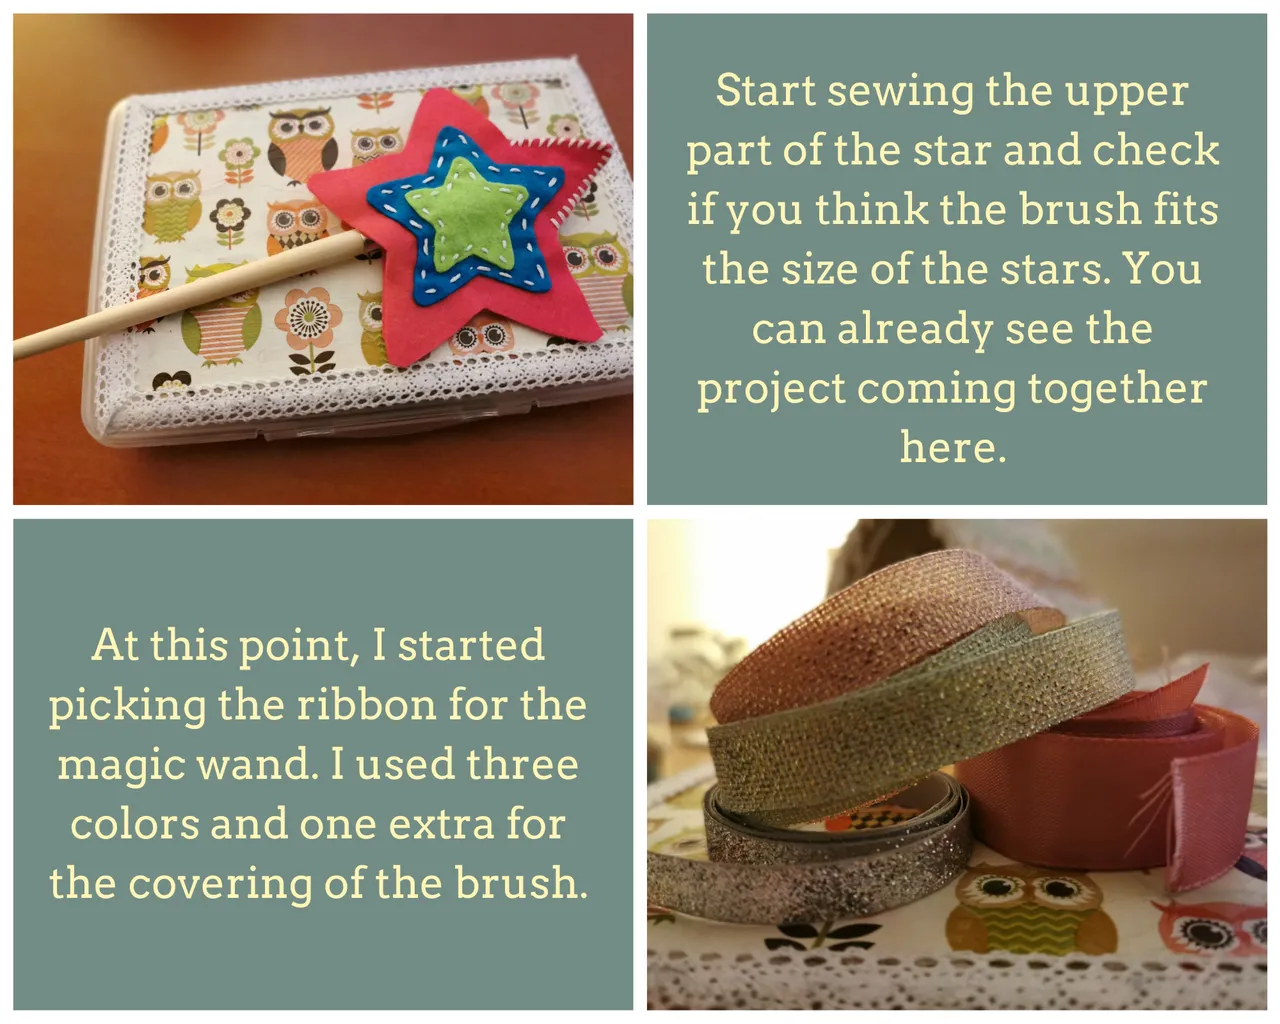
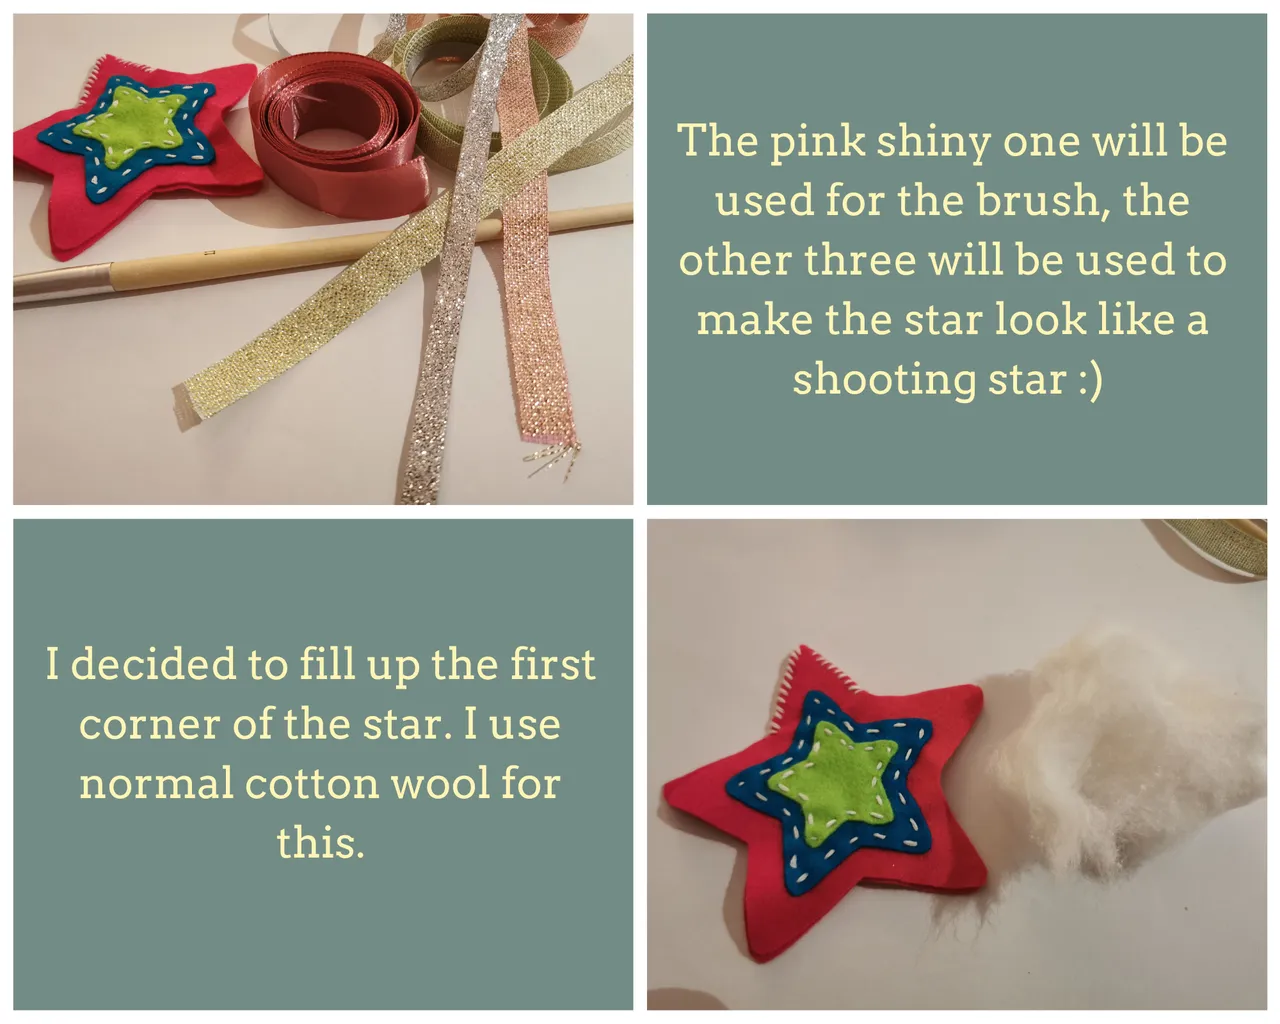
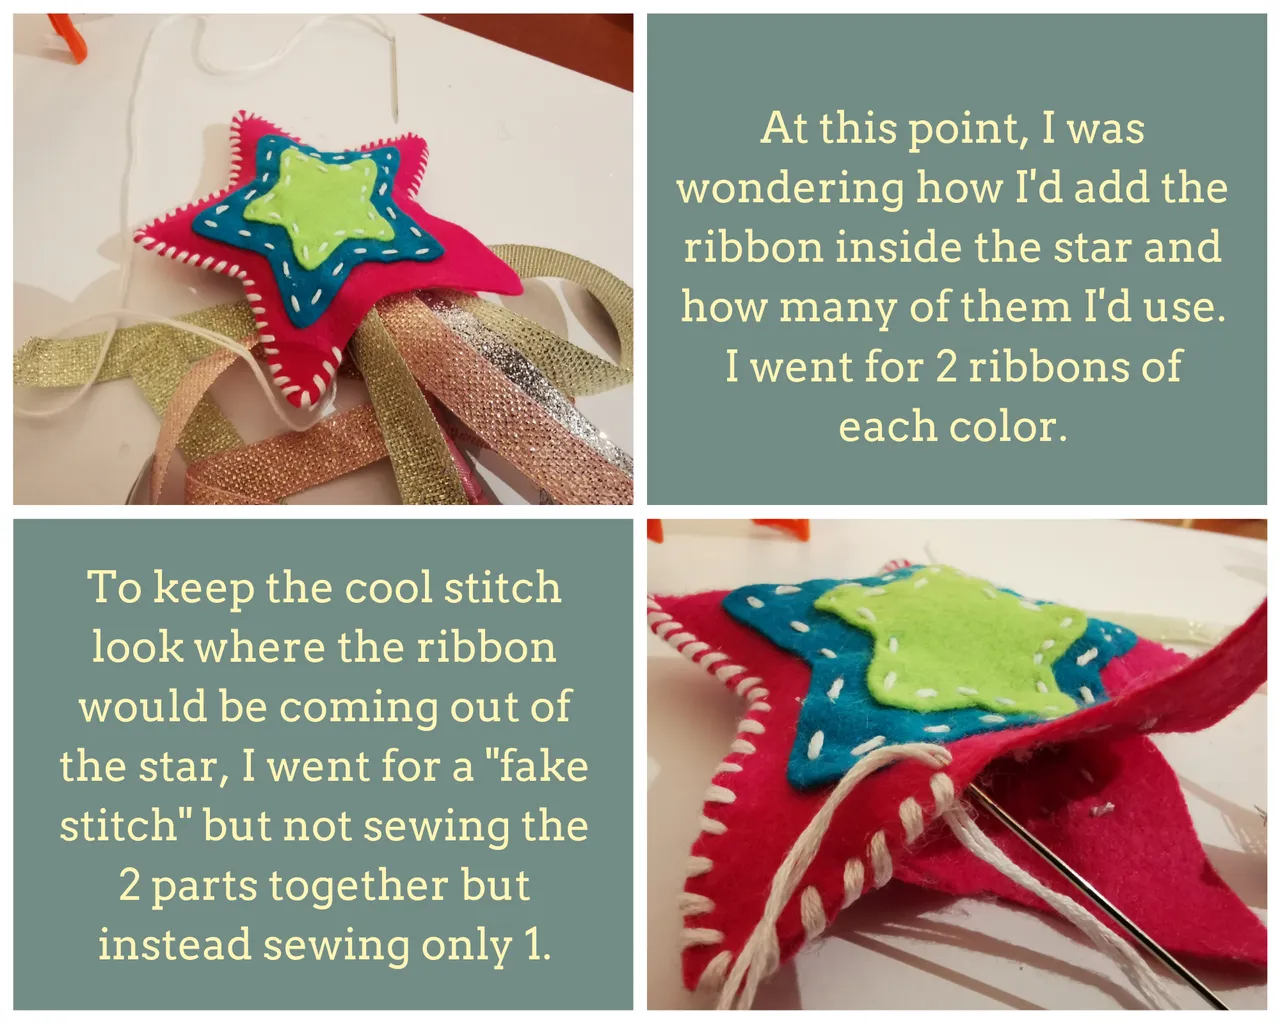
- 3 x 1 meter of ribbon in different colors (I didn't use them completely)
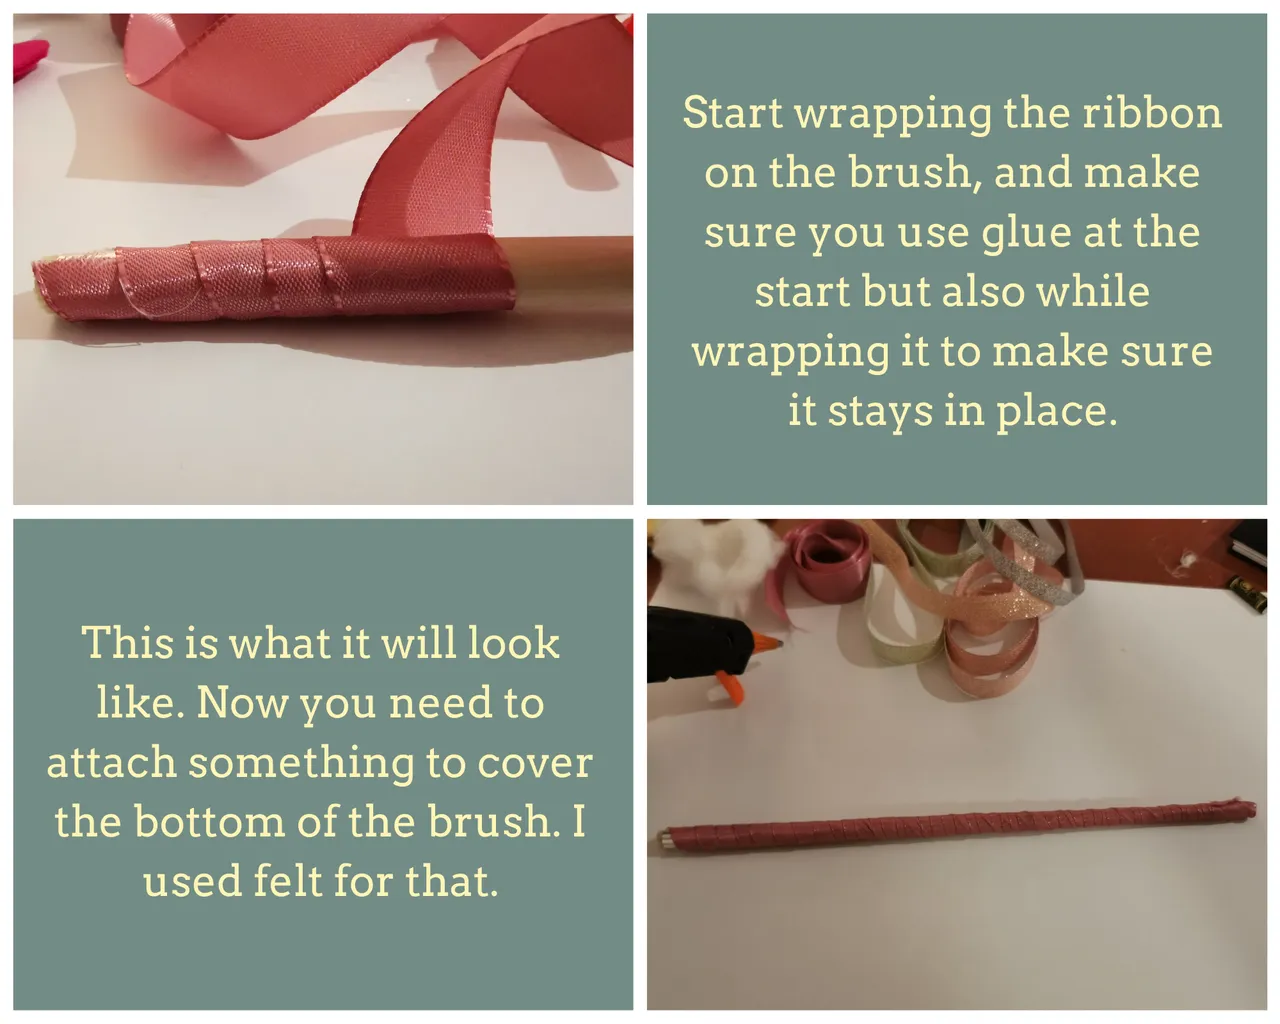
- 1 meter of ribbon that you want to use to wrap around the wooden part
- Tiny bit of felt to cover up the bottom of the magic wand
- Star template in 3 different sizes: Pick the ones you like here
Why I used a paintbrush instead of a normal wooden stick is simply because I could not find a stick that was decent enough not to break and carry the weight of the ribbon and star. If you can find a normal stick it's fine of course. In my case, I saved myself a chunk of cash because this was a set of 4 brushes only costing me about 1,10 dollars.
Whenever I don't have an item needed for a crafting project, I try to find a solution first within the household, if that doesn't work out, I try to be creative and make it as low budget (but decent) as possible. I would advise you to do the same. These cool crafts don't have to be expensive at all!
Instructions


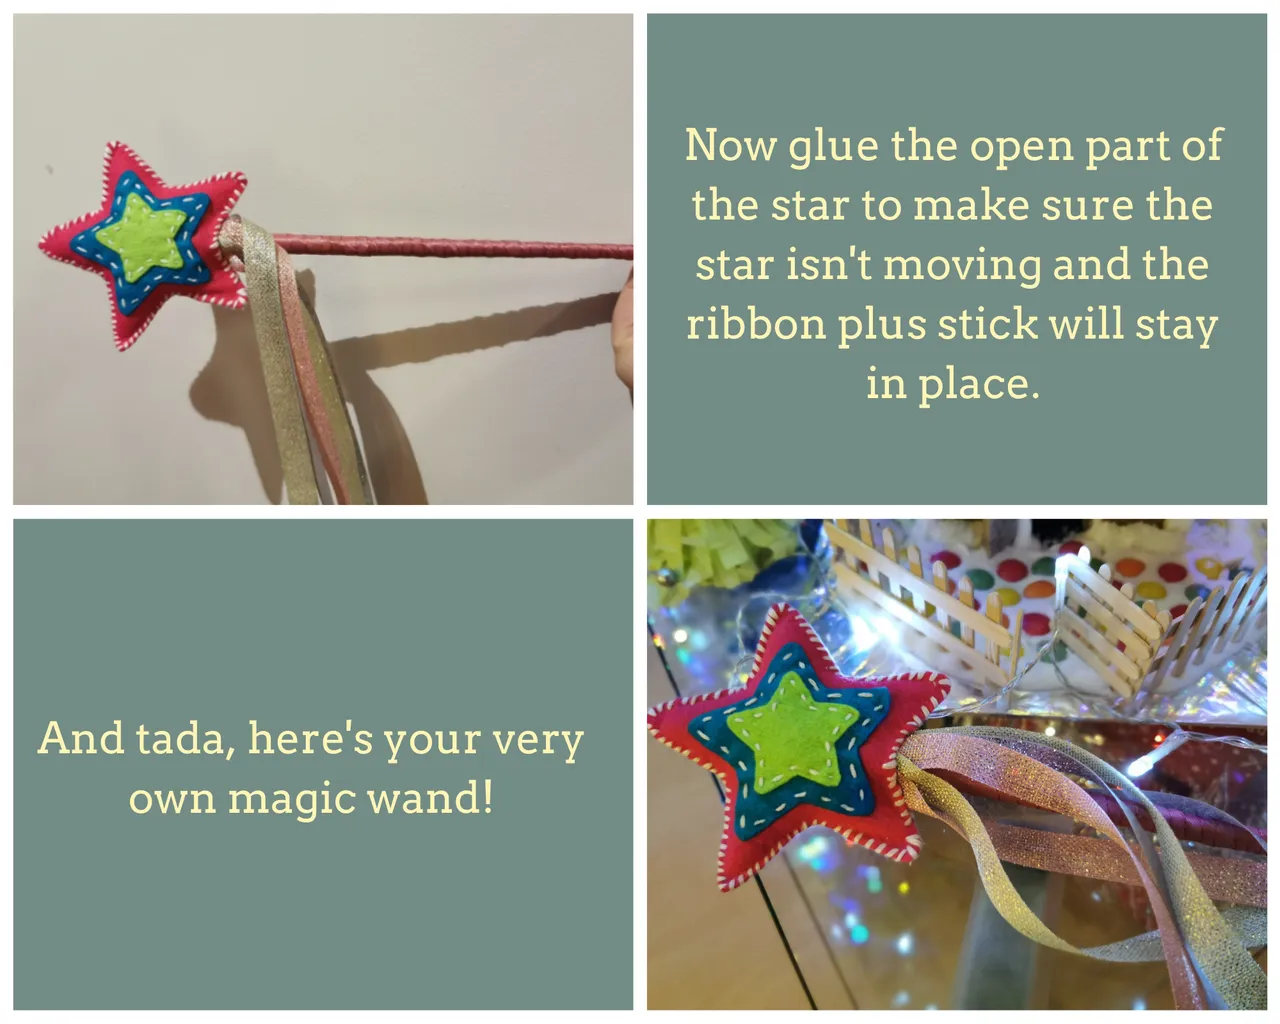
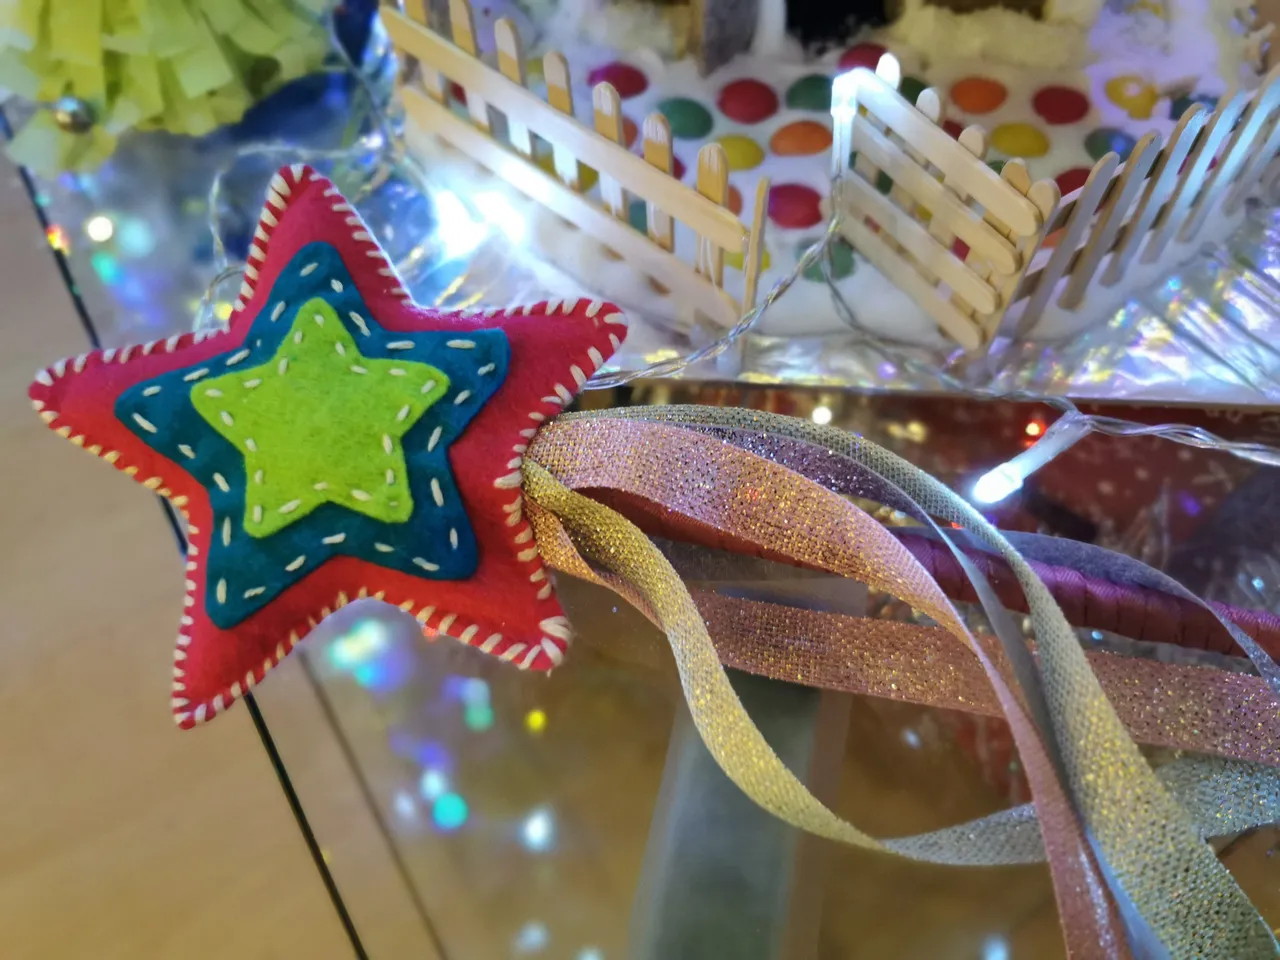
The end result

I can tell you that my daughter still says the best gift she received for Christmas was the magic wand. My boyfriend already predicted this when I finished it before Christmas, but I never expected it to be the truth. Her happy face absolutely made it worth my time!
I hope you enjoyed this crafty tutorial and see you in the next part!
Thanks for stopping by.. <3
Tags: #diy #tutorial #crafts #crafting #creative #handmade #magicwand #fairy #kids #magic