Hello friends!
Hola Amigos!
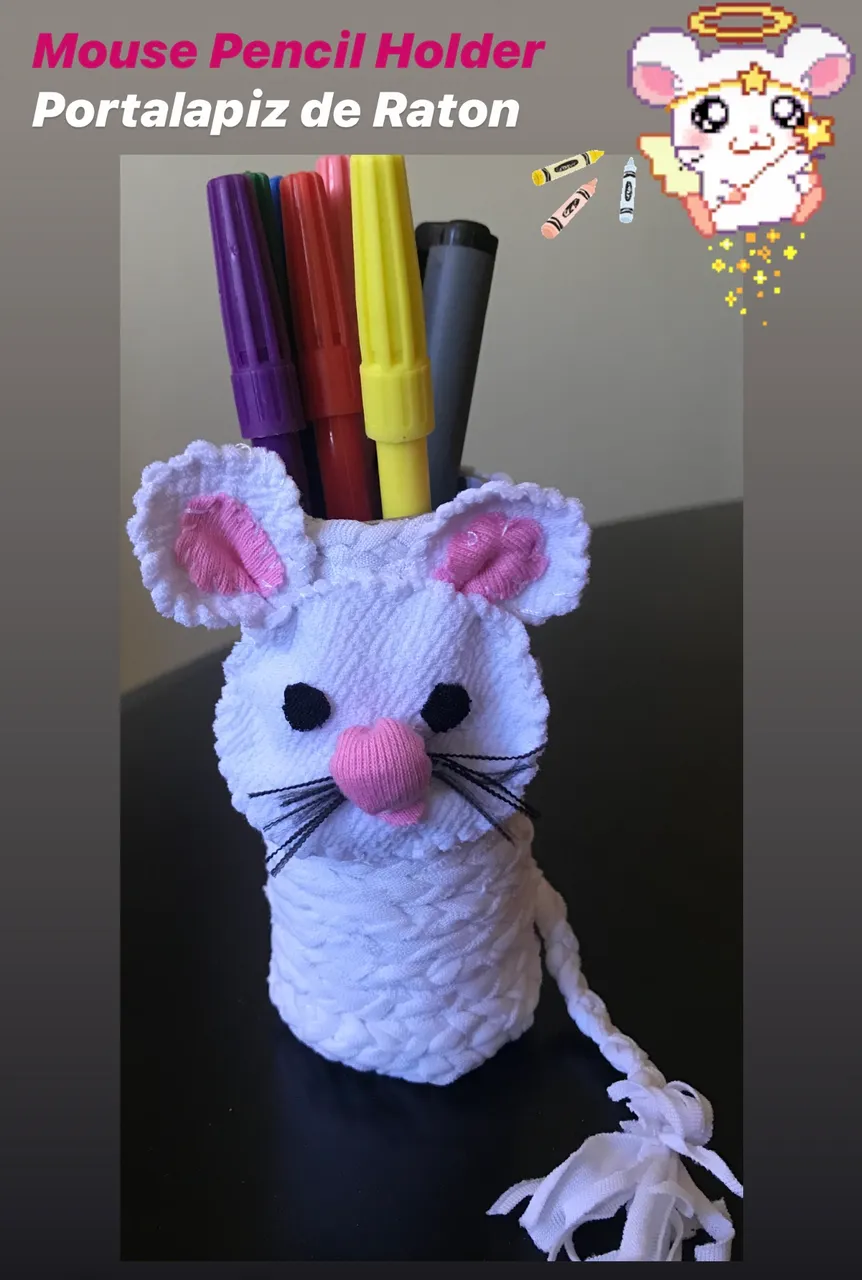
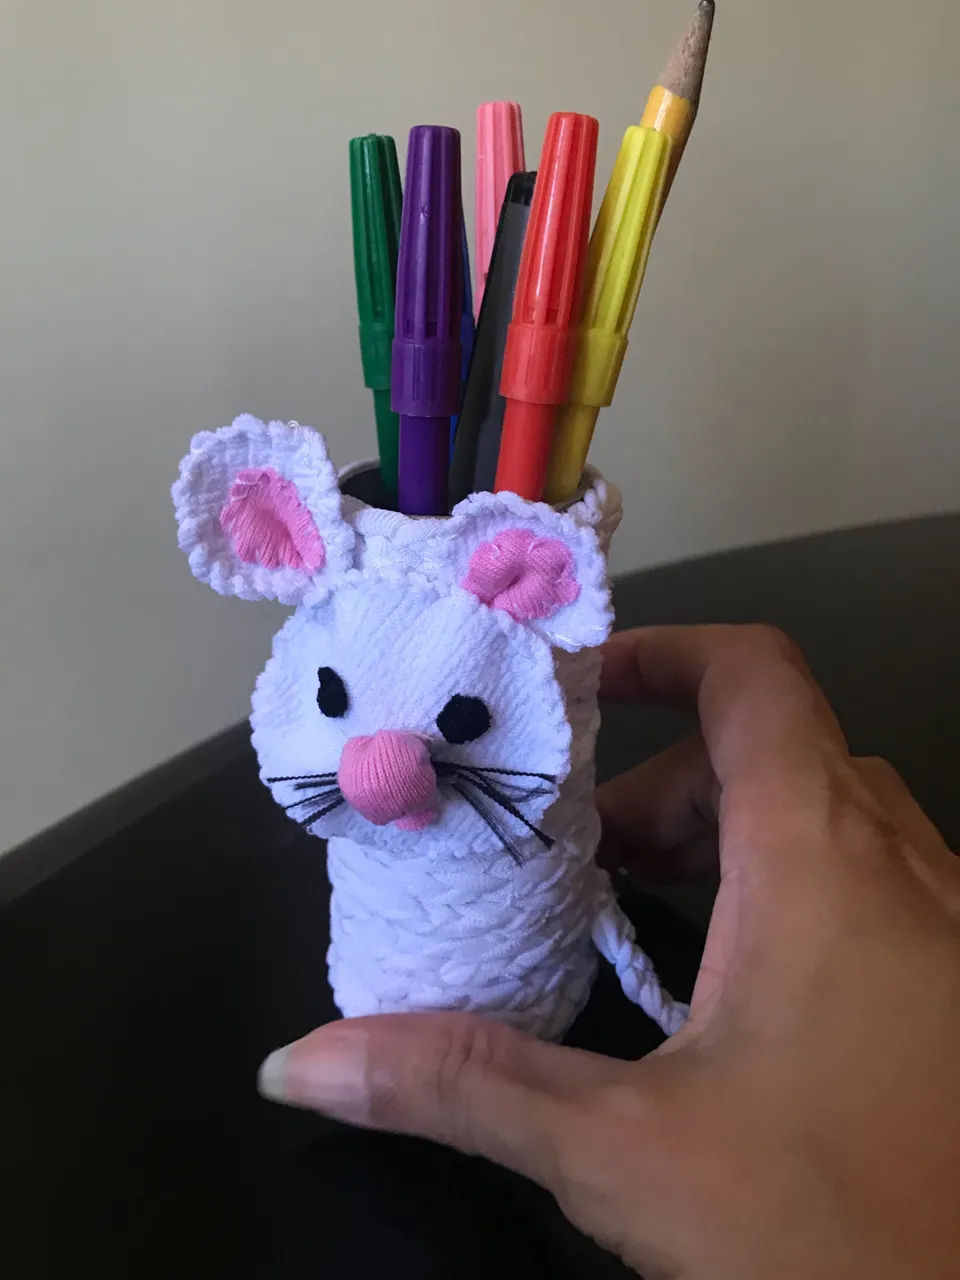
Today I want to show you a beautiful, simple and inexpensive idea that will help you organize and decorate spaces in a fun way, a little mouse holding pencils.
El día de hoy quiero mostrarles una linda, sencilla y económica idea que los ayudará a organizar y decorar los espacios de forma divertida, un ratoncito porta lápices.
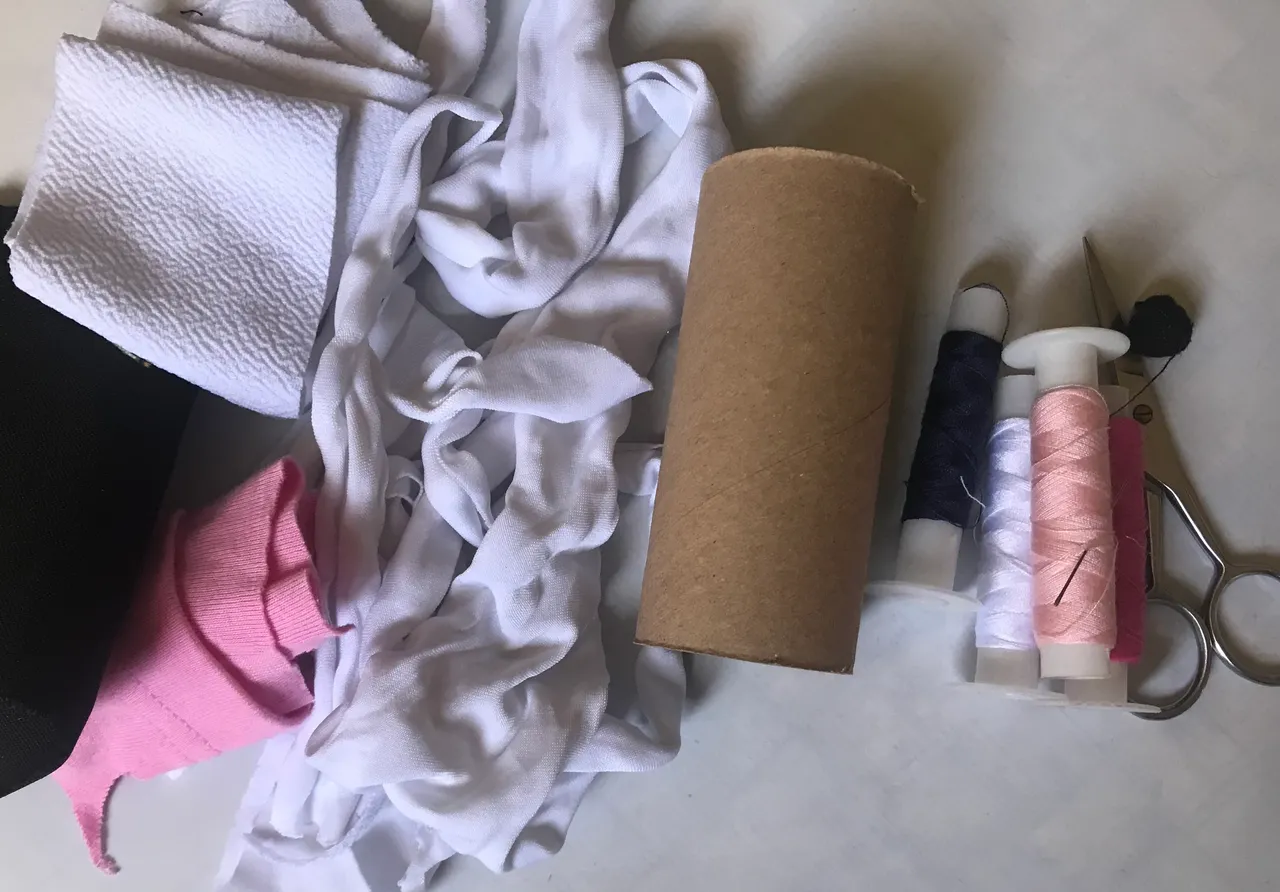
They need:
Necesitan:
• White, black and pink fabric.
• Cardboard cylinder.
•Paperboard.
•Glue.
•Needle and thread.
•Scissors.
•Tela blanca, negra y rosada.
•Cilindro de cartón.
•Cartón.
•Pegamento.
•Aguja e hilo.
•Tijera.
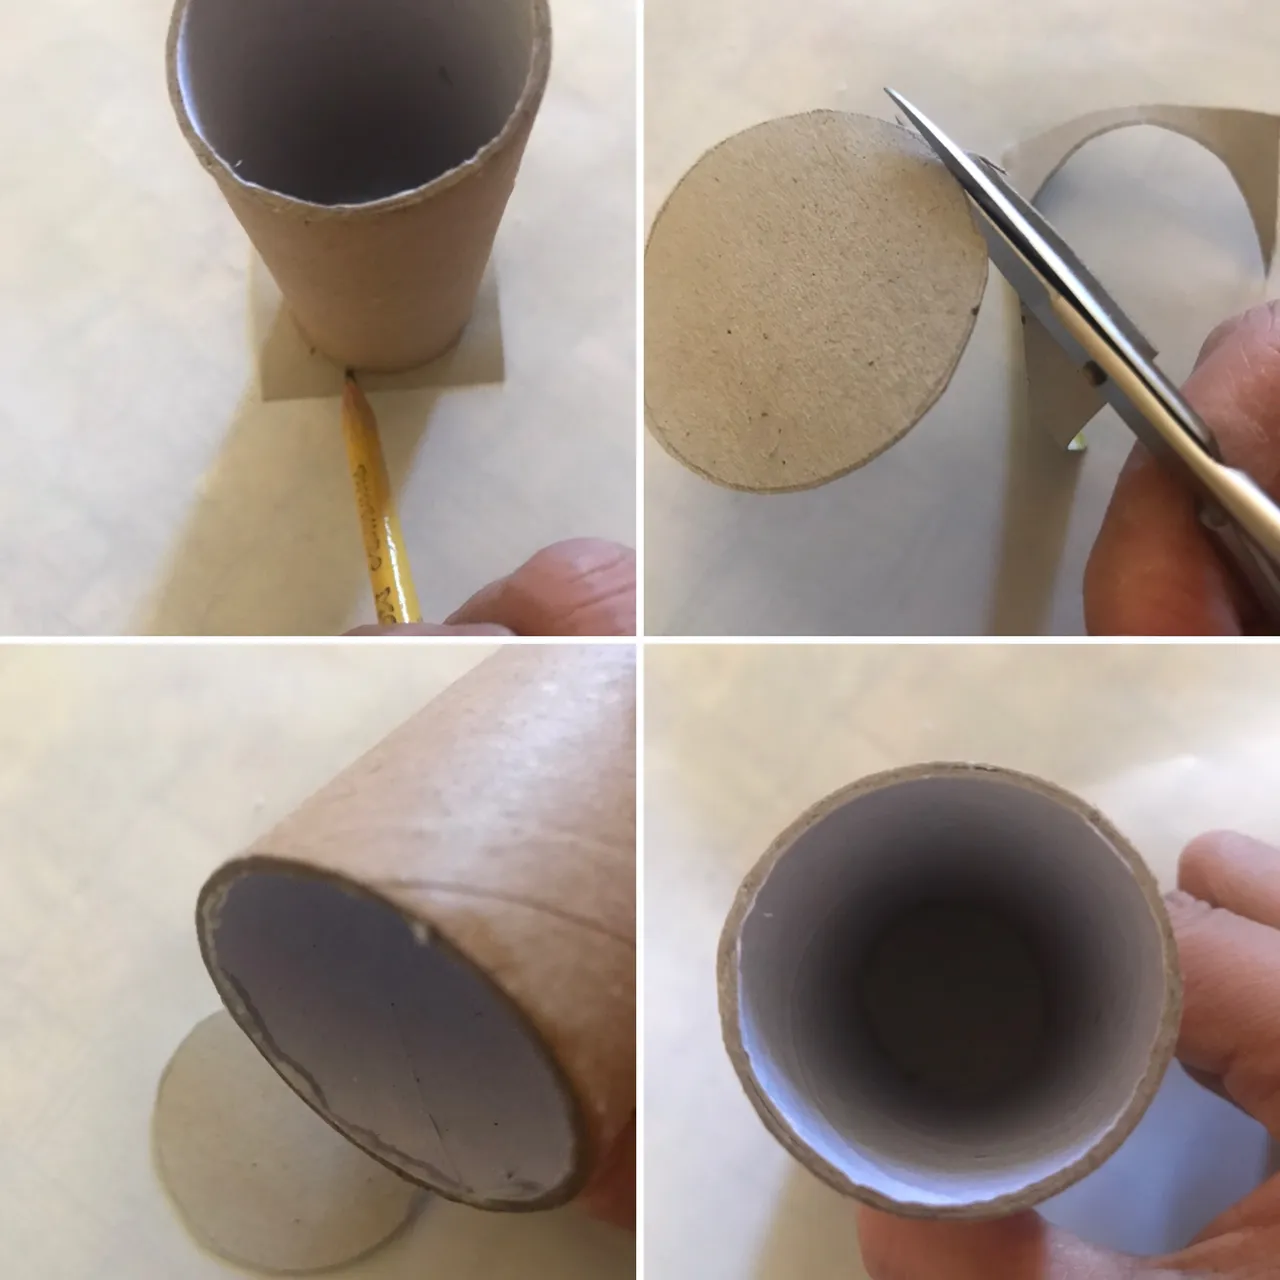
We start by marking the base of the cylinder on a cardboard, cut out and fix with the glue to the base of the cylinder.
Iniciamos marcando en un cartón la base del cilindro, recortamos y fijamos con el pegamento a la base del cilindro.
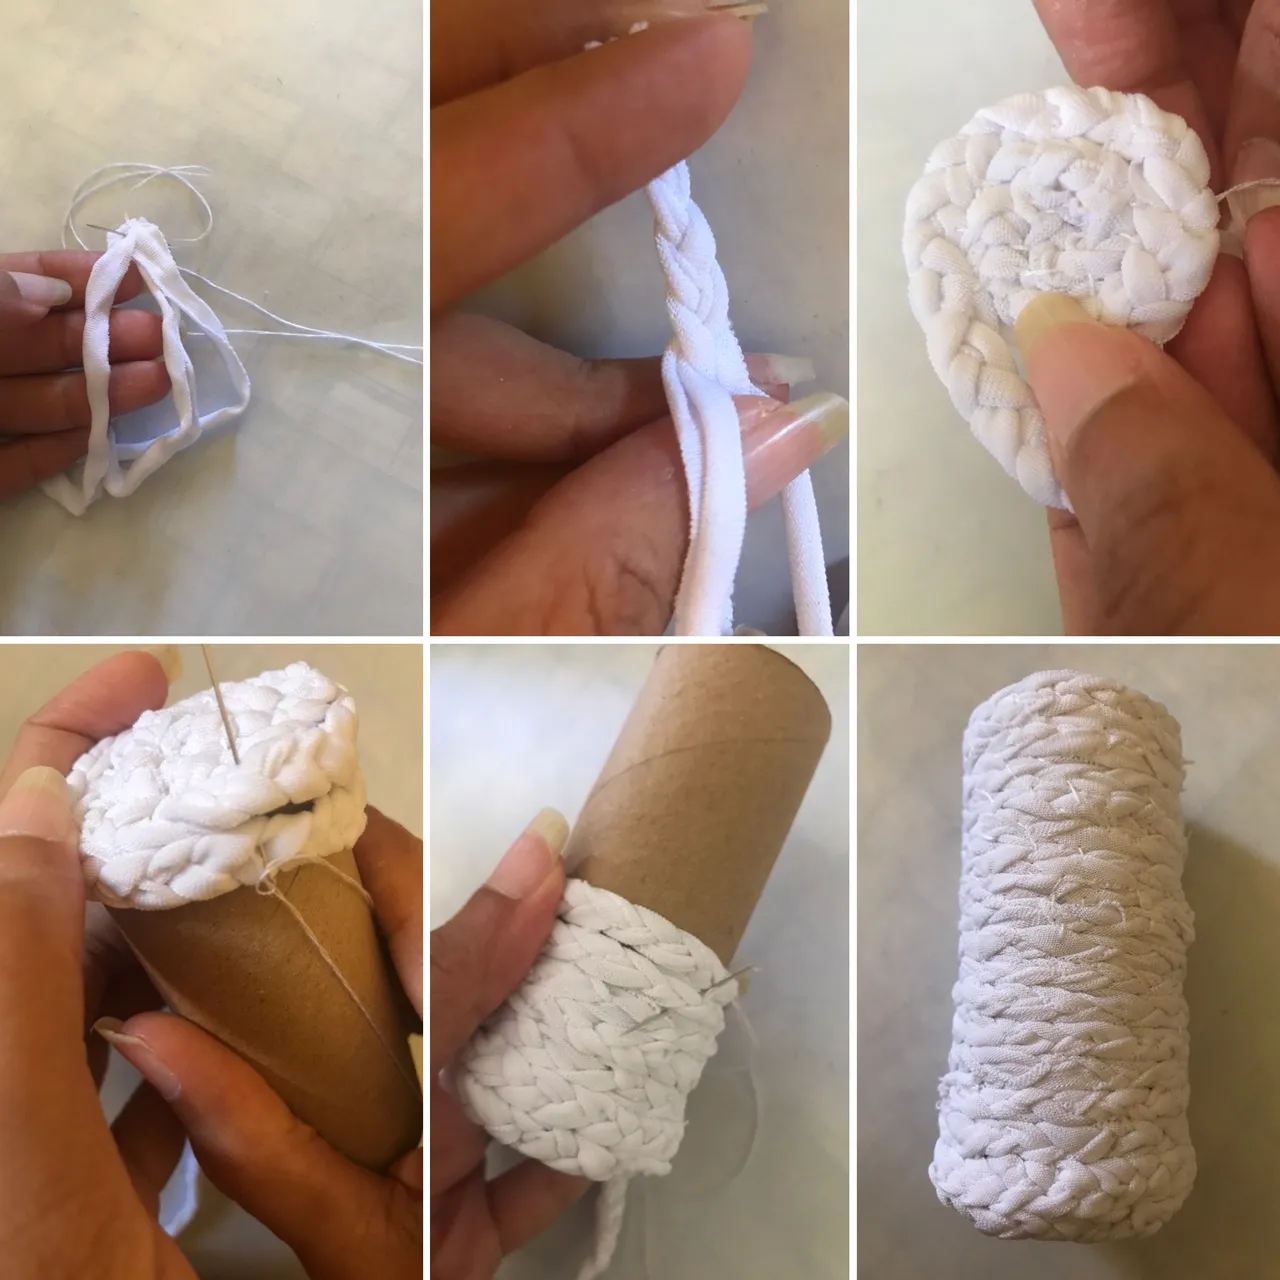
We continue cutting long strips in the white fabric, grouping 3 strips, we sew it at the upper end and we make a braid, which we are fixing with stitches forming a spiral until we complete the base, we continue turning with the braid until completing the cylinder.
Continuamos cortando tiras largas en la tela blanca, agrupando 3 tiras la cosemos en el extremo superior y realizamos una trenza, que vamos fijando con puntadas formando un espiral hasta completar la base, seguimos dando vuelta con la trenza hasta completar el cilindro.
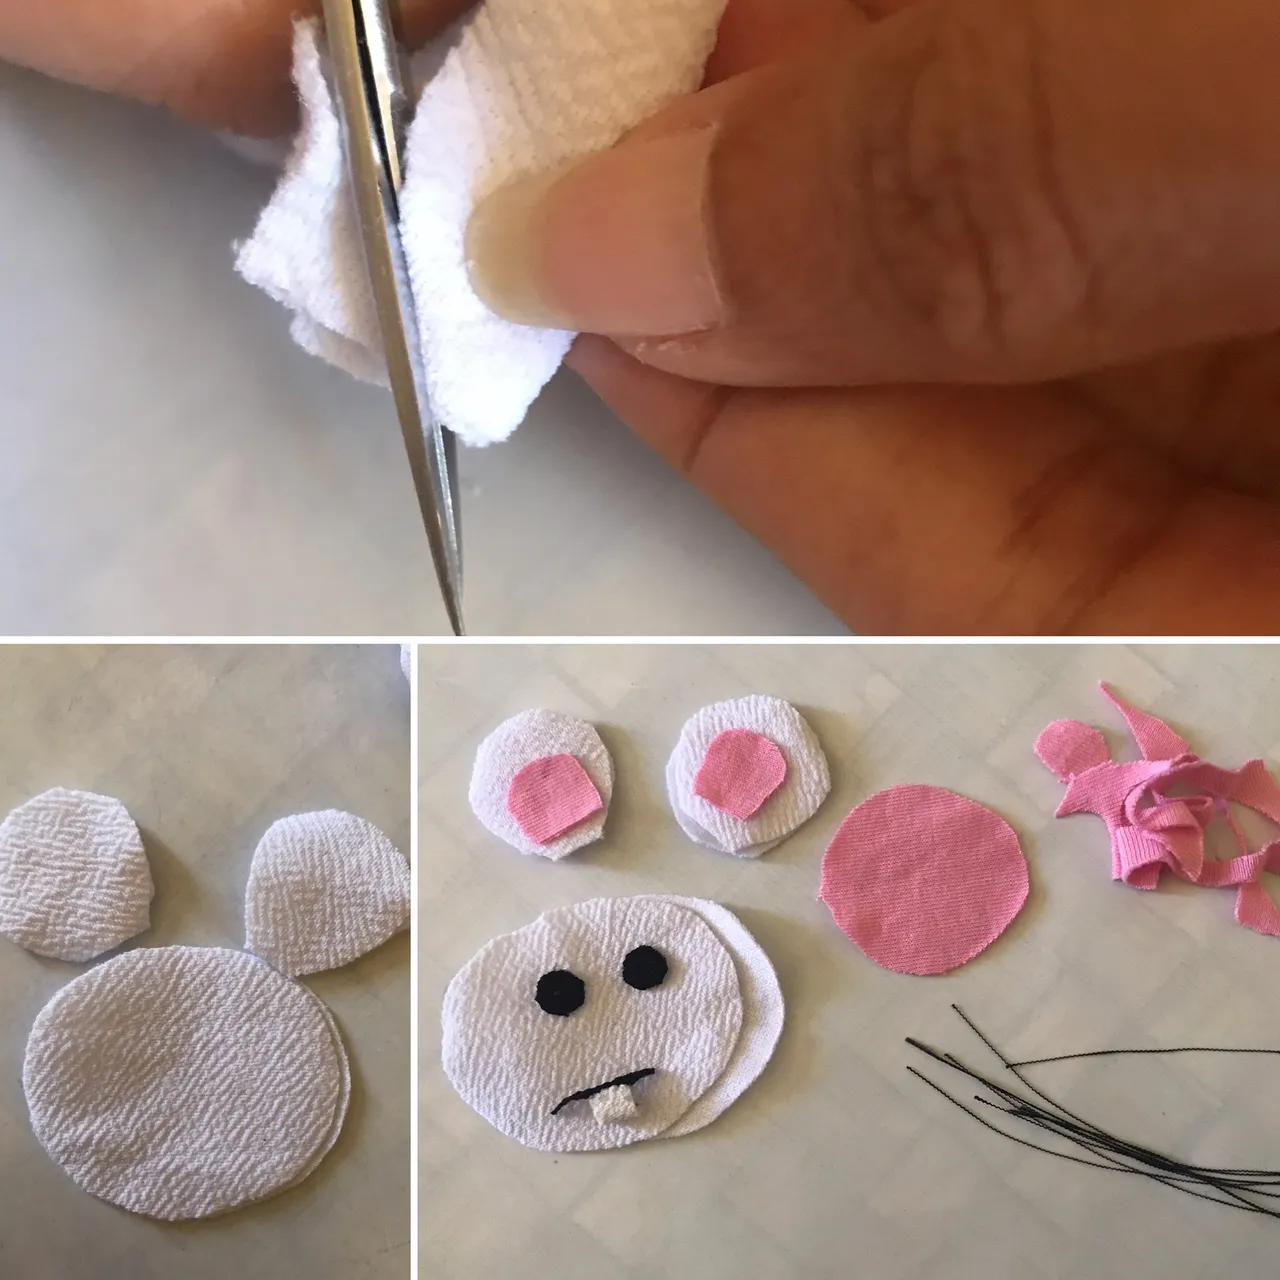
In the white cloth we cut a medium oval, a pair of ears, ears, a small tooth; pink circle to form a nose, in the black fabric eyes and with thread we create their whiskers.
En la tela blanca cortamos un óvalo mediano, un par de orejas orejas , pequeño diente; círculo rosa para formar nariz, en la tela negra ojos y con hilo creamos sus bigotes.
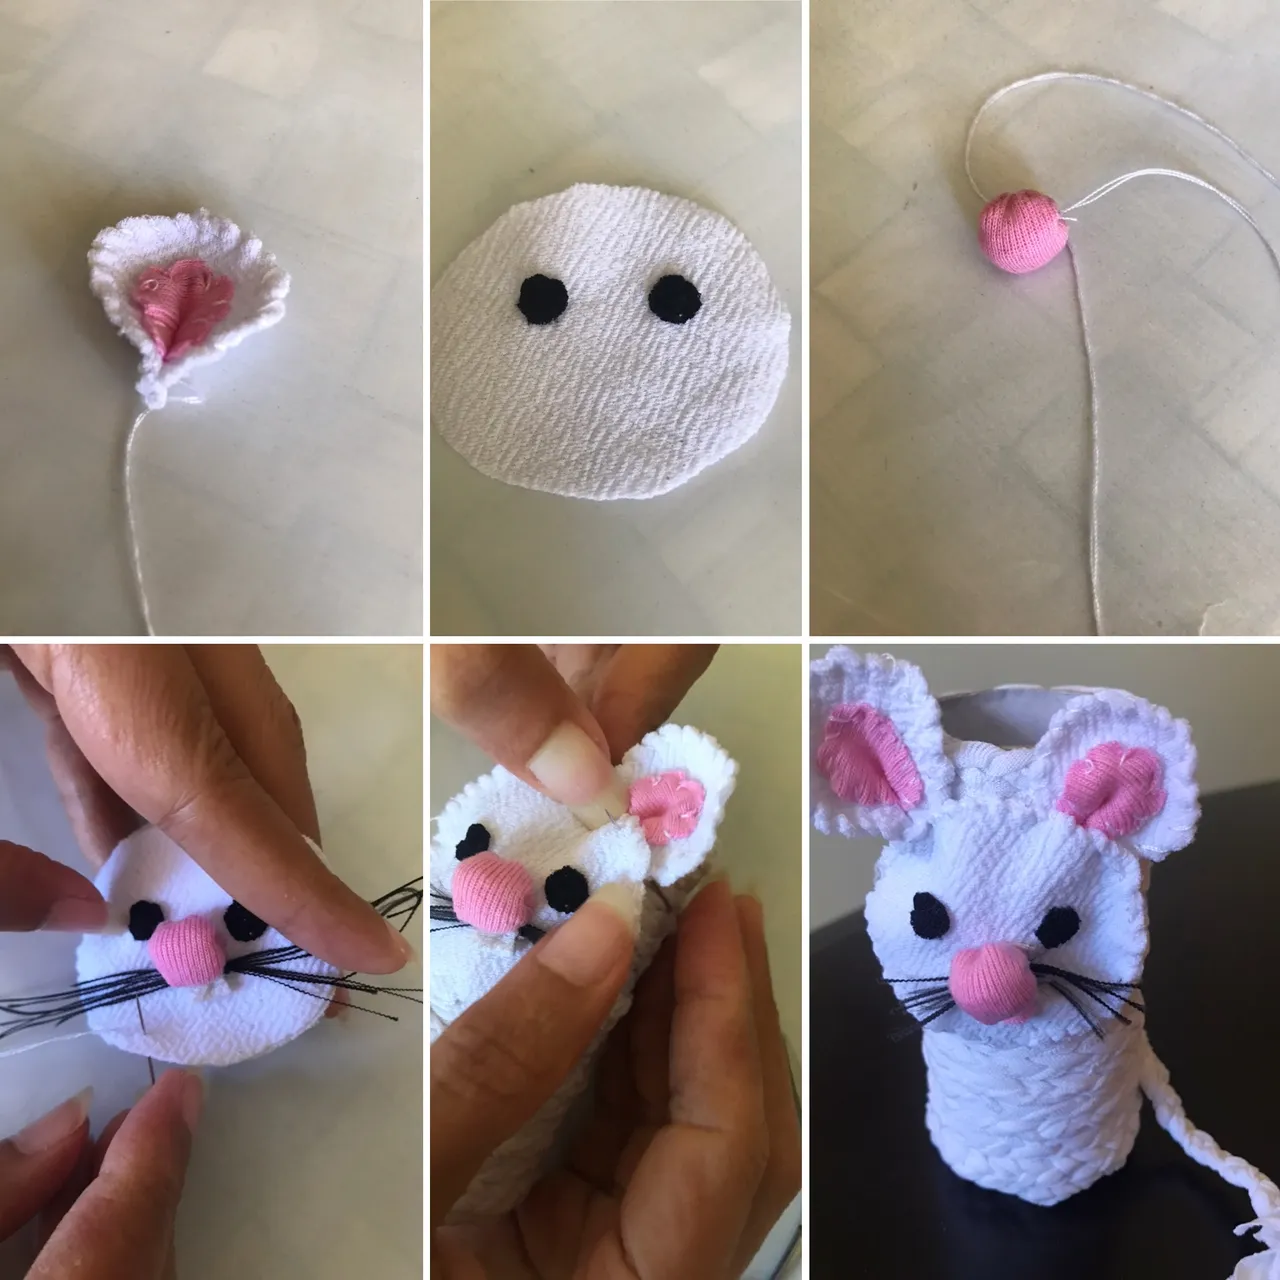
To finish we sew the inner part of the ears, then the edge to complete we give a stitch in the back; with the pink circle we form the nose, filling and sewing the edge to gather; We fix it to the oval next to the whiskers, the mouth and the small tooth. We continue to sew the face of the mouse in the upper part of the cylinder, we continue fixing the ears and the tail that we have made with a small braid.
Para terminar cosemos la parte interna de las orejas, luego el borde para completar damos una puntada en la parte posterior; con el círculo rosado formamos la nariz, rellenando y cosiendo el borde para fruncir; la fijamos al ovalo junto a los bigotes, la boca y el pequeño diente. Continuamos cosiendo la cara del ratón en la parte superior del cilindro, seguimos fijando las orejas y la cola que hemos realizado con una pequeña trenza.
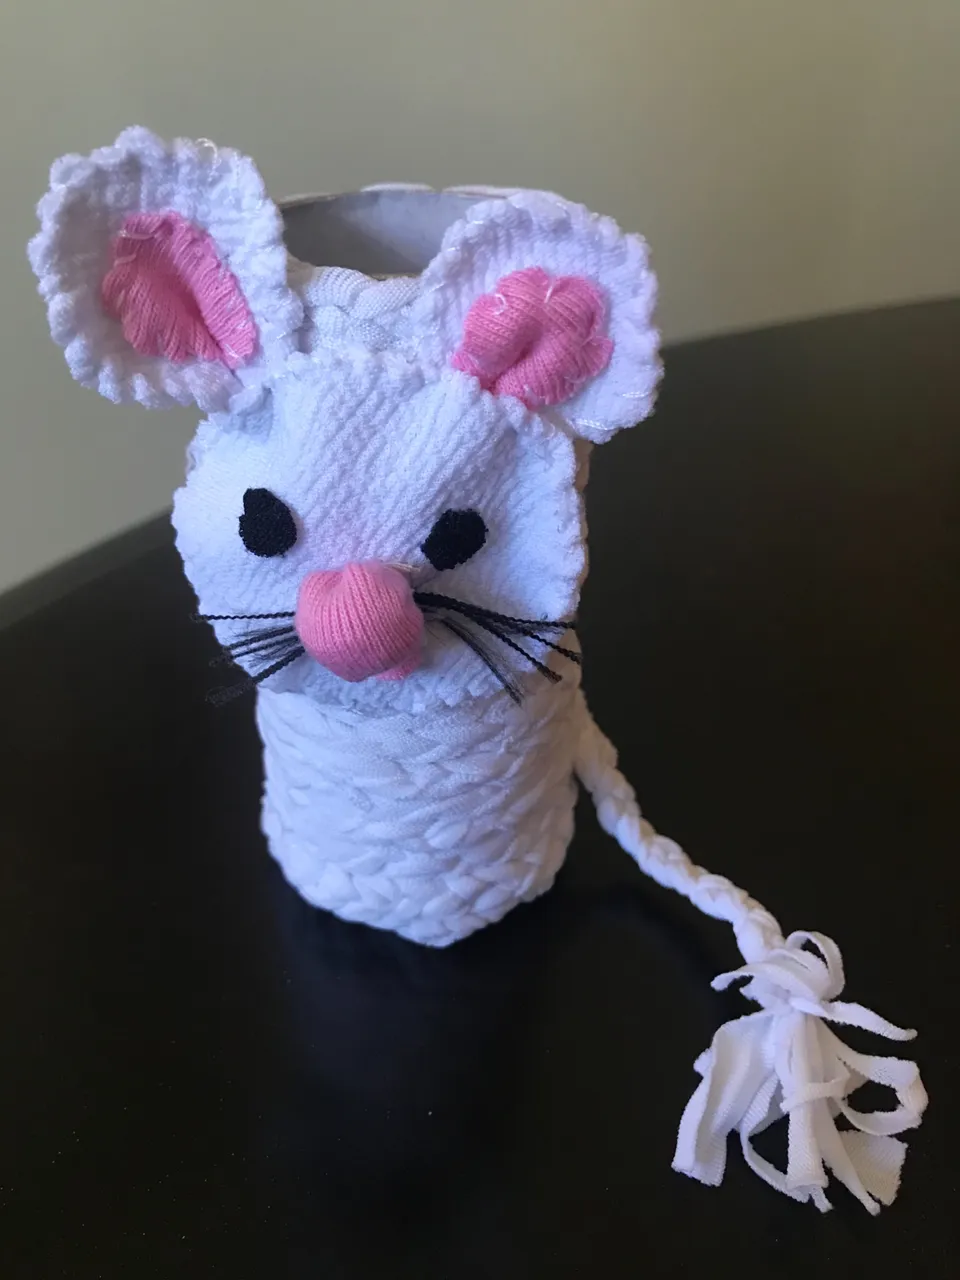
Friends hoped you like this cute and fun little mouse to store pencils or other objects, it is simple, inexpensive and easy to make at home, the children will love it.
Amigos esperó que sea de su agrado este lindo y divertido ratoncito para guardar lápices u otros objetos, es sencillo, económico y fácil de hacer en casa a los niños les encantará.
Until next time.
Hasta una próxima oportunidad.