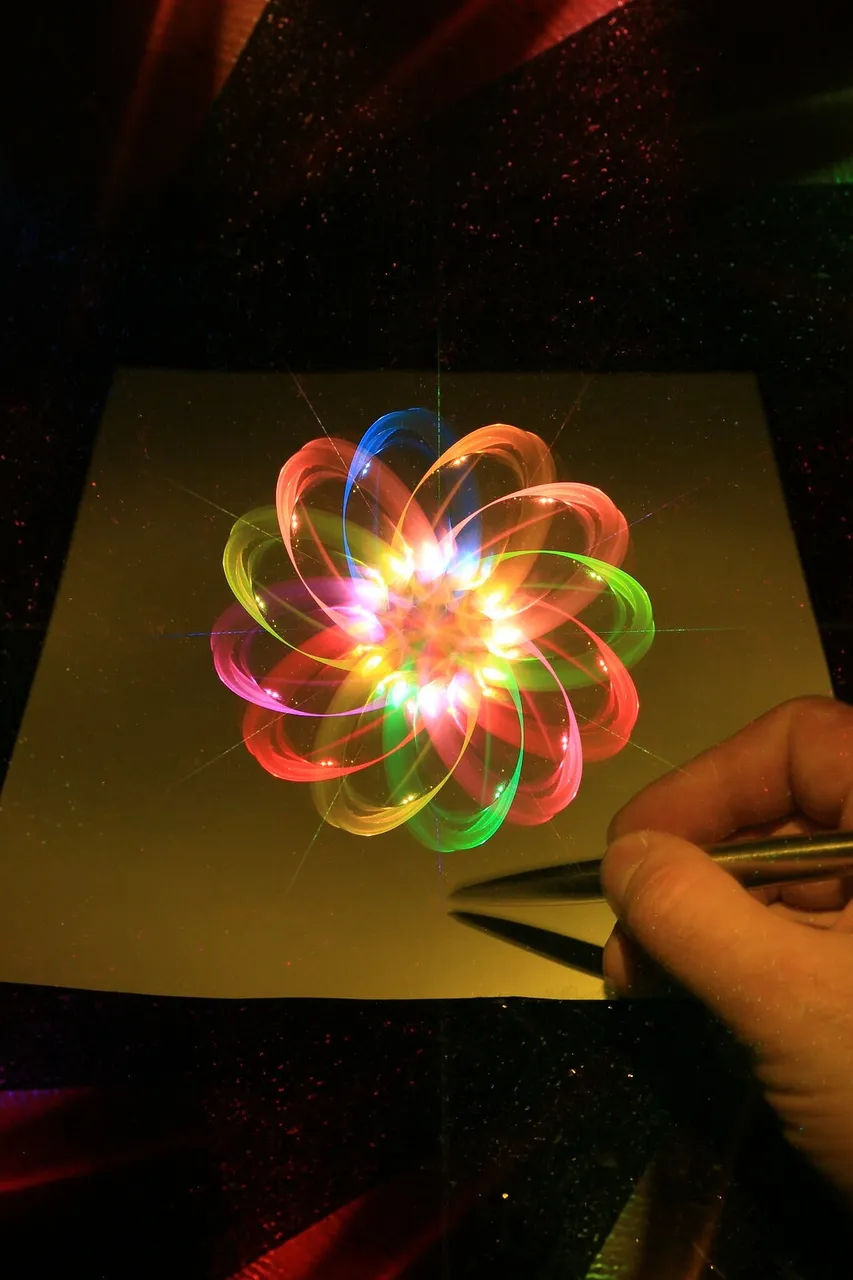
I thought I'd do a post highlighting the progression I have made on this particular series. I call them Light Drawings and are all created using the same principles. The title shot was my first attempt after having the idea and fingers crossed come the end of this post you'll understand how they were created and will be able to see the progress I made. That's the plan anyway.
As I have mentioned in earlier posts I always look to create dead space in the first half of the exposure and then fill that space in the second half of the exposure.
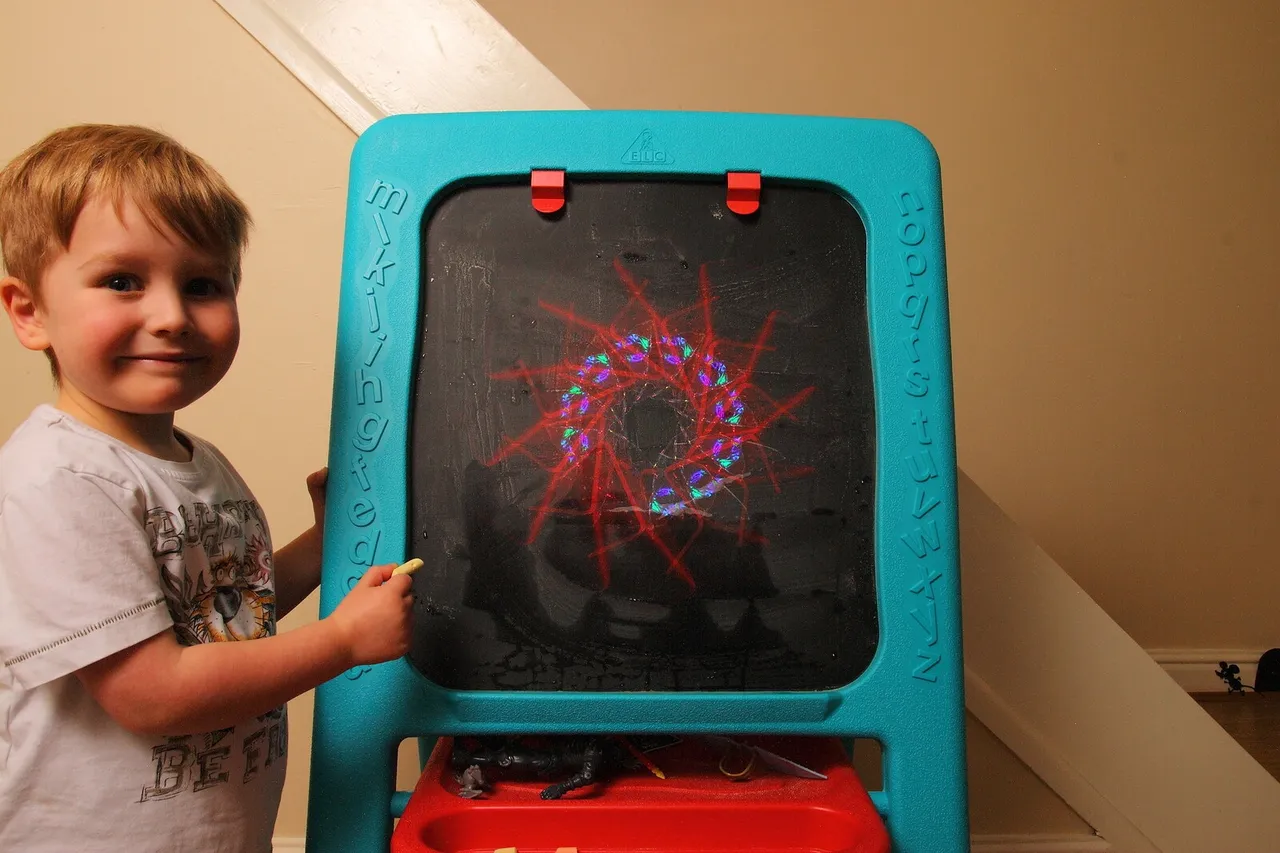
You can probably work out from the picture above that tripod one is set up for the black board and my lovely son pretending to draw. This is the first half of the exposure. I lit the scene with a flashgun so as to freeze my son. We all know how much children hate to remain motionless. Once the flash had fired I replaced the lens cap and retired to the kitchen to tripod two.
I had already framed up a camera rotation in the kitchen and had composed it to land slap bang in the middle of where the blackboard was in the frame.
Top tip is to use a drywipe marker on your camera screen to outline the dead space. This takes the guesswork out of where the second element should fall in the frame
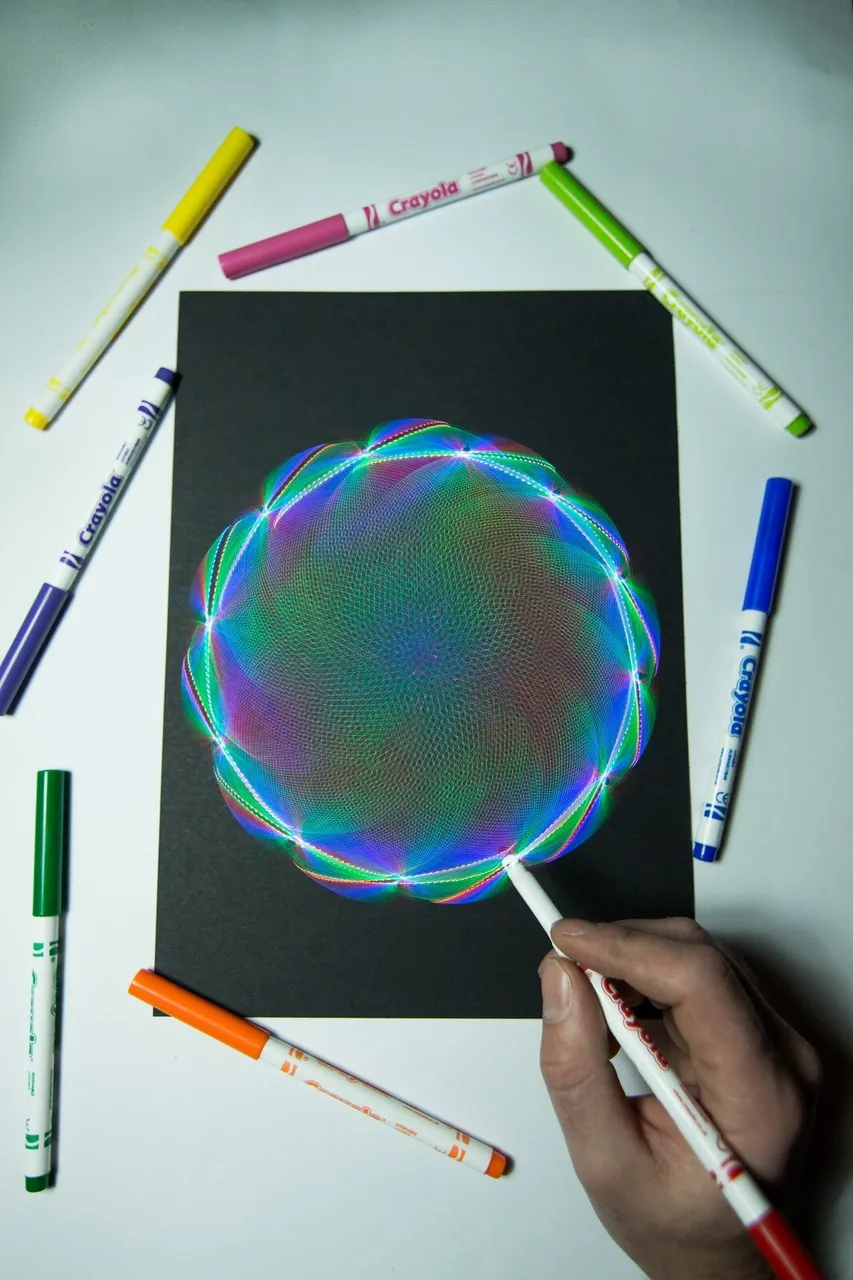
Here I revisited the title image after a couple more years and I feel this one is far more polished.
I shot the hand drawing element first, lens cap on and into the kitchen for a dome rotation.
I love the effect achieved from dome rotation and I wish I hadn't taken the tool to pieces to repurpose the LEDs. I'll rebuild it one day with addressable RGB LEDs.
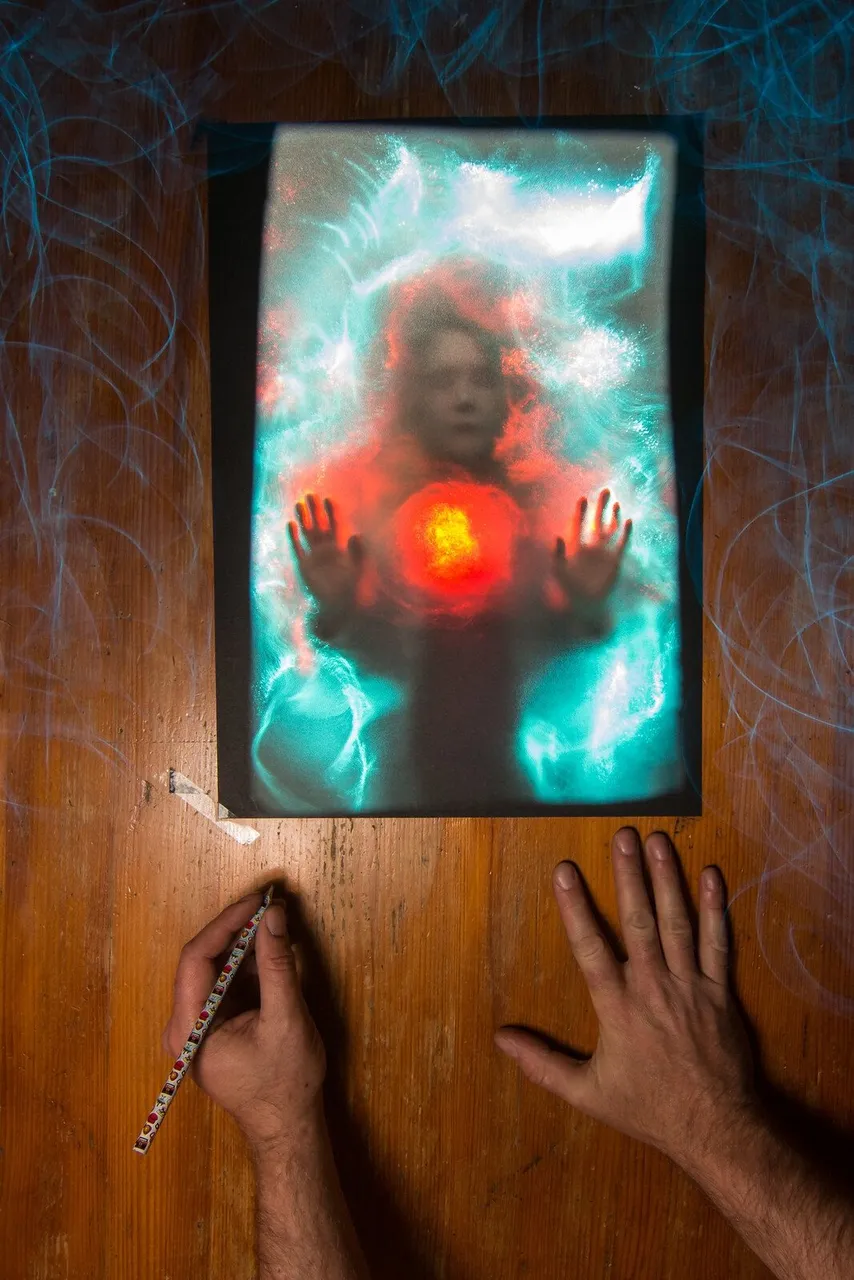
Here I tried to push the idea even further using my girlfriend as the second half of the exposure. This one also need a piece of card to act as a stencil to ensure she fell within the confines of the paper on the table. It's not quite as polished as I'm not a fan of how the top of her element curves but it was a one shot affair so I was unable to retry. Still a good exercise in lens and tripod swapping and felt good to push myself.
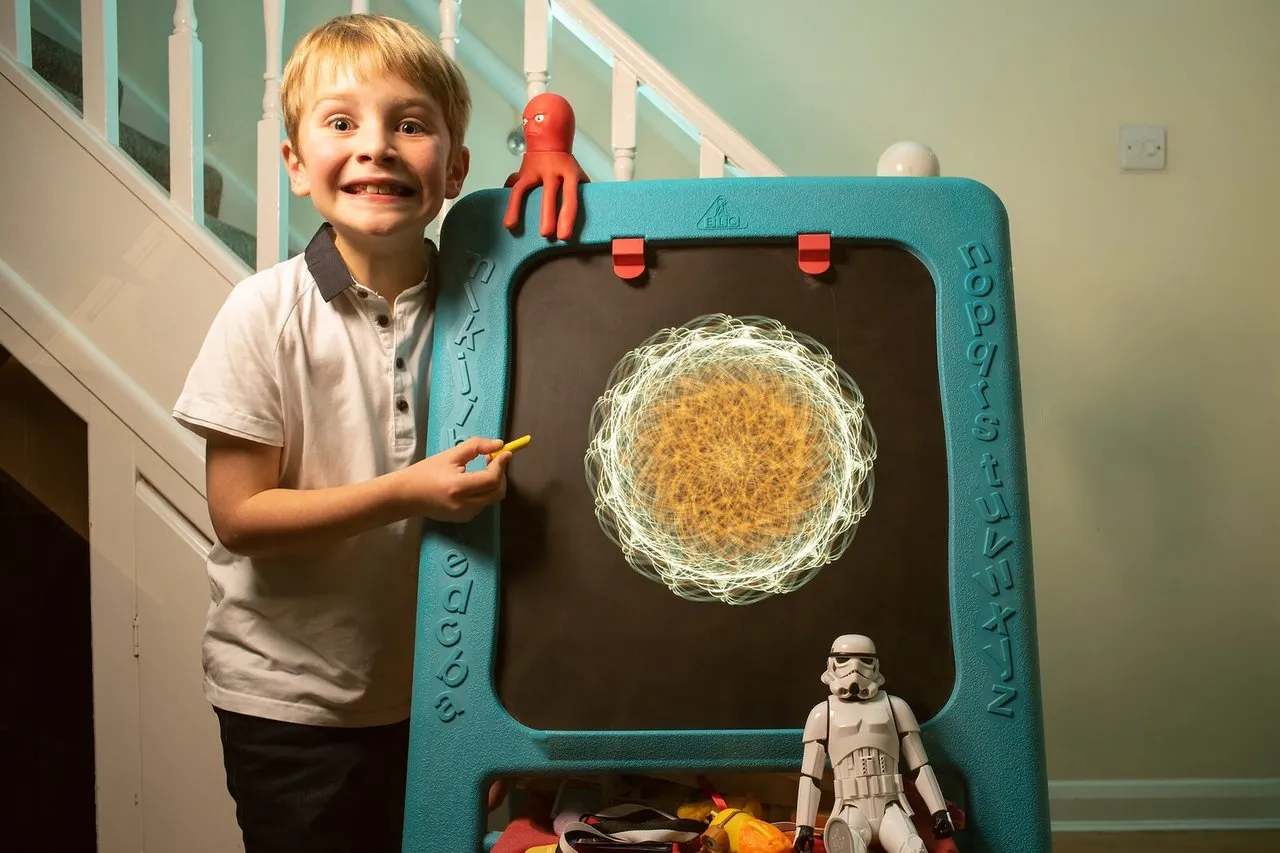
This is the last version of the one I shot with my son, now a few years older he was able to stand motionless so I was able to add more light using a constant light source paired with the flashgun. Exact same process other than that and a rare portrait of him smiling.
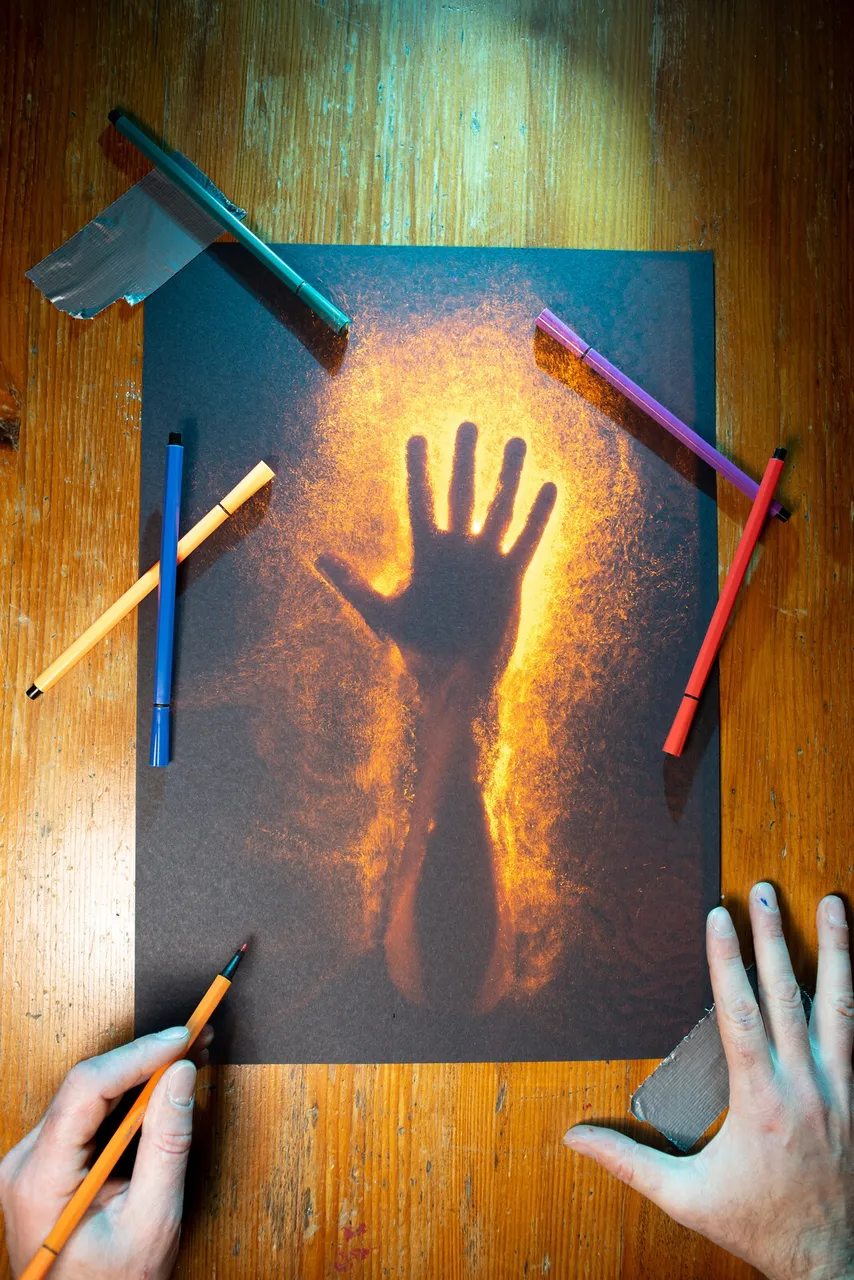
This is the last in the series I have created, and for me it is my favourite. This one was about as technical as I could get, and again involved a cardboard stencil so as to isolate my fiber optic backlit hand from bleeding over the edge of the page. Another reason I love this one is that it tricked someone into thinking I had drawn the hand rather than it being a Lightpainting. Those are the shots I get the most fulfillment from as I feel I have really nailed the shot. Small details like using the pen in my hand as a leading line into the frame and matching the pen colour to that of the orange gel I used on the fibers.
All of the above were created in complete darkness during a single long exposure using the following tools.
2 X tripods
Sony A7ii
Various lenses
Light stands
Flashguns
Lpb Fiber optic brushes
Gels and coloured torches
Camera rotation tool
All of the Lightpainting tools I use come from www.lightpaintingbrushes.com for whom I am a proud brand ambassador. Jason over in the States asked me to be part of the LPB family a few years back and I couldn't recommend their tools enough. Making your own tools is a lot of fun and very individual but I believe every lightpainter would benefit from their Universal Adaptor as it can be used in many different scenarios and is always with me when I go out shooting.
I hope you enjoyed my little post, that you have learnt from it and that you are able to see that with some hard work and perseverance you can achieve results like this. Looking back on the title image here I do find it a little amateurish but at the same time we've all got to start somewhere.
Much love and happy days.
Give our Hive Community Lightpainters United a follow and you will be introduced into the world of light painting.
For more examples of innovative and original lightpainting including camera rotation photography, check these lightpainters: @fastchrisuk @dawnoner @lacelight @mafufuma @oddballgraphics @lichtkunstfoto @martbarras @stefan.stepko @rod.evans.visual @yo-hoho @maxpateau These chaps are amongst the best there is!