Una de las cosas que me ha gustado es diseñar imágenes con efectos que no tenía idea como se hacían, pero nada como las nuevas tecnologías para aprender, ver como se hacen, y darte cuenta de que no es tan difícil como pensábamos, sobre todo entender que, si otros pueden hacerlo, porque tú no.
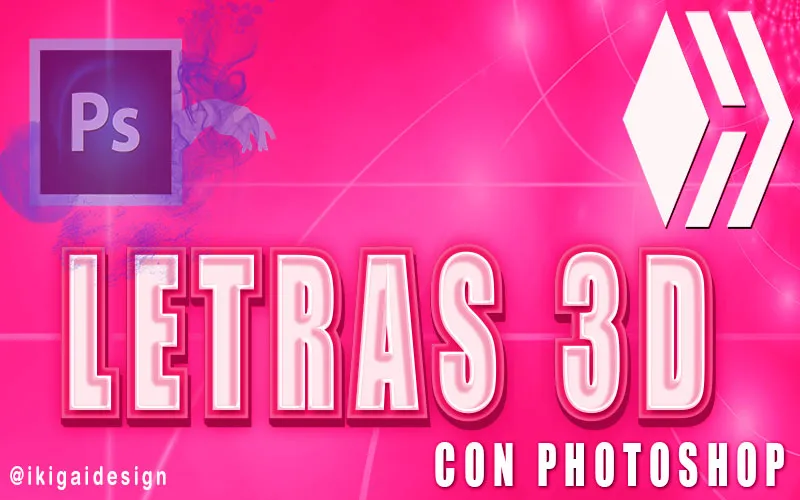
Hola amigos Geek Zone, esta es mi primera publicación en la comunidad, quiero compartirles con ustedes, mi experiencia y aprendizaje en el diseño de Letras 3D con PHOTOSHOP.

El mundo de la tecnología cada día avanza más, uno a veces se siente abrumado con tantas cosas, sin embargo, la ventaja de esto, es que también surgen personas dispuestas ayudarte, ya sea realizando eventos, conferencias, tutoriales, de todo un poco.
Desde hace un tiempo, he ido incursionando en el mundo del diseño digital, e incluso un poco manual, así como lo leen, yo trabajo con el programa Photoshop, y sé que muchos han dicho que este programa es bastante complejo, y les doy la razón, pero a la vez cuenta con tantas herramientas, que nos permite crear todo tipo de imágenes, diseños, vectores, e incluso hasta gif.
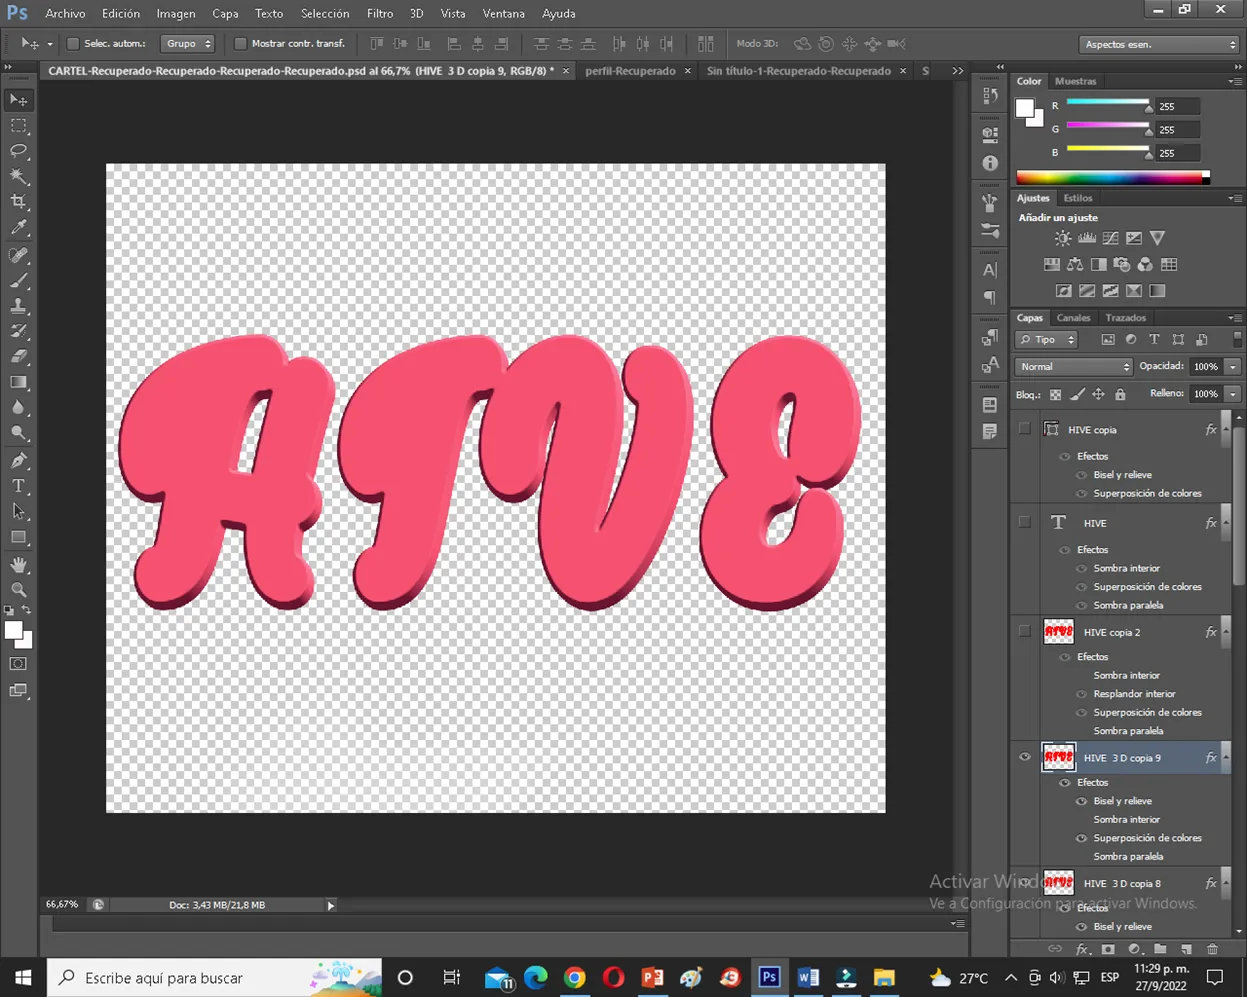
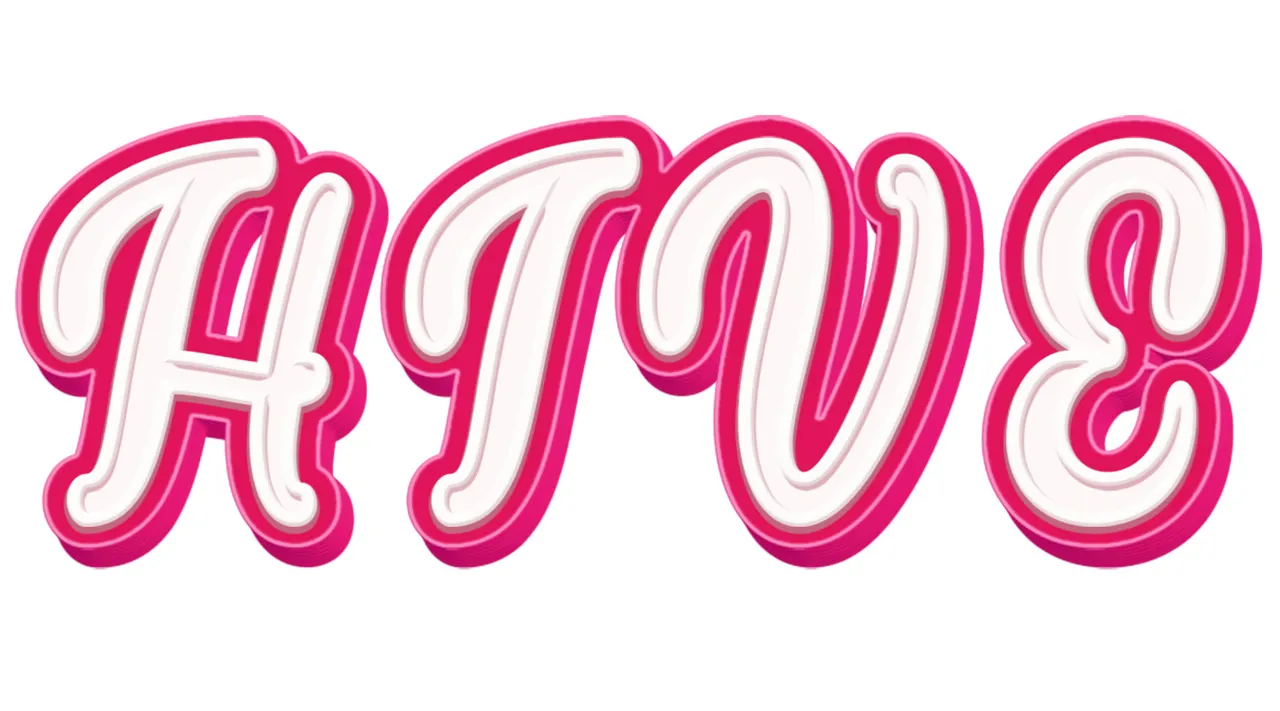
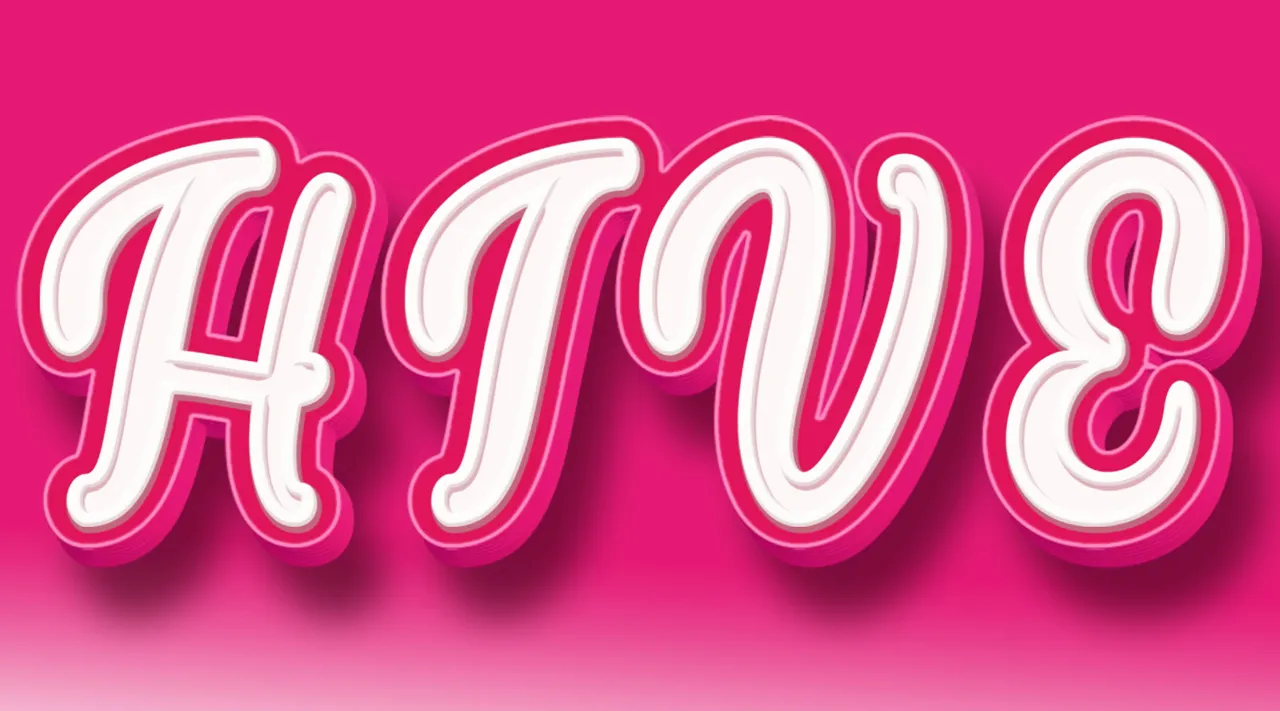
Como estoy en esto de crear nuevas imágenes cada vez que puedo, decidí crear este diseño, en formato 3D, y para ello use el nombre de nuestra amada plataforma HIVE, realizando este efecto único y distinto, con colores llamativos, este rosa que para mí es uno de mis favoritos, me siento identificada con este color, y por ello también quise plasmarlo en el nombre de la blockchain.
Como les mencione, uno siempre suele asustarse con lo nuevo, te sientes cohibido, algo perdido, y más si estás solo y no tienes a quien acudir, o como guiarte, afortunadamente para ello cada día surgen nuevos medios que lo ayudan a uno aprender, nada como adquirir nuevos conocimientos, sobre todo si es en algo que te gusta, y te sientes entusiasmada al ver el resultado final.
Les confieso que yo no tenía idea de esto del diseño, ni muchos menos manejar los programas, pero a raíz de la pandemia, algo dentro de mí se encendió, como dicen la espinita de la curiosidad, muchos me decían que buscara aprender a trabajar con PHOTOSHOP, y aunque al principio me negué por lo complejo que lo veía, hoy en día, me siento feliz y a gusto de poder defenderme un poco con este programa.

Sé que existen muchos programas, muchos más fáciles, e incluso con formatos y plantillas directas, para hacer todo tipo de diseño, pero por los momentos yo me he dedicado a utilizar solo Photoshop, con este programa realizo todos mis diseños.
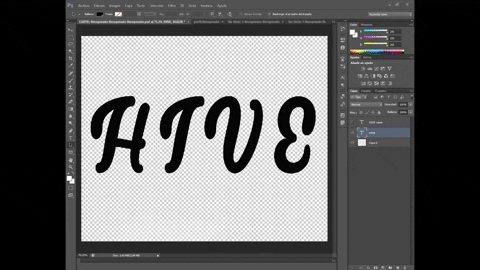
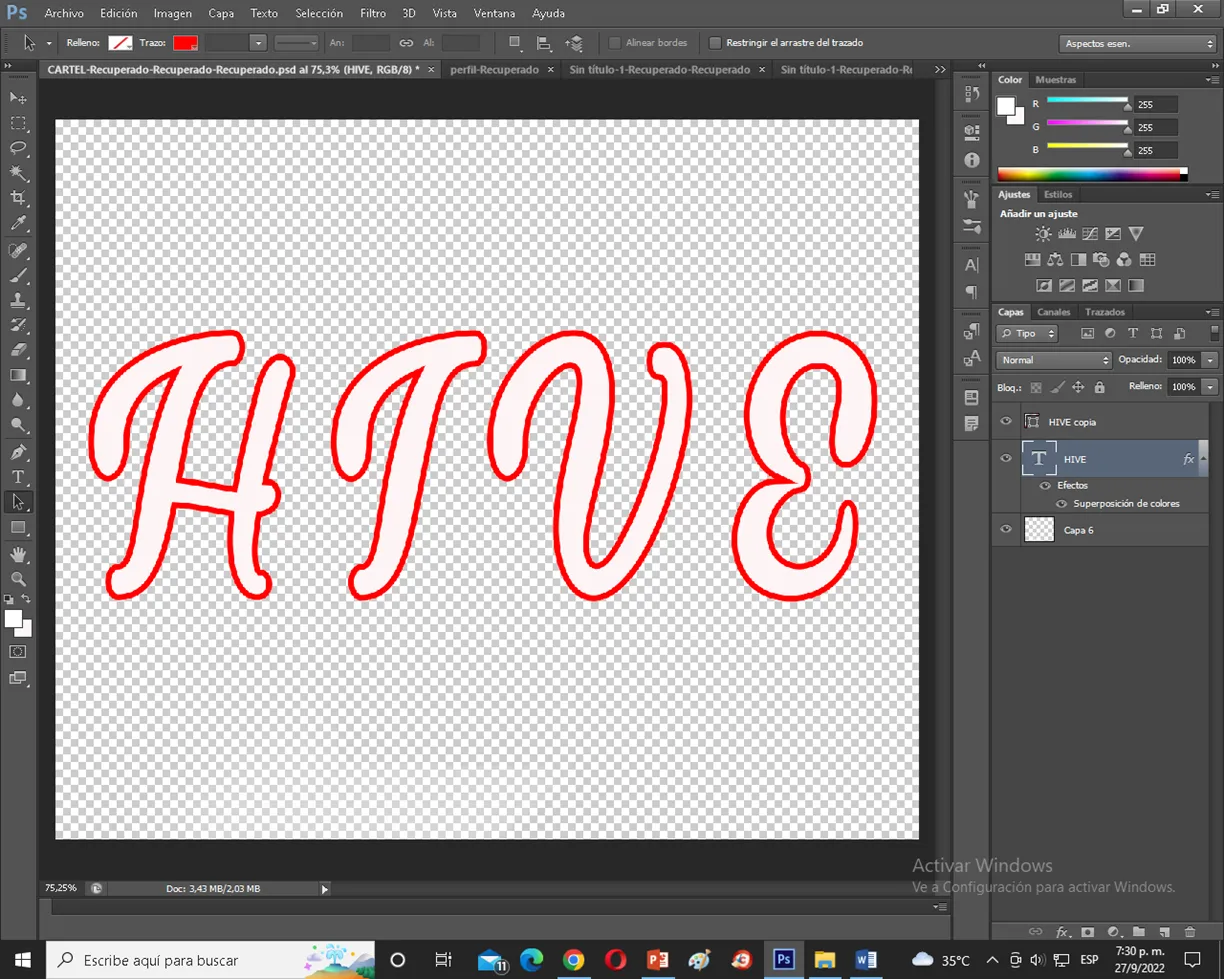
Bien, ahora les muestro un pequeño paso a paso de cómo lo hice, para esto utilizamos un tipo de letra especial, en mi caso usé lucythecat , una vez seleccionada nuestra letra, colocamos nuestro texto, y procedemos a crear nuestro diseño, duplicando primero el mismo.
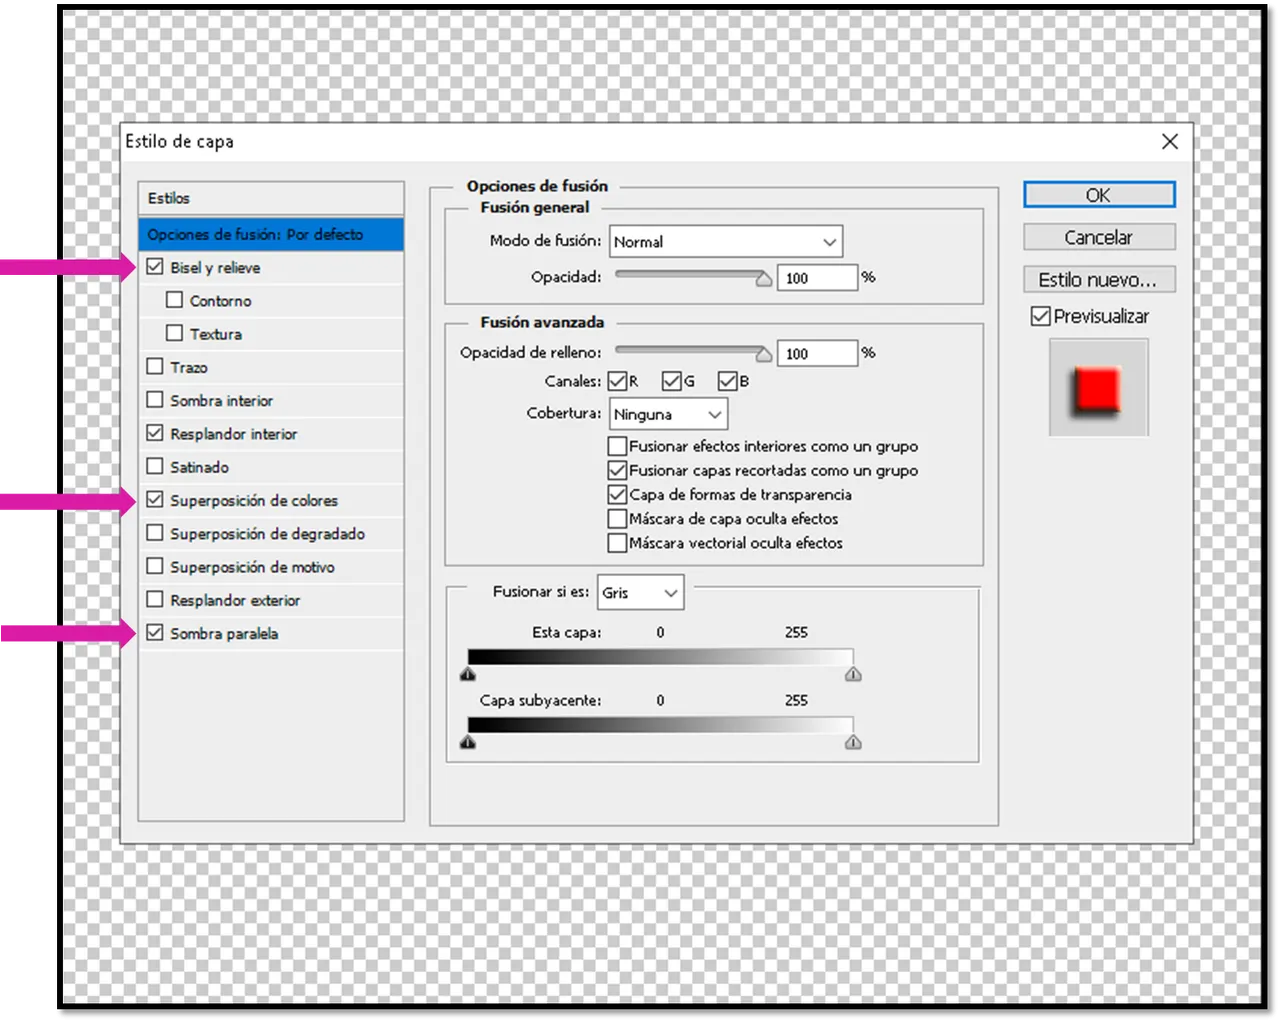
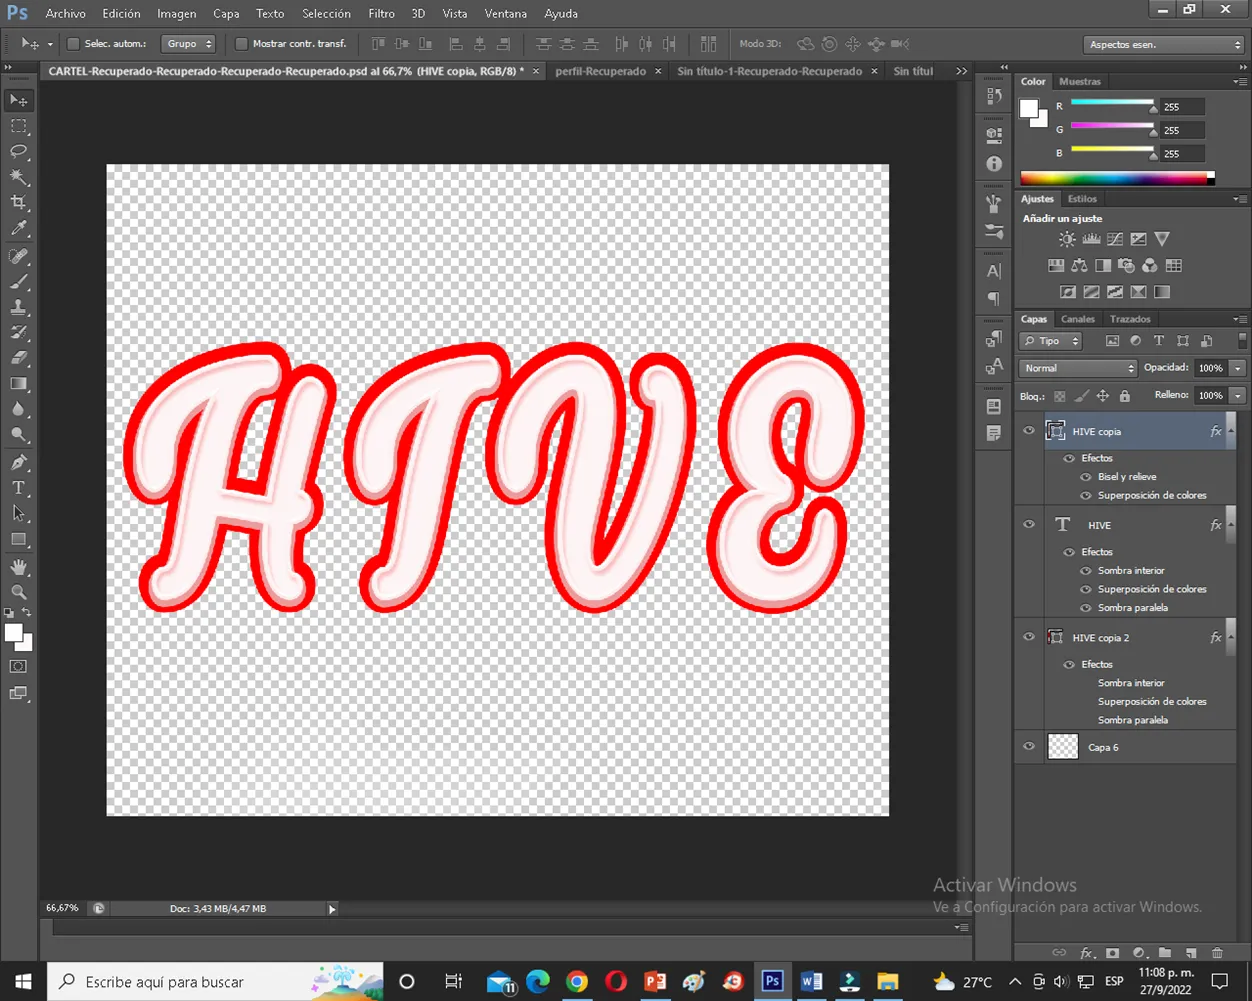
Una vez tengamos nuestro texto duplicado, haremos uso de los distintos estilos de capa con los que se manejan en el programa, para esto nos iremos a las opciones de fusión, haciendo ajustes en la sombra interior, biesel, el resplandor y la superposición de colores.
Esta es una de las partes mas importantes de este programa, ya que aqui podemos crear nuestros distintos efectos, jugando un poco con cada uno de estos estilos de capa.
 |  |
|---|
Estas son básicamente los estilos que más manejaremos, combinando con los distintos tonos de colores para obtener ese acabado que deseamos.
Una vez obtenido esto, procederemos a darle ese fondo de efecto 3D, sin duda esta es la parte más engorrosa, pues debemos hacer uso del duplicado de las capas, para poder obtener dicho efecto.
Como verán, a simple vista se ve sencillo, pero esto lleva su proceso, quiero aclarar que el programa que yo manejo está limitado en ciertas opciones, el cual no me permite crear este efecto de otra forma, es difícil de explicar, porque esta parte también se puede crear utilizando un panorama tridimensional, pero esto es más avanzado.
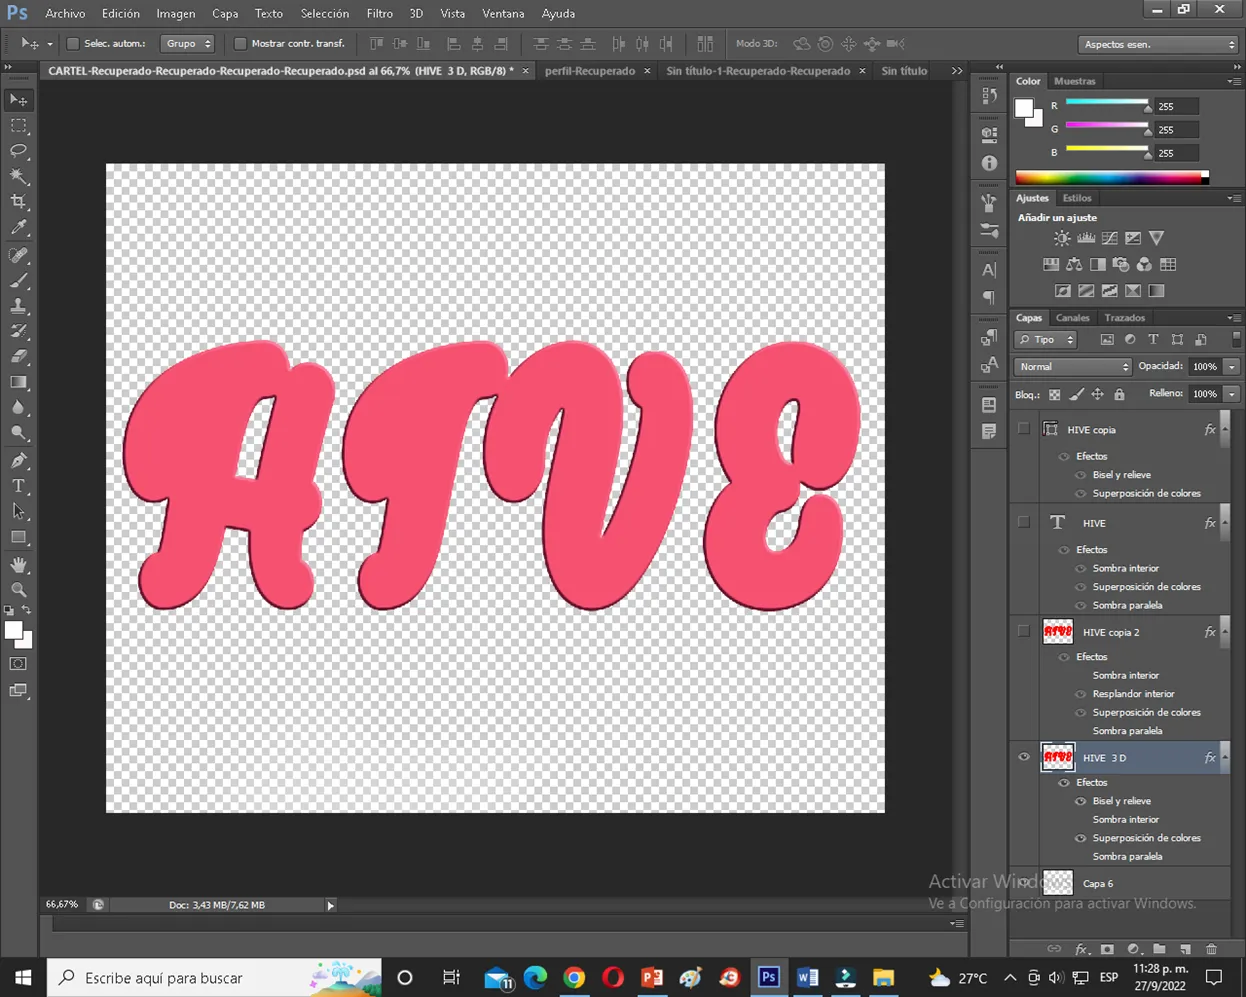
Para hacer este efecto de fondo 3D, debemos hacer uso del teclado presionando las teclas ALT + las flechas al mismo tiempo.
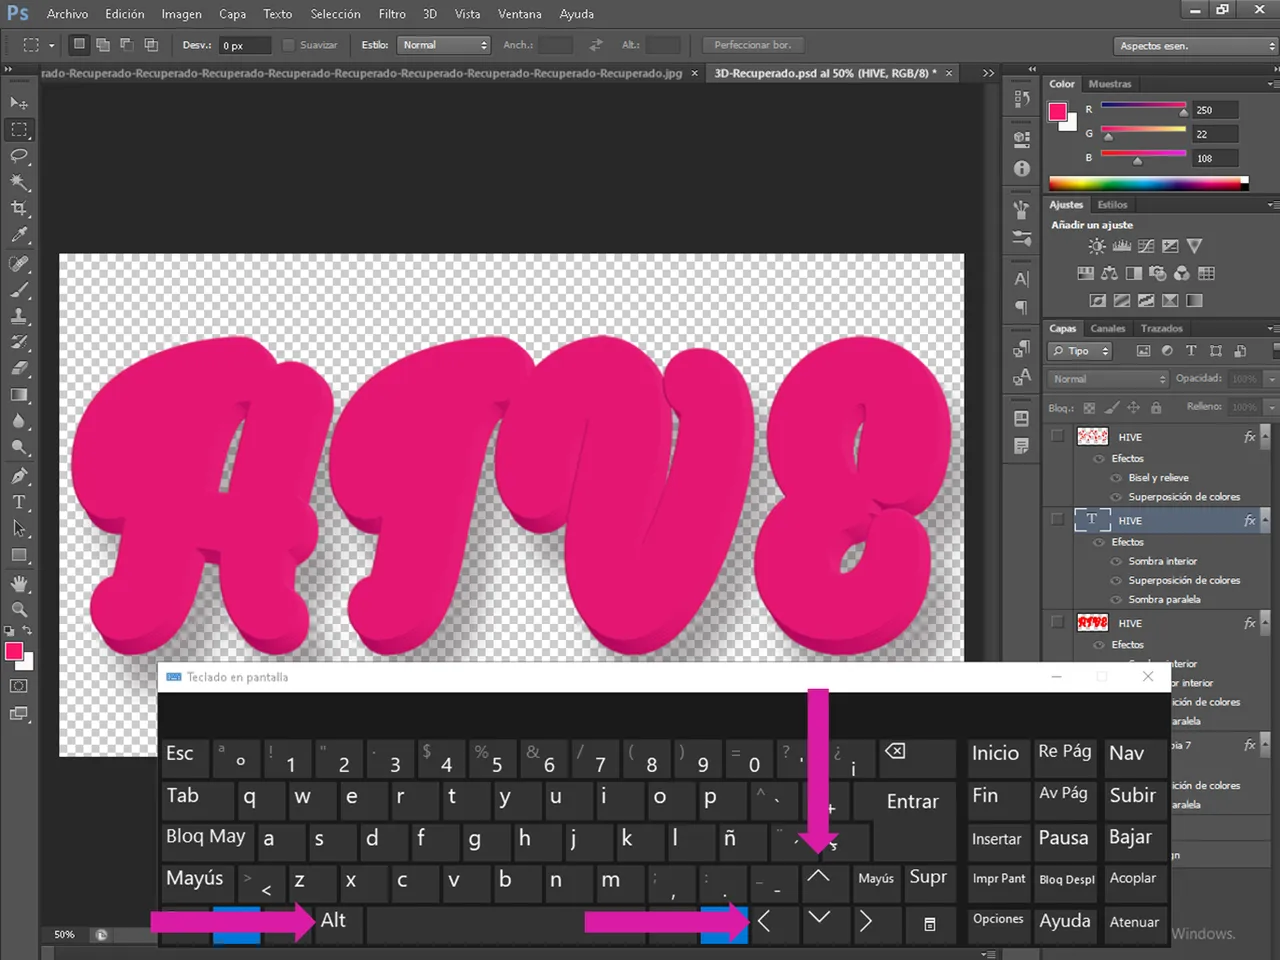
Como verán, sin duda vale la pena el resultado final, empezar de cero, y ver que a medida, que vas haciendo los ajustes, dicha imagen va tomando forma, y se va transformando.
Obteniendo así de esta forma nuestro resultado final, con acabado rosa, un efecto de sombra y la parte 3D de las letras, la cual es la parte más compleja de obtener, pero como dicen la práctica hace al maestro.
Me gusta mucho trabajar con este programa, y buscar cada día aprender, hacer algo nuevo, si tienen la posibilidad de instalarlo y usarlo, háganlo, no se arrepentirán.
Gracias por leerme, nos vemos en la próxima, si les gusto este contenido, háganmelo saber para compartir más diseños con este programa, para que también aprendan..

One of the things that I liked is to design images with effects that I had no idea how they were done, but nothing like new technologies to learn, see how they are done, and realize that it is not as difficult as we thought, especially to understand that if others can do it, why not you.
Hello Geek Zone friends, this is my first publication in the community, I want to share with you, my experience and learning in the design of 3D letters with PHOTOSHOP.

The world of technology is advancing every day, sometimes you feel overwhelmed with so many things, however, the advantage of this, is that there are also people willing to help you, either by holding events, conferences, tutorials, a little bit of everything.
For some time, I have been dabbling in the world of digital design, and even a little manual, just as you read it, I work with the program Photoshop, and I know that many have said that this program is quite complex, and I give them the reason, but at the same time has so many tools that allows us to create all kinds of images, designs, vectors, and even gif.
As I am in this of creating new images whenever I can, I decided to create this design, in 3D format, and for this I used the name of our beloved platform HIVE, making this unique and different effect, with bright colors, this pink that for me is one of my favorites, I feel identified with this color, and therefore I also wanted to capture it in the name of the blockchain.
As I mentioned, one is always scared with the new, you feel self-conscious, somewhat lost, and more if you are alone and have no one to turn to, or how to guide you, fortunately for this every day there are new ways to help you learn, nothing like acquiring new knowledge, especially if it is something you like, and you feel excited to see the end result.
I confess that I had no idea about this design, much less handle the programs, but as a result of the pandemic, something inside me was lit, as they say the thorn of curiosity, many told me to seek to learn to work with PHOTOSHOP, and although at first I refused because I saw it complex, today, I feel happy and comfortable to be able to defend myself a little with this program.

I know that there are many programs, much easier, and even with direct formats and templates, to make all kinds of design, but for the moment I have dedicated myself to use only Photoshop, with this program I make all my designs.
Well, now I show you a little step by step of how I did it, for this we use a special typeface, in my case I used lucythecat , Once we have selected our font, we place our text, and proceed to create our design, duplicating it first.
Once we have our duplicated text, we will make use of the different layer styles that are handled in the program, for this we will go to the blending options, making adjustments in the inner shadow, biesel, glow and color overlay.
This is one of the most important parts of this program, since here we can create our different effects, playing a little with each of these layer styles.
| |
|---|
These are basically the styles that we will handle the most, combining with the different shades of colors to get that finish we want.
Once this is obtained, we will proceed to give that 3D effect background, without a doubt this is the most cumbersome part, because we must make use of the duplicate of the layers, to be able to obtain this effect.
As you will see, at first glance it looks simple, but this takes a process, I want to clarify that the program I use is limited in certain options, which does not allow me to create this effect in another way, it is difficult to explain, because this part can also be created using a three-dimensional panorama, but this is more advanced.
To make this 3D background effect, we must make use of the keyboard by pressing the ALT + arrow keys at the same time.
As you will see, it is certainly worth the final result, starting from scratch, and seeing that as you make adjustments, the image takes shape and transforms.
I really like working with this program, and every day I try to learn, to do something new, if you have the possibility to install and use it, do it, you will not regret it.
Thanks for reading me, see you in the next one, if you like this content, let me know to share more designs with this program, so you can also learn...
Resources used for editing this post:
Cover and Bannerd edited with Photoshop
Images Pixabay: logo Photoshop / cover background
Animated Gif: https://giphy.com
Bitmoji App
Separator with Power Point
Capture images Photoshop