ESPAÑOL
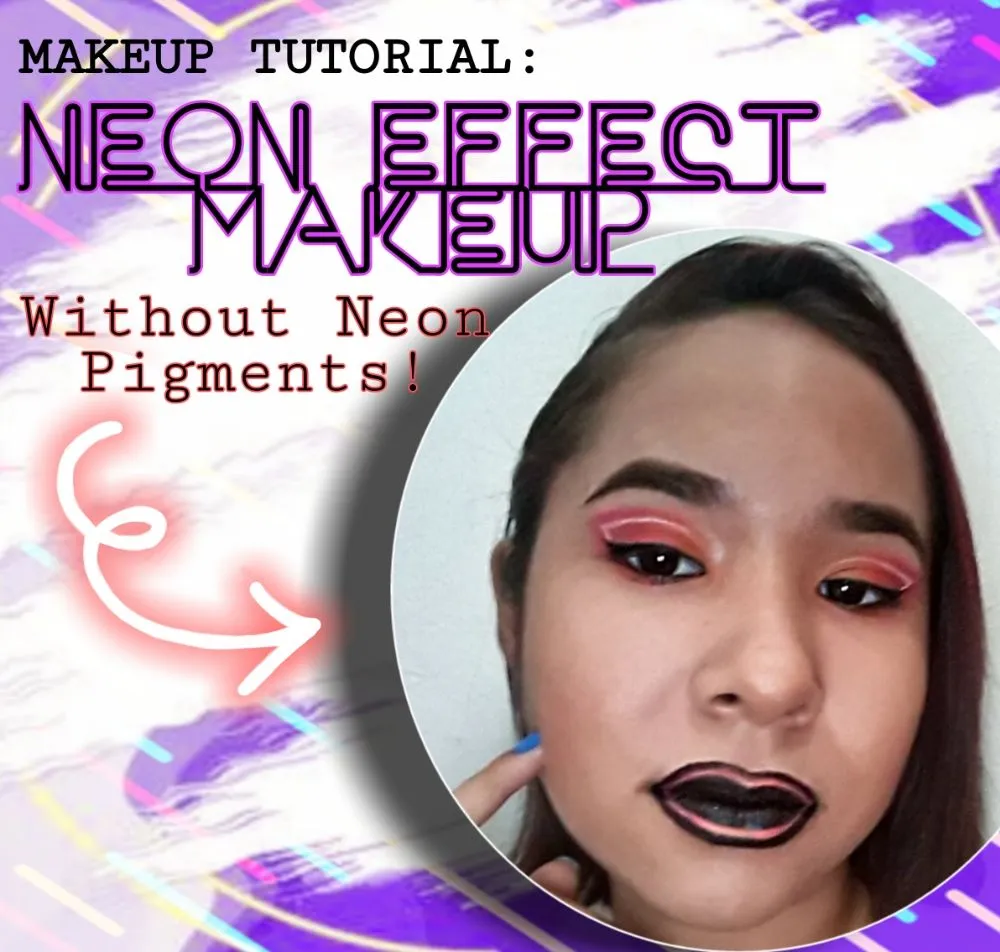
¡Saludos, Hivers! Espero se encuentren bien, aquí les comparto este tutorial de maquillaje de efecto neón, se puede considerar artístico o extravagante dependiendo de los gustos de cada quien, para mi es artístico ya que no suelo usar maquillajes de este tipo para salir pero me divierto intentando cosas nuevas en la comodidad de mi casa (me arreglo para ir a la cocina) así que aproveché para mostrarles el procedimiento y resultado.
Los maquillajes con efecto neón normalmente se hacen con sombras o pigmentos especiales que ya vienen con esos tonos y que permiten muchísimos diseños y estilos nuevos, pero también hay una manera de lograr este efecto sin usar pigmentos especiales sino usando nuestras sombras de cada día, hice la prueba sin tomarme fotos primero para asegurarme de que si funciona este método así que ahora si puedo compartirles este pequeño tutorial. Espero les guste.
ENGLISH
Hello, Hivers! I hope you're all fine, here I share with you this neon effect makeup tutorial, it can be considered artistic or extravagant depending of the taste of each person, for me it's artistic because usually I don't wear this type of makeup for going out but I have fun trying new things in the comfort of my house (I dress up to go to the kitchen) so I use it to show you the procedure and result.
Neon effect makeup usually are made with special pigments or eyeshadow that already have those tones and allow a lot of designs and styles, but there's also a way to make this effect without special pigments but our everyday eyeshadow, I did the test without taking pictures first to make sure it worked so now I can share with you this little tutorial.

Maquillaje con efecto neón (sin pigmentos) || Neon effect makeup (without pigments)
TUTORIAL
Ojos:
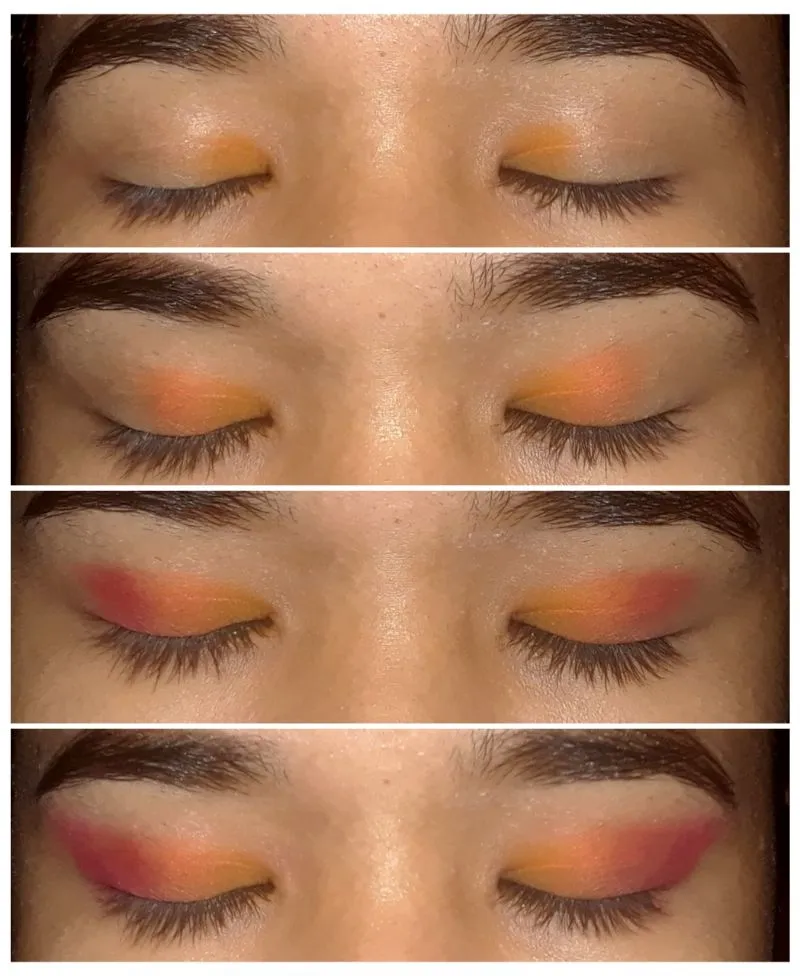
- Primeramente se cubre el párpado con corrector o pre sombra (cualquiera sirve) para que los colores se vean más intensos. Comenzamos colocando una sombra naranja pastel en el inicio del ojo, sólo una sección pequeña.
- Proseguimos con el siguiente color, esta vez un naranja más oscuro dejando espacio para los demás colores.
- Aplicamos el antepenúltimo color que sería un tono rojizo, algo fuerte sin toca el final del ojo.
- Aún sin llegar completamente al final del ojo, colocamos la última sombra que sería un tono fuscia llamativo y nos aseguramos de que cada color quede en transición, que parezca un degrade.
Eyes:
- First, we cover the eyelid with concealer or pre-eyeshadow (any is good) so the colors can look more intense. We start by placing a pastel orange shadow on the start of the eye, just a small section.
- We proceed with the next color, this time a darker orange leaving space for the other colors.
- We apply the almost last color that it would be a reddish tone, a little bit strong without touching the end of the eye.
- Still without getting completely to the end of the eye, we put the last eyeshadow that would be a flashy fuchsia tone and we make sure that every color stay in transition, like a degrade.
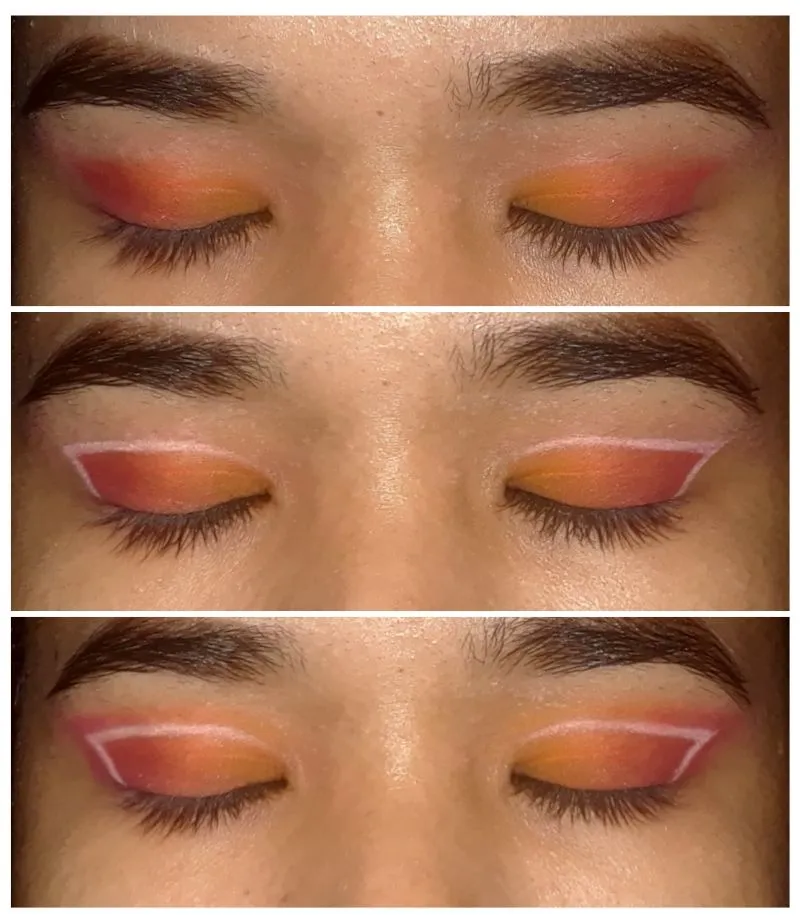
- Con corrector y un pincel adecuado, perfeccionamos la forma de la sombras, haciendo una línea recta en dirección a la ceja y una curva justo por encima de la cuenca del ojo.
- Con delineador blanco (líquido, crema, gel, etc.) Hacemos la línea que dará el efecto neón siguiendo la forma hecha con el corrector, el color blanco debe ser muy notorio.
- Por último, se repite la aplicación de las sombras pero esta vez por fuera de la línea blanca lo que terminará de simular la luz neón.
- With concealer and an adequate brush, we improve the shape of the eyeshadow, making a straight line in direction to the eyebrow and a curve just above the eye socket.
- With white eyeliner (liquid, cream, gel) we draw the line that will give the neon effect following the shape made with the concealer, the white color must be really notorious.
- Last, we repeat the application of the eyeshadow but this time outside the white line that will simulate the neon light.
Labios:
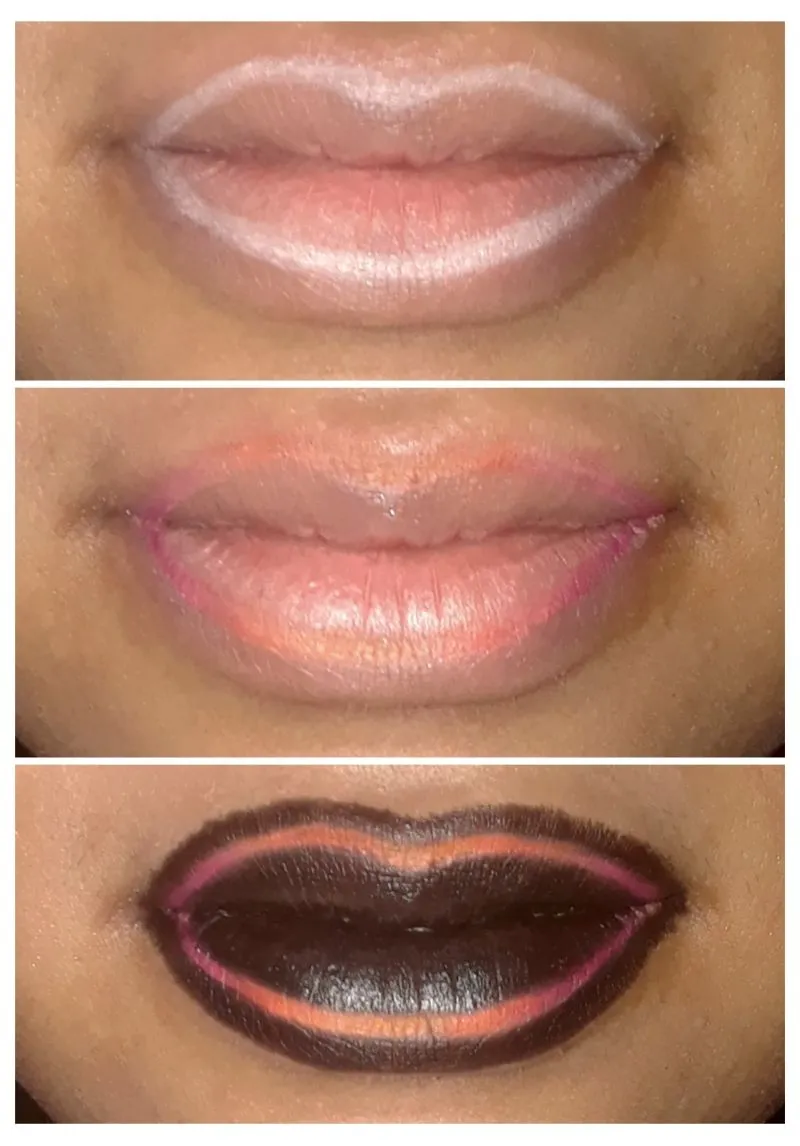
Nota: Recomiendo hidratar los labios con bálsamo labial antes de proceder con este paso. También recomiendo aplicar corrector o base para que los colores sean más notorios.
- Con el mismo delineador blanco usado en los ojos, se hace una línea siguiendo la forma de los labios pero un poco más adentro sin llegar al centro.
- Se colocan los mismos tonos de sombra antes usados siguiendo el orden desde las comisuras de los labios hasta llegar al centro.
- Con color negro (si tienen labial de ese color es mucho mejor) empezamos a rellenar todas las secciones alrededor de la línea que se dibujó antes.
Lips:
Note: I recommend to hydrate the lips with lip balm before proceeding to this step. I also recommend to apply concealer or base so the colors can be more notorious.
- With the same white eyeliner used on the eyes, we make a line following the shape of the lips but a little bit inside without getting to the center.
- We apply the same tones used before following the order from the ending of the lips to the center.
- With black color (if you have lipstick of that color is better) and we fill in every section around the line we made before.
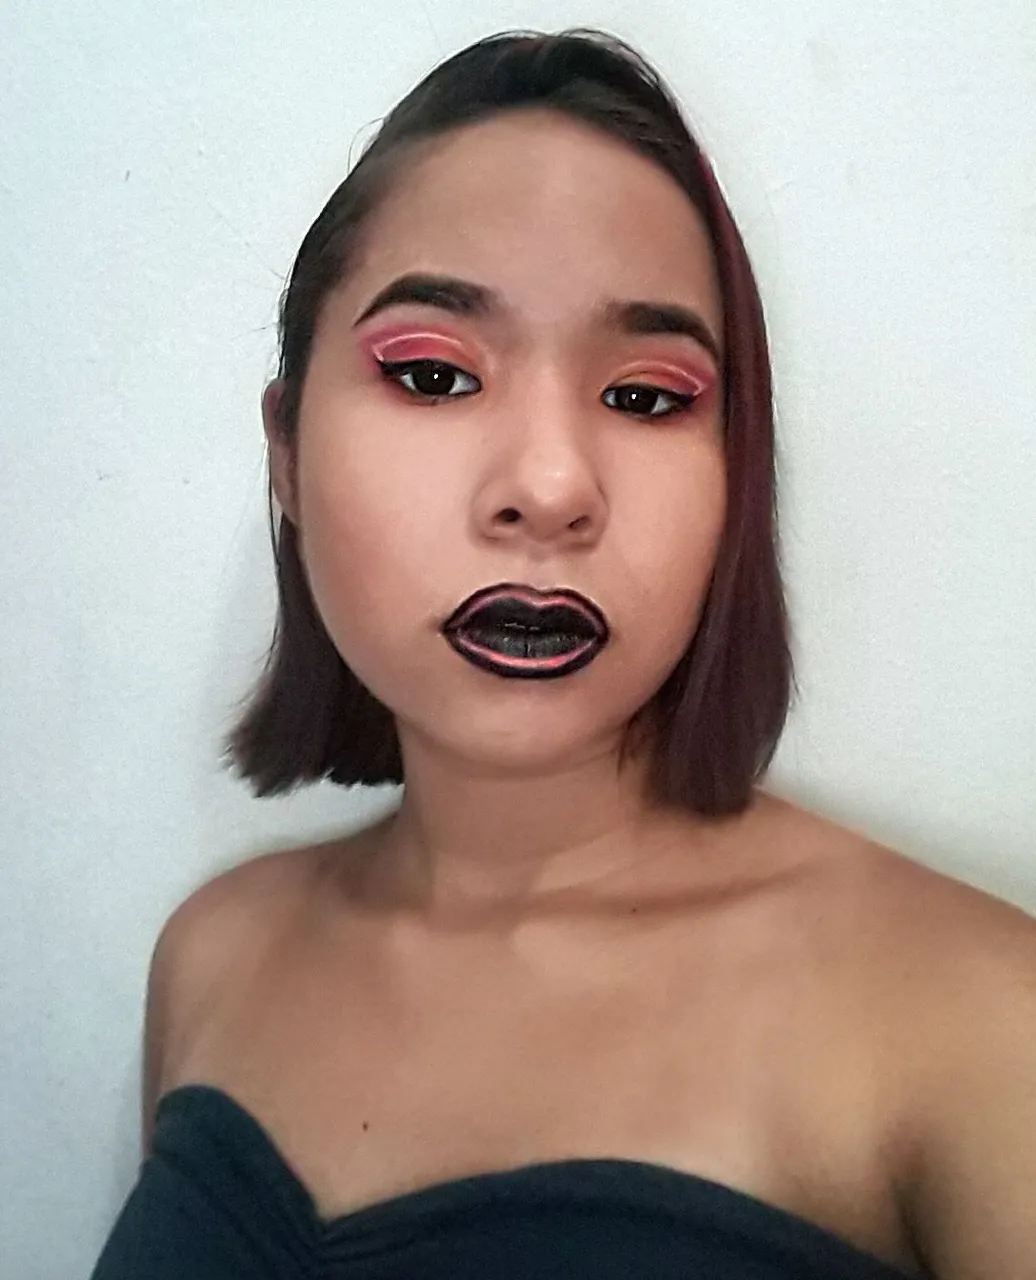
Resultado Final || Final Result
Aquí les muestro el resultado final, no quedó perfecto pero tiene el efecto deseado. El objetivo es imitar la manera en que las luces neón brillan, blanco en el centro y colores fuertes alrededor.
Here I show you the final result, it's not perfect but it has the desired effect. The goal was to imitate the way neon lights shine, white in the center and strong colors around it.
Esto puede ser reemplazado con una línea negra en lugar de blanca y pueden jugar con los colores que deseen y las formas que más les guste. El delineado negro también es opcional (yo lo uso porque me encantan los delineados). Y lo más importante es que se diviertan mientras lo hacen.
This can be replaced with a black line instead of a white one and you can play with as many colors and shapes as you like. The black eyeline is also optional (I wear it because I love eyeliner) And most important have fun while doing it.

¡Espero que les haya gustado, gracias por leer y nos vemos pronto! || I hope you liked it, thank you for reading and see you soon!

~Yoha