🌈¡HI FRIENDS!🌈
Espero todos se encuentren bien.
En esta oportunidad les traigo mu primera vez intentando un corte Samurái, de verdad tenía mucha miedo de intentarlo ya que es un maquillaje que lleva mucho tiempo y cortes.
I hope everyone is well.
This time I bring you my first time trying a Samurai cut, I was really very afraid to try it since it is a makeup that takes a long time and cuts
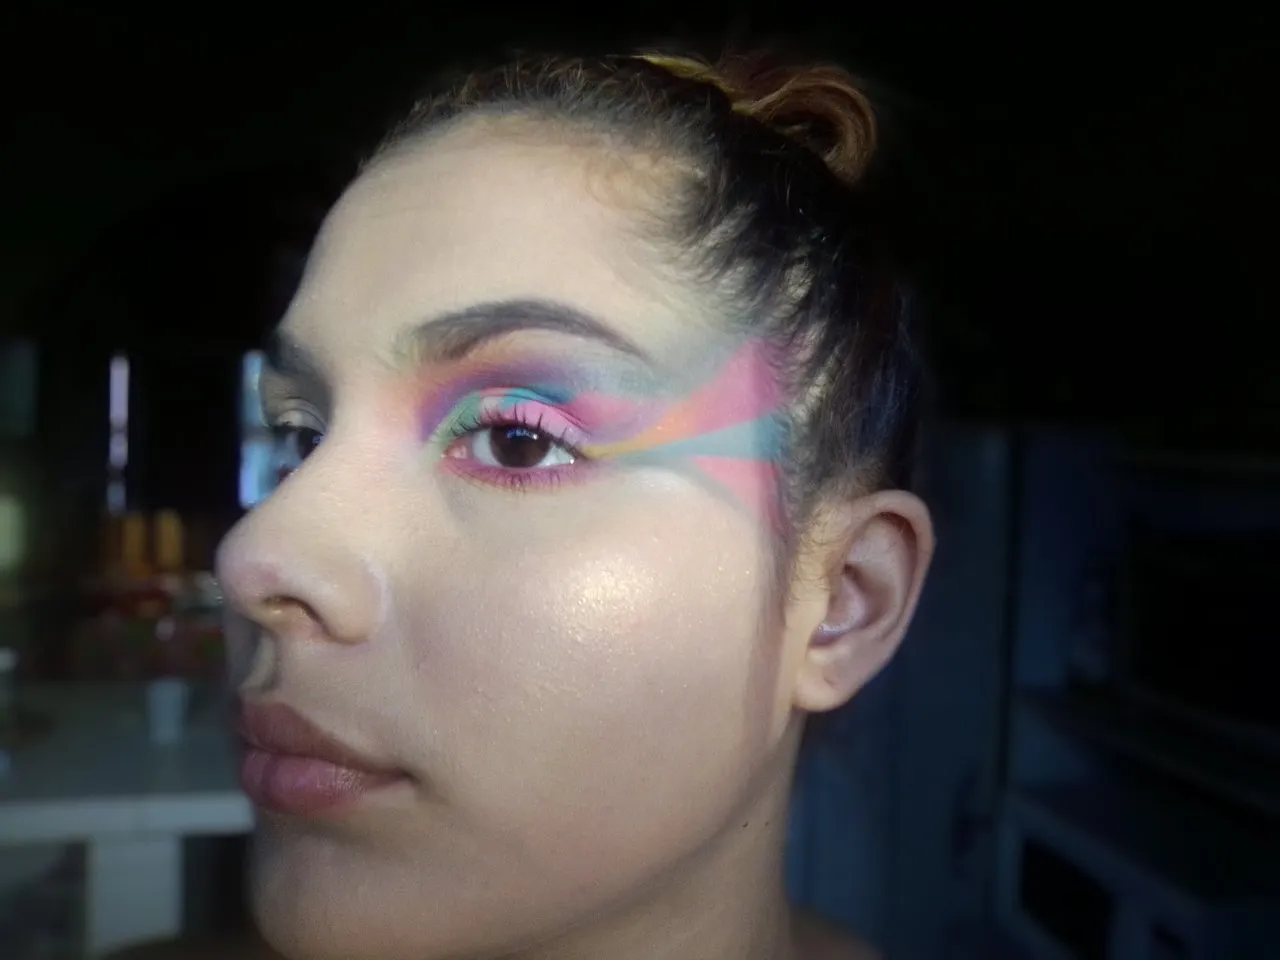
🗡️Steps for the elaboration 🗡️
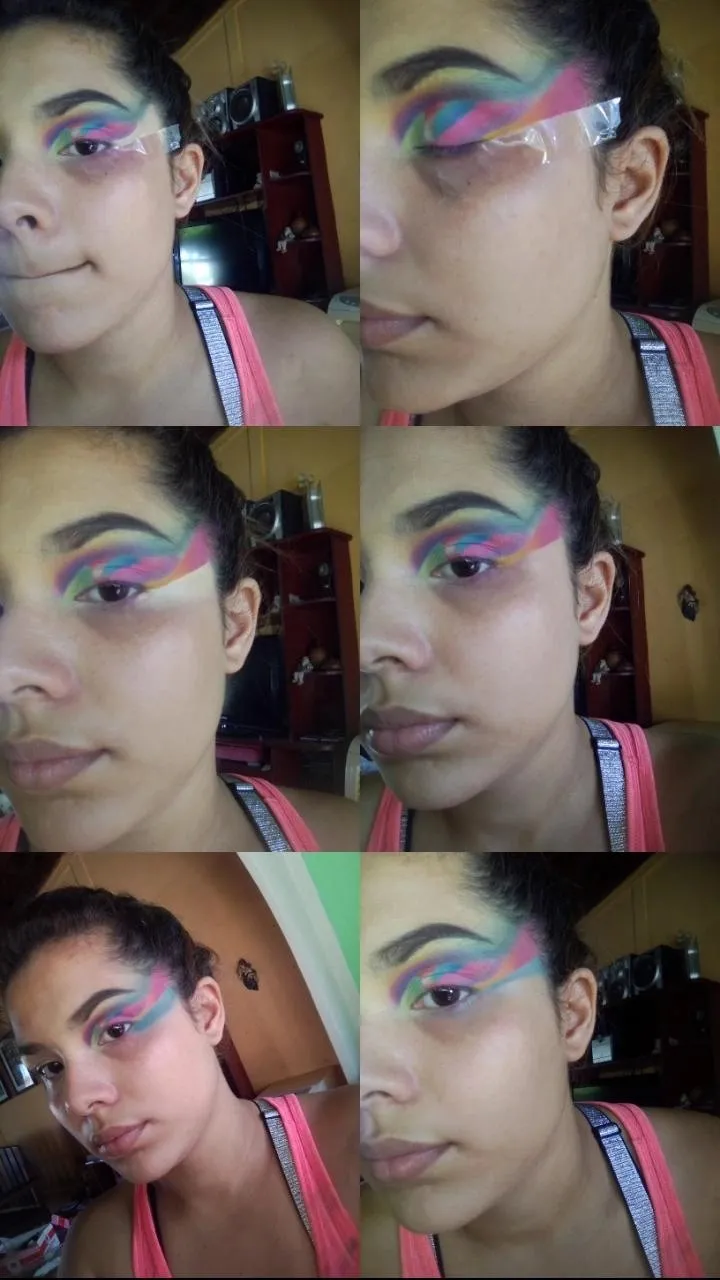
Colocámos corrector en el párpado sin sellar.
A toques colocamos sombra morada, rosada y amarilla hasta la mitad de nuestra cuenca, y vamos a difuminar de arriba hacía abajo, uniendo todos los colores. Con sombras verdes vamos a realizar el mismo procedimiento, colocarlo a toques dándole la forma con la colita y difuminamos de arriba hacia abajo.
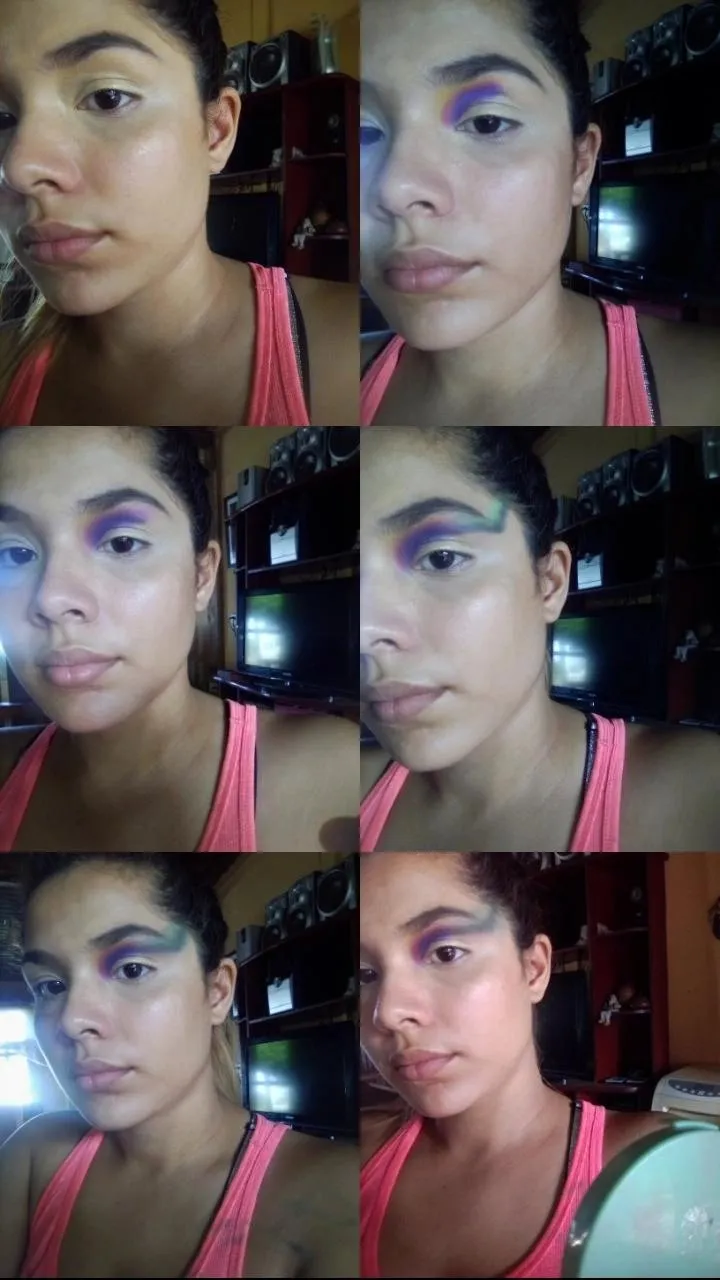
Seguido con agua micelar vamos a realizarse nuestro corte de cuenca para luego al inicio del ojo colocar corrector. Sellamos con una sombra verde manzana con verde césped, difuminamos entre ellas.
Repetimos el proceso de limpiar con agua micelar y colocamos corrector. Esta vez arriba y abajo ponemos una sombra roja y en el centro una blanca para dar el efecto de degradé.

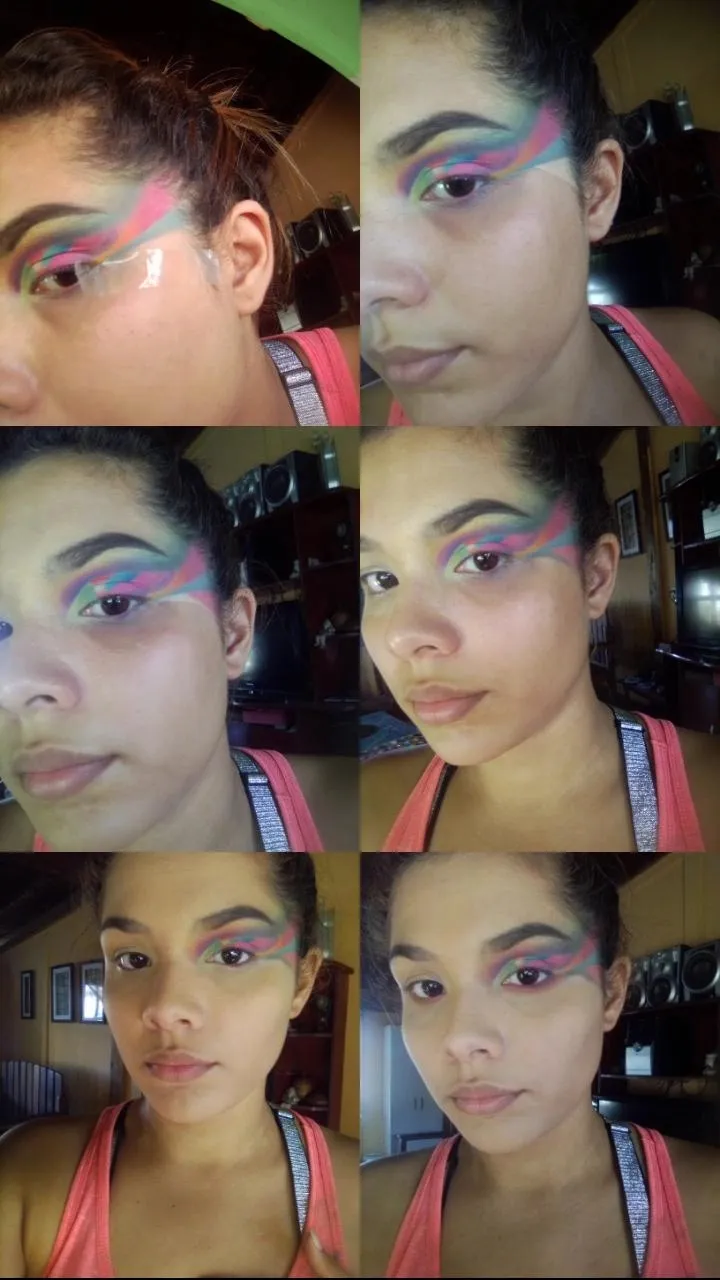
Con cada corte vamos a limpiar con el agua micelar y colocar corrector(lo digo para no estar diciendo lo mismo muchas veces).
Luego venimos con un azul cielo y azul rey, colocamos a toques y difuminamos entre ellas, cuidando de no pasarnos y unir las sombras.Seguido ponemos sombra rosada junto a una fúcsia para dar profundidad y difuminamos entre ellas.
Con un seloven nos ayudamos para que la línea sea totalmente recta y ponemos corrector; ponemos a toques sombra tono mostaza, otra toni naranja y de último un tono rosado fuerte pars difuminar entre ellas.
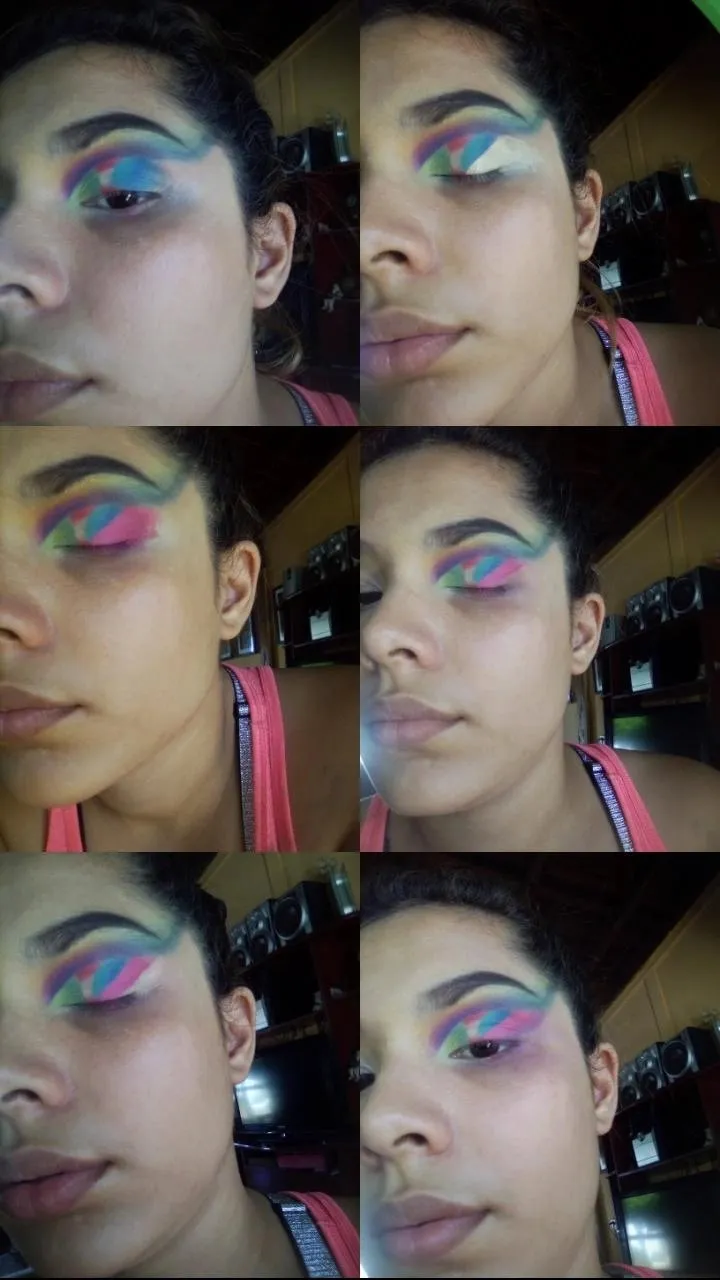
En el siguiente corte volvemos con un tono azul claro solo que está vez le vamos a agregar una sombra blanca para crear otro efecto de degradé.
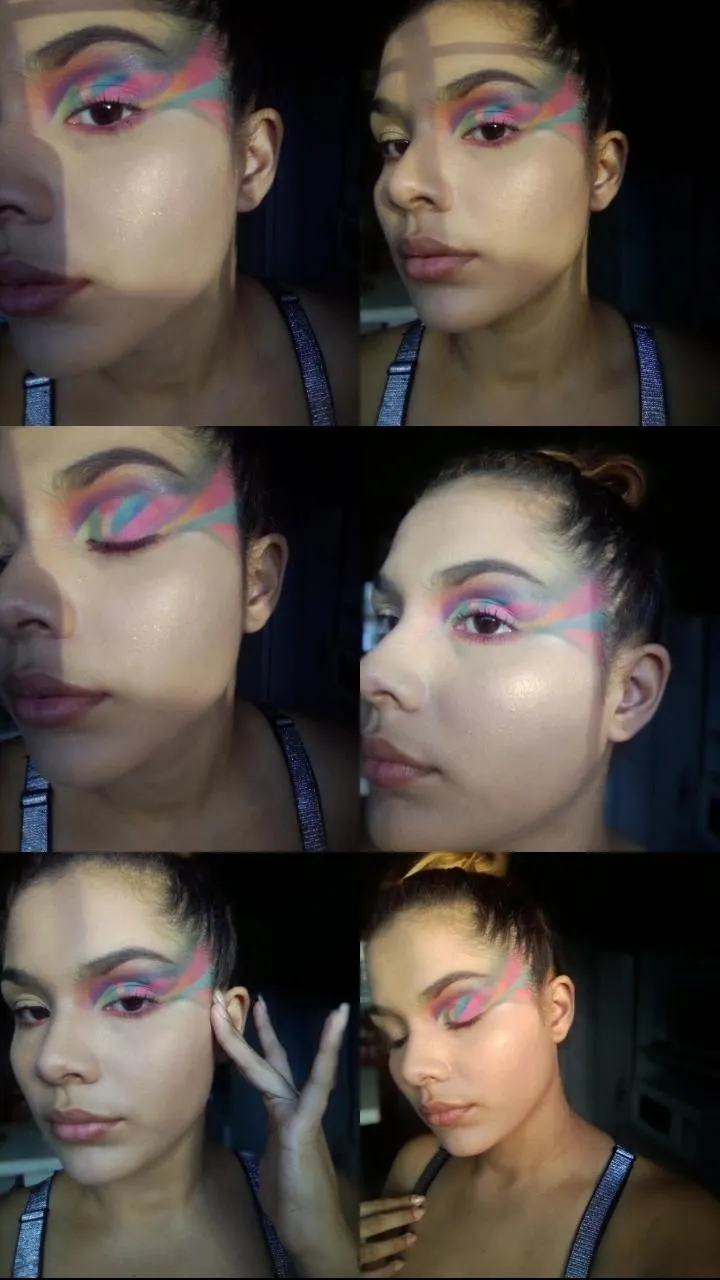
Para finalizar con los cortes hacemos dos más, con seloven nos volvemos a ayudar para que salgan totalmente recto, ponemos el corrector y sellamos con rojo (el primer corte) y el otro lo sellamos con sombra verde oscura.
En la línea de agua vamos a poner una sombra fúcsia a toques con cuidado que no entre en los ojos.
Nos hacemos la piel, base, contorno, rubor, iluminador, rímel y listo.
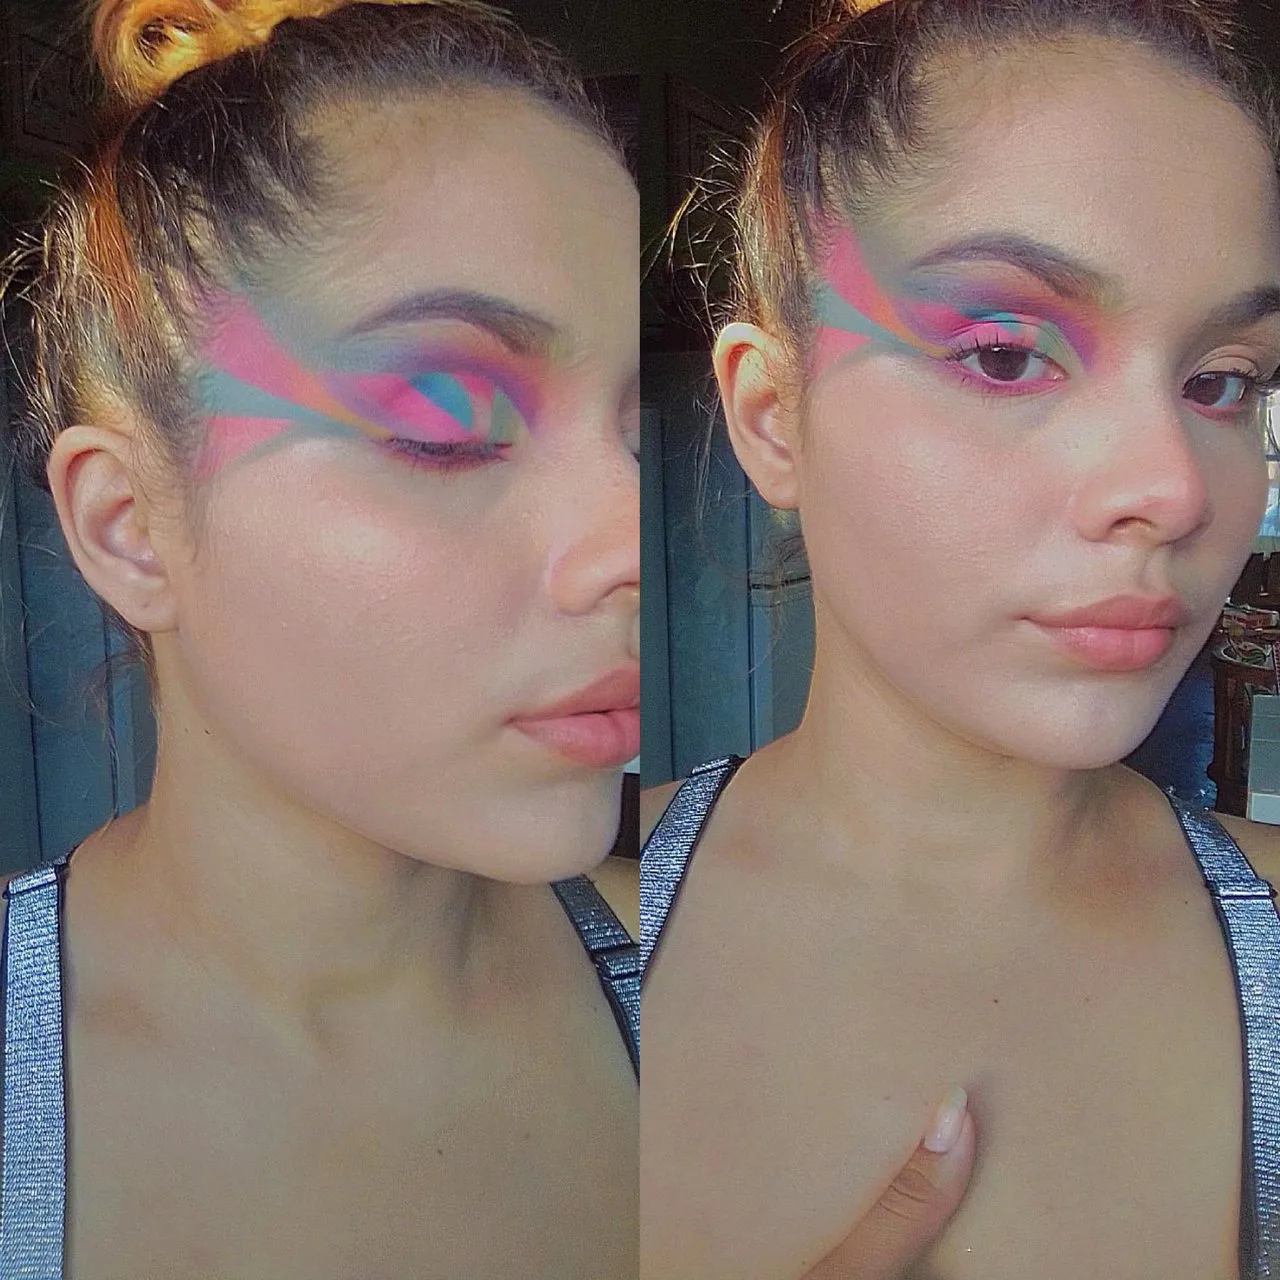
En el otro ojo solo pondremos sombra fúcsia en la línea de agua ya que lo que queremos que resalte es el corte Samurái.
We put concealer on the unsealed eyelid.
With touches we place purple, pink and yellow shadow up to the middle of our basin, and we are going to blur from top to bottom, joining all the colors. With green shadows we are going to carry out the same procedure, place it in touches, giving it the shape with the tail and blur from top to bottom.
Followed with micellar water we are going to make our basin cut and then at the beginning of the eye place concealer. We seal with an apple green shadow with grass green, we blur between them.
We repeat the process of cleaning with micellar water and apply concealer. This time above and below we put a red shadow and a white one in the center to give the gradient effect.
With each cut we are going to clean with micellar water and apply concealer (I say this so as not to be saying the same thing many times).
Then we come with a sky blue and a royal blue, we place touches and blur between them, taking care not to go over and join the shadows. Next we put pink shadow next to a fuchsia to give depth and blur between them.
With a seloven we help ourselves so that the line is completely straight and we put corrector; we put mustard shade shadow touches, another orange shade and lastly a strong pink shade to blur between them.
In the next cut we return with a light blue tone, only this time we are going to add a white shadow to create another gradient effect.
To finish with the cuts we make two more, with seloven we help each other again so that they come out completely straight, we put the corrector and seal with red (the first cut) and the other we seal with dark green shadow.
On the water line we are going to put a fuchsia shadow to touches carefully so that it does not get into the eyes.
We do the skin, base, contour, blush, highlighter, mascara and that's it.
In the other eye we will only put fuchsia shadow on the water line since what we want to highlight is the Samurai cut.
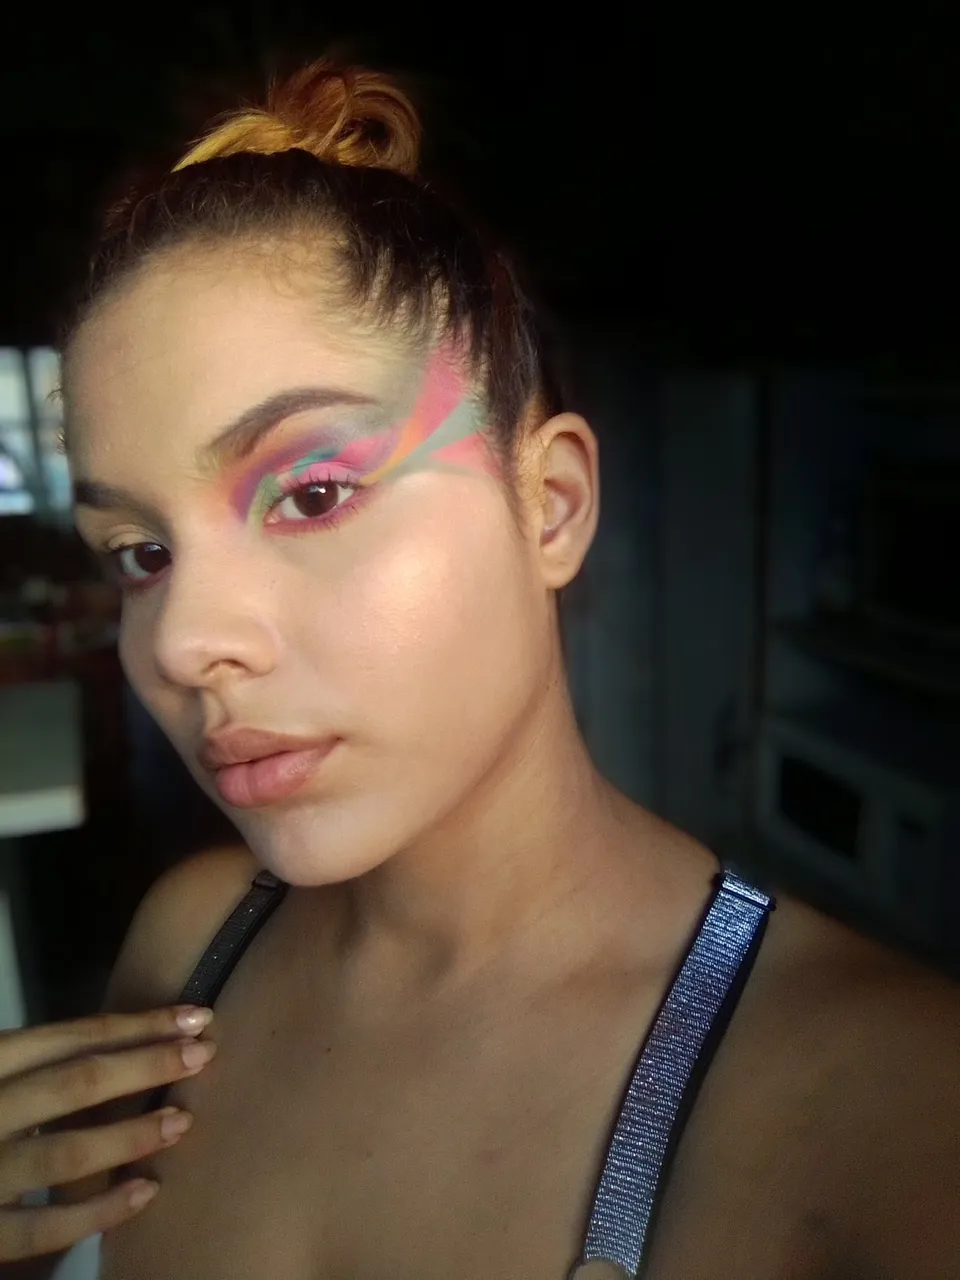
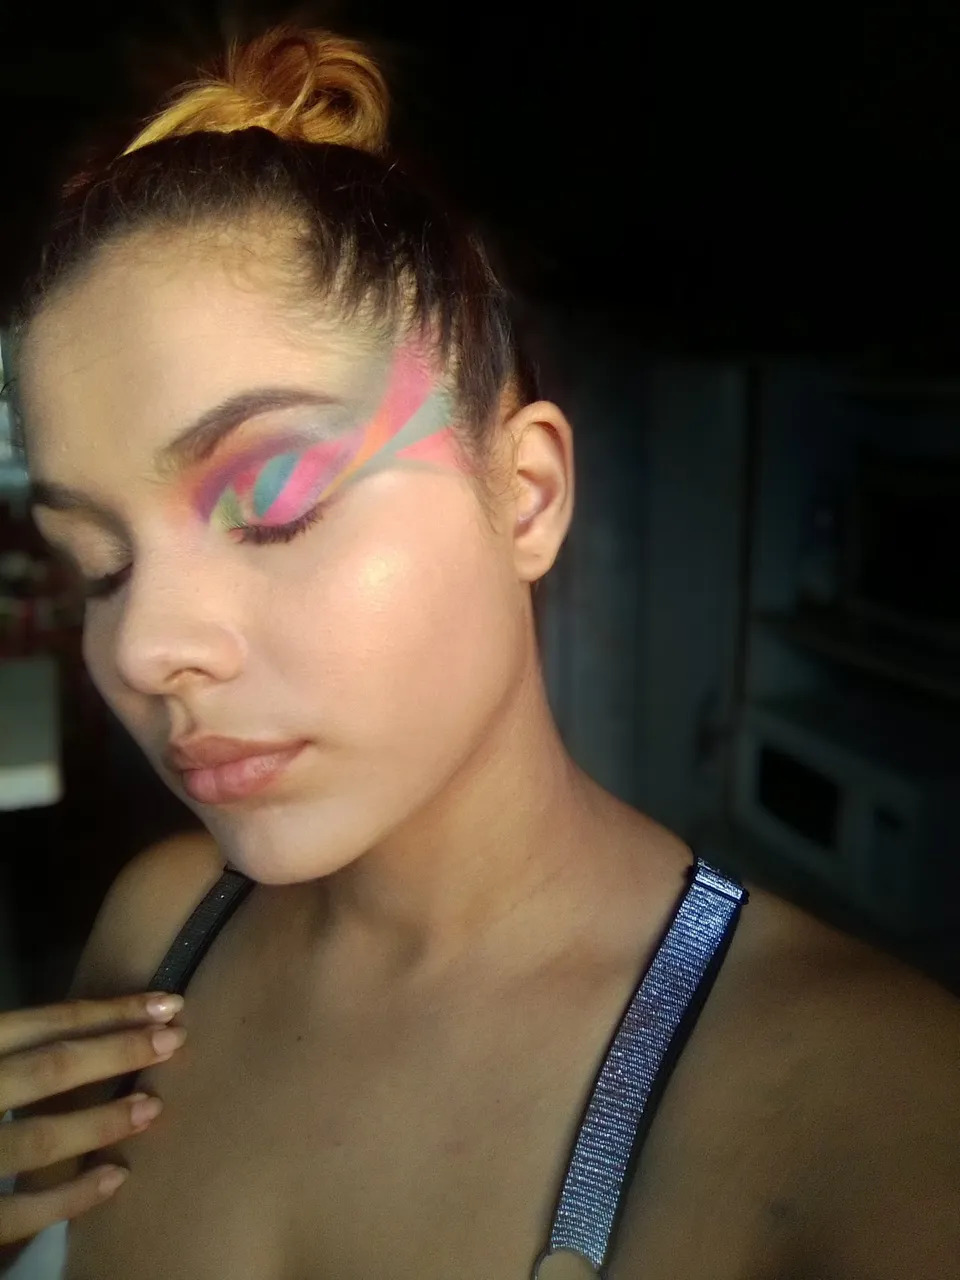
🤩More photos of the result 🤩
A pesar de que tenía mucho miedo ya que no es el tipo de maquillaje que he hecho, totalmente fuera de mi zona de Confort, me gustó mucho el resultado para ser la primera vez que lo realizo.
Me tomó alrededor de tres horas, y ha valido totalmente la pena✨
También espero que puedan entender mi explicación ya que al ser la primera vez no sabía como darme a entender, espero entiendan😅.
Espero les guste, quedo atenta a sus comentarios 😊
Hasta un próximo post🥰
*Fotos editadas en collage con Instshot y Layout de Instragram.
*Fotos tomadas con Instagram con el efecto Ethereal de Glamouraesth.
Although I was very scared since it is not the type of makeup I have done, totally out of my comfort zone, I really liked the result for the first time I have done it.
It took me about three hours, and it was totally worth it✨
I also hope you can understand my explanation since it was the first time I didn't know how to make myself understood, I hope you understand😅.
I hope you like it, I am attentive to your comments 😊
Until a next post✨
*Photos edited in collage with Instasize and Instagram Layout.
*Photos taken with Instagram with Glamouraesth's Ethereal effect.