¡HOLA AMIXES! en esta oportunidad me animé a participar en el challenge de esta semana, ya que este tipo de maquillajes me encantan y ya sería el 4to maquillaje inspirado en halloween que hago pero este lo hice en especial para la iniciativa de @lucianav y @ambarvegas. La verdad es que este maquillaje me ha encantado el resultado y espero que a ustedes también y ojalá también se animen a participar en el challenge.
HI AMIXES! This time I was encouraged to participate in the challenge this week, since I love this type of makeup and it would already be the 4th Halloween-inspired makeup that I do but I did this especially for the initiative of @lucianav and @ambarvegas. The truth is that this makeup I loved the result and I hope that you too and hopefully you will also be encouraged to participate in the challenge.
PROCESO
PROCESS
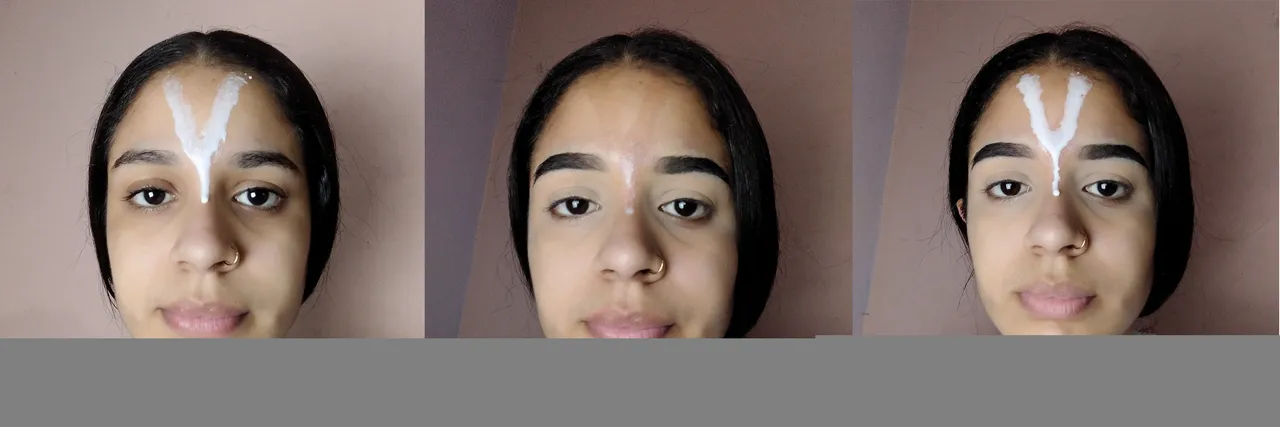
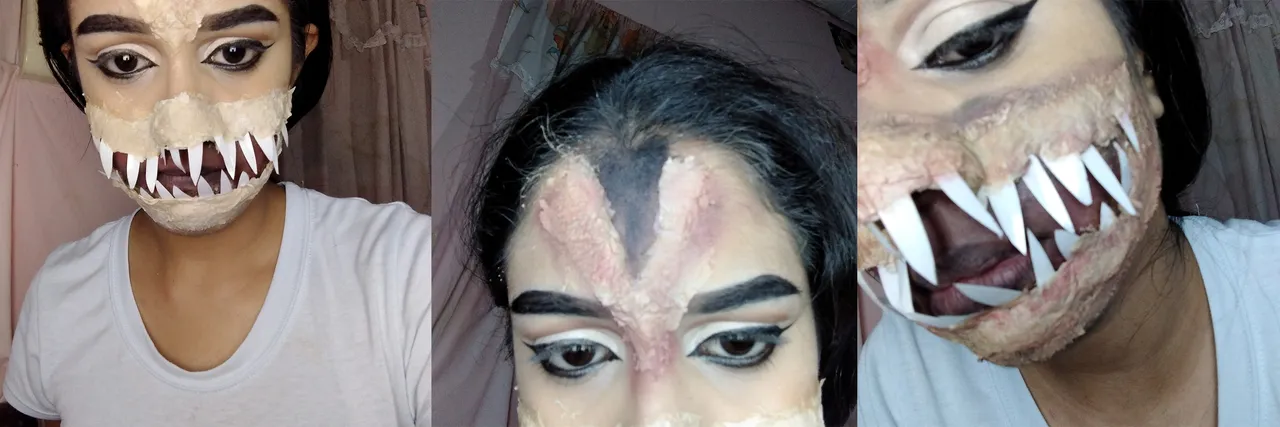
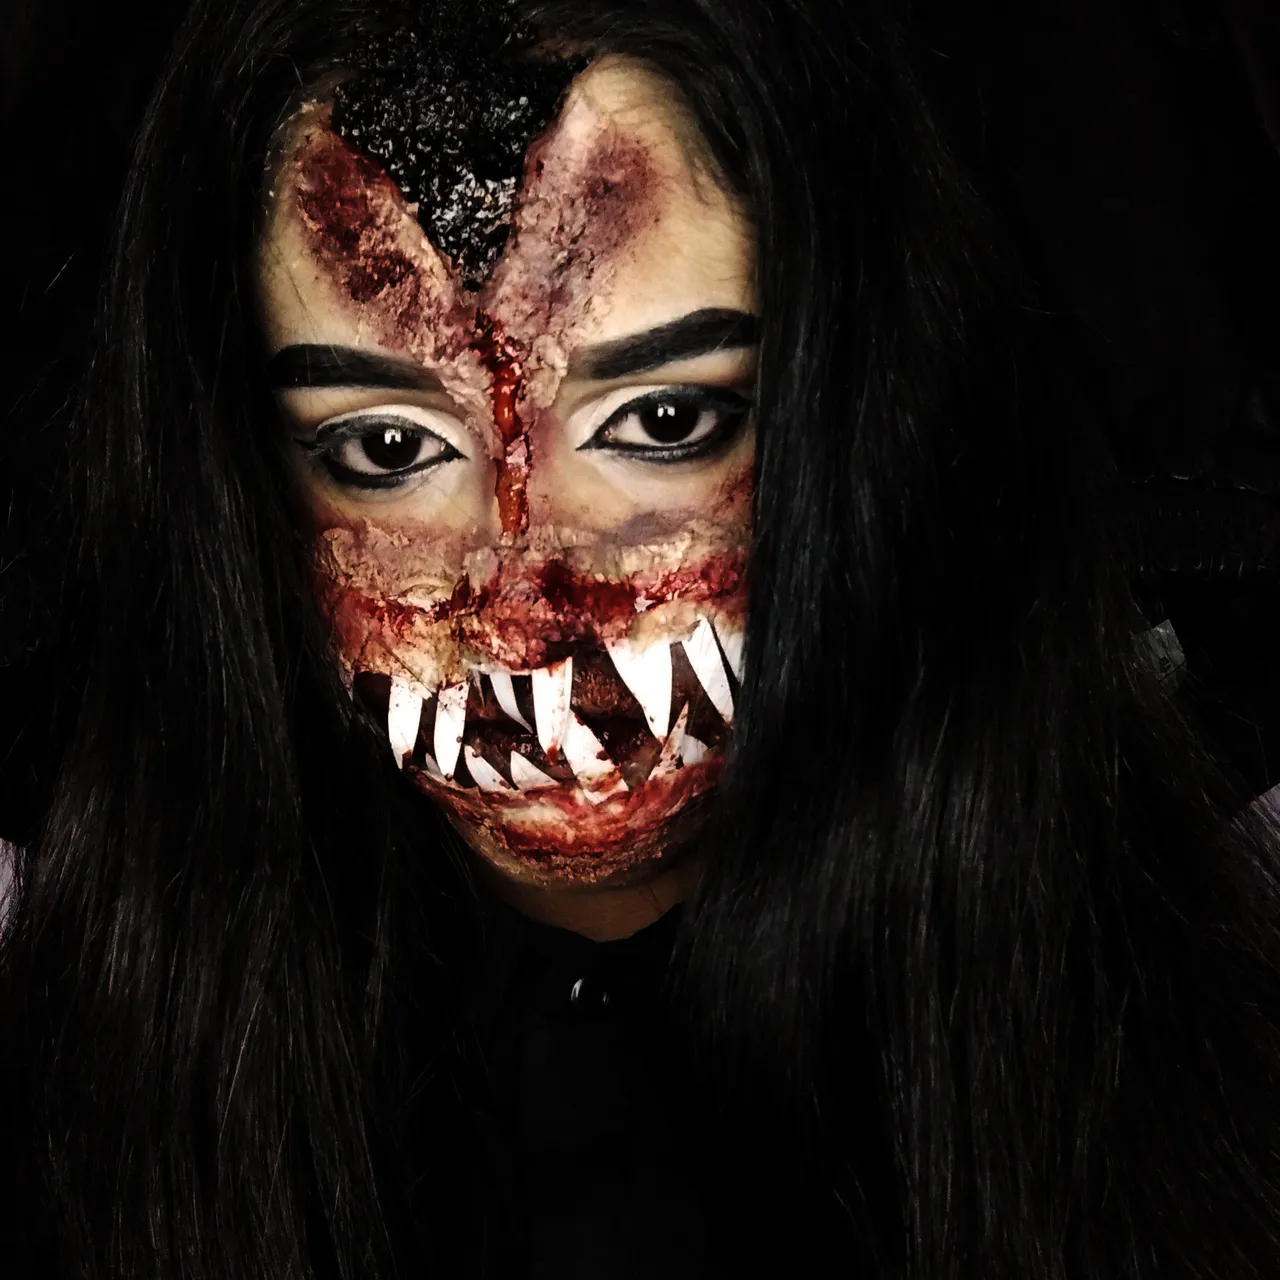
Comencé aplicando pega blanca escolar en la frente en forma de triangulo para el efecto de levantamiento de piel. Mientras secaba maquillé mis cejas y apliqué corrector en los párpados para luego empezar con las sombras. Luego puse otra capa de pega y procedí a maquillar los ojos.
I started by applying white school glue on my forehead in the shape of a triangle for the skin-lifting effect. While drying, I made up my eyebrows and applied concealer on the lids and then started with the shadows. Then I put another layer of glue and proceeded to make up the eyes.
Para los ojos apliqué un color beige como tono de transición y luego apliqué una sombra marrón en el párpado fijo hasta cuenca y luego de haber difuminado bien realicé un cut crease.
For the eyes I applied a beige color as a transition tone and then I applied a brown shadow on the fixed eyelid up to the basin and after having blended well I made a cut crease.
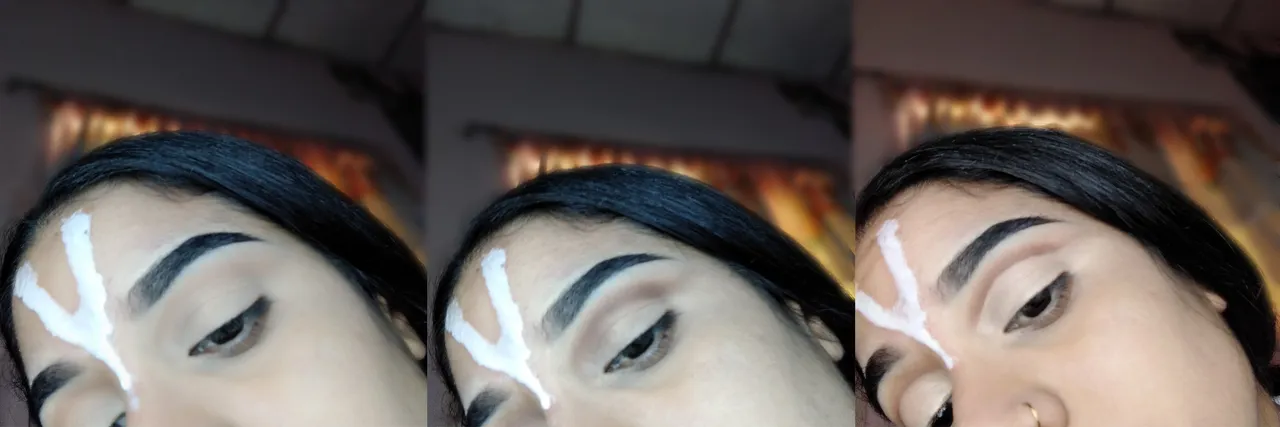
Luego coloqué sombra blanca brillante en todo el párpado móvil y finalicé con delineador.
Then I applied bright white eyeshadow all over the eyelid and finished with eyeliner.

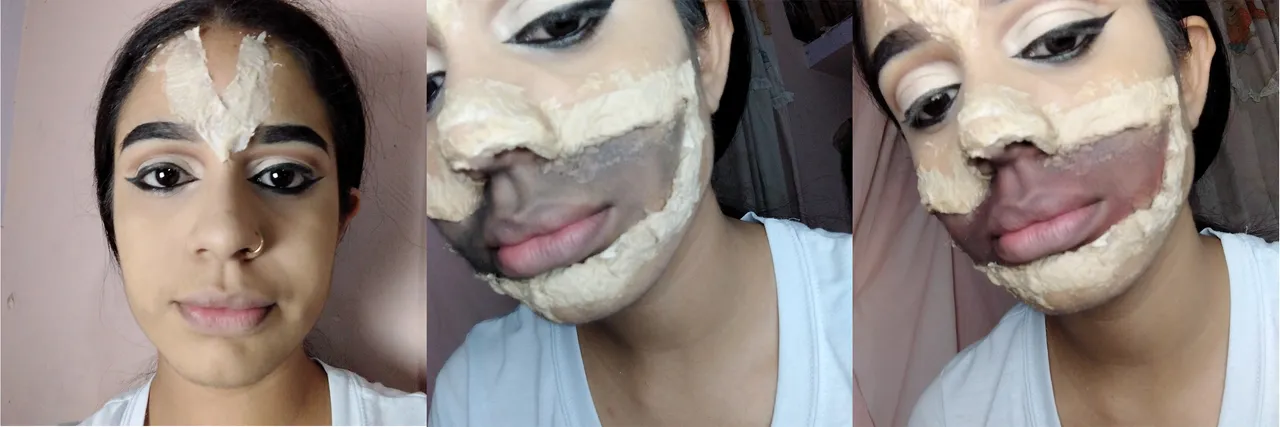
Cuando secó la pega, sentí que no iba a funcionar y se desprendería por completo, así que decidí aplicar papel higiénico junto con la pega para hacer algo más resistente y así mismo hice con la parte de la boca, y al secar coloqué en la parte interior sombra negra y roja.
When the glue dried, I felt that it would not work and it would come off completely, so I decided to apply toilet paper together with the glue to make something more resistant and I did the same with the part of the mouth, and when drying I placed on the part inner black and red shade.
Para los dientes utilicé una botella de plástico y la pinté de blanco por el lado de adentro. Luego la corté en tiras e hice la forma de los dientes.
For the teeth I used a plastic bottle and painted it white on the inside. Then I cut it into strips and made the shape of the teeth.
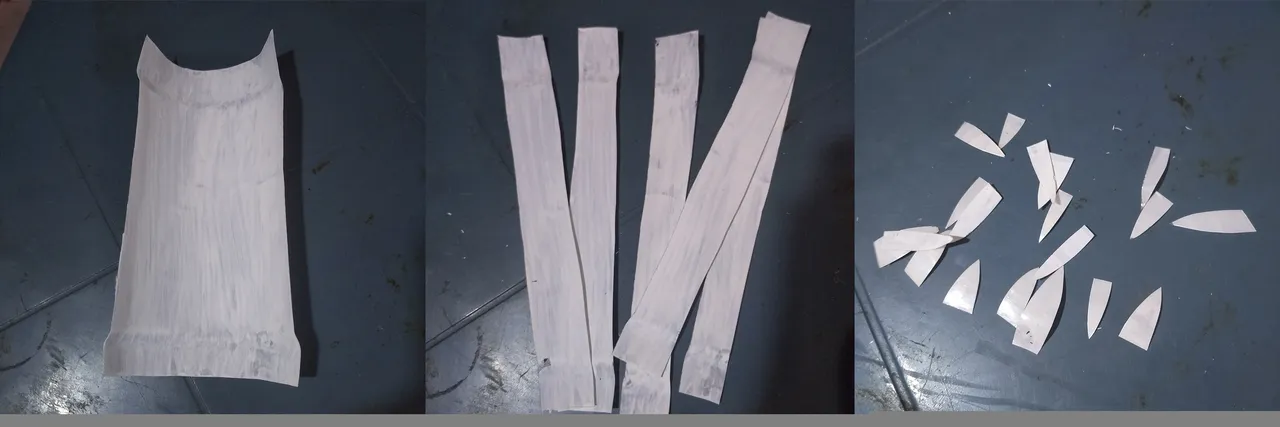
Luego los pegué del mismo modo, con papel y pega. Al secar muy bien todo, empecé a aplicar sombras de color negro, rojo y marrón para dar un efecto golpeado.
Then I glued them in the same way, with paper and paste. After drying everything very well, I began to apply black, red and brown shadows to give a beaten effect.
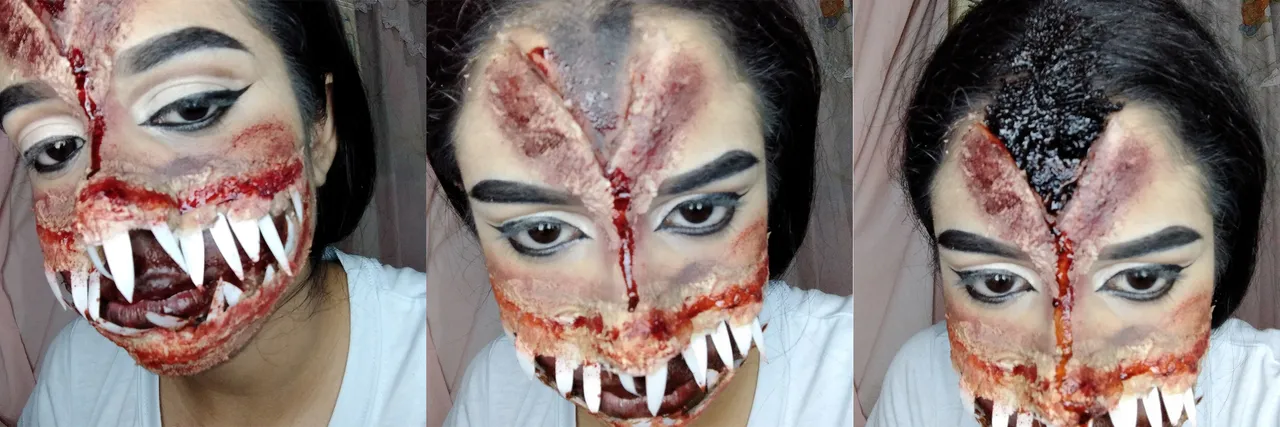
Y finalmente apliqué la sangre que hice con almíbar y colorantes rojo y azul. Para la sangre coagulada de la parte superior mezclé la sangre con café en polvo ¡y listo!.
And finally I applied the blood that I made with syrup and red and blue dyes. For the clotted blood on top I mixed the blood with coffee powder and voila!
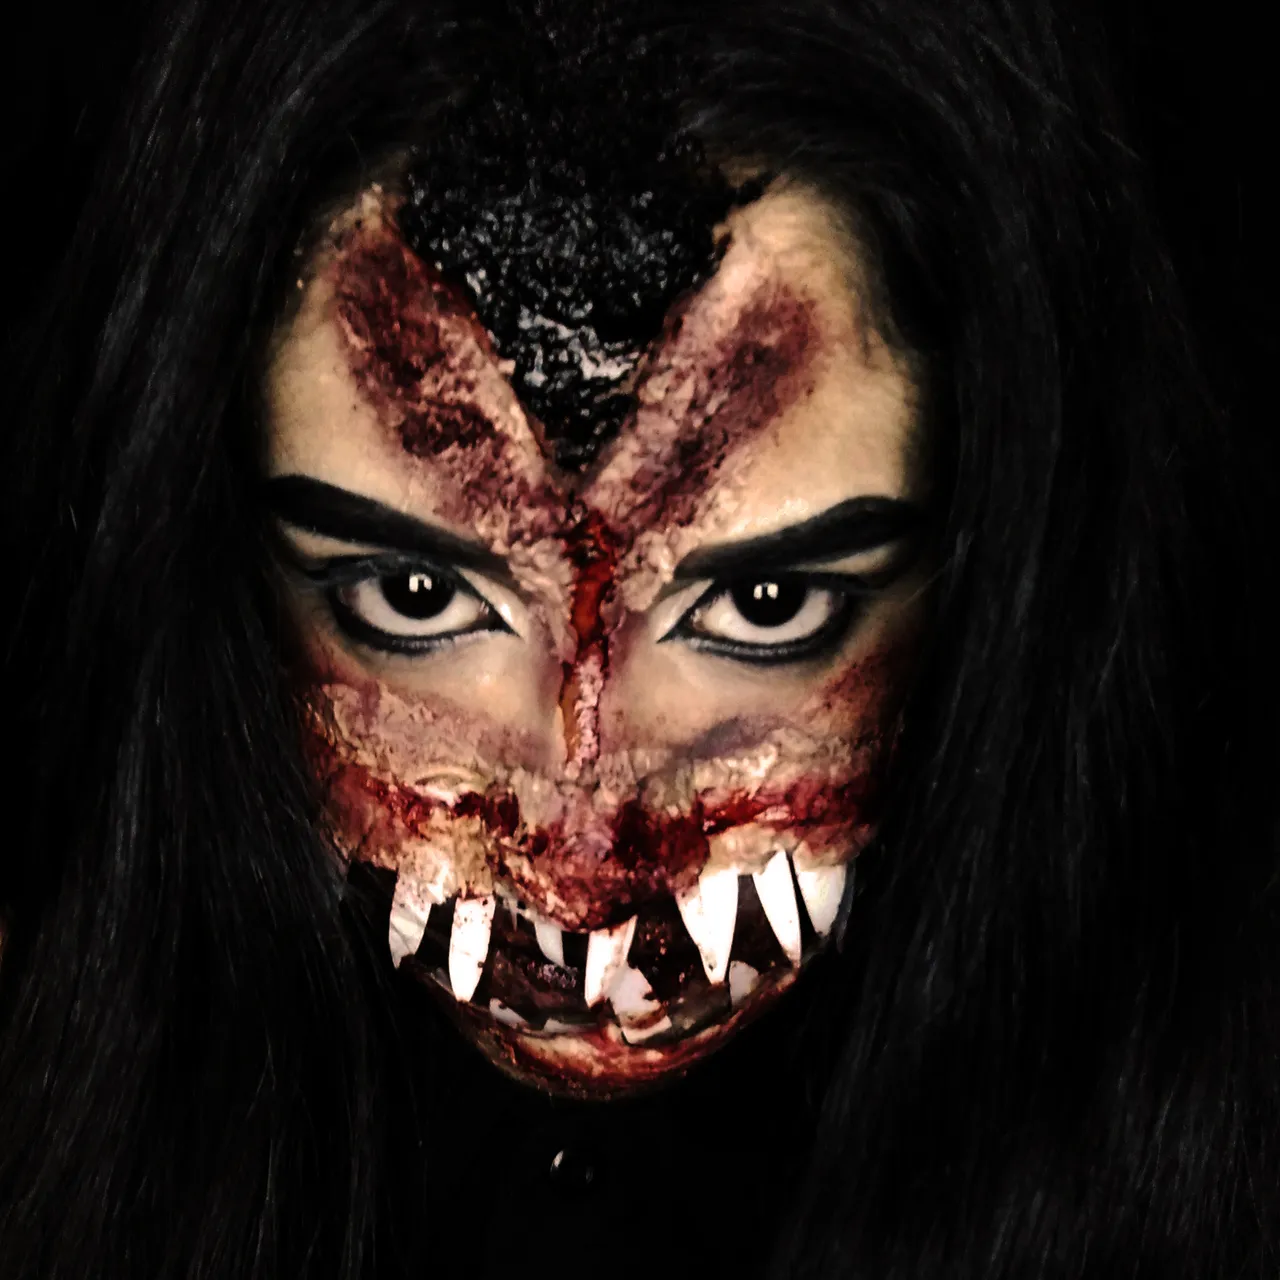
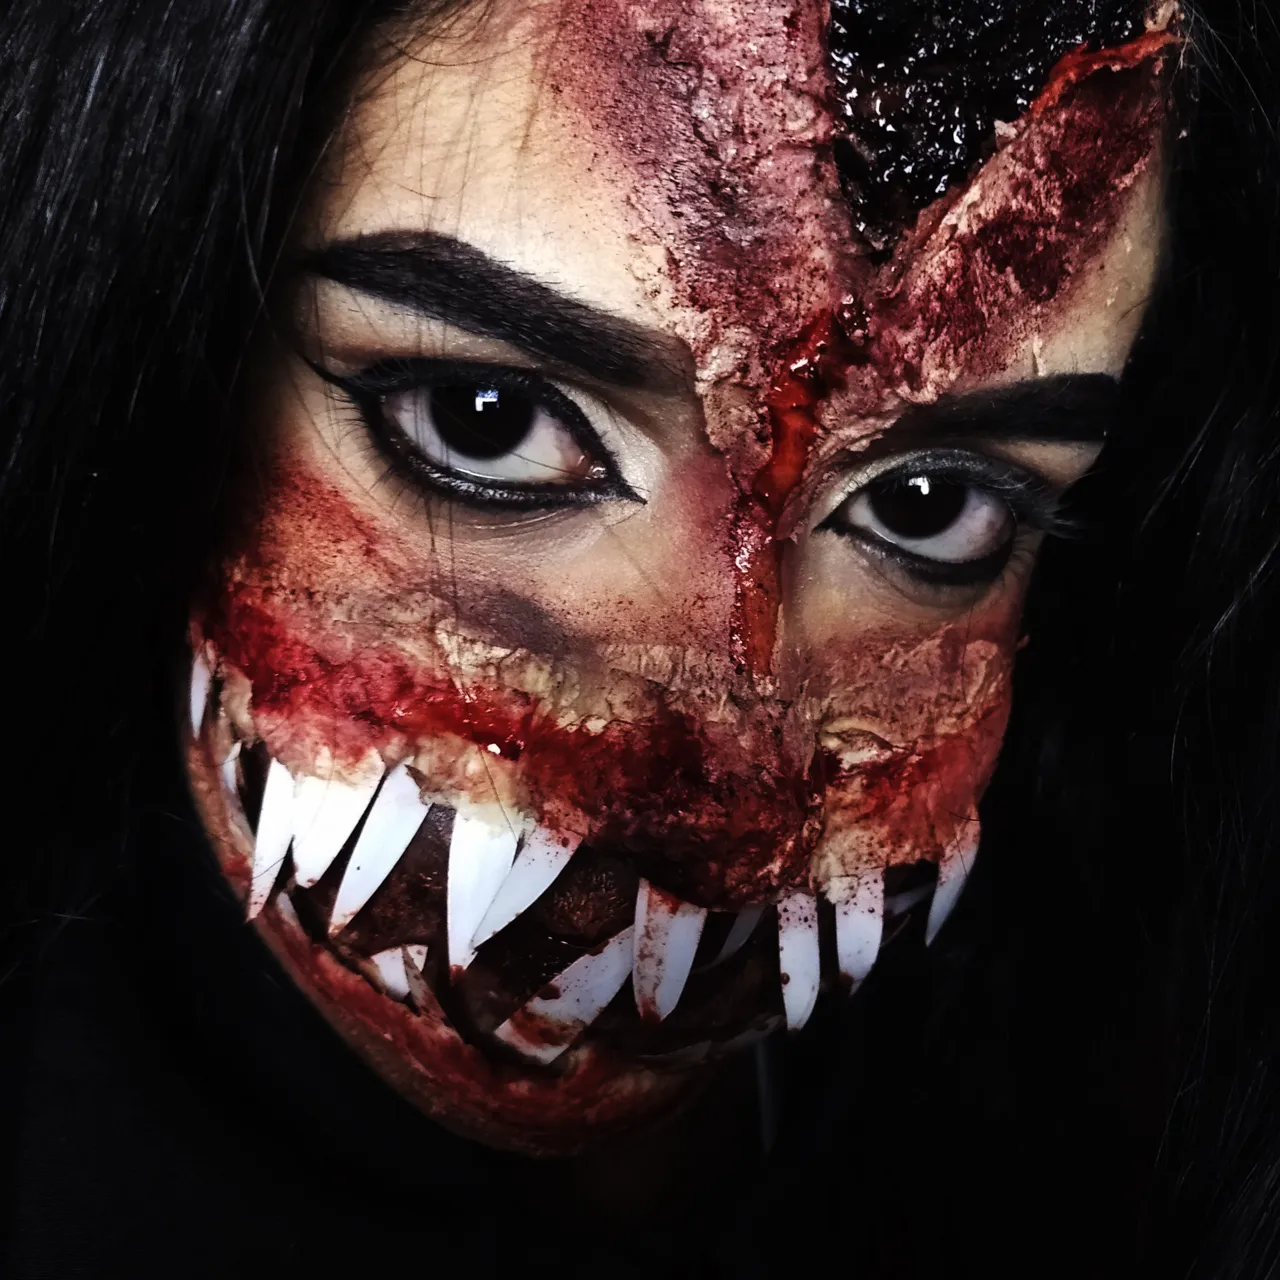
RESULTADOS
RESULTS
Espero les haya gustado,no olviden que pueden comentar, votar y seguirme, besitos xoxo