ESPAÑOL
Bienvenidos
ENGLISH
Welcome
Que tal amigos de hive motor!
Hoy les traigo un a nueva situación que viví con mi carrito Aveo... Cuando un vehículo pide cariño lo hace siempre de manera imprevista, mas si es un carro que se ha adquirido de segunda mano... Lo digo porque no lo conocemos y no sabemos que le hicieron y que le falta por hacer.
Luego de una situación presentada con la correa de tiempo hace algunas semanas, la inspección que habíamos hecho anunciaba una corrección por cambio de piezas, que era fundamental lo hiciera, pero el golpe la bolsillo fue considerable con lo de el cambio de correa y otros repuestos para ese momento.
Asi que decidí dejar lo que había descubierto para otra ocasión, ya que el carro en ese aspecto se estaba comportando bien.
Sorpresa! El carrito como que tiene vida propia, y como si fuese un obejo animado, decidió pedir un poco más de cariño, y fue otro golpe necesario para su operatividad que le hiciera el cariñito.
Pues bien... En estas semanas el carro empezó a fallar en el sistema de croche, así que pensé inmediatamente que fue el croche el que había que sustituir, eso implicaba invertir en comprar disomco plato y collarín. Sin embargo me dispuse a prestar atención a lo que habíamos visto la última vez que le cambiamos la correa de tiempo.
Busque a mi amigo y familiar que es mecánico, lo monte en el carro y dimos una vuelta... El carro por supuesto presento la falla y llegamos a la conclusión que el sistema de croche tenía malo realmente eran los dos bombines, el superior que está justo donde van los pedales detrás del motor y el inferior que está justo al lado de la caja.
Hello friends of hive motor!
Today I bring you a new situation that I lived with my Aveo car .... When a vehicle asks for affection it always does it in an unexpected way, even more if it is a car that has been acquired second hand... I say this because we don't know it and we don't know what has been done to it and what still needs to be done.
After a situation presented with the timing belt a few weeks ago, the inspection that we had done announced a correction by changing parts, which was essential to do so, but the blow the pocket was considerable with the belt change and other spare parts for that time.
So I decided to leave what I had discovered for another occasion, since the car in that aspect was behaving well.
Surprise! The trolley as if it had a life of its own, and as if it were an animated rabbit, it decided to ask for a little more affection, and it was another necessary blow for its operability that I made it the affection.
Well... In these weeks the carriage began to fail in the crochet system, so I immediately thought that it was the crochet that had to be replaced, that implied investing in buying disomco plate and collar. However I set out to pay attention to what we had seen the last time we changed the timing belt.
I looked for my friend and relative who is a mechanic, I put him in the car and we went for a ride.... The car of course presented the failure and we came to the conclusion that the croche system had bad really were the two pumps, the upper one that is right where the pedals go behind the engine and the lower one that is right next to the box.
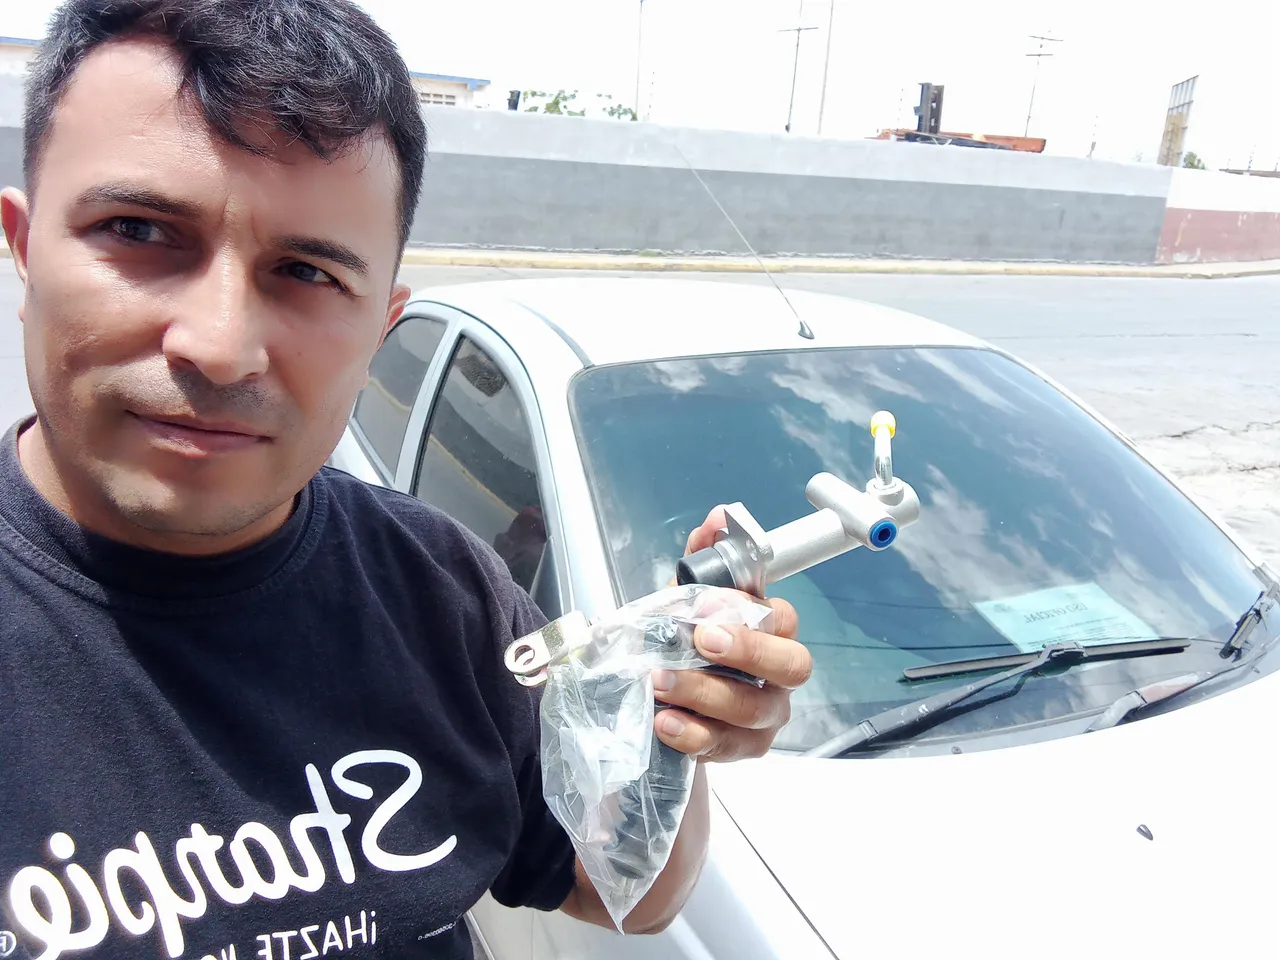
Por lo que decidí parar el carro y buscar los repuestos.
- Bombin superior
- Bombin inferiior
- Liga de freno
Las herramientas usadas fueron
- Laves de 1/2 y 7/8 mm
- Rache y dados de 1/2 y 7/8 mm
- Destornillador
So I decided to stop the car and look for spare parts.
- Upper pump
- Lower cylinder
- Brake linkage
The tools used were
- 1/2 and 7/8 mm keyways
- 1/2 and 7/8 mm rachet and sockets
- Screwdriver
Después de obtener los repuestos nos pusimos manos a la obra, empezando a desarmar la parte que era más tediosa o más complicada, ya que debíamos quitar en su lado del chófer el sistema de tanque de agua, el cajetin del sistema eléctrico y la batería, para llegar más cómodamente al bombin superior.
After obtaining the spare parts we got down to work, starting to disassemble the part that was more tedious or more complicated, since we had to remove the water tank system, the electrical system box and the battery on the driver's side, in order to reach the upper pump more comfortably.
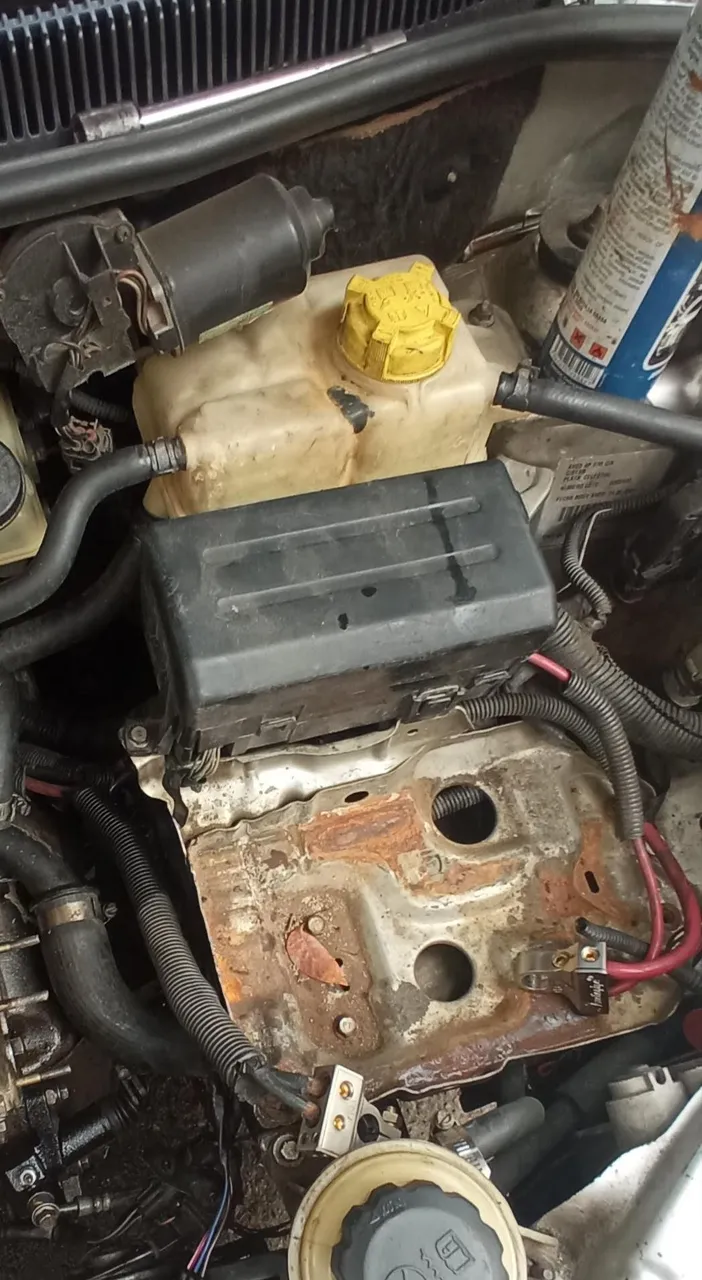
Con las llaves y el destornillador quitamos el cajetin de relés y fusibles. Luego desplegamos y quitamos el depósito de agua, logrando ver el bombin superior, para lo cual usamos los dados y el rache para despegarlo. Ya dentro de la pedalera del carro nos fijamos bien en el lápiz que estaba conectado al bombin quitando la tuerca que lo sujetaba.
With the wrenches and the screwdriver we remove the relay and fuse box. Then we unfold and remove the water tank, managing to see the upper pump, for which we use the dice and the rache to take it off. Already inside the pedalboard of the car we looked well in the pencil that was connected to the pump by removing the nut that held it.
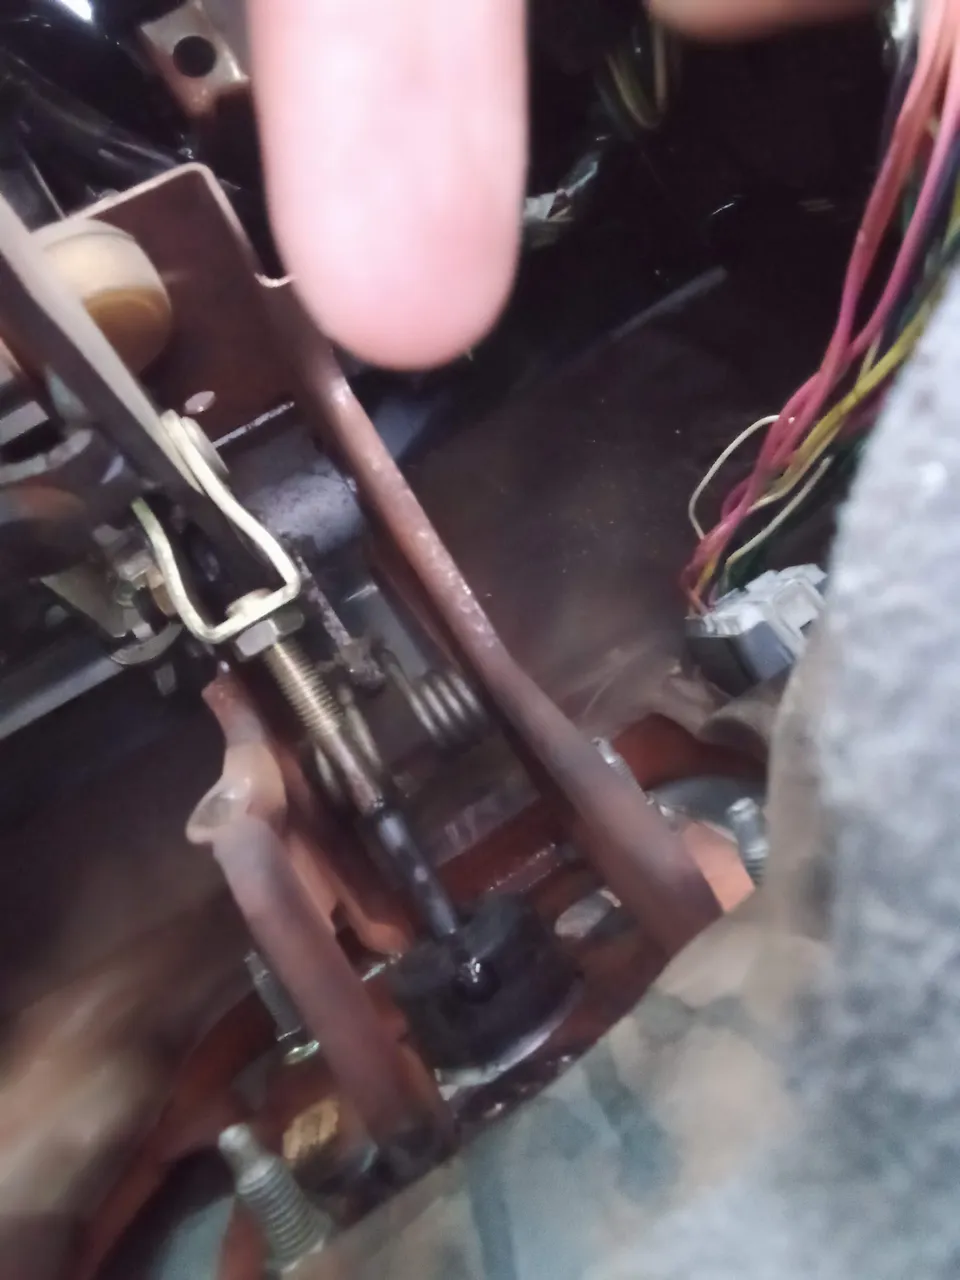
Posterior a esta primera etapa de desarme nos dispusimos a colocar el nuevo bombin superior...
After this first stage of disassembly, we decided to install the new upper cylinder...
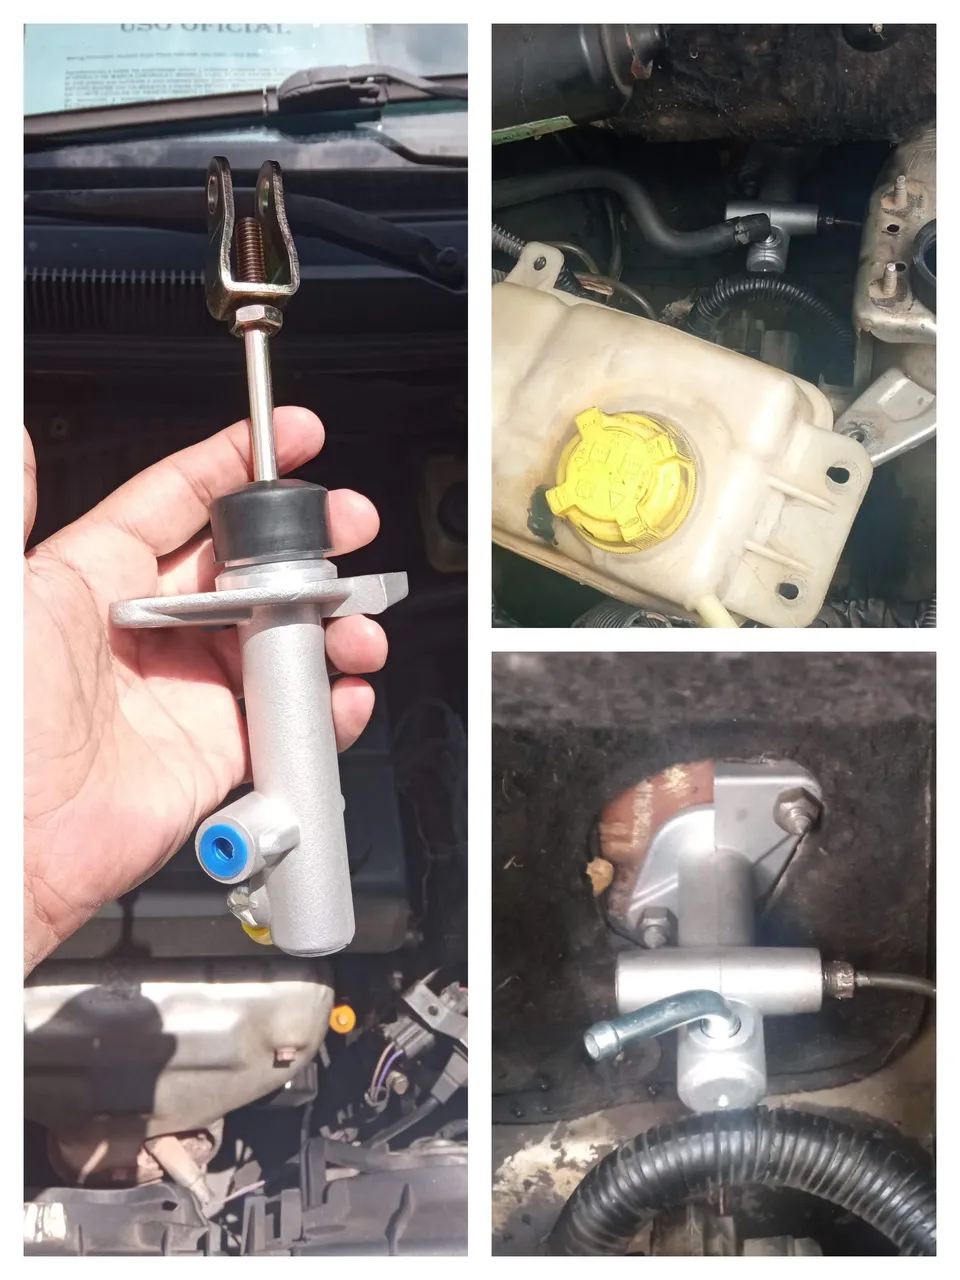
Ya colocado el primer bombin nos dirigimos a desarmar el bombin inferior que esta localizado al lado de la caja del carro. Ya ese bombin lo habíamos detallado y vimos la condición que tenia, una mala intervención de algún mecánico había puesto la pieza con un lápiz que no era de ese carro y para colmo le había soldado otra.
Already placed the first pump we went to disassemble the lower pump that is located next to the box of the car. We had already detailed that pump and saw the condition it had, a bad intervention of a mechanic had put the piece with a pencil that was not of that car and to top it off had welded another.
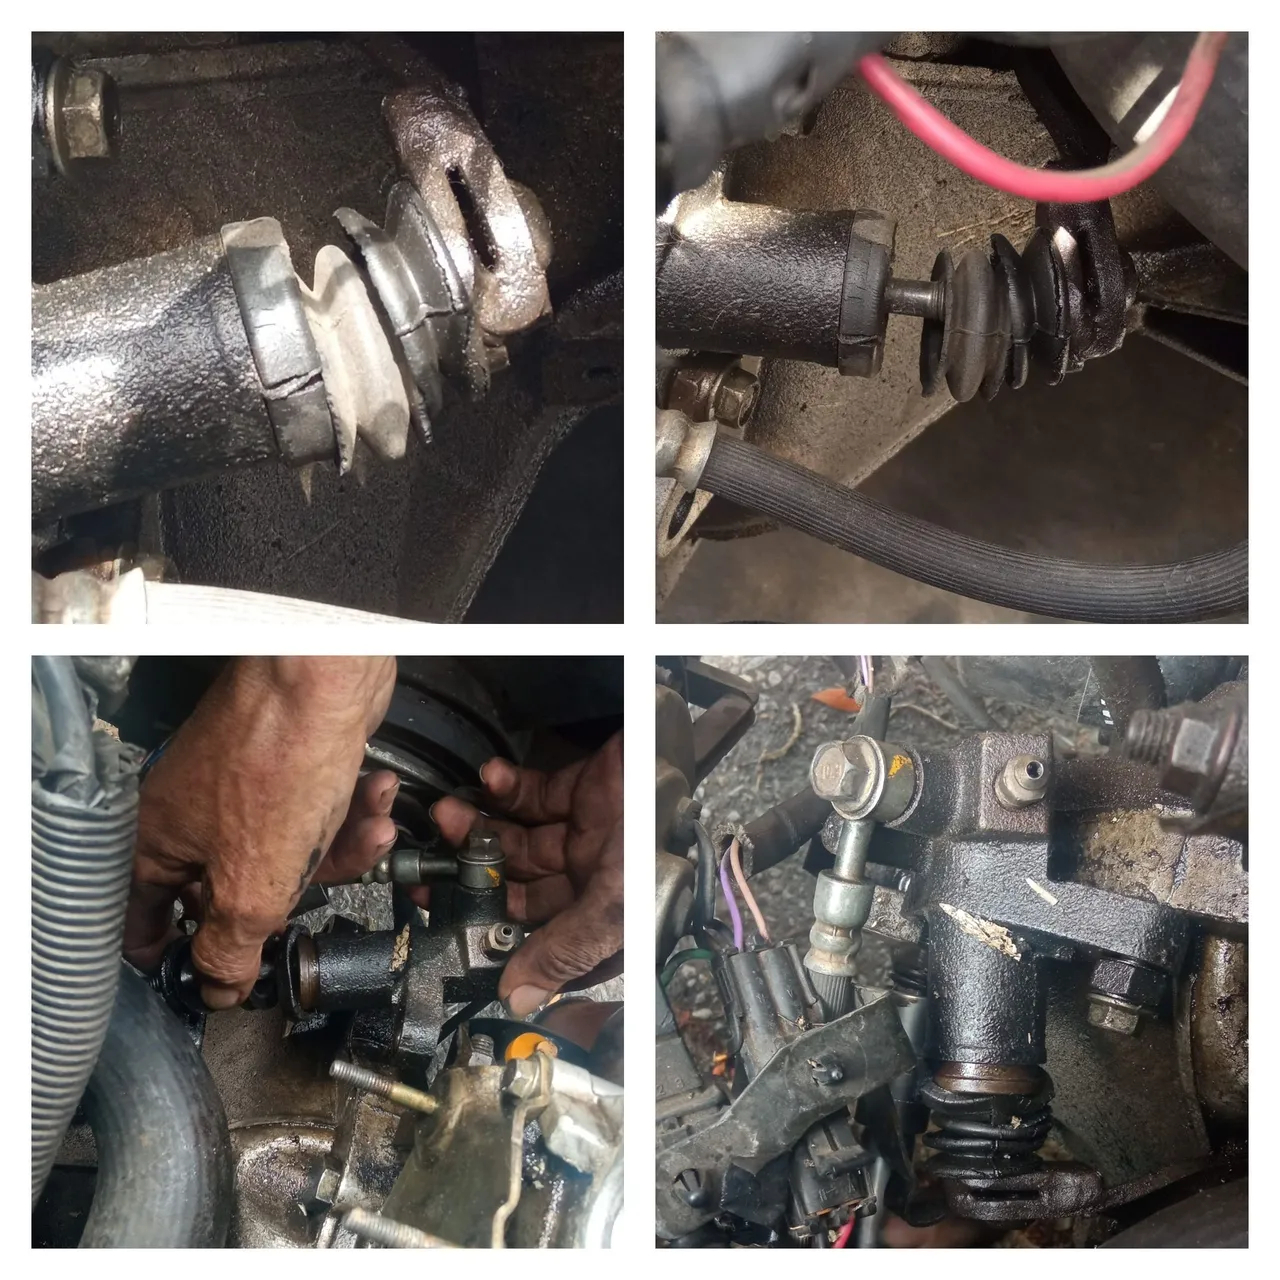
Así que quitamos todo y le colocamos su pieza original con el lápiz exacto como debería ir.
So we removed everything and put his original piece with the pencil exactly as it should go.

Ya sustituidas las piezas, colocamos y armado todo en su sitio, le echamos liga de freno al depósito para purgar el sistema, misntras uno pisaba el croche el otro con una llave aflojaba y aportaba la válvula de purgar para sacar todo el aire que podía estar en la tubería. Una y otra vez se realizaba esa operación hasta que el pedal del croche quedaba en su sitio y con la hidráulica perfecta.
Así fue que cambiamos los dos bombines del Aveo... Nada complicado y con el cariño necesario.
Once the parts were replaced, we placed and assembled everything in its place, we put the brake hose to the tank to bleed the system, while one stepped on the crochet the other with a wrench loosened and provided the bleeder valve to remove all the air that could be in the pipe. Again and again this operation was performed until the crochet pedal was in place and the hydraulics were perfect.
That's how we changed the two pump cylinders of the Aveo .... Nothing complicated and with the necessary care.

Gracias por leer y votar este post...
Un abrazo!
Hasta otra oportunidad!
Puedes visitar mi blog de arte digital en Nftshowroom
Thank you for reading and voting this post...
A hug!
See you again!
You can visit my digital art blog at Nftshowroom
Translated with www.DeepL.com/Translator (free version)
Nota: todas las imágenes son de mi propiedad y fueron tomadas con mi dispositivo móvil Xiaomi.

Note: all images are my property and were taken with my Xiaomi mobile device.