Hello, Hive Motors! I'm happy to finally bring another post about some DIY auto repair to this wonderful community! In this post I'll be sharing sharing some work I've done as a freelance mechanic. I'll also talk about safely lifting a vehicle, and probably some other general mechanic knowledge.
This vehicle was brought to me to have the rear brake pads and rotors replaced, but in the course of that work I discovered that some of the slide pins on the brake caliper brackets had seized up. Repair kits for these slide pins are usually around $10, but you'll most likely have to order them online. The entire caliper bracket, with slide pins, can often be bought at the local auto parts store, but will usually cost $100 or more. I'll let you work out your own math on that, but obviously this can be a very lucrative (or money saving!) repair.

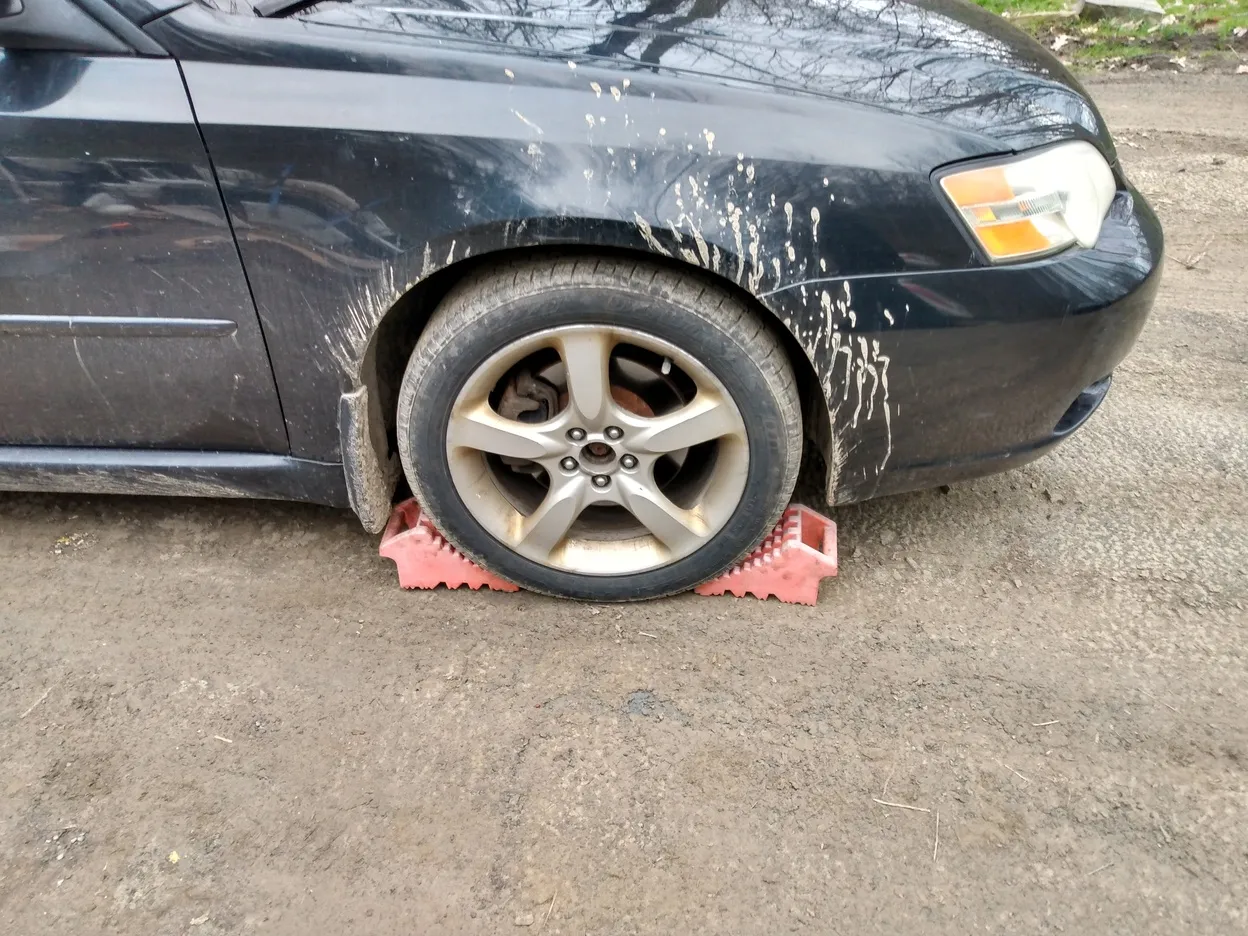
My work space is a dirt driveway that isn't particularly flat or level, so I always make sure to block both sides of a wheel opposite of the side I'll be raising with the jack. Because I'll be removing the rear wheel rotors, I cannot set the parking brake while working on this car, so the wheel blocks are the only things preventing it from rolling.
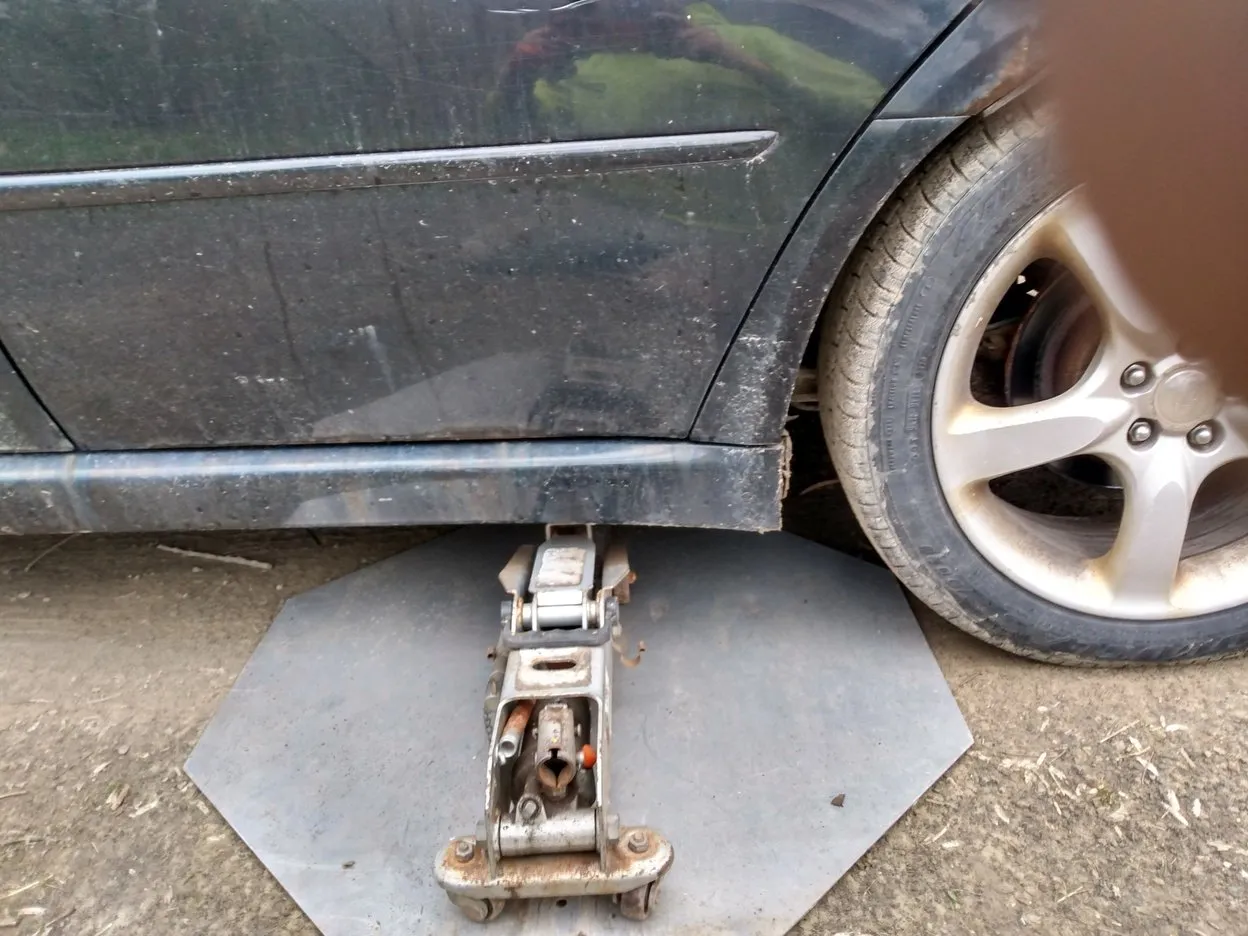
I have a small but sturdy rolling floor jack that I like to use when working on cars. It doesn't roll well on the dirt, so I place on old stop sign underneath to give it a smooth surface. If the jack can't roll forward as it raises, it will pull the vehicle slightly to the side, which will cause it to be less stable.
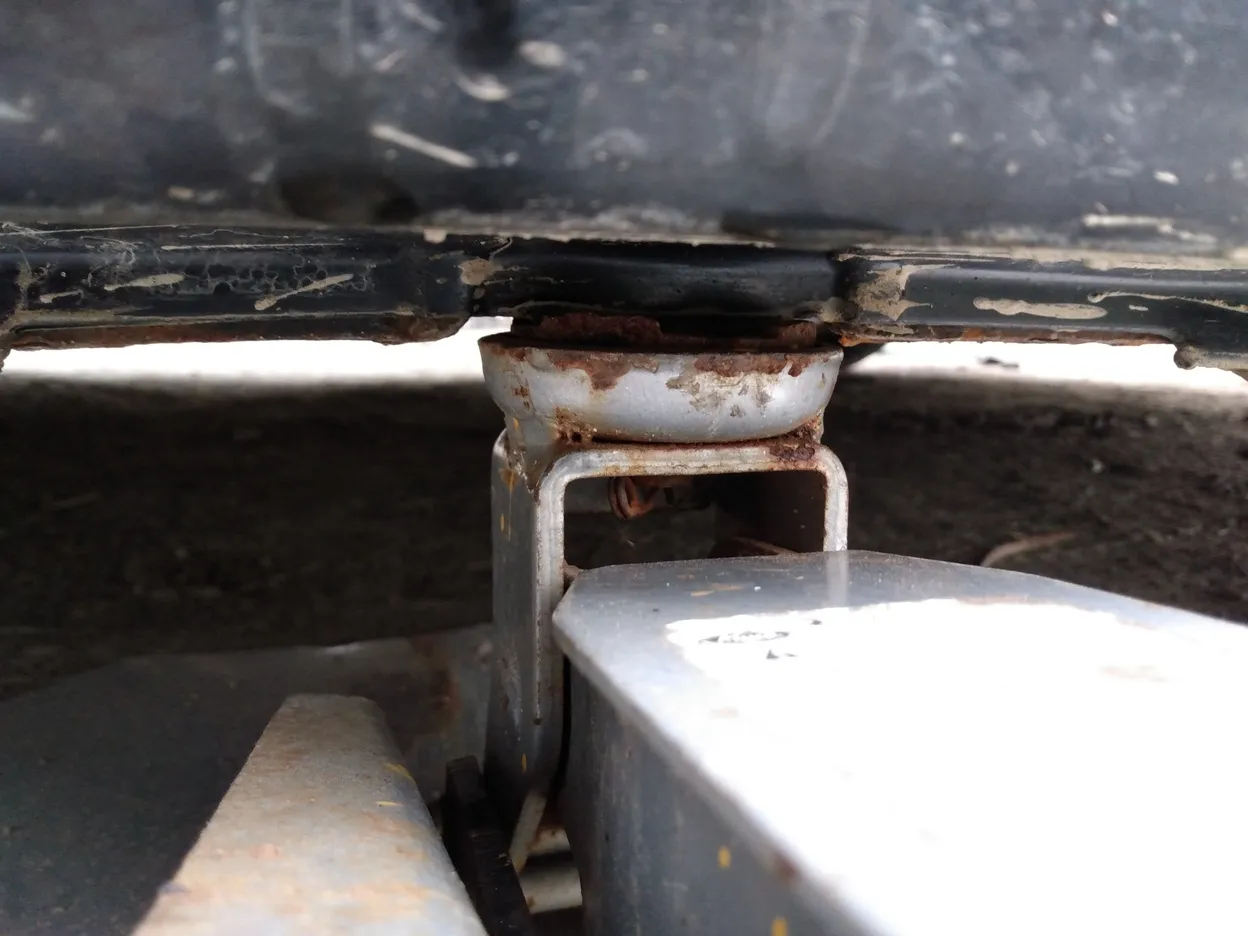
Most cars made after 1990 have specific spots where the jack should be placed, and it's important to use them. Other areas of the frame may appear solid, but will crumple after the vehicle is raised.
This floor jack is well over 20 years old now, and could use some minor repairs. I actually have to lift the hydraulic plunger that raises the jack each time I pump it.
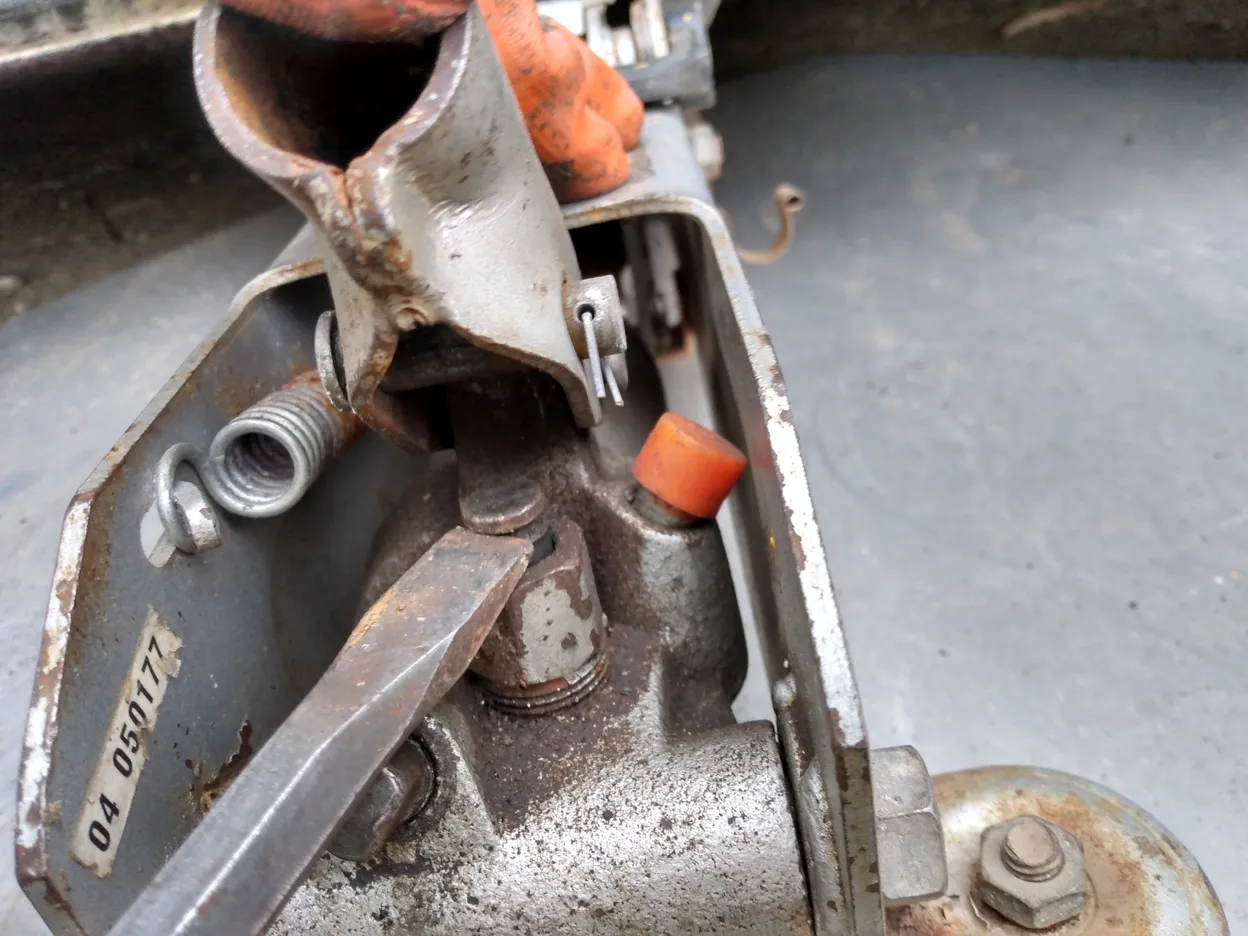
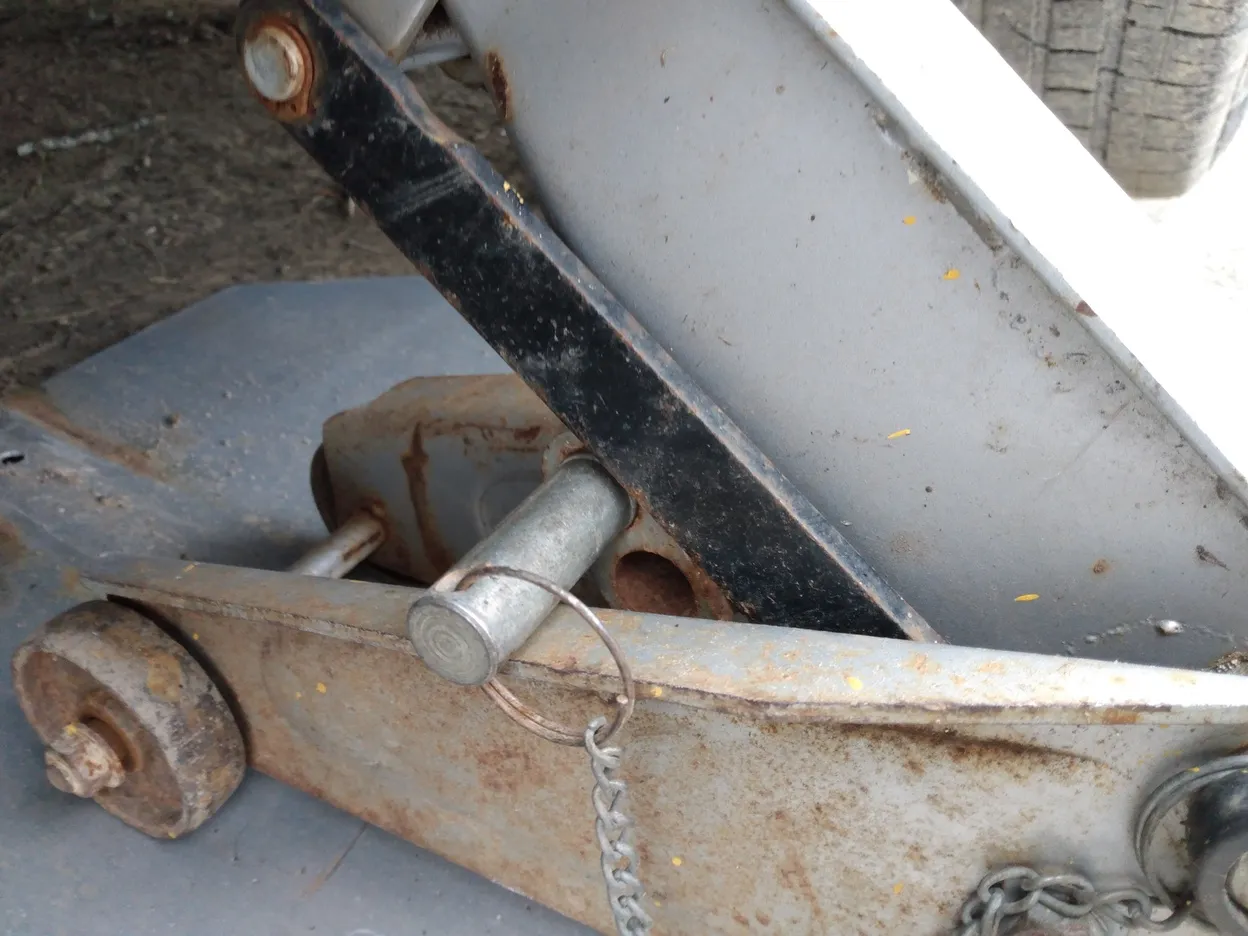
The extra work is cumbersome, but I like using this jack because it has this safety pin feature that I haven't found on any other jack. This lets me lock the jack in place after it's raised, so it won't collapse if it suddenly loses hydraulic pressure.
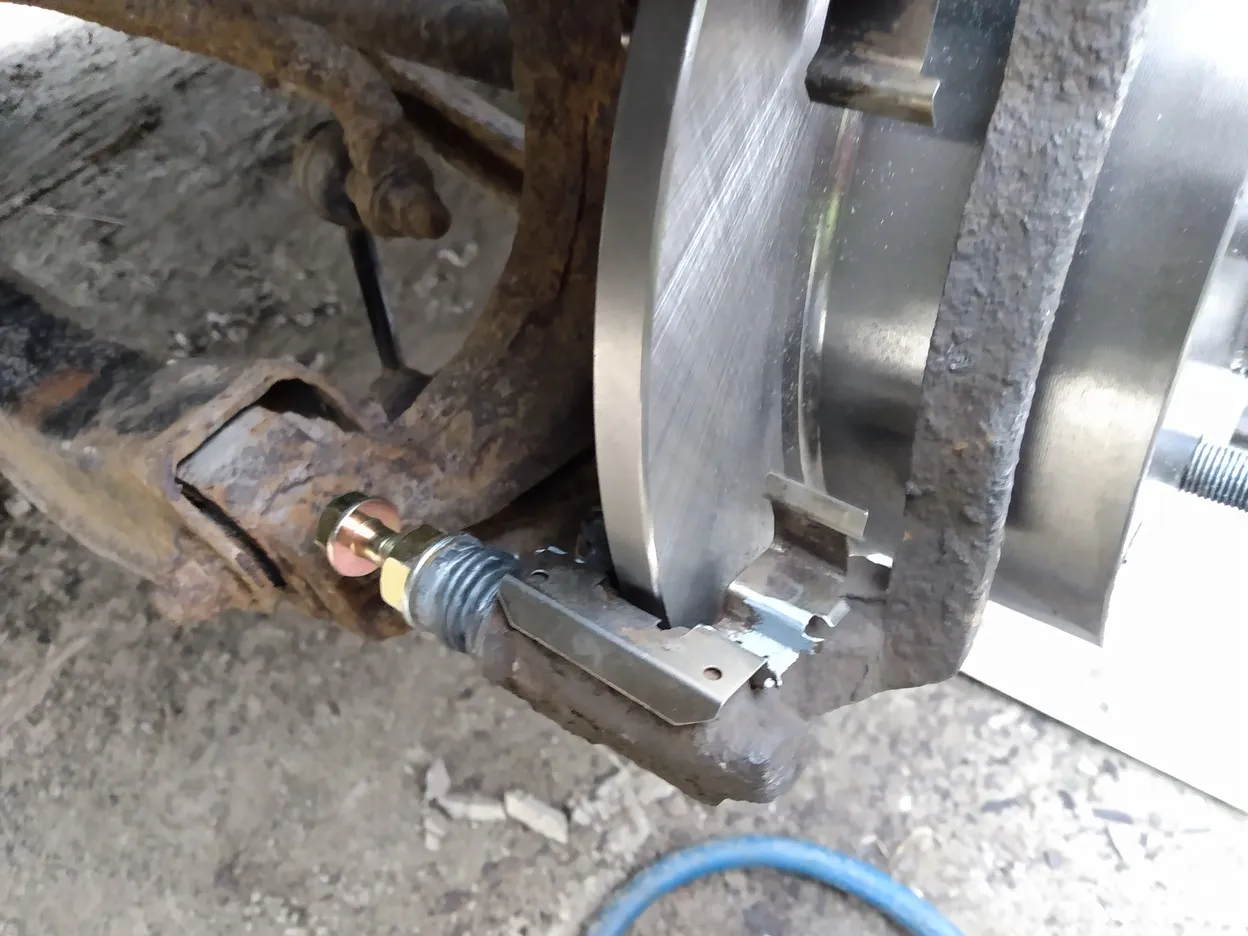
I describe how to remove the wheel, caliper, and bracket in this post from long ago. On this particular vehicle, I wasn't replacing the caliper, so I left the banjo bolt connected, which saved me from having to bleed the brake lines after the repairs.
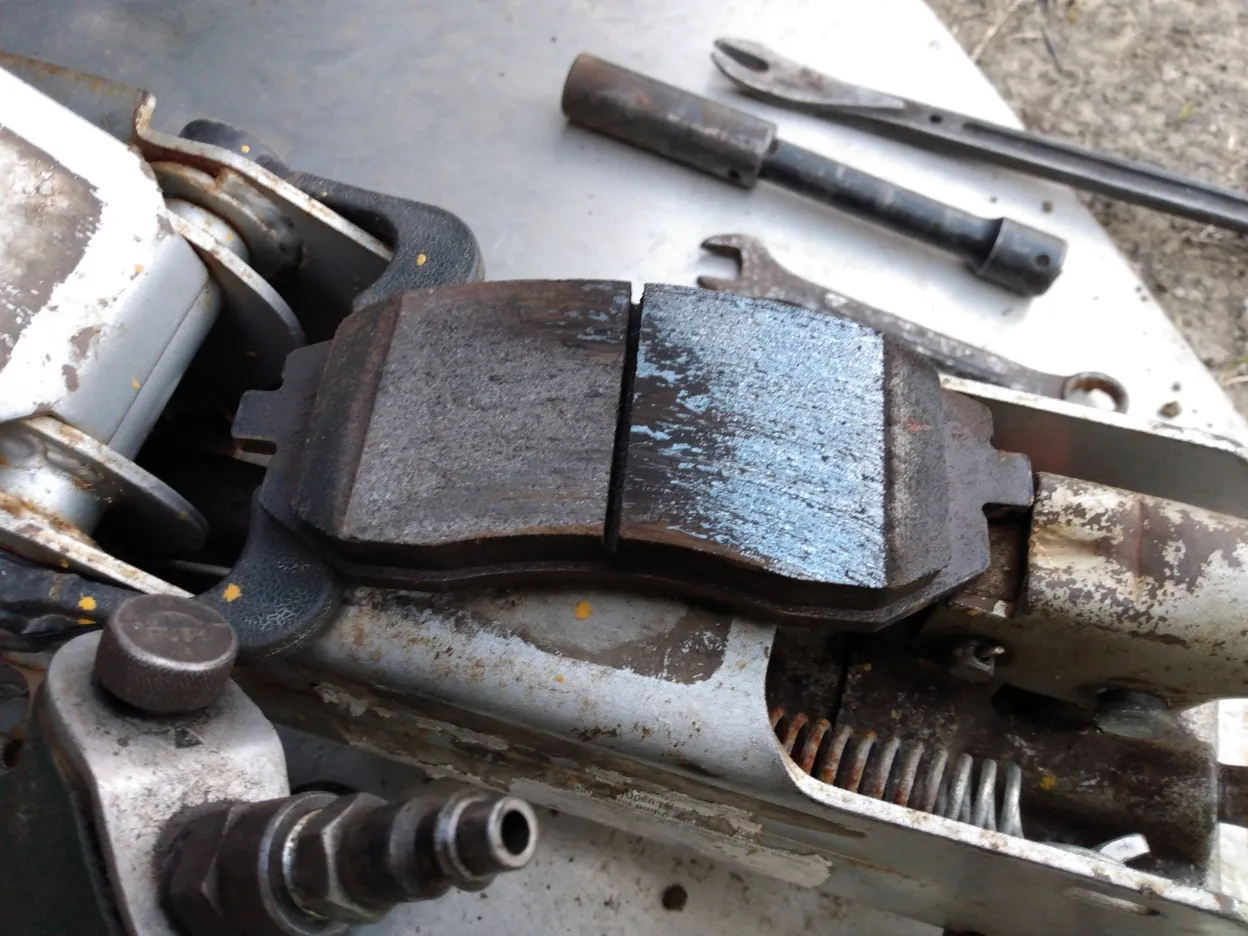
I could tell as soon as I removed the brake pads that one of the slide pins was seized. When one pin is seized, is causes the outer brake pad to pull in against the rotor on only one side when the brake is engaged. This causes the uneven wear you see on the pad in the photo below.
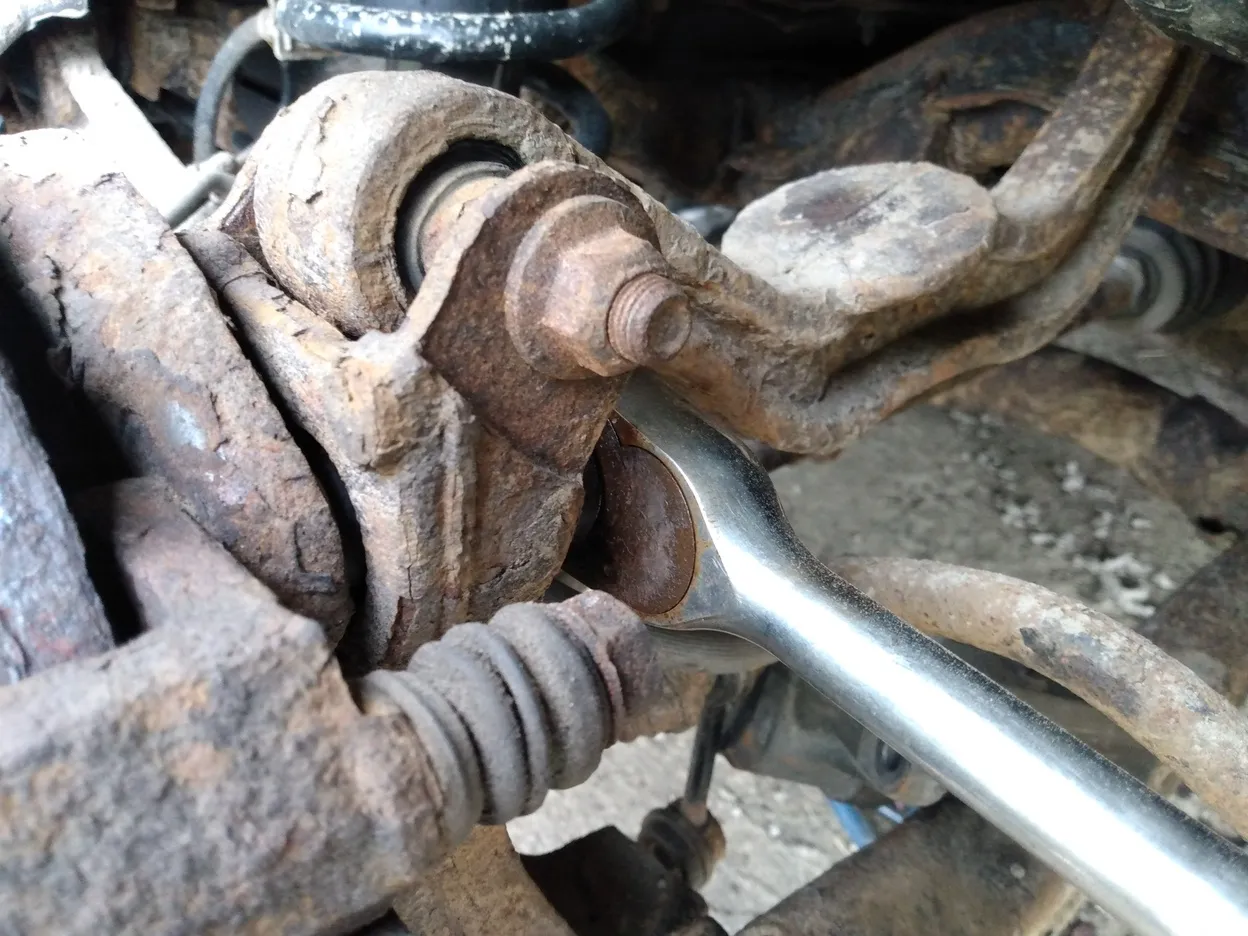
This vehicle had very difficult access to the upper caliper bracket bolt. It took me a while to figure out that this combination of 1/2" ratchet, 1/2" to 3/8" reducer, and 14mm(?) socket were what I needed to get...
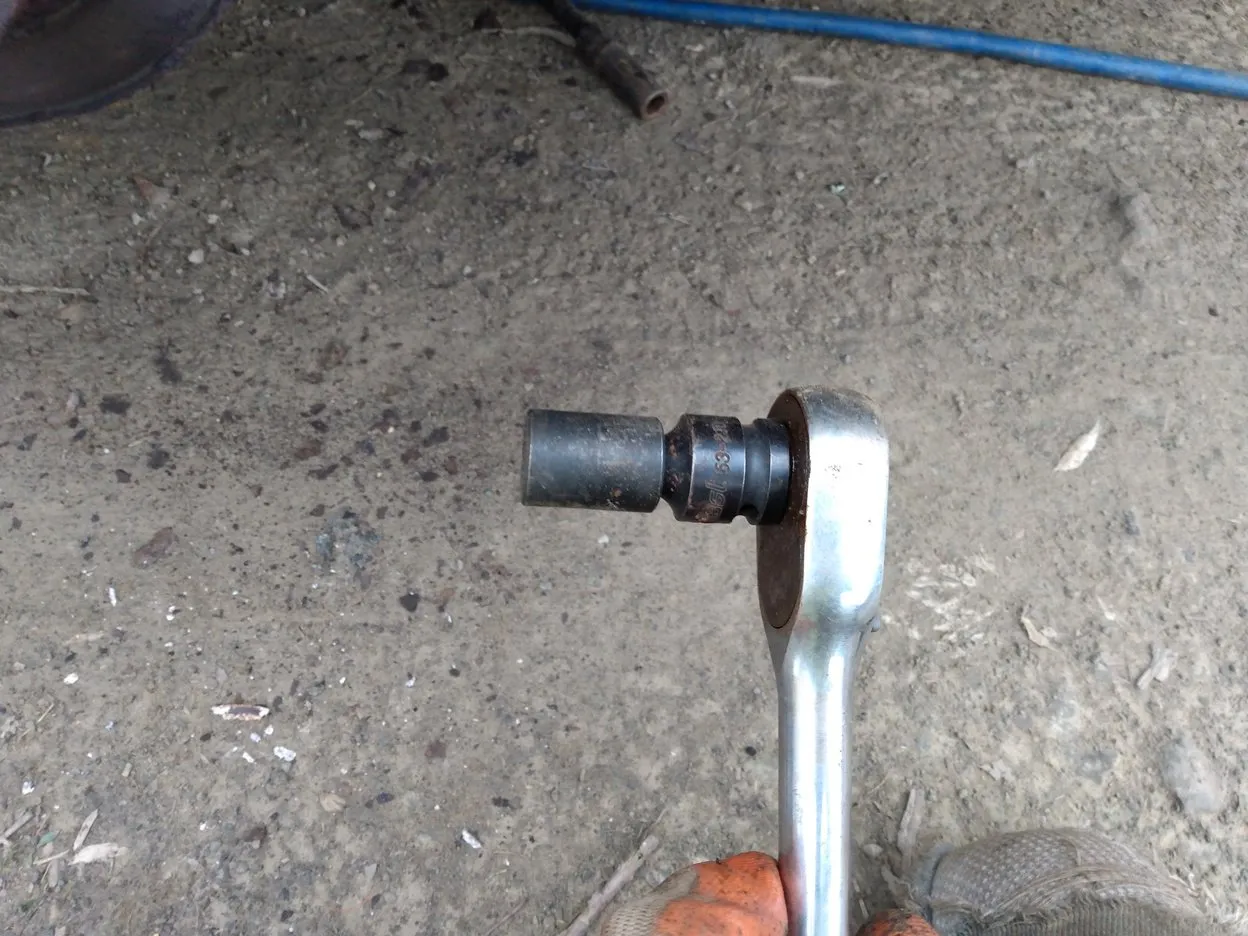
...into THIS little space. I tapped the handle of the ratchet of the ratchet with a hammer a few times, and fortunately the bolt came loose without having to apply any heat.
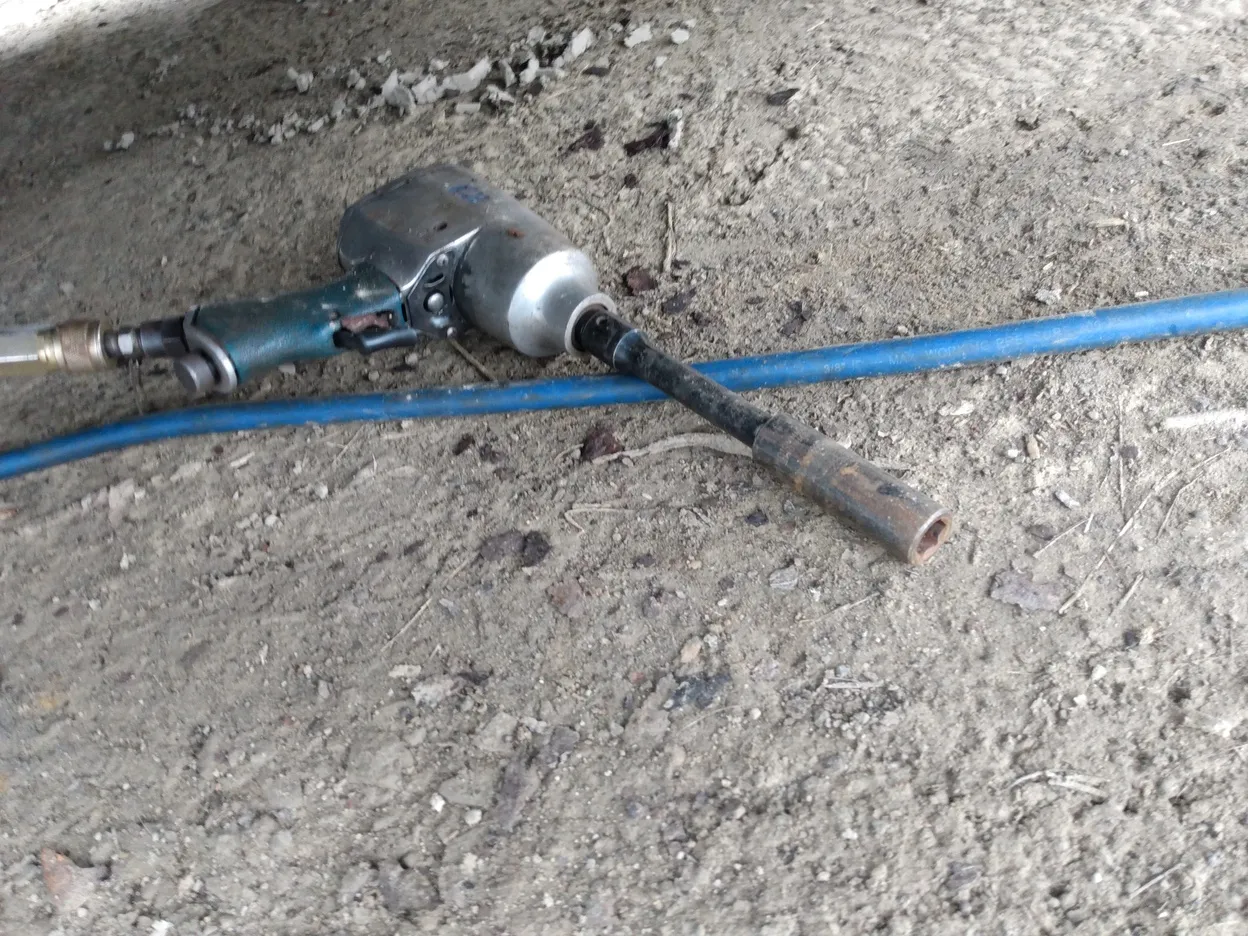
I was able to get at the lower bolt with an extension on the impact hammer. This impact hammer was less than $30 when I bought it brand new, about 15 years ago. I use it all the time, and it has never needed any service. These tools are absolute lifesavers if you do a lot of work on older vehicles.
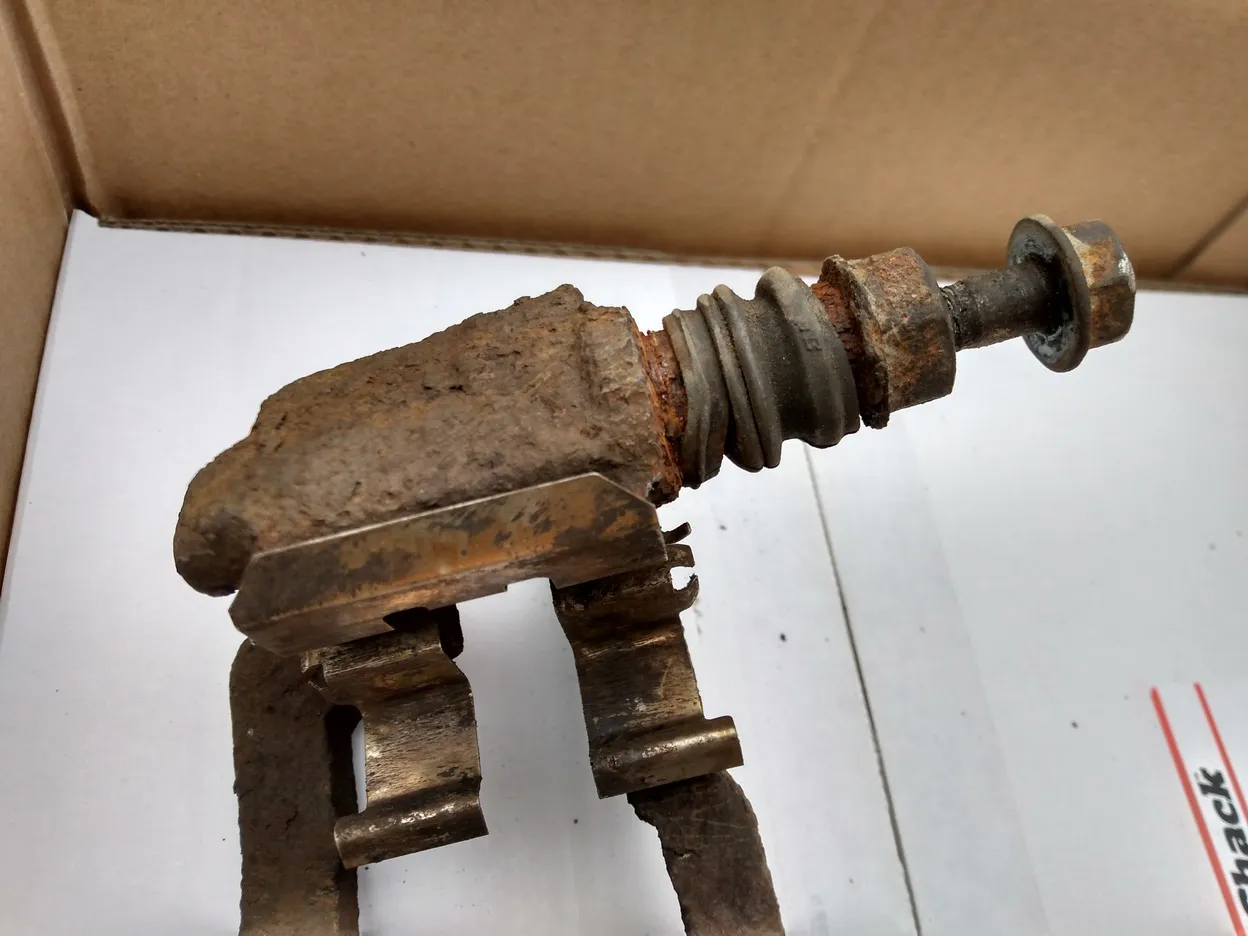
With the caliper bracket removed, it was pretty easy to see which slide pin I was going to have a problem with. You can see where the rubber boot has slipped off its seals, and the exposed metal underneath is thick with corrosion.
Often, the upper ends of these slide pins will have a hex head on them, which makes it easy to work them loose when they get stuck. You simply fit a socket on the end, and run the impact hammer on it until the pin starts to turn. Once it turns freely, it will usually pull right out. This one did not have a hex head, so I thought I would be clever and just use the caliper retainer bolt to get the necessary grip.
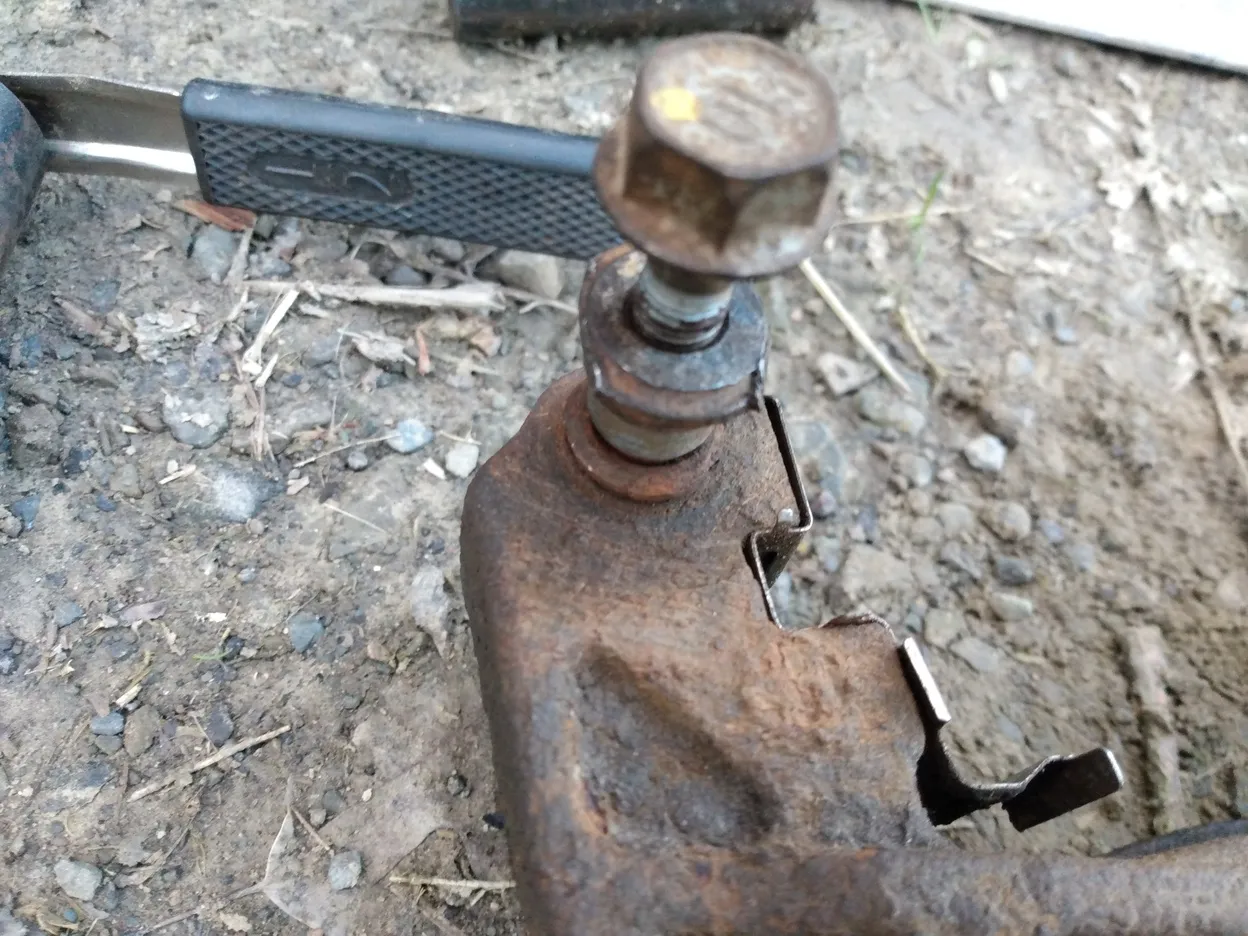
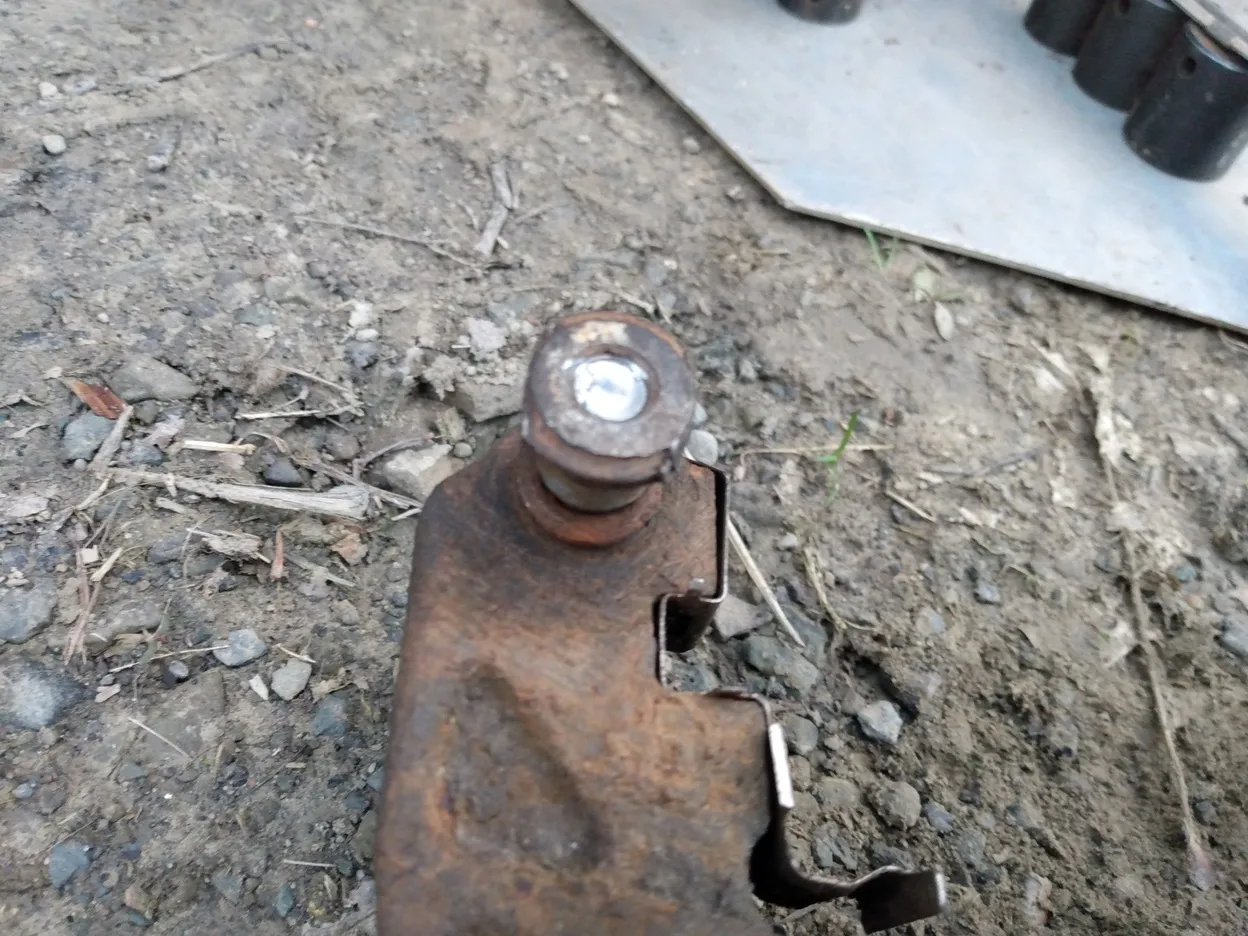
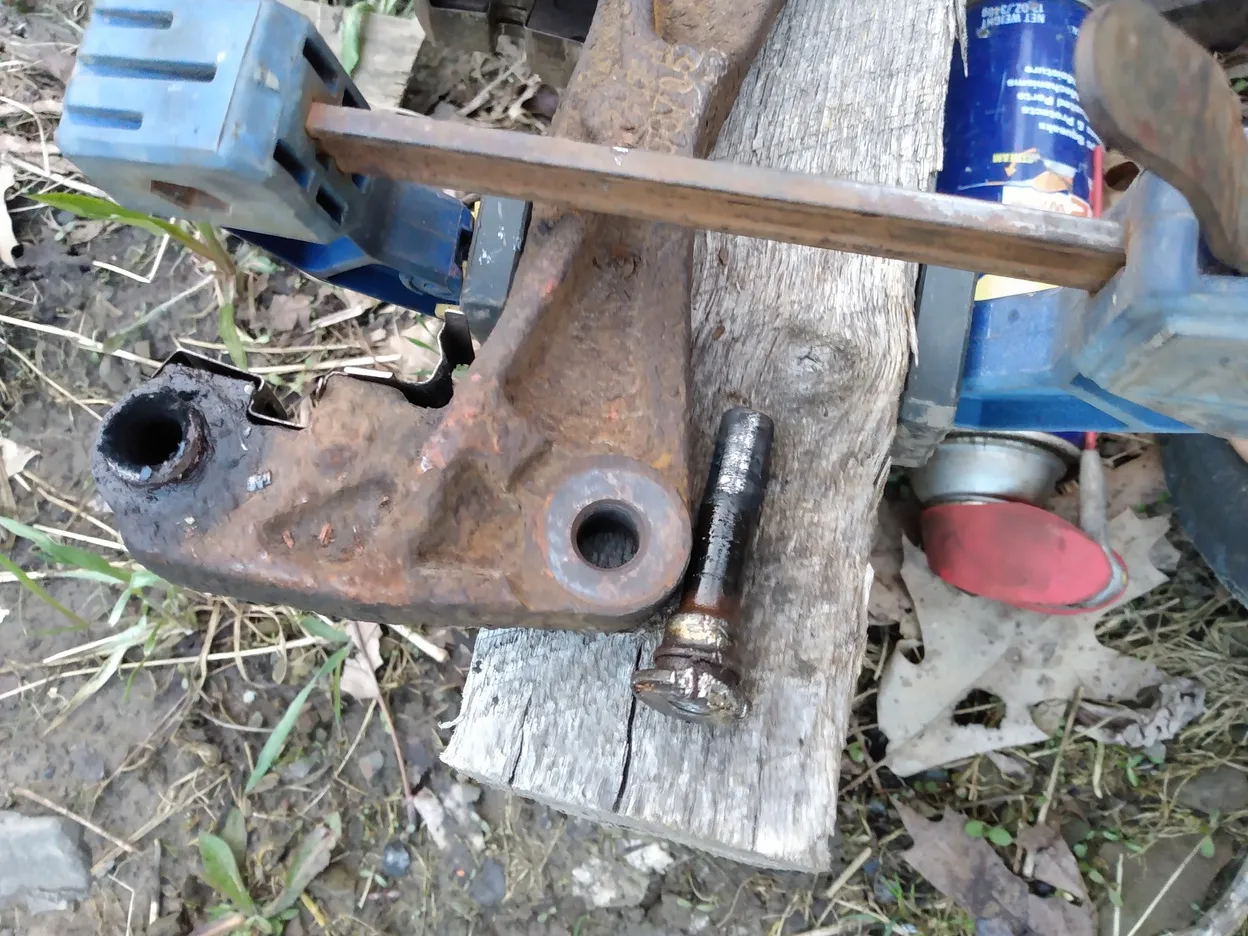
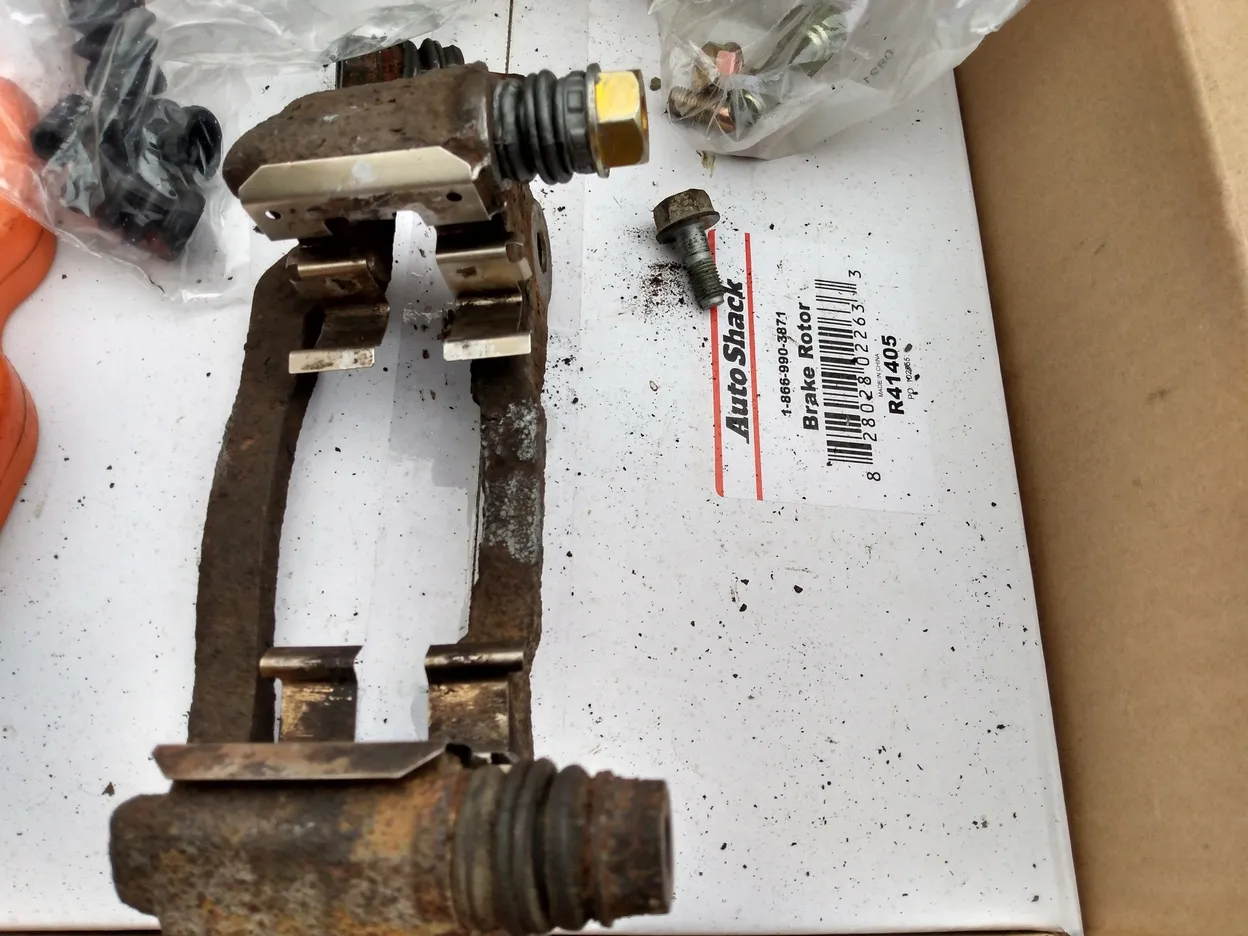
That plan quickly backfired, and the head of the caliper retainer bolt just broke off. On the bright side, I'm replacing this caliper slide pin anyway, so at least I don't have to worry about getting the broken bolt out of it!
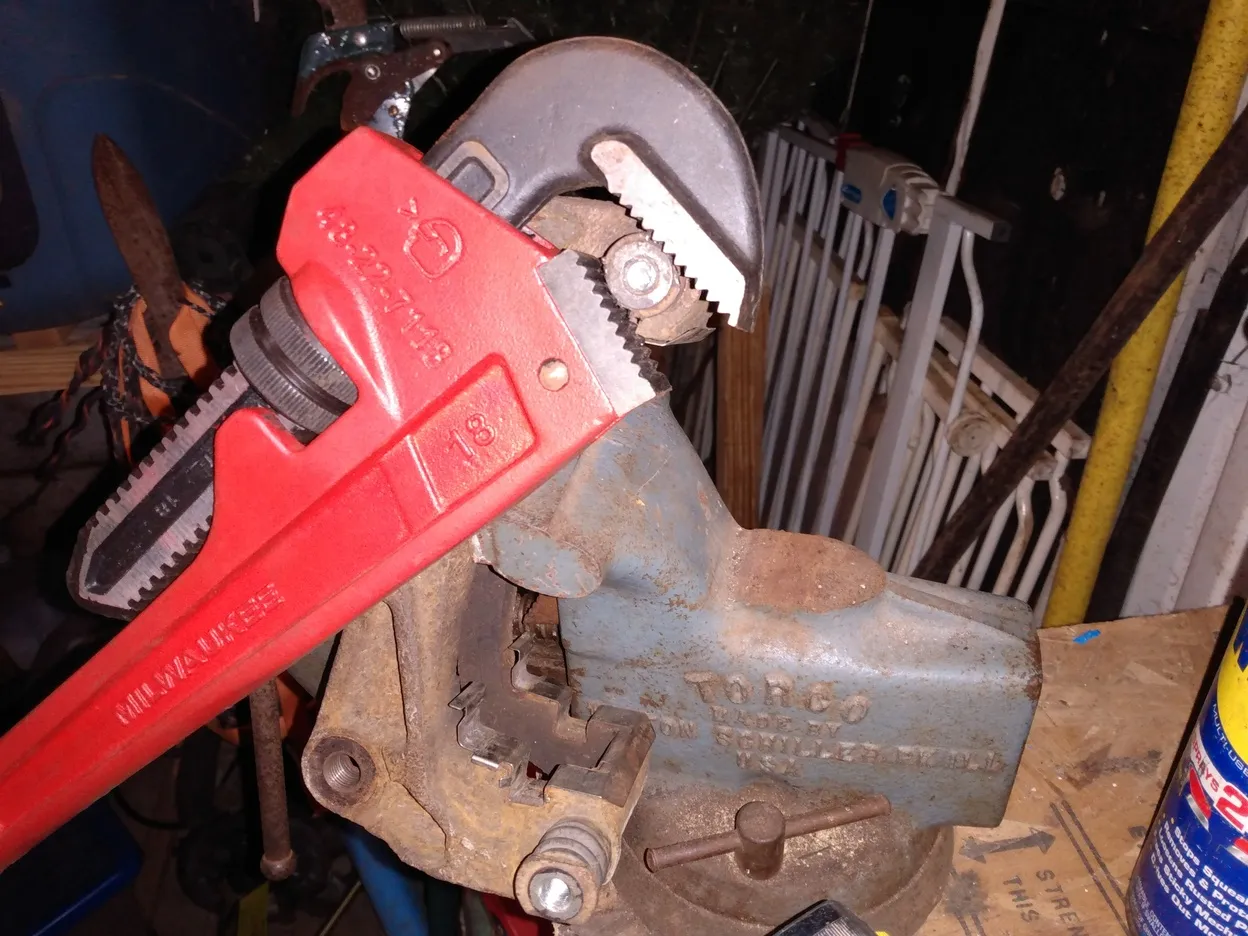
Since that didn't work, I'm stuck removing the old pin the hard way... with a vice and a pipe wrench. A little torch heat is sometimes necessary to get the pin to work loose. These pins often have rubber boots inside, so if you have to heat it with a torch, be prepared for a lot of smoke!
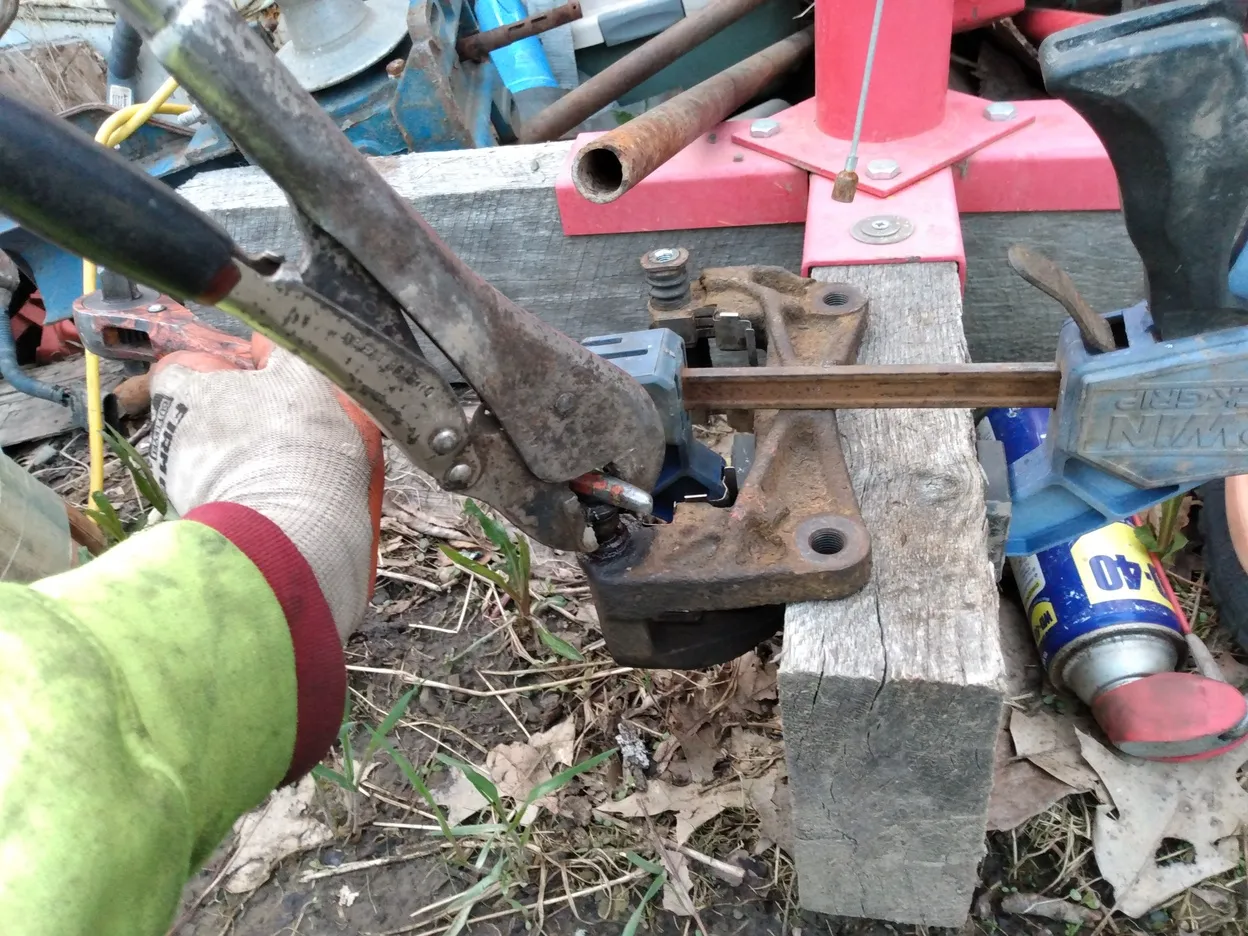
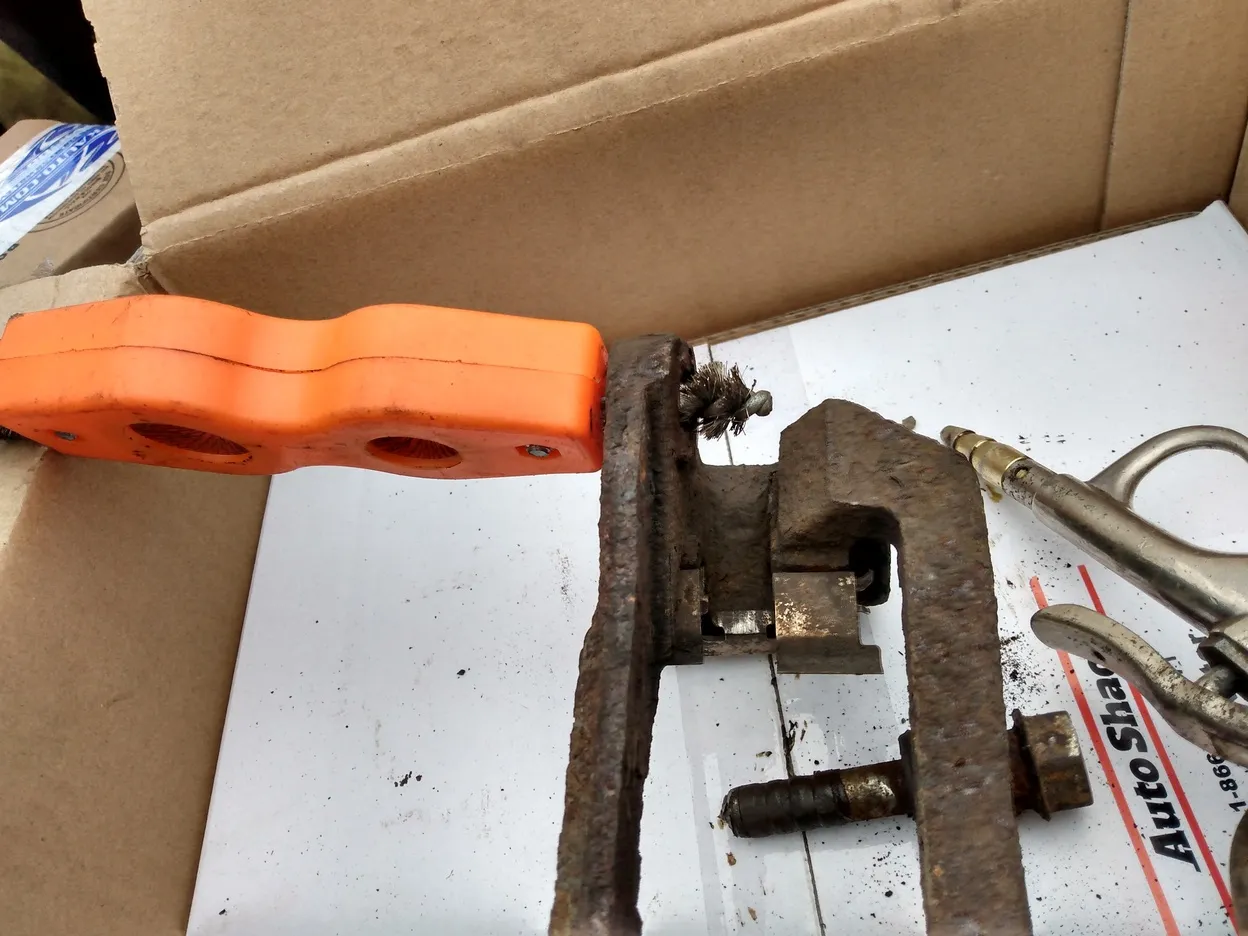
This turned out to be a case where torch heat was necessary, so I had to move things back outdoors. I was able to create a makeshift vise with my quick clamp. By clamping on to the end of the stuck slide pin with these old vise grips, and inserting a handle into the gap between the vice grip jaws, I was able to heat the pin and work it back and forth while pulling up on the vise grips. It took quite a while to get the stubborn old thing out, but I proved to be more stubborn in the end!
Below you can see the mangled old slide pin, with a bunch of rubber from the inner seal burned onto it.
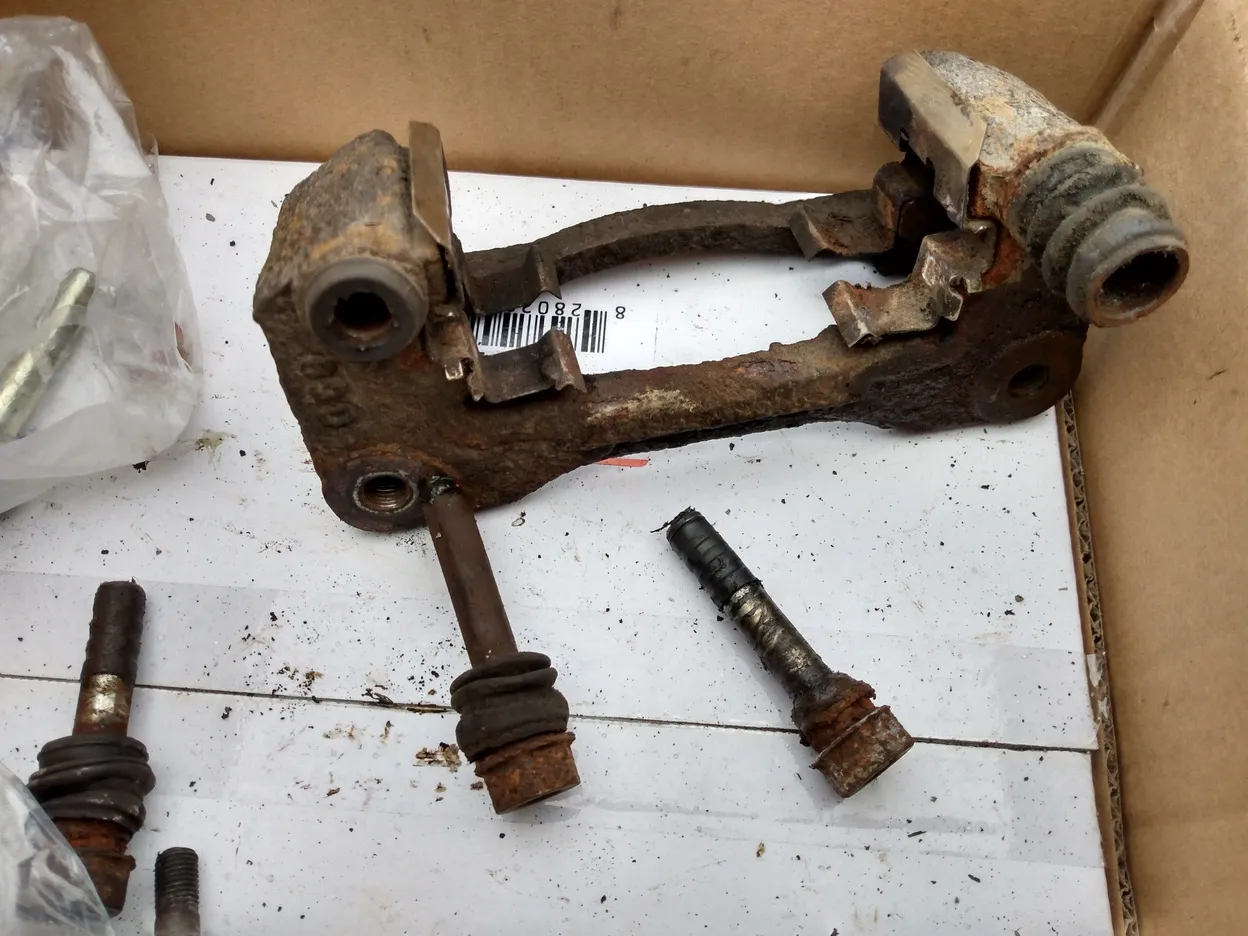
In the photo above, you can see one of the front caliper brackets, with both slide pins removed. The ones on the front had hex heads, and I was able to easily spin them loose with the impact hammer.
It's very important to thoroughly clean the holes for the slide pins, or else they will quickly seize again. I like to use the wire brushes that are made for cleaning copper pipe; similar ones are made for cleaning battery terminals. Scrub with the wire brush, blow out with airgun, and repeat, until the inside is as shiny as an engine cylinder. There will also be a little lip around the top of the hole for the slide pin, where the slide pin boot locks into place. It's important to get this clean enough for a good seal on the slide pin boots. (In the photo, the brush isn't actually inserted into the hole for the slide pins... that's the threaded hole that the caliper bracket bolts screw into. It's also a good idea to clean these threads.)
If your slide pins have internal rubber seals, these will need to be assembled before inserting the slide pins. Some slide pins don't have this extra rubber inside (as seen in the earlier photo).
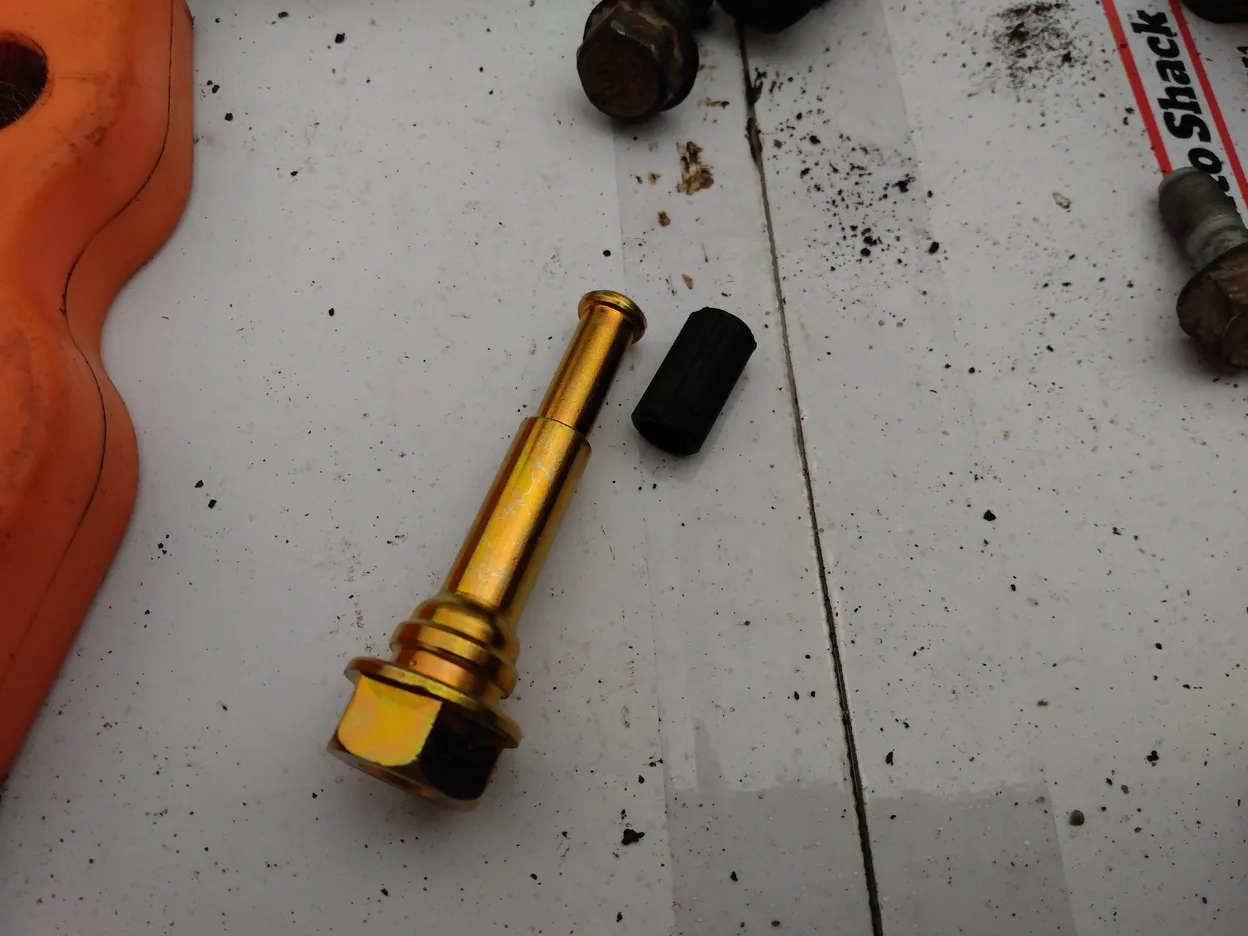
Once you're ready to install the new slide pin, start by installing the slide pin boot (cover) on the caliper bracket. Most of these boots can be installed in either direction, but some of them will have a larger diameter at one end, so pay attention.
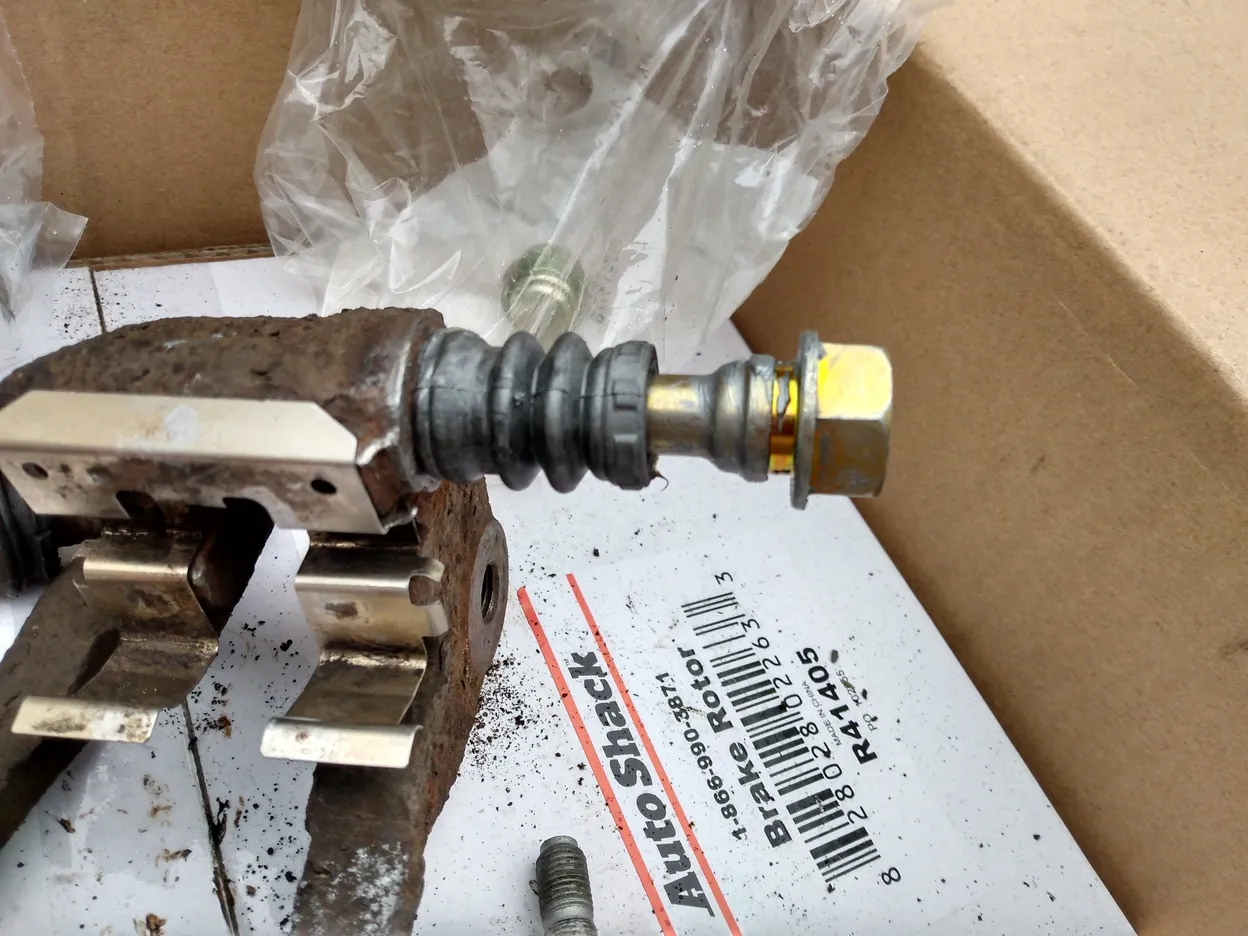
Next, just push the slide pin in until it the boot locks into place around it. The silver stuff you see all over things is anti-seize lubricant, which is what I prefer to use for brake assemblies. Many people use grease as a lubricant, and that's just fine, but higher temperature grease is better.
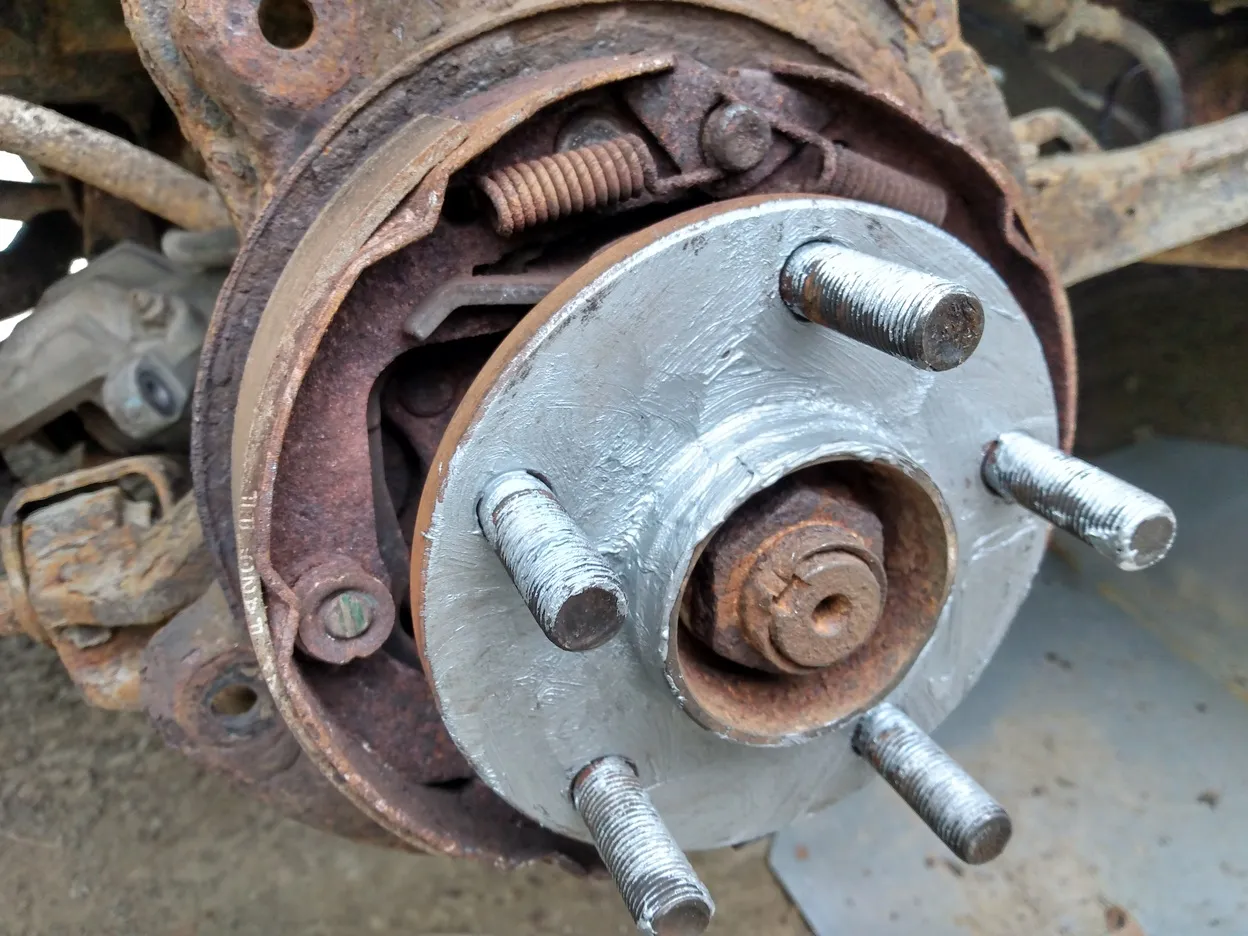
I also like to use anti-seize lubricant pretty liberally on the wheel hubs before installing the new rotors. This helps prevent the rotors from becoming stuck to the wheel hubs over time, which will make the next replacement that much easier.
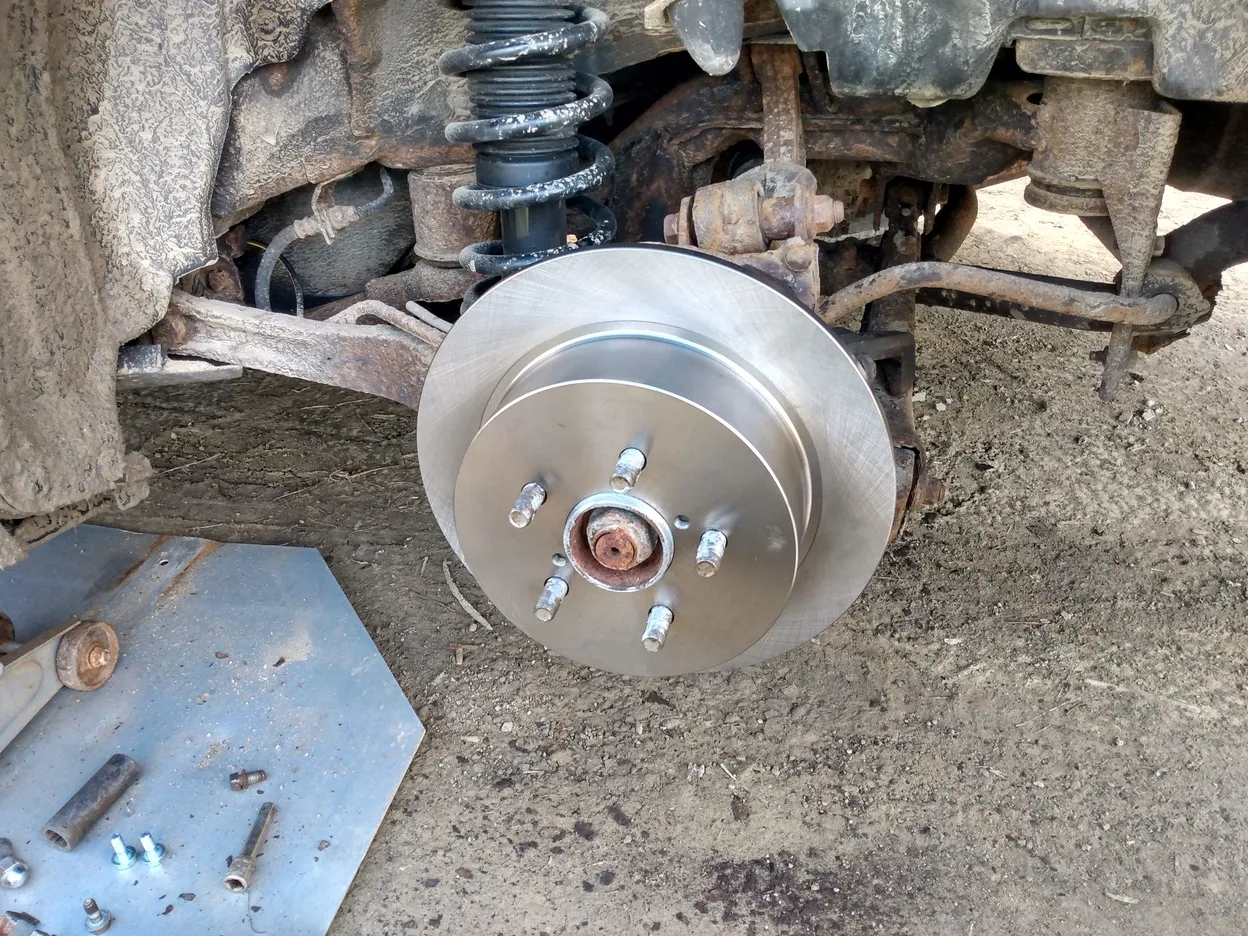
Nothing pretties up your wheels quite like new rotors! Okay, maybe new wheels will pretty up your wheels a bit more :D
Fortunately, the new slide pins also came with new caliper bolts, so I didn't have to find a replacement for the one I broke while trying to loosen up that stubborn slide pin!
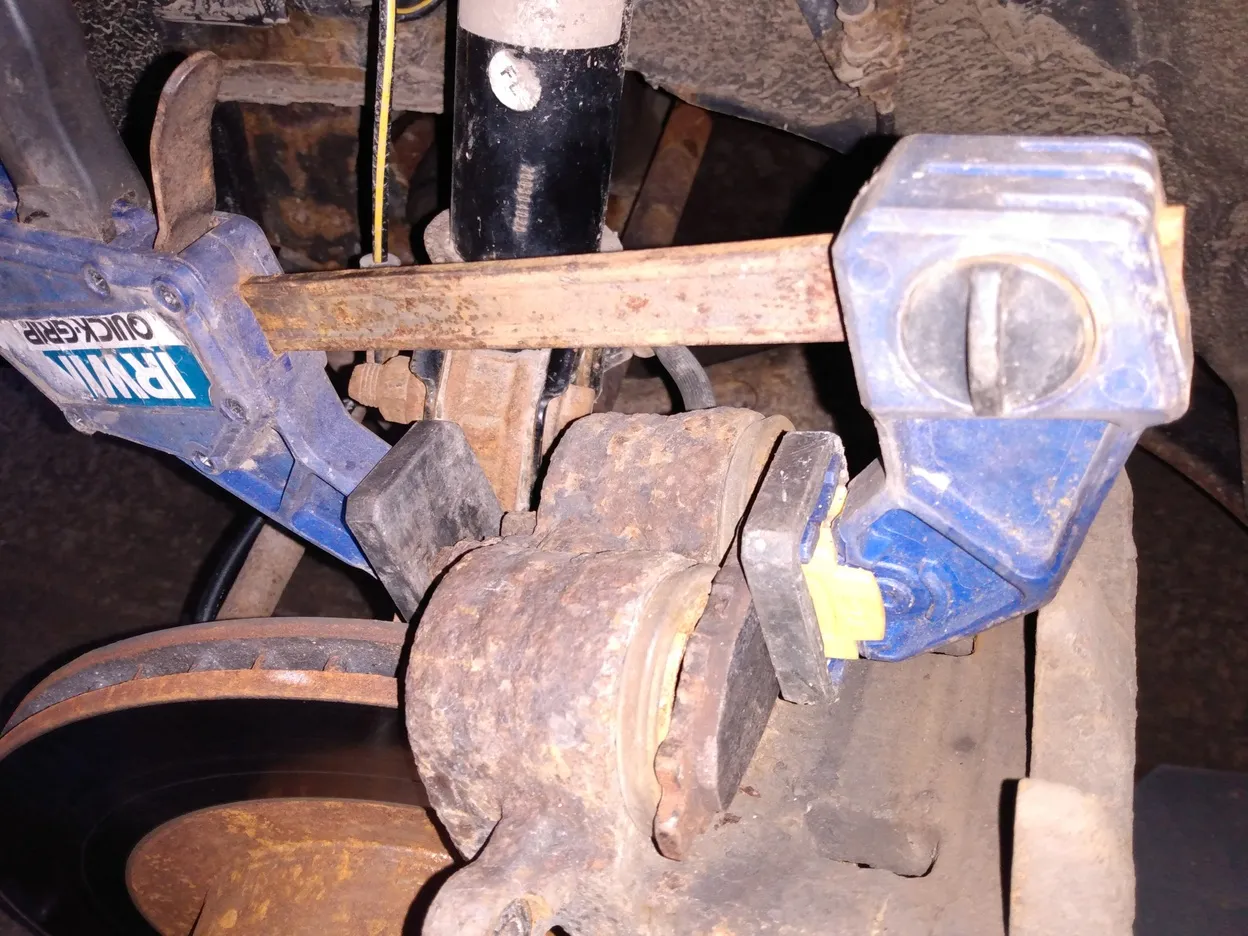
This vehicle had double piston brake calipers on the front, like a truck. To compress these pistons I use one of the old brake pads, and in this case, my quick clamp.
If you made it this far, the rest of the reassembly should need no explanation 😂
It's always a good idea to test the brakes after a job like this, before doing any real driving. No matter how careful you are, there's always a chance that you've forgotten something simple, or a chance that a brake line was damaged during repairs. Make sure your brakes build proper pressure, and stop the vehicle as they should!
Thanks for taking the time to read my post! I hope you learned something new, or were at least a little entertained!
I do want to mention quickly, to whoever does the curation for this community, please DO NOT submit this for an OCD upvote... as a curator for Homesteading community, I'll submit this post to OCD in the share-your-post room.
Thanks for reading!
