Hola hivers bienvenidos nuevamente a mi blog.
Hello hivers welcome back to my blog.
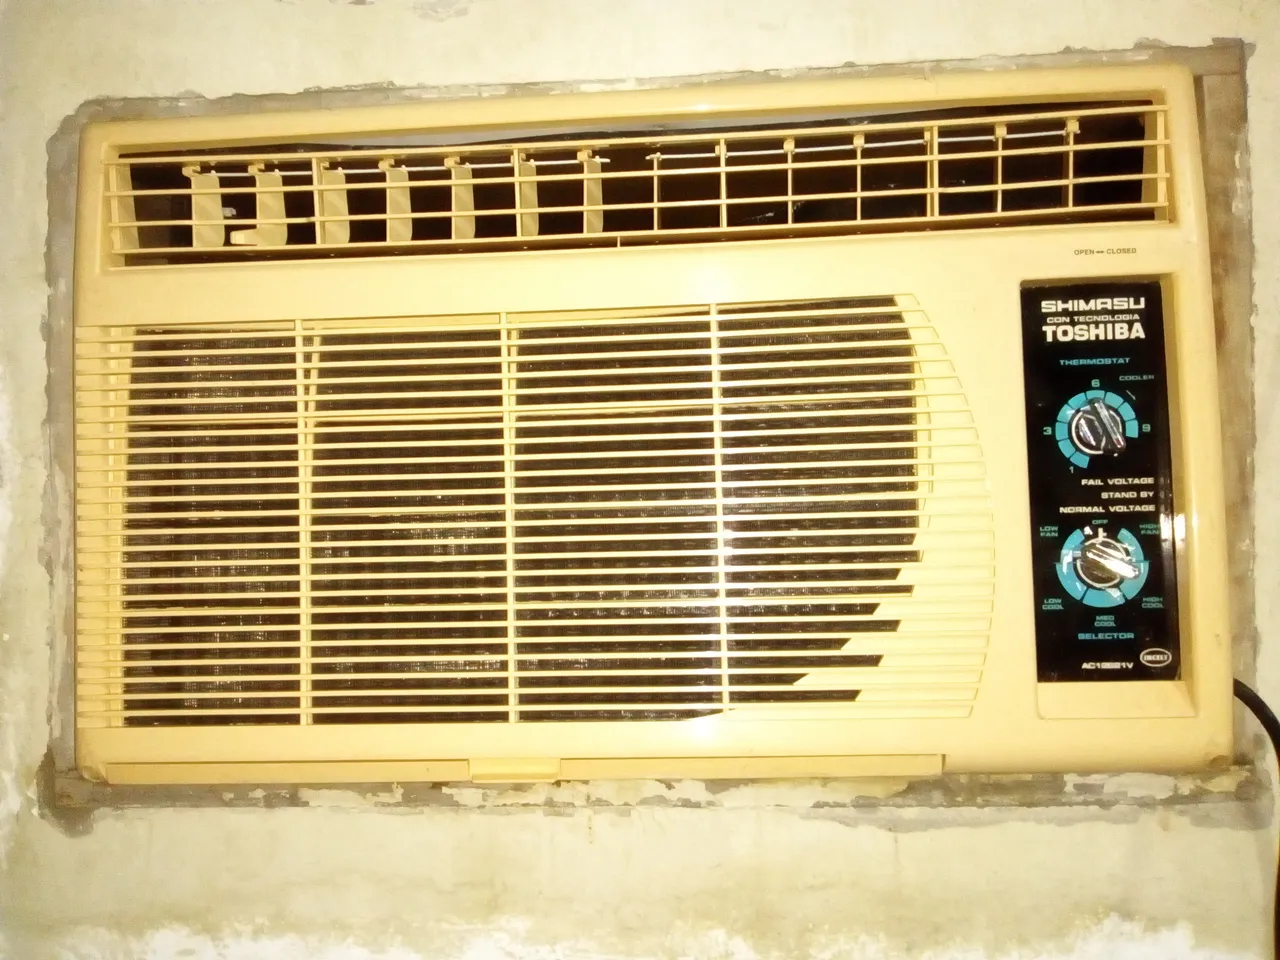
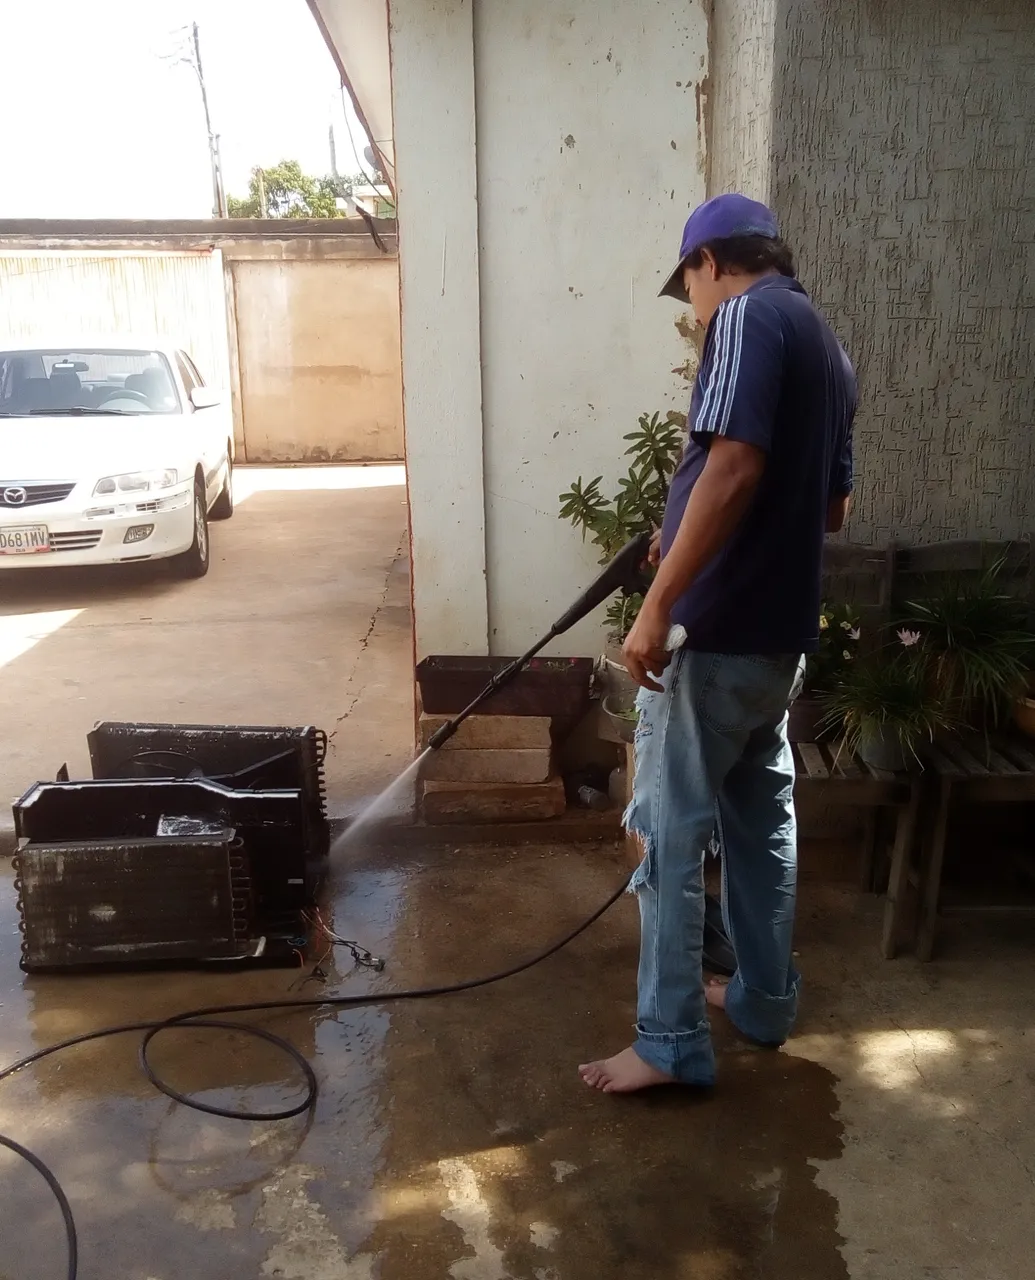
Hoy le traigo un tutorial de como lavar un aire acondicionado de ventana, está ves no es un trabajito fuera de casa, si no que es un trabajo para la casa, hoy le dedique tiempo a hacerle mantenimiento al aire acondicionado de la habitación de mis hijos que se encontraba muy sucio y no estaba enfriado cómo era debido.
Today I bring you how to wash a window air conditioner, this time it is not a small job outside the home but it is a job for the house, today I dedicate time to doing the maintenance of the air conditioning in my children's room, which is very dirty and no longer cooling properly.
Bueno acá les dejo mi pequeño tutorial de cómo lavar un aire acondicionado de ventana.
Well here is my little tutorial on how to wash a window air conditioner.
Primero te mostraré las herramientas con las que trabajo.
First I will show you with the tools I work with.
Hidroyet, destornillador de paleta, destornillador estriado, alicates y piensa.
Hidroyet, paddle screwdriver, spline screwdriver, pliers and think.
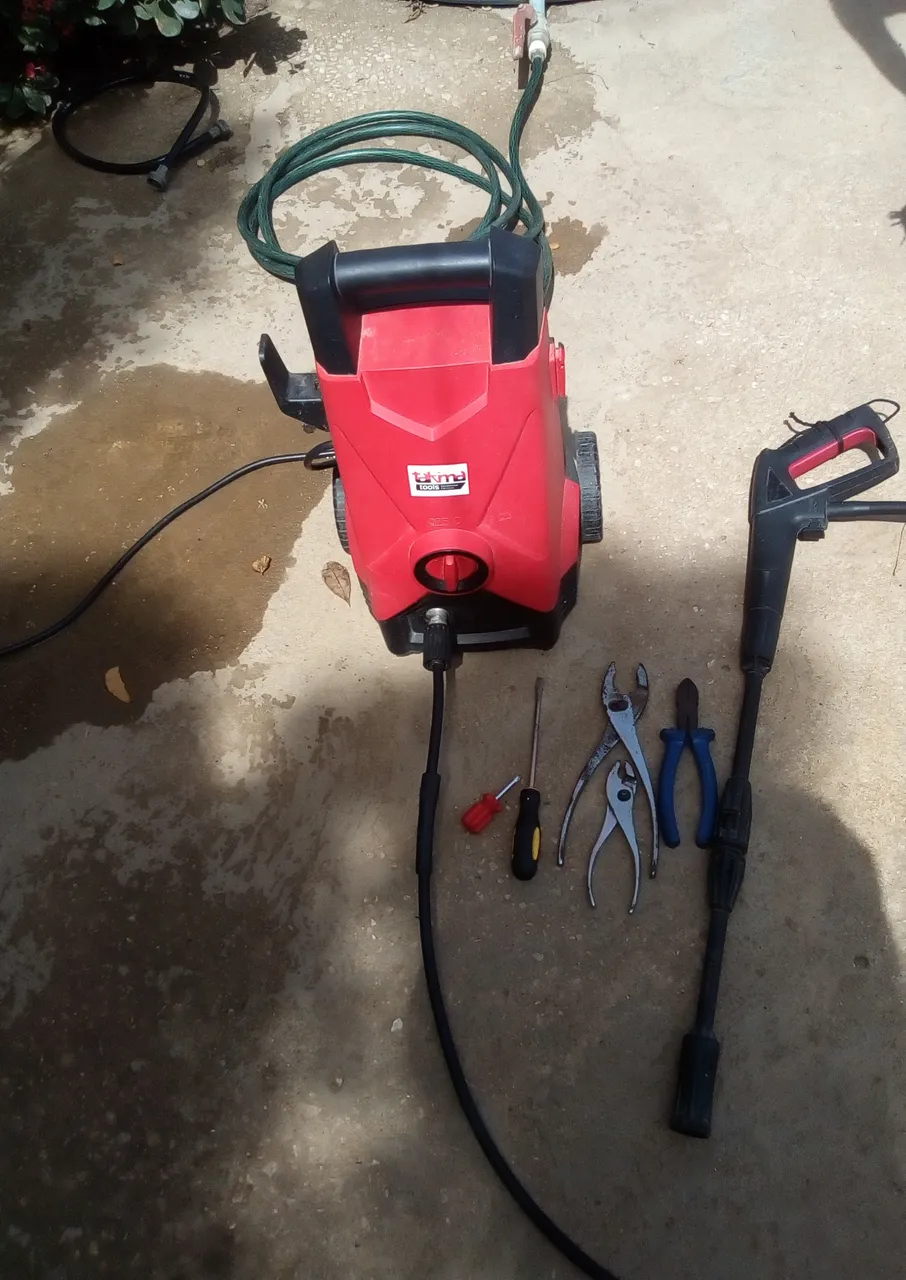
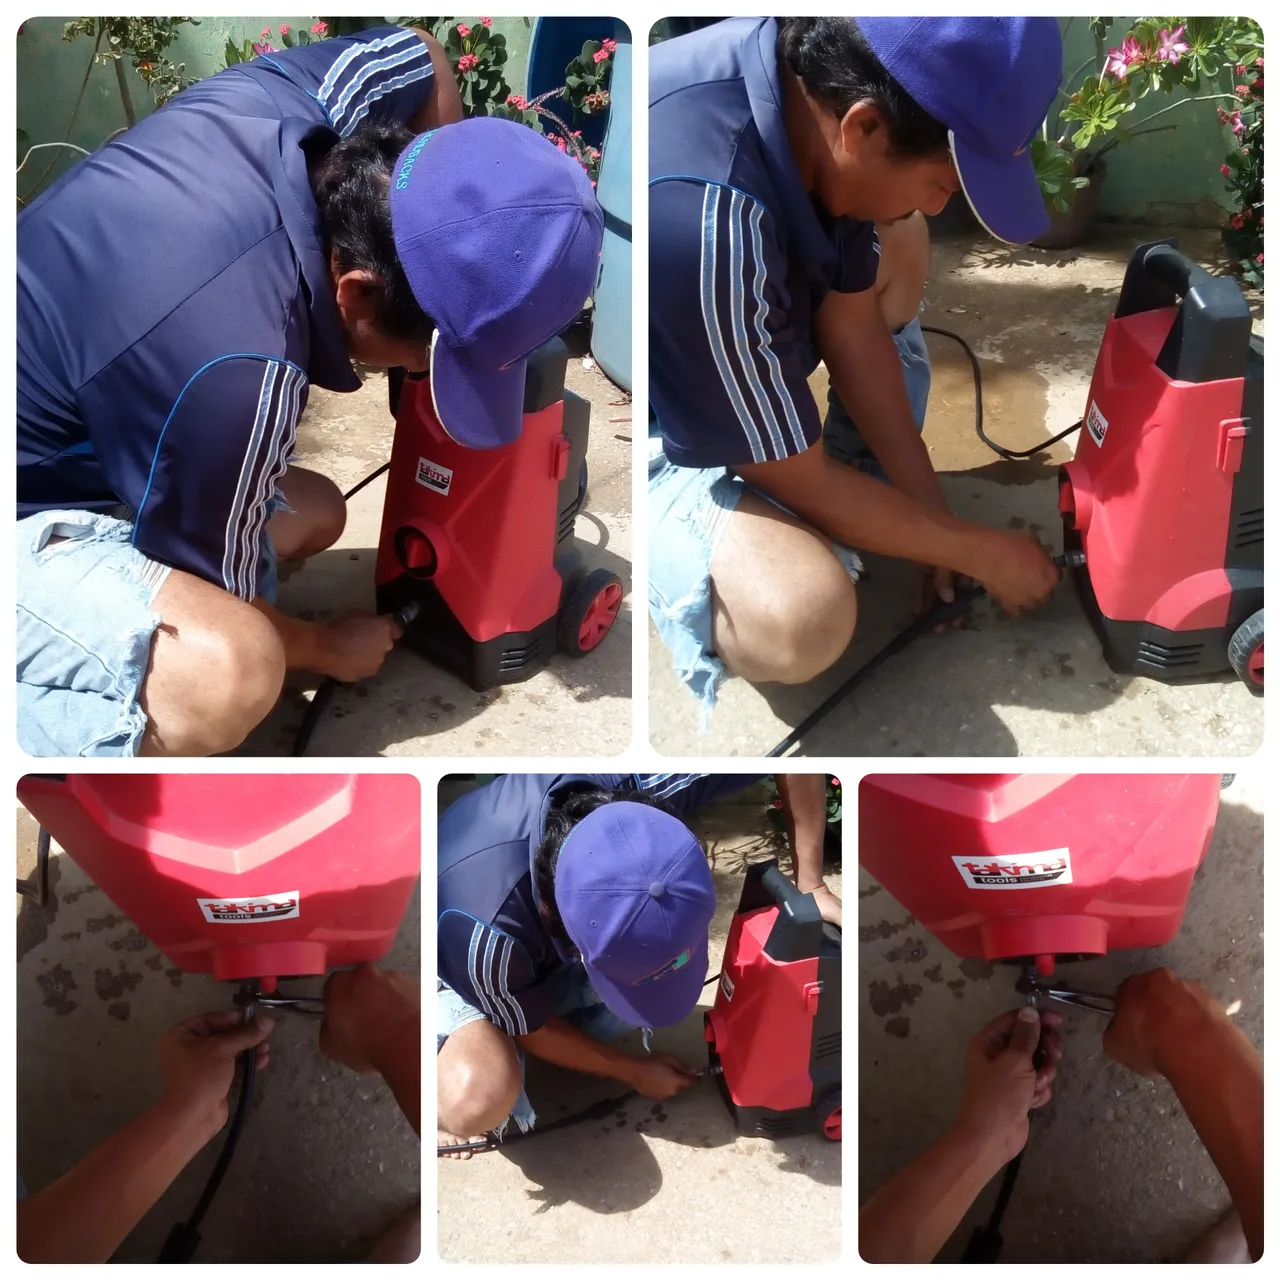
Lo primero que debemos hacer es armar el hidroyet y colocarlo de dónde recibirá la fuente de agua, lo ajustamos bien con el alicate.
The first thing we must do is assemble the hydroyet and place it where it will receive the water source, we adjust it well with the pliers.
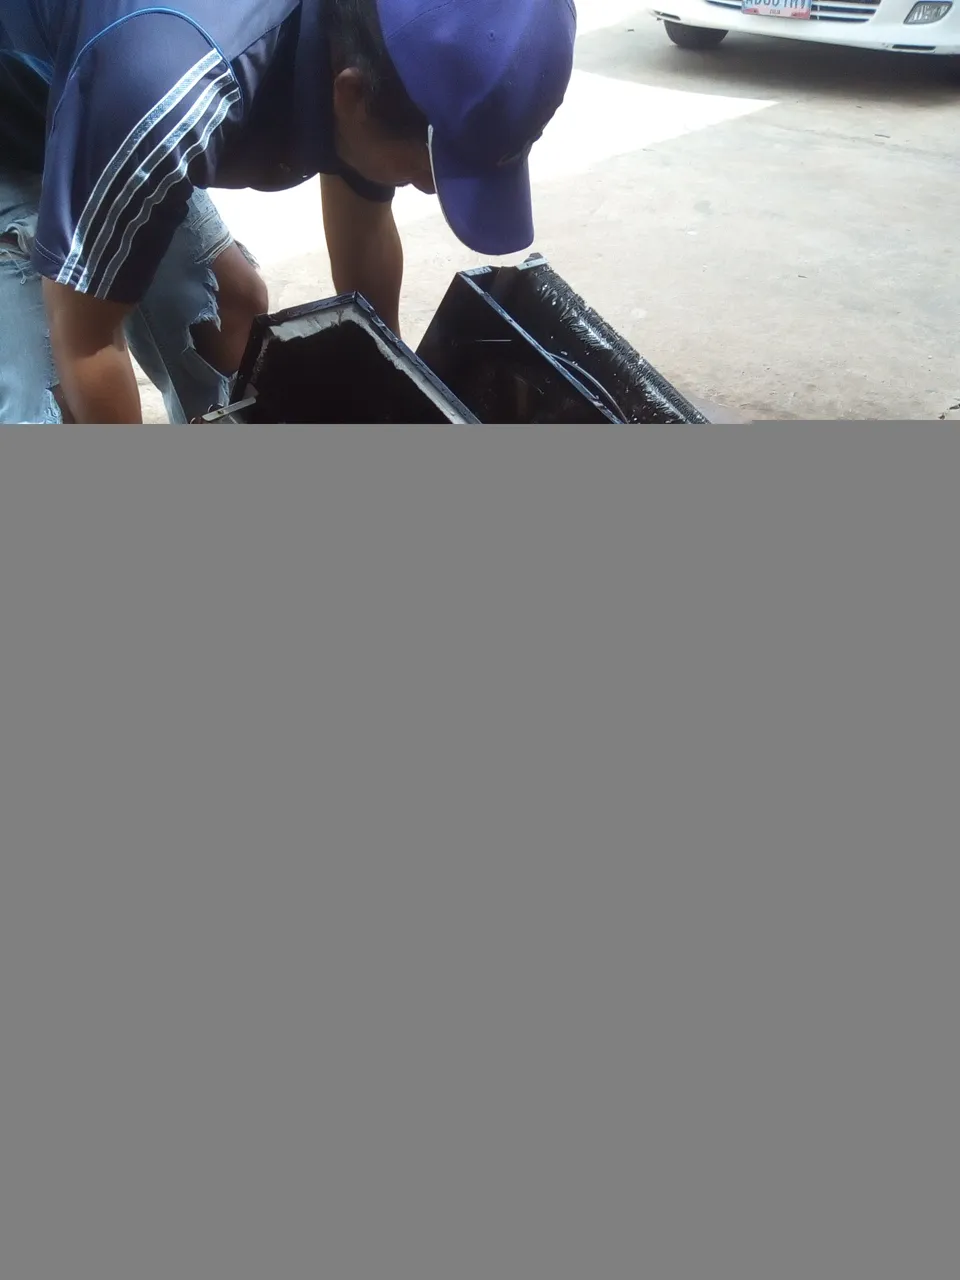
Ahora comencemos con el aire acondicionado ya desinstalado, procedemos a desmontarlo, quinta las partes de la parte superior destornillando todos los tornillos.
Now let's start with the air conditioning already uninstalled, we proceed to dismantle it, fifth the parts of the upper part by unscrewing all the screws.
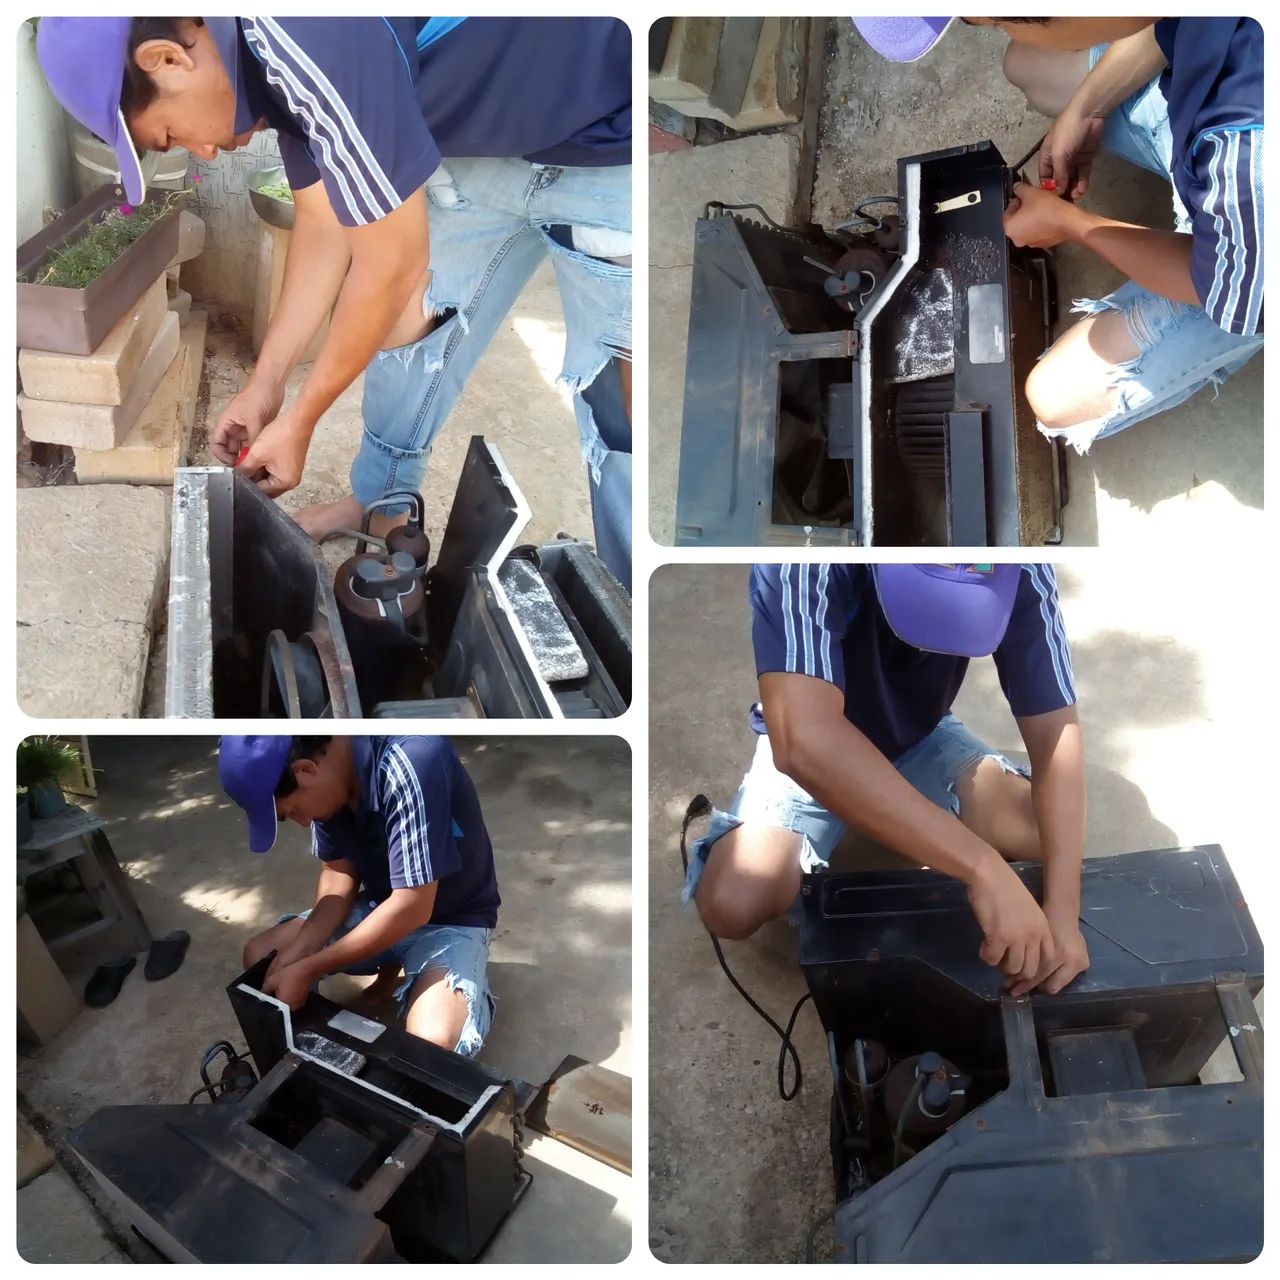
Luego le quitamos el panel de control, dónde se encuentran los capacitadores.
Then we remove the control panel, where the Capacitors are located.
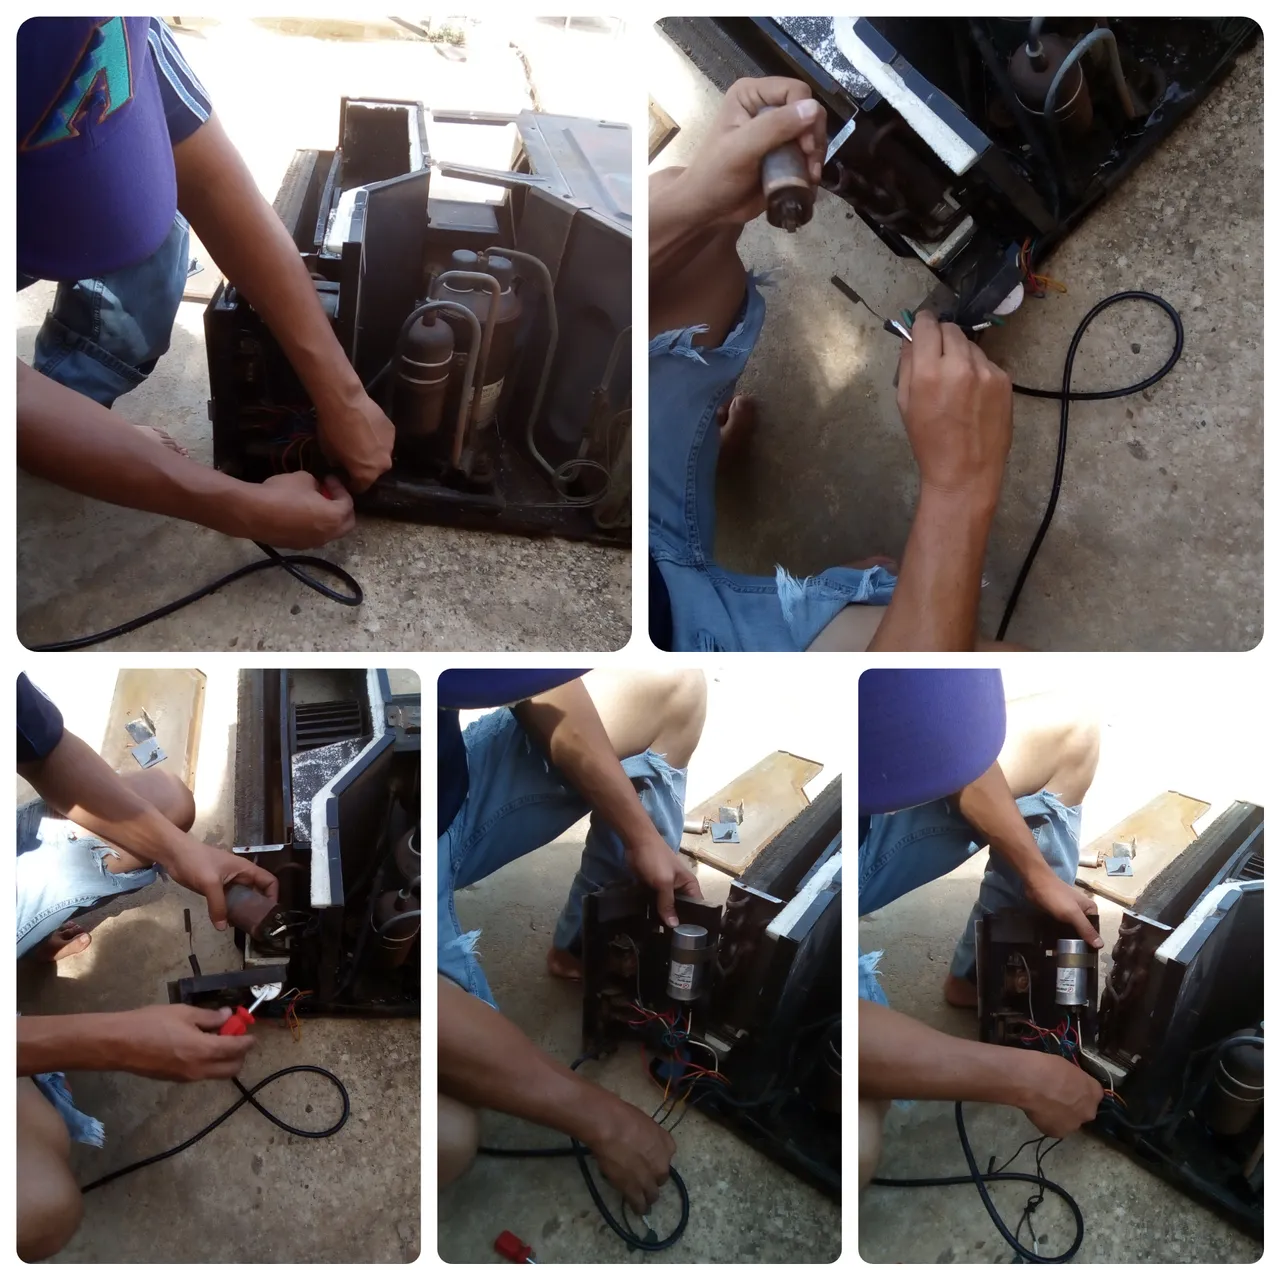
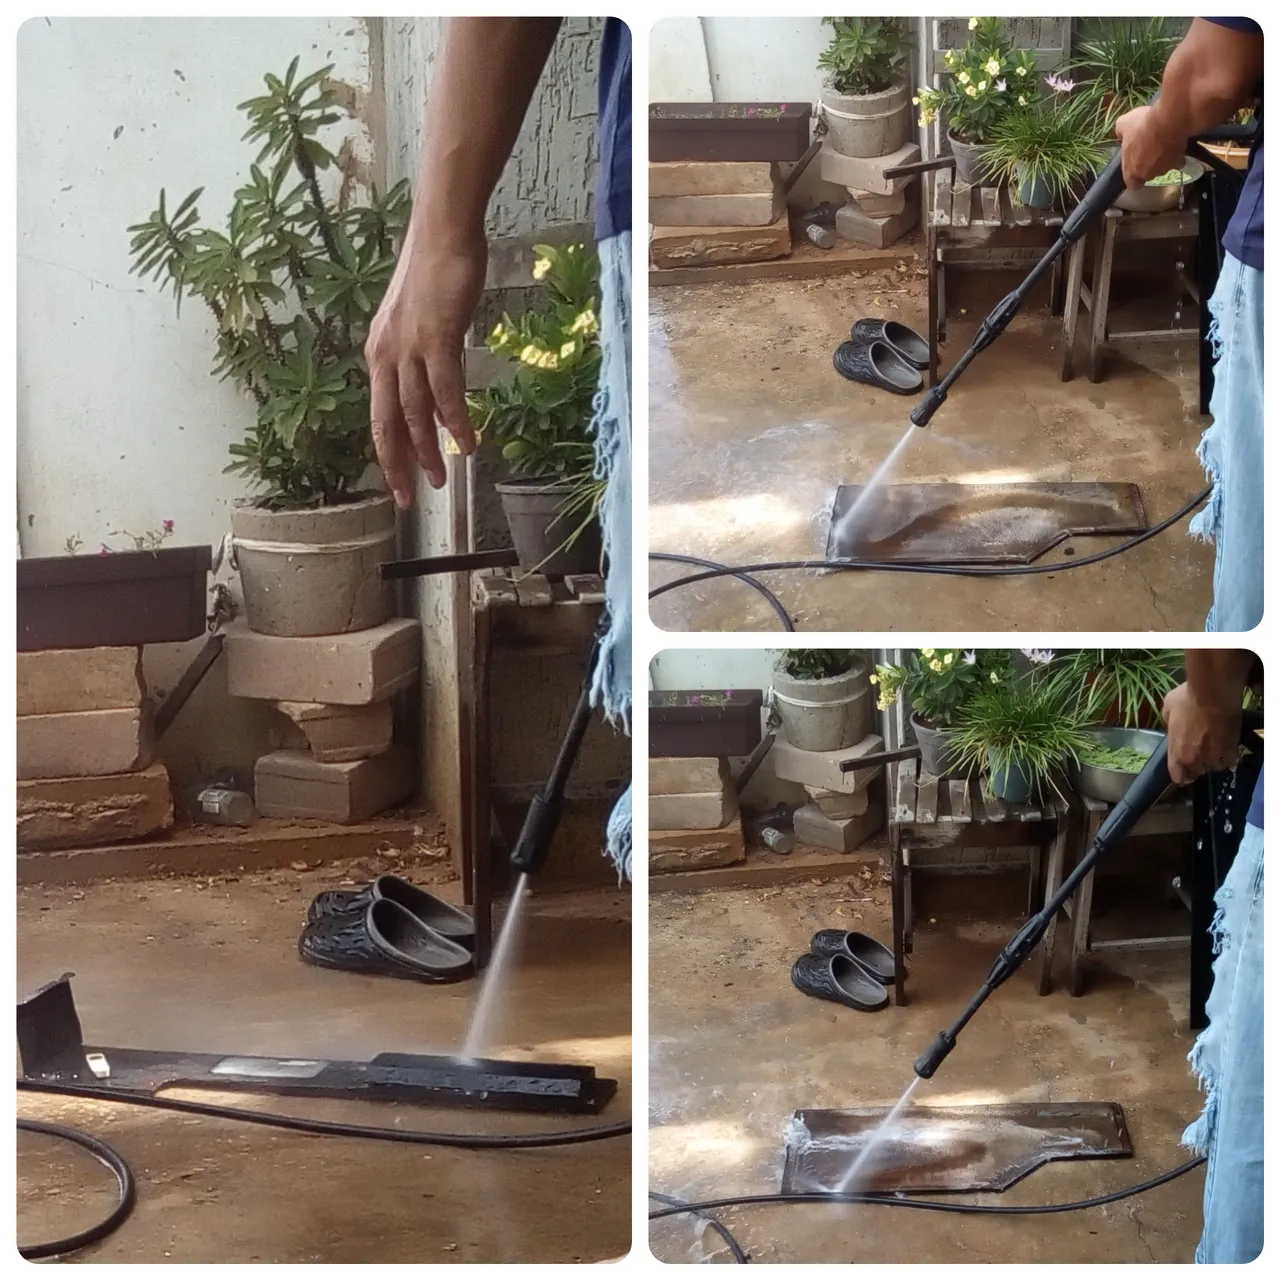
Luego sacamos un poco los panales de su posición original.
Then we take the honeycombs out of their original position a bit.
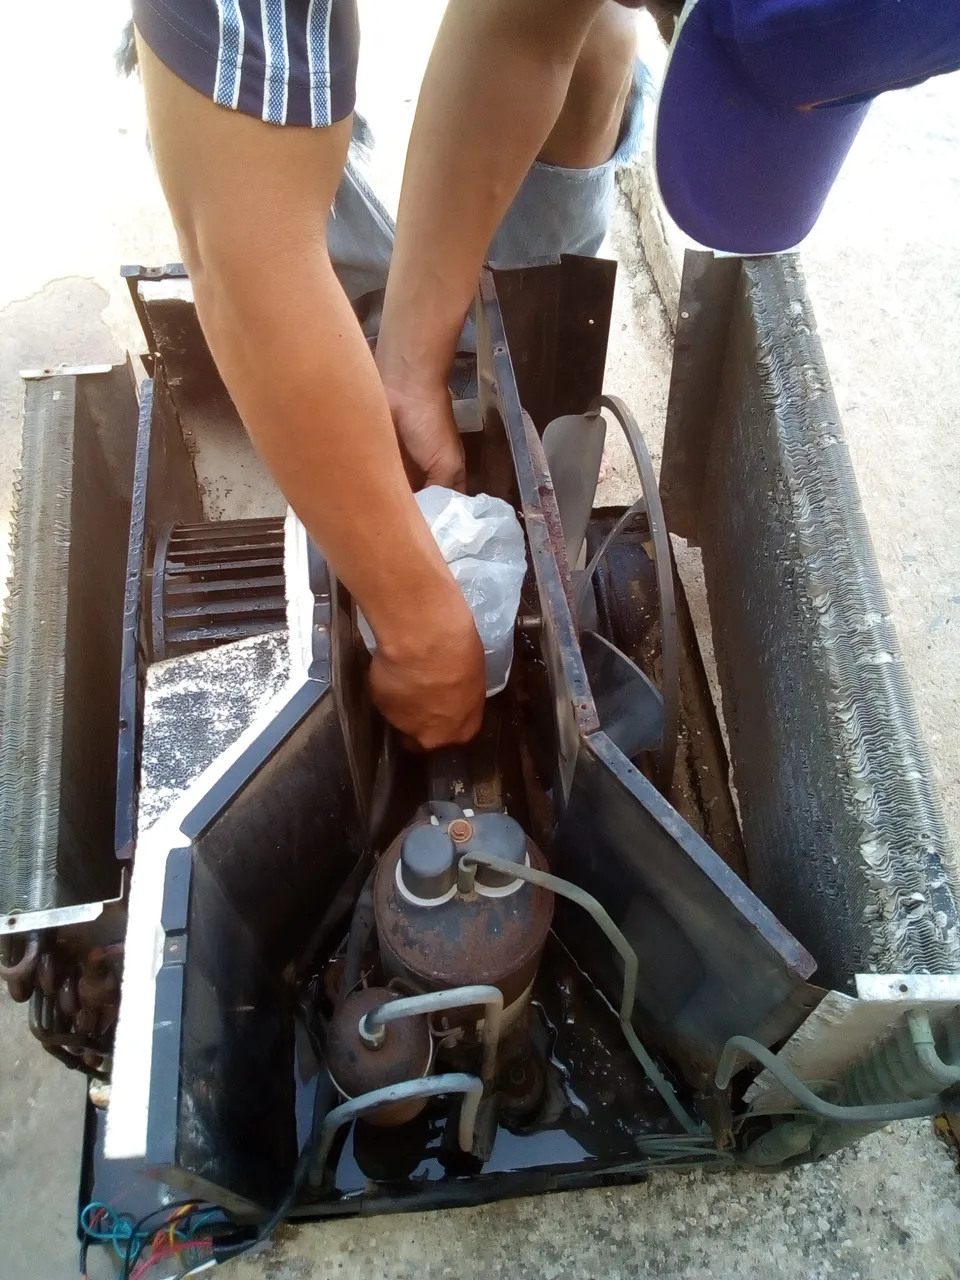
Con una bolsa tapamos el motor del ventilador para que no se moje.
With a bag we cover the fan motor so that it does not get wet.
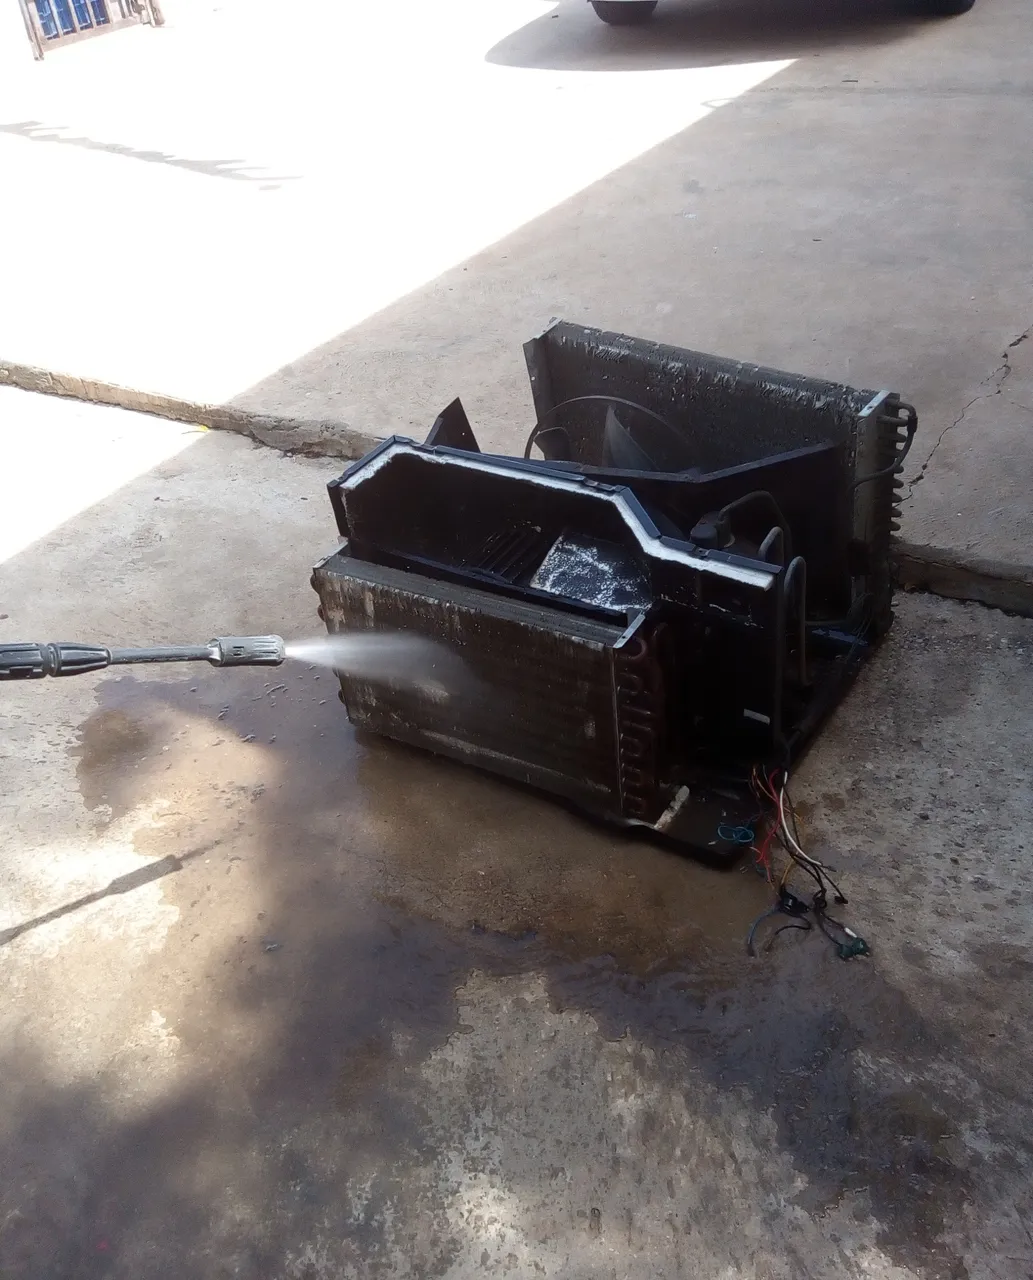
Ya desmantelado y con todas las piezas fuera empezamos.
Already dismantled and with all the pieces out we begin.
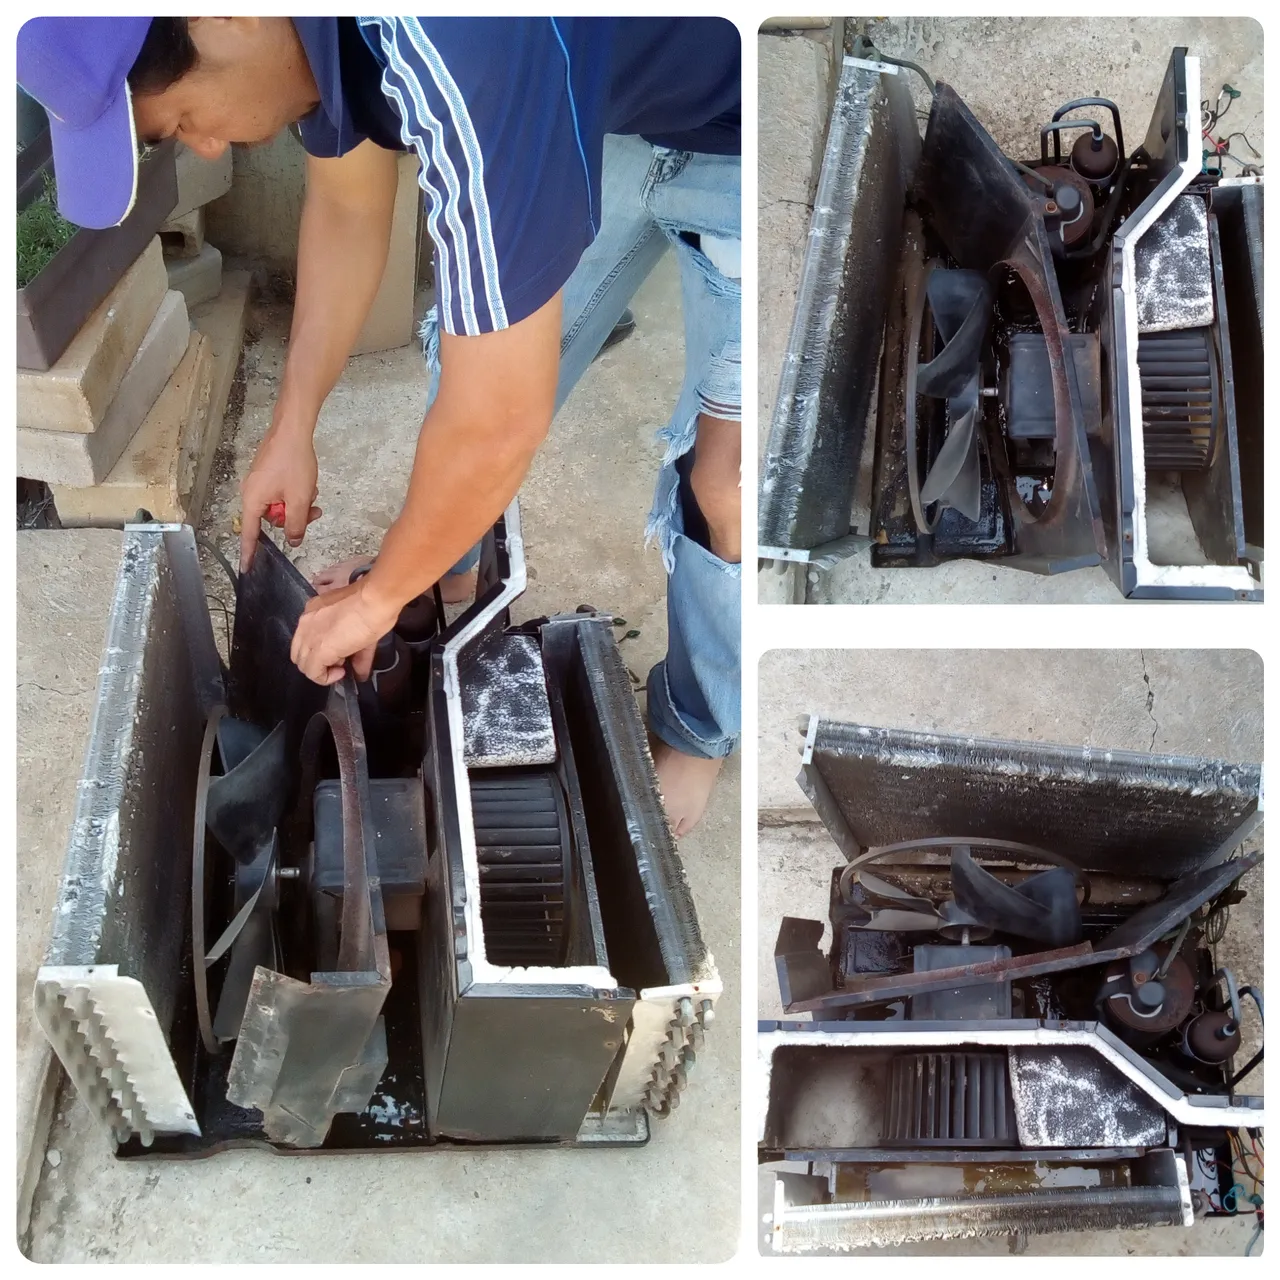
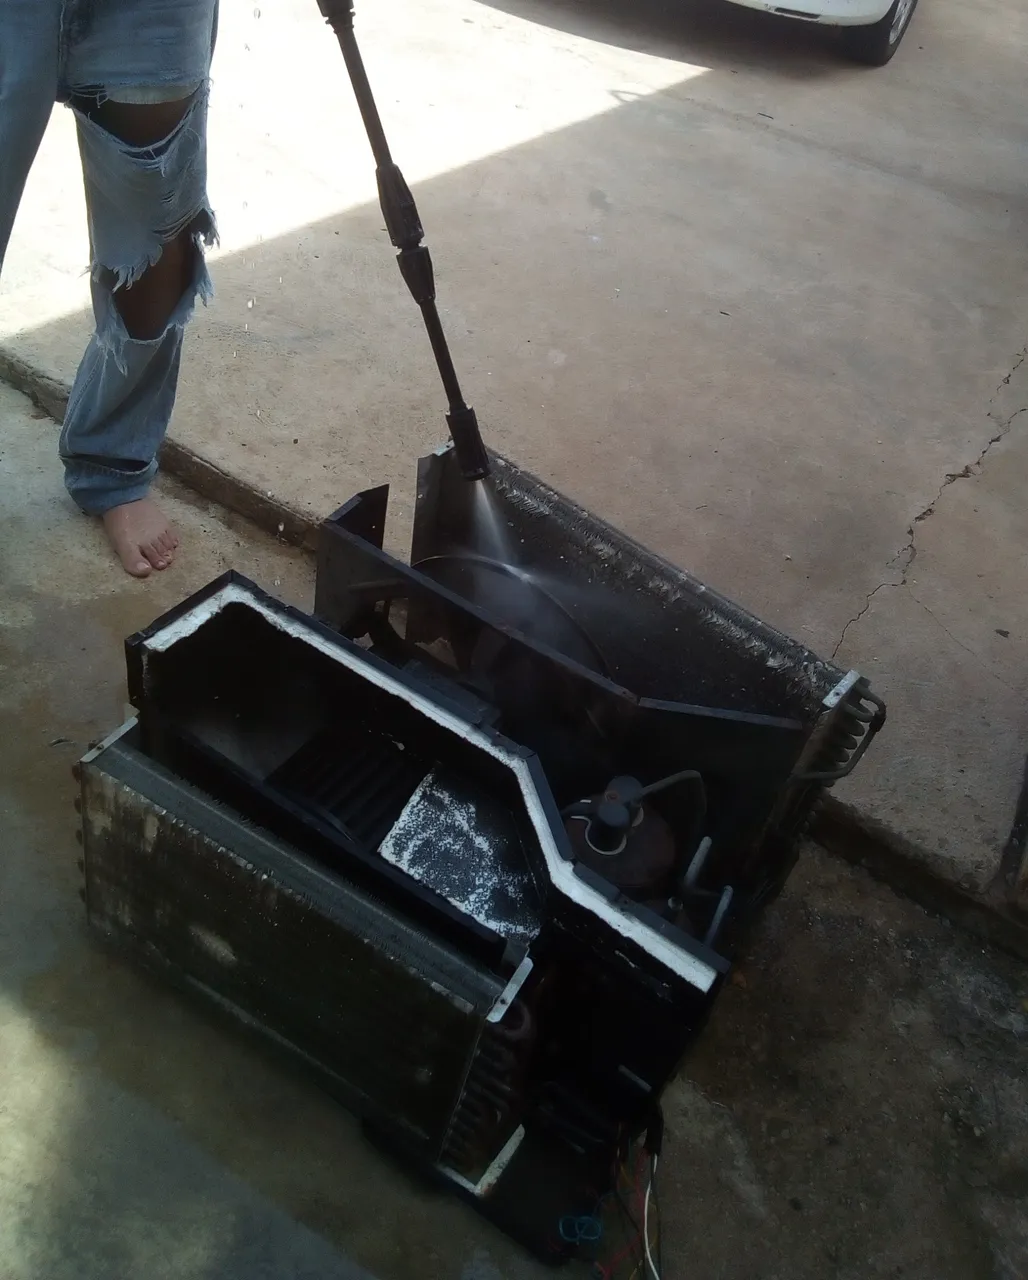
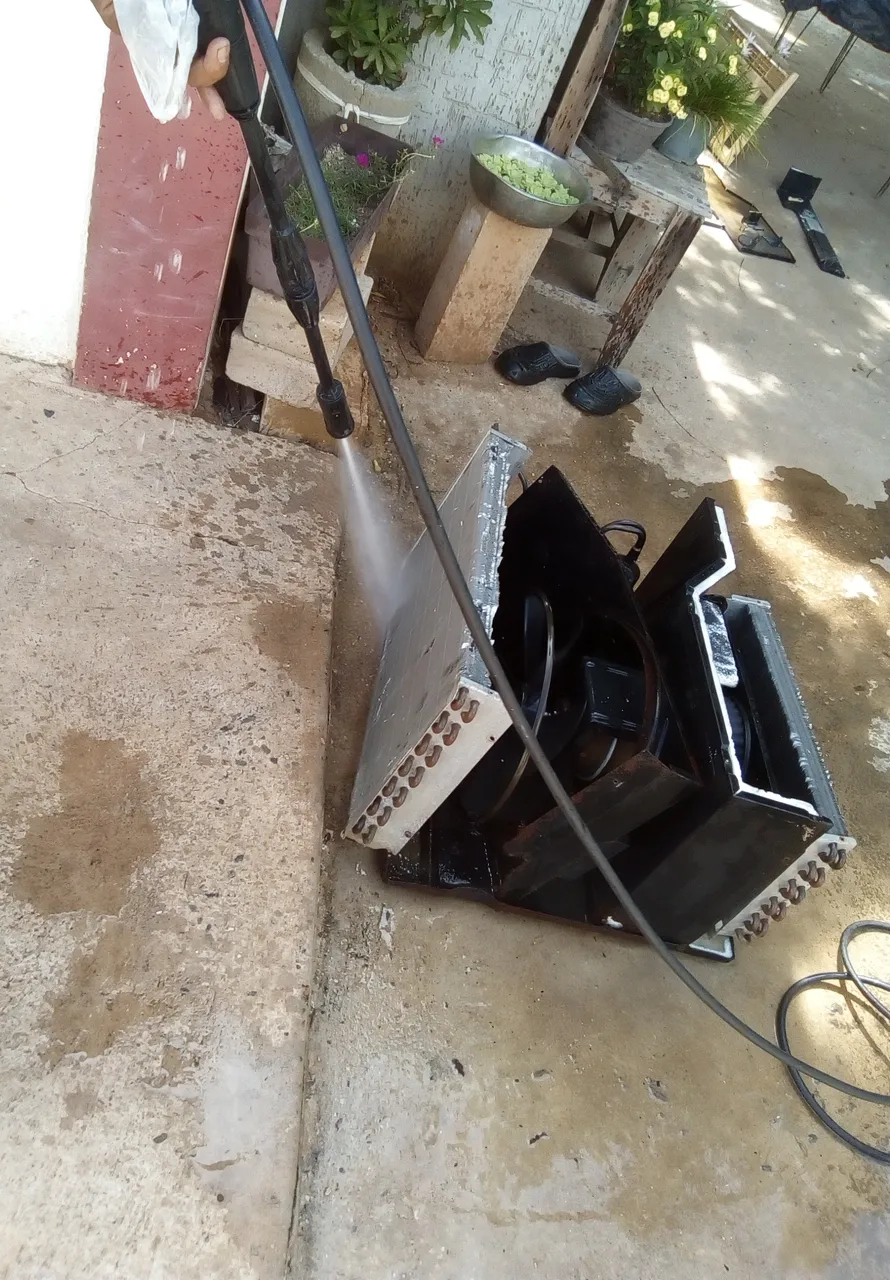
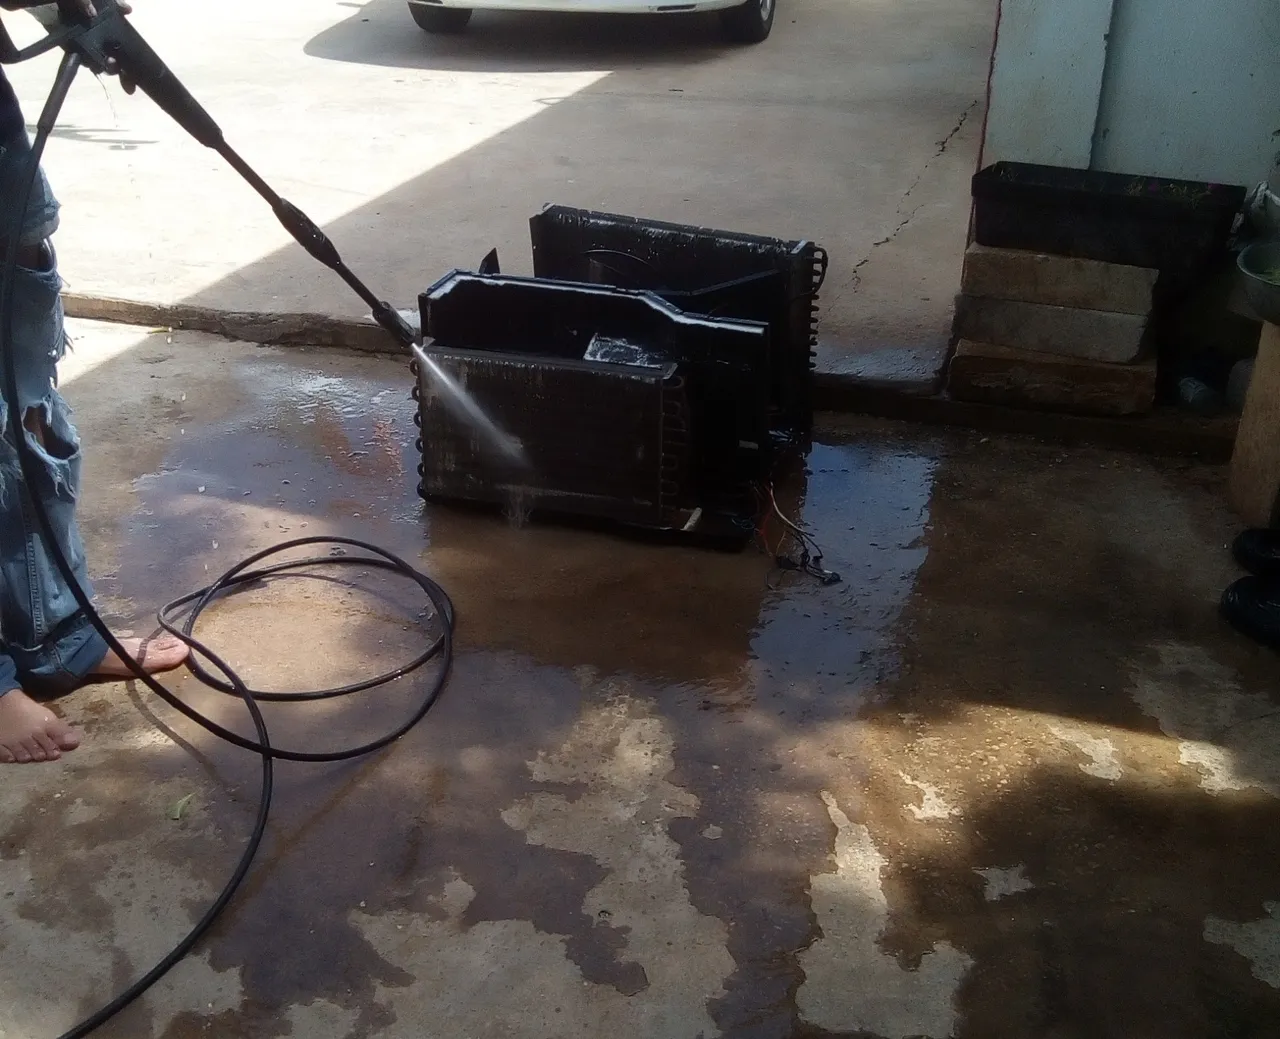
Encendemos el hidroyet y comenzamos a lavar el aire, bajamos y subimos con la pistola del hidroyet para quitar todo el sucio de los panales tanto el delantero como el trasero.
We turn on the hydroyet and begin to wash the air, we go down and up with the hydroyet gun to remove all the dirt from the front and rear panels.
Añadimos el líquido y dejamos actuar unos minutos, y volvemos a empezar con el hydroyet, hasta quitar toda la suciedad, lo inclinamos hacia atrás para escurrir el agua y repetimos el procedimiento.
Add the liquid and let it act for a few minutes, and we start again with the hydroyet, until all the dirt is removed, we tilt it back to drain the water and repeat the procedure.
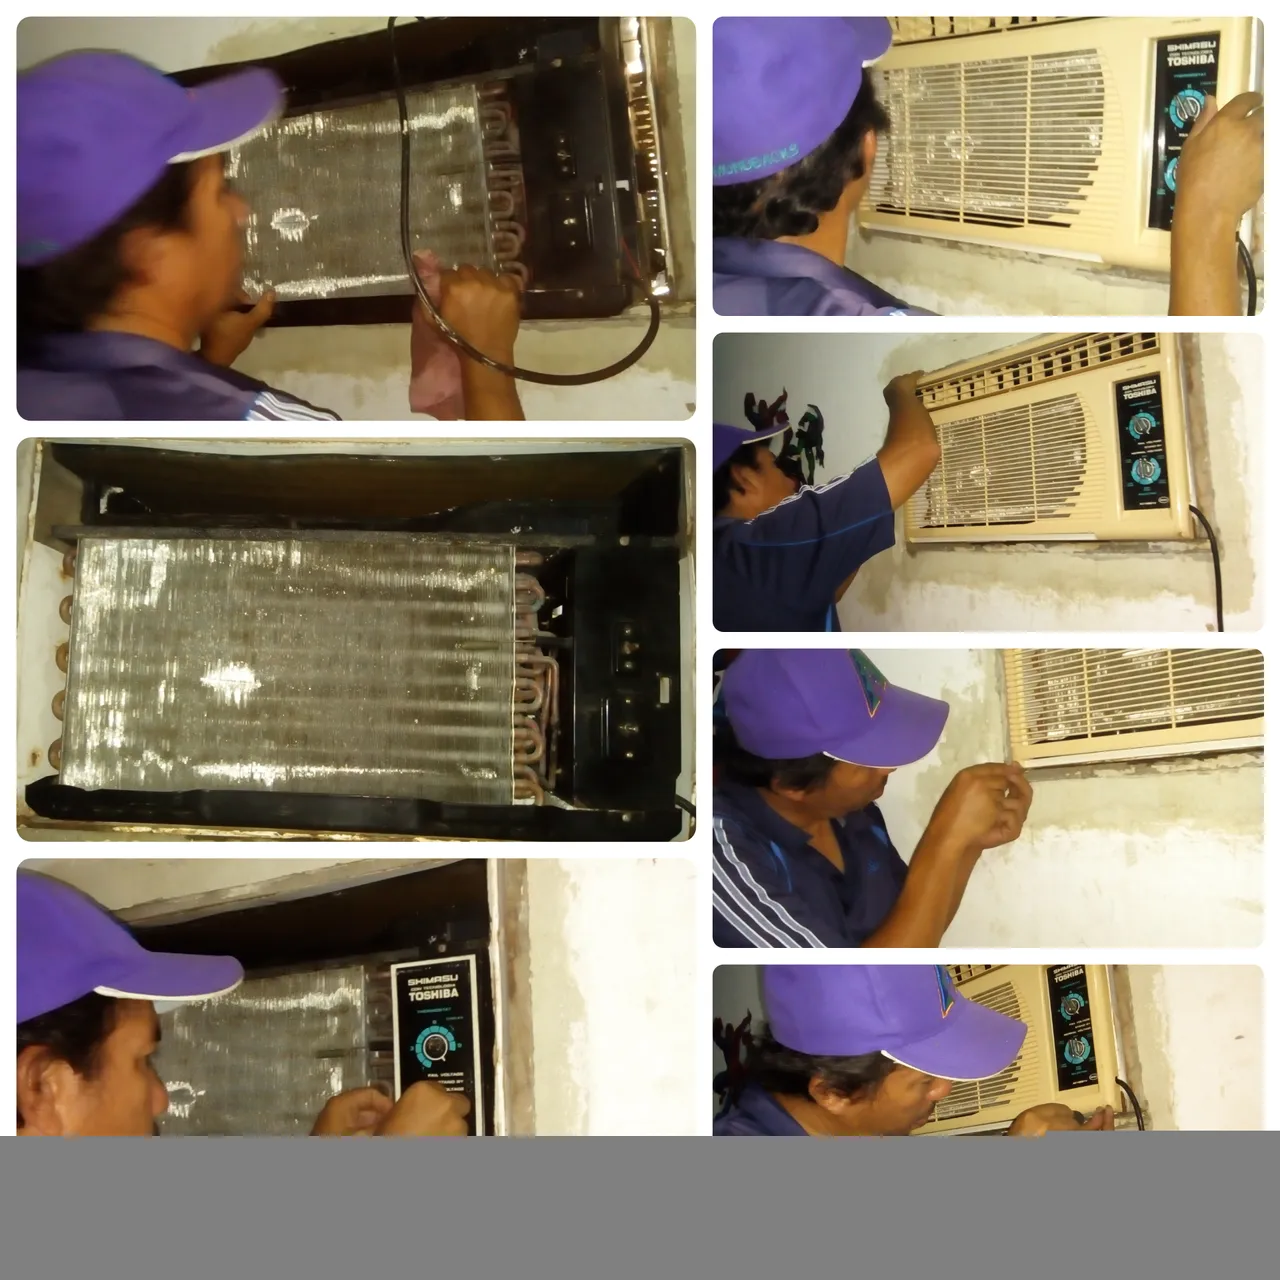
Aquí algunas fotos de cómo lo hice.
Here are some photos of how I did it.
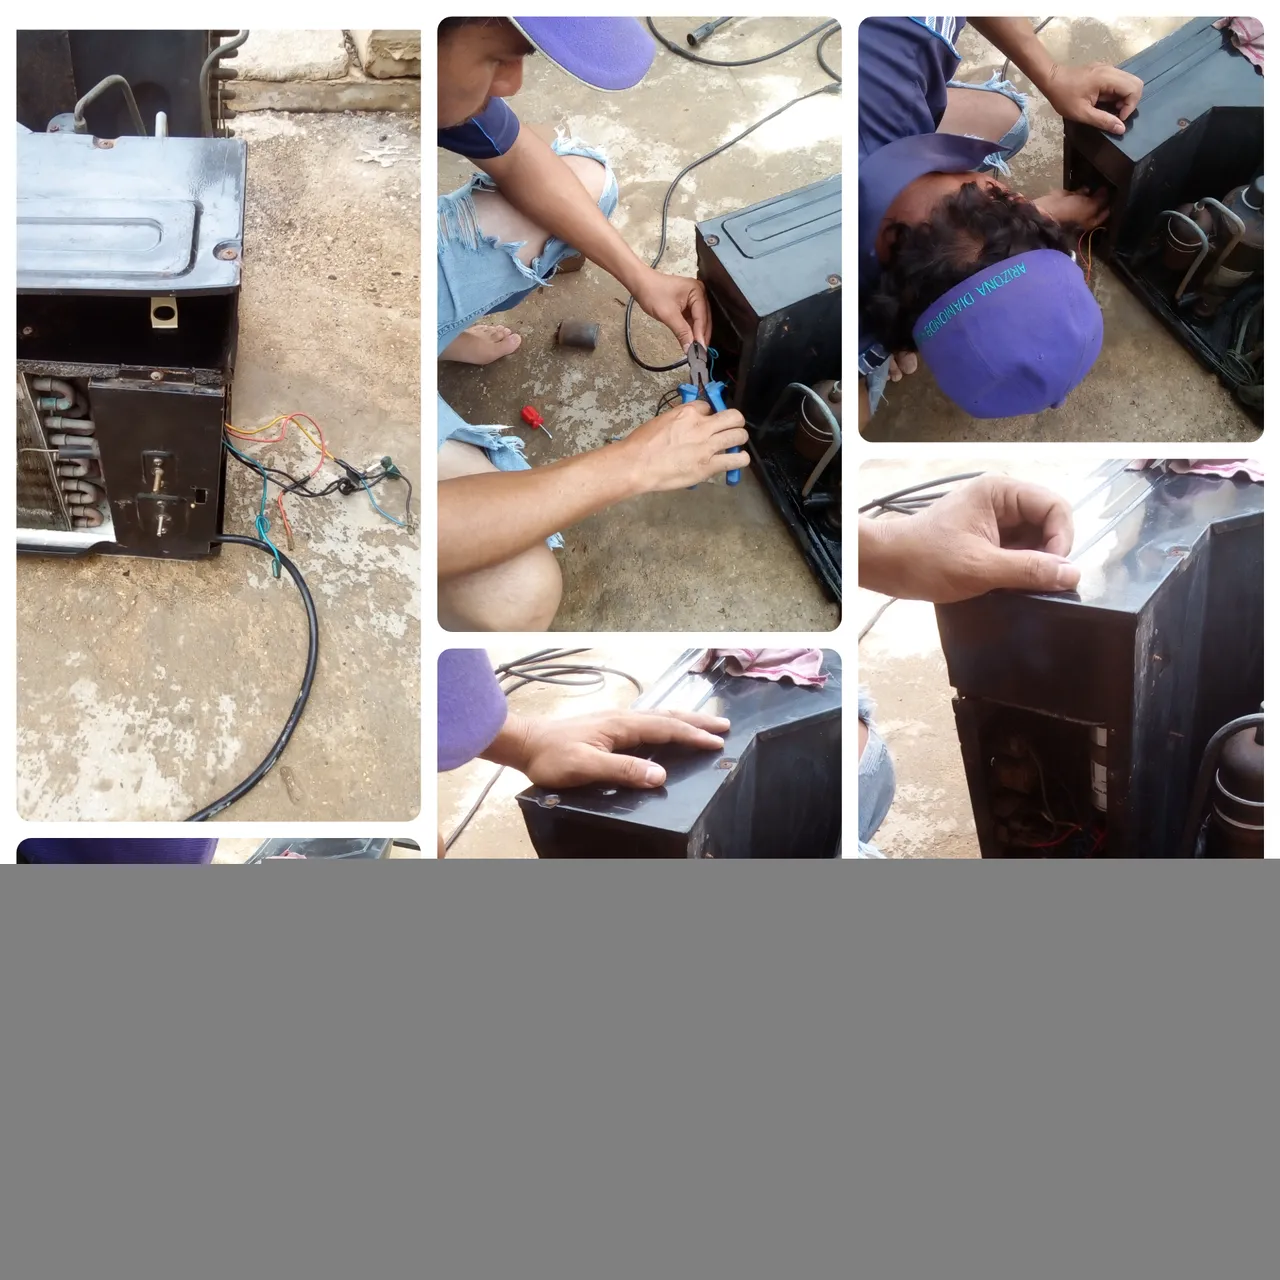
Luego procedemos a lavar las piezas que sacamos del aire acondicionado en un principio y secarlas con un paño.
Then we proceed to wash the pieces that we removed from the air conditioning at first and dry with a cloth.
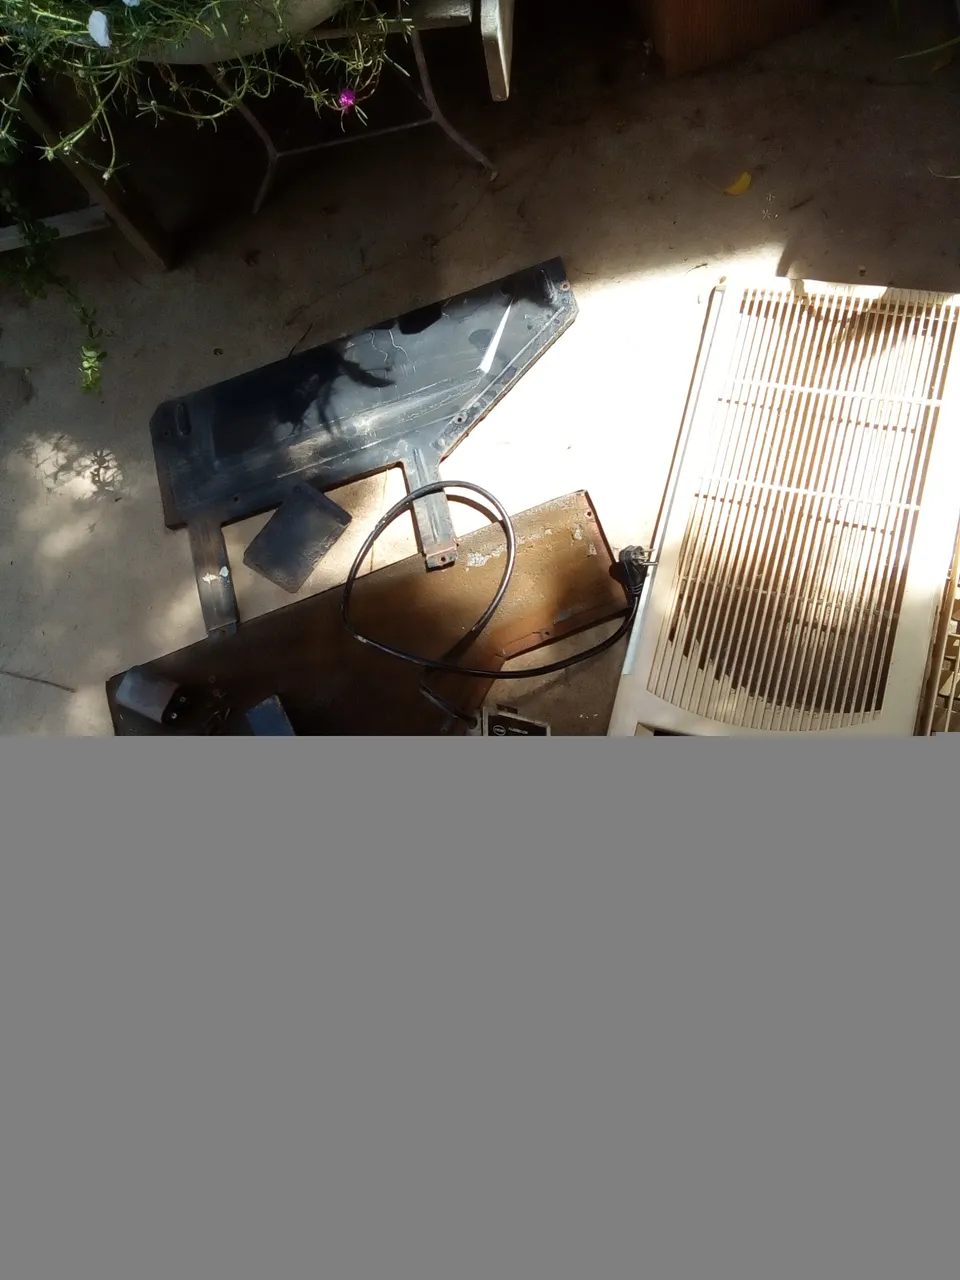
Una vez que el aire está listo, comenzamos a ensamblarlo nuevamente para instalarlo.
Once the air is ready, we begin to assemble it again to install it.

Cuando se vuelve a colocar el panel de control, agitamos los terminales para sacar los residuos del agua.
When the control panel is put back on, we shake the terminals to get the residue out of the water.
Ya listo procedemos a instalarlo, ya instalado, terminamos de colocar los botes del panel de control, la tapa y el filtro que se atornillará al cajón.
Now ready we proceed to install it, already installed, we finish placing the canisters of the control panel, the lid and the filter that will be screwed to the drawer.
Espero qué este pequeño tutorial les sirva de mucha ayuda.
I hope this little tutorial will be very helpful to you.
Gracias por visitar mi blog, nos vemos en mi siguiente post. @Juanqui05
Thanks for visiting my blog, see you in my next post. @Juanqui05