Hola a toda la familia de la comunidad de @hivemotors. Por aquí estamos de nuevo para contarle como va el proceso del carro. Y agradecerles el apoyo brindado a todas las publicaciones.
Hello to the whole family of the @hivemotors community. We are here again to tell you how the car process is going. And thank you for the support given to all the publications.
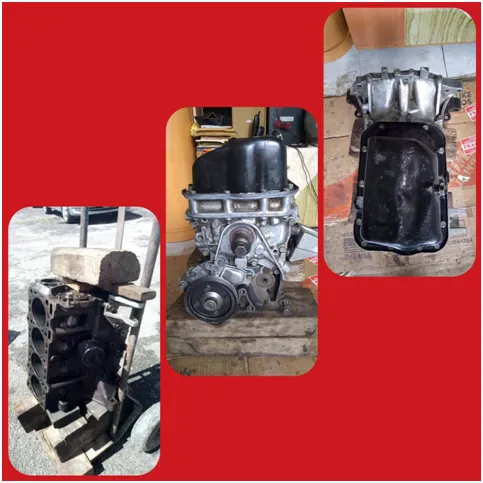
Engine 3/4 is ready
Así subimos el Motor 3/4 al apartamento para amarlo y así ya listo para bajarlo.
So we raise the 3/4 Motor to the apartment to love it and so ready to lower it.
Primero se suspende el carro en unas rampas y ayudado también con tronco de madera, Se deja a una altura que el bloque pase y se puso en posición de subirlo.
First the cart is suspended on ramps and also aided with a wooden log. It is left at a height that the block passes and it is put in position to raise it.
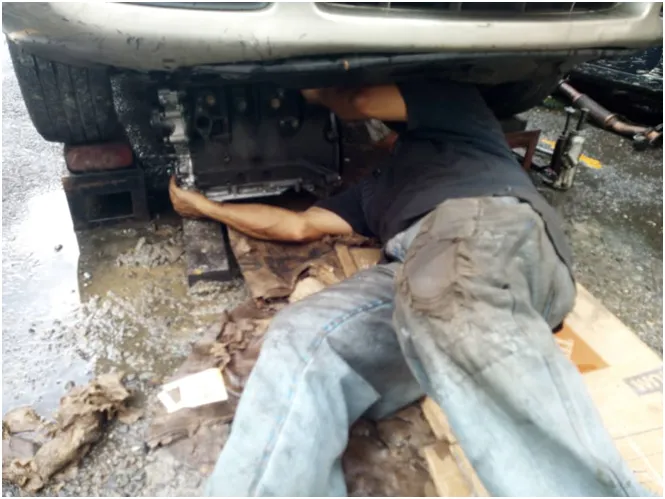
Estas rampas también se pueden usar para cambiar el aceite del carro, cuando lo amerite. Tambien se uso para bajar el motor y comenzar el trabajo.
These ramps can also be used to change the oil in the car, when required. It was also used to lower the engine and start work.
Preparando la grúa de puente manual artesanal.
Preparing the craft manual bridge crane.
La distancia de esa base la da al medir, de la ranura del guarda fango al otro. Que varía según el carro.
The distance from this base is given when measuring, from the slot of the mud guard to the other. That varies by car.
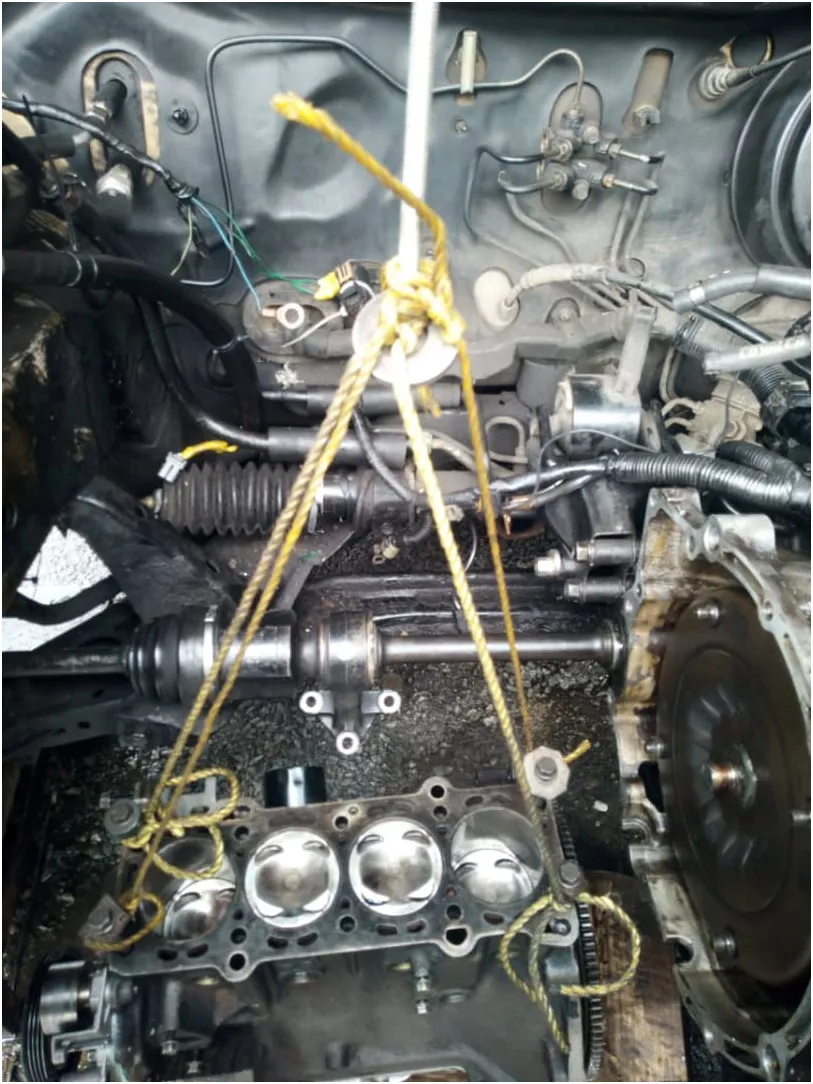
In the center it is drilled and a continuous thread screw is inserted, to raise the motor, preferably a guide bolt, recommended of 7.12 "(inches). And as long as possible. With an exact nut that also has a ( 1) reinforcement washers. It is recommended that it is not a continuous thread bar, because they are galvanized and with the weight of the motor the nut damages the thread or (Thread pitch). With the same screws of the camera, they are placed in the Four (4) corners of the block to lower or raise the engine level.
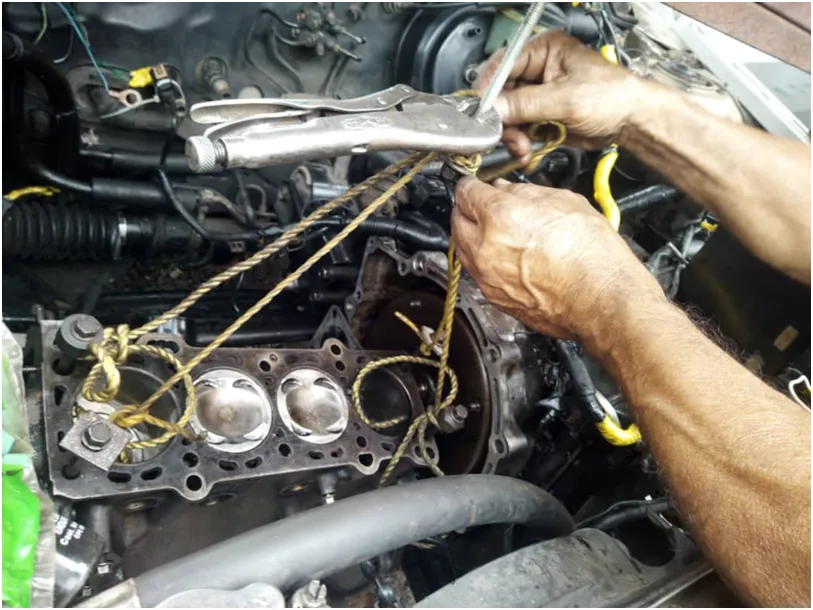
Se usaron unas cuerdas delgadas de nailon.
Thin nylon ropes were used.
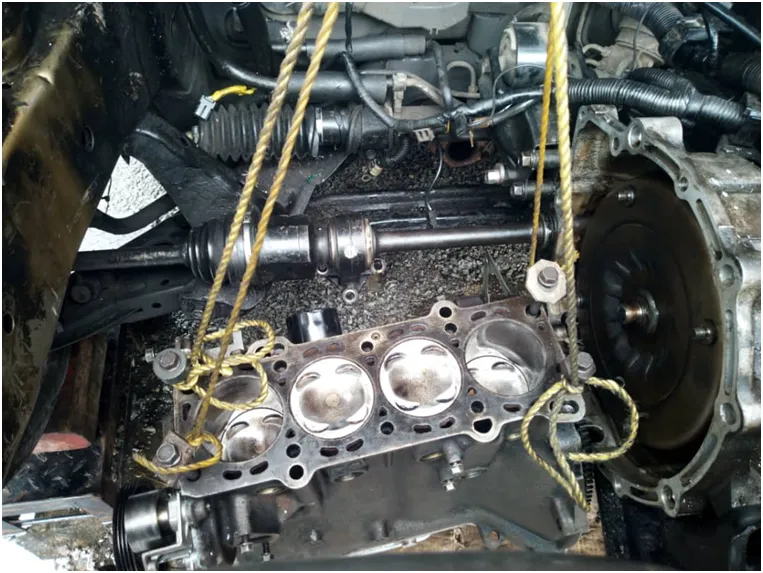
Se amarran a los cuatro (4) tornillos y se llevan unidos al centro del tornillo.
They are tied to the four (4) screws and are attached to the center of the screw.
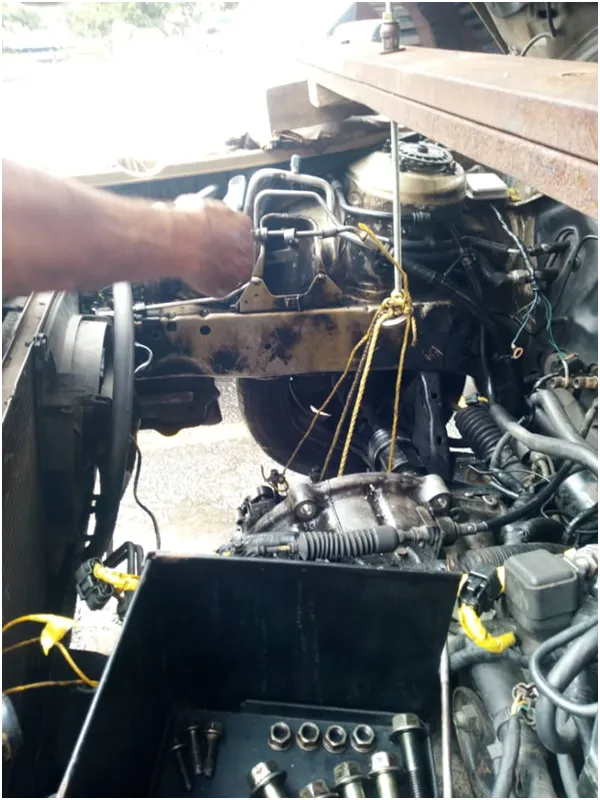
It begins to rise
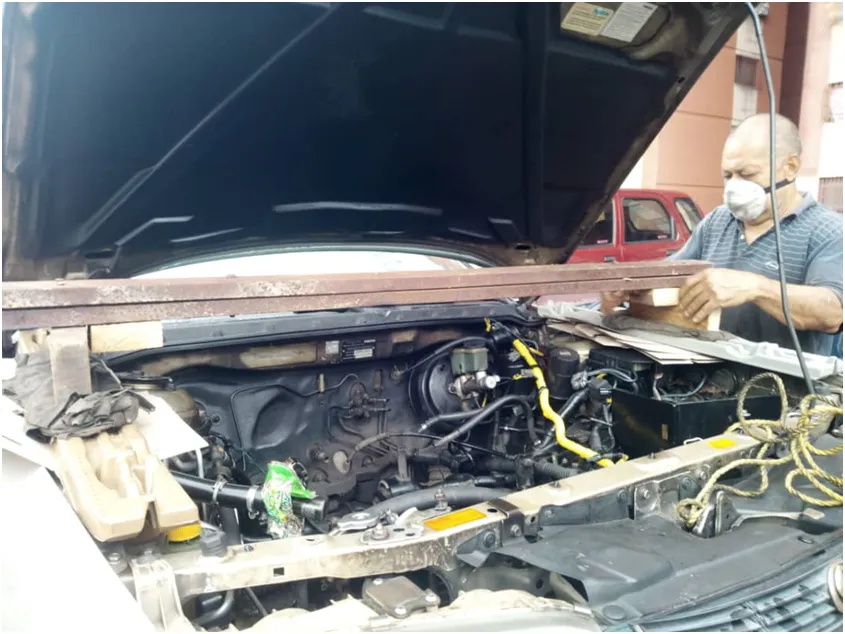
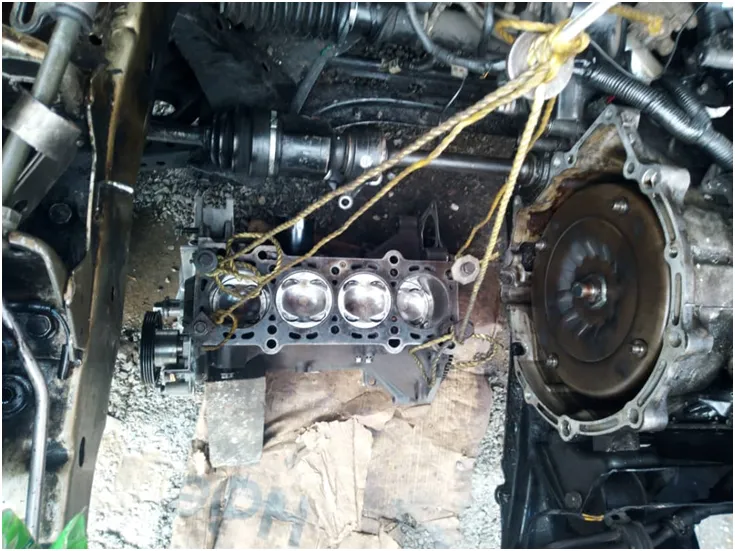
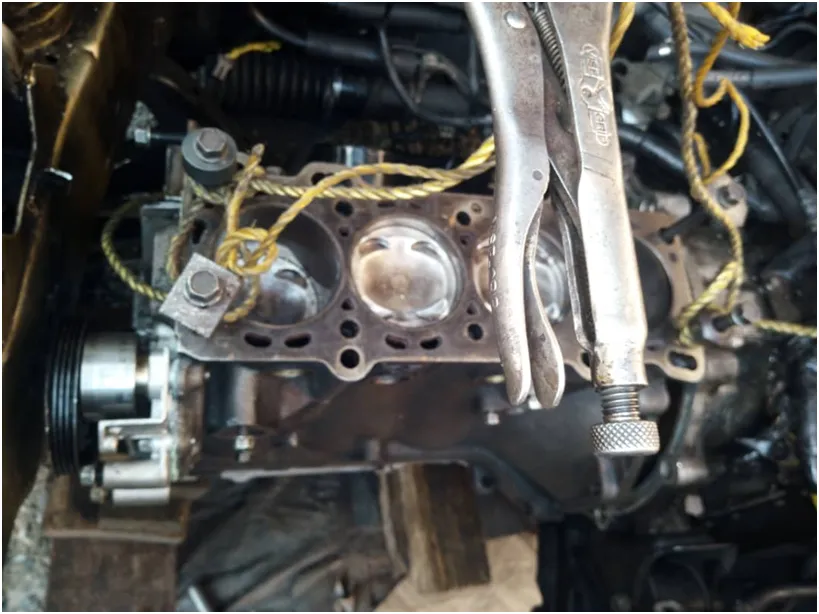
Se trabajo con lo que teníamos, y como eran corta la cuerda se ayudaba con el alicate de presión para cambiar la distancia de la cuerda. Ya casi listo para pegarlo al flanche y la caja.
We worked with what we had, and since they were short the rope was helped with the pressure pliers to change the distance of the rope. Almost ready to glue to the flange and the box.
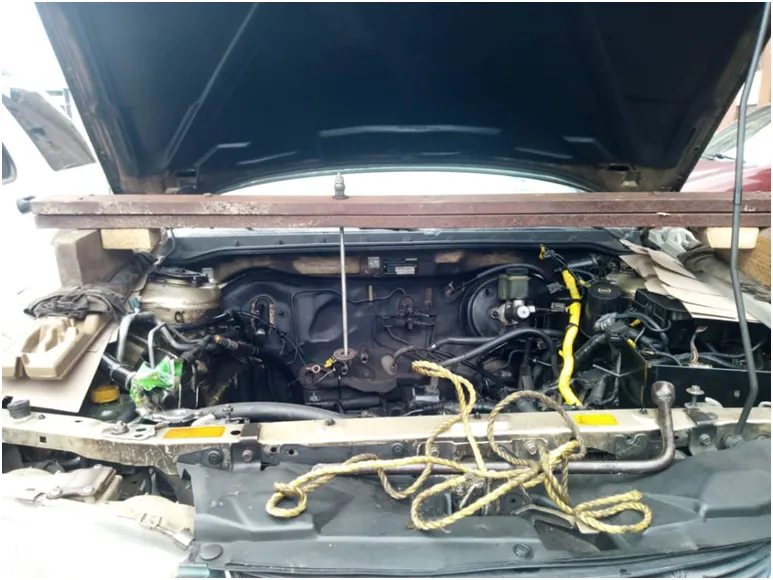
Ya pegado a la caja. Solo falta ponerle los tornillos para unirlos.
Already glued to the box. You just need to put the screws to join them.
Muy agradecida por leer mi blog
Les dejo mis redes por aquí.
@jaci11
Twitter: ainegue63
Instagram: @mauraeugeniainfantebello
Very grateful for reading my blog
I leave my networks here.
@ jaci11
Twitter: ainegue63
Instagram: @mauraeugeniainfantebello
