Hola, ¿qué tal les va amigo de Hive? El día de hoy paso por aquí a compartirles esta receta, espero les gusté.
Esta receta de bomba sin duda me trae muchos recuerdos de niñez, aunque no sean rellenas de crema pastelera, debo decirles que igual me trae muchos recuerdos.
Me lleva los recuerdo de cuando estudiaba en la escuela, escuela donde una señora autorizada vendía bombas y donas, recién hechas llegaba todos los días a partir de las 3 de la tarde(hora la cual era recreo o receso). Siempre que ella llegaba todos los niños salíamos corriendo hacer una fila para comprarles bombas antes de que se les terminaran.Sin duda alguna puedo darle certeza de que han sido una de las mejores bombas que he probado en mi vida.
Hace un tiempo atrás aprendí a hacer la receta de bomba, pero no aprendí cómo hacer la crema pastelera y por ende las rellenas de arequipe, qué de igual manera me gusta cómo quedan.
Así que el día de hoy quiero compartirles esta receta.
Hi, how are you doing Hive's friend? Today I'm here to share with you this recipe, I hope you like it.
This bomba recipe certainly brings back many childhood memories, although they are not filled with pastry cream, I must tell you that it still brings back many memories.
It brings back memories of when I was in school, a school where a lady who was authorized to sell bombs and donuts, freshly made, arrived every day after 3 o'clock in the afternoon (recess time). Whenever she arrived all of us kids would run out and line up to buy bombs before they ran out and I can assure you that they were some of the best bombs I have ever tasted in my life.
Some time ago I learned how to make the bomba recipe, but I didn't learn how to make the custard and therefore the arequipe filled ones, which I still like the way they turn out.
So today I want to share this recipe with you.
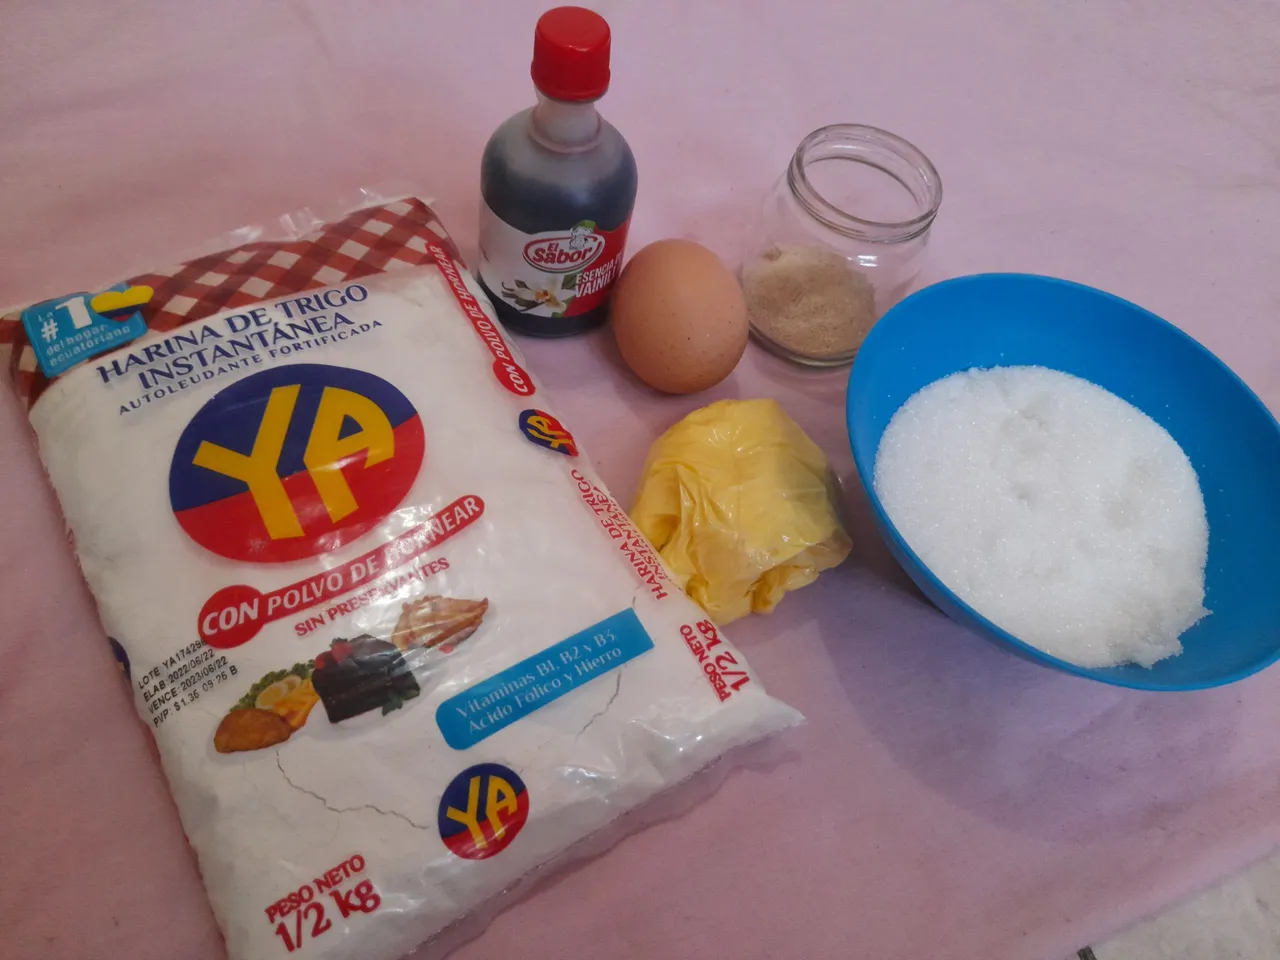
For the ingredients we will use
- 400 g of all-purpose wheat flour.
- 150 ml of water.
- 50 g butter.
- 70 g sugar.
- 3 g of yeast.
- 1 egg.
- a pinch of salt.
- 1 tablespoon vanilla essence.
Para los ingredientes utilizaremos;
- 400 g de harina de trigo todo uso.
- 150 ml de agua.
- 50 g de mantequilla.
- 70 g de azúcar.
- 3 g de levadura.
- 1 huevo.
- una pizca de sal.
- 1 cucharada de esencia de vainilla.
Comenzaremos tibiando un poco los 150 ml de agua con una cucharadita de azúcar, la cual estaremos colocando 3 g de levadura y dejaremos reposar por 10 o 15 minutos.
Una estrategia para saber si la levadura está buena si en 10 minutos la levadura hace bastante espuma es porque está buena, pero si no hace espuma en este mismo tiempo es porque está dañada.
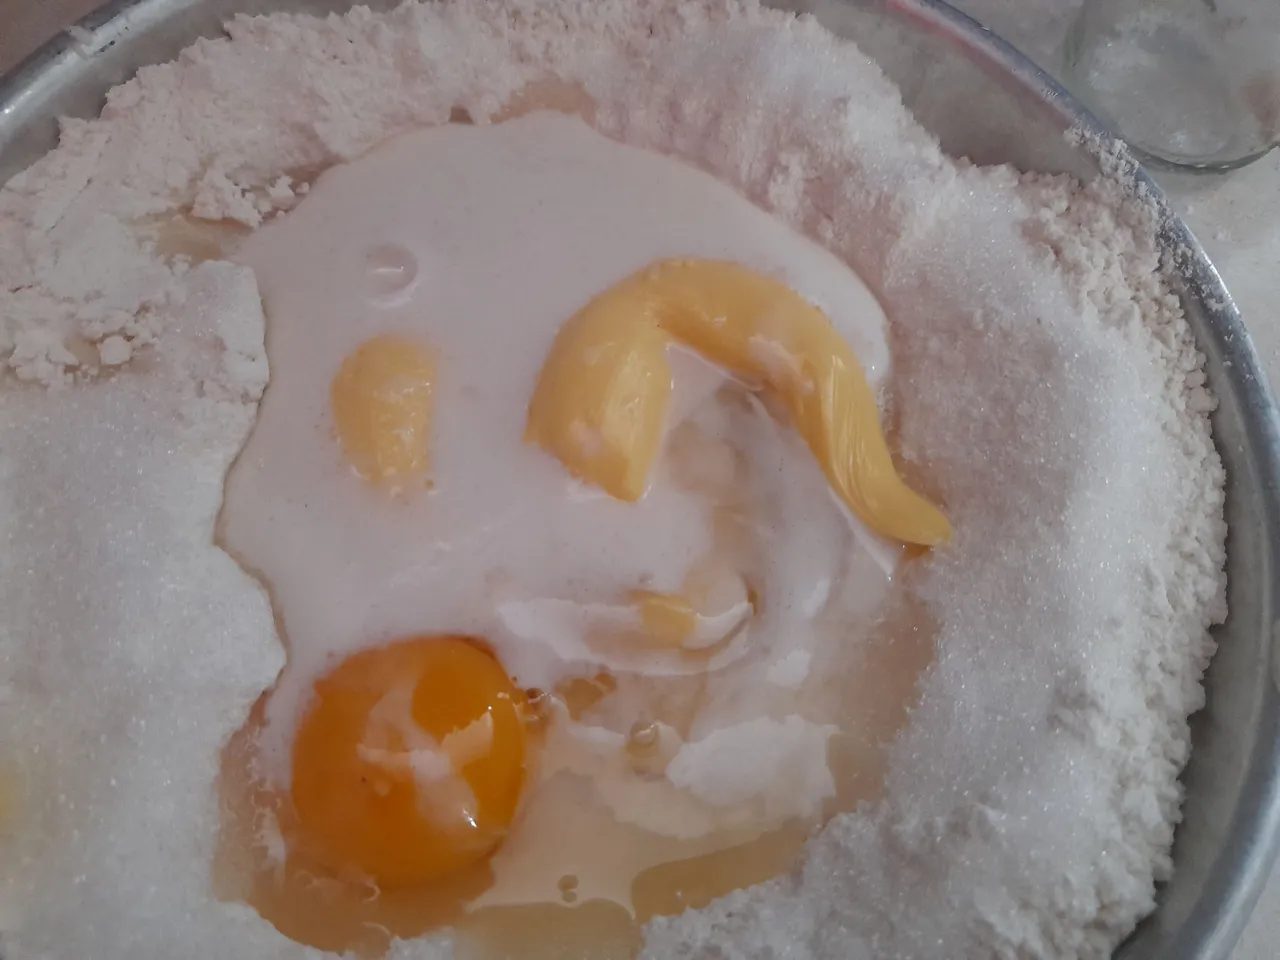
Una vez tengamos activada la levadura continuaremos haciendo la masa de la siguiente manera; prepararemos una taza o bol y colocaremos la harina, los 70 gramos de azúcar, la pizca de sal y en el medio haremos un espacio dónde colocaremos la levadura el huevo una cucharada de esencia de vainilla y los 50 gramos de mantequilla.Luego empezaremos a amasar toda la mezcla consiguiendo una textura bastante homogénea y continuaremos amasando durante unos 20 minutos.
We will begin by lukewarming a little 150 ml of water with a teaspoon of sugar, which we will be placing 3 g of yeast and we will let it rest for 10 or 15 minutes.
A strategy to know if the yeast is good if in 10 minutes the yeast makes enough foam it is because it is good, but if it does not make foam in this same time it is because it is damaged.
Once we have activated the yeast we will continue making the dough in the following way; we will prepare a cup or bowl and we will place the flour, the 70 grams of sugar, the pinch of salt and in the middle we will make a space where we will place the yeast, the egg, a spoonful of vanilla essence and the 50 grams of butter, then we will begin to knead all the mixture getting a fairly homogeneous texture and we will continue kneading for about 20 minutes.
En una taza o un bol de vidrio limpio y seco agregaremos un poquito de aceite, lo esparciéremos muy bien por todo el molde, colocaremos la masa y la dejaremos reposar alrededor de una hora.
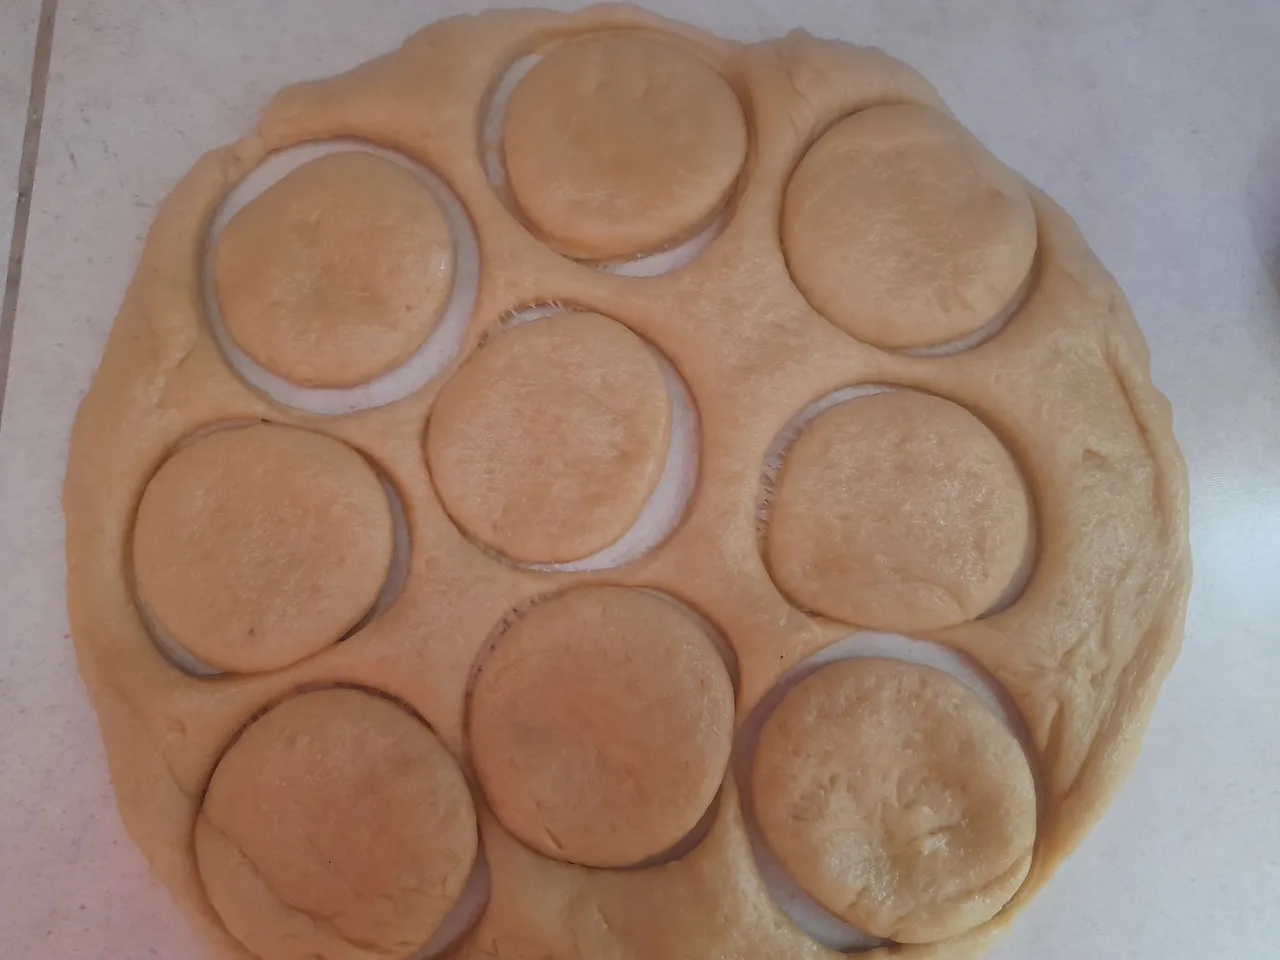
Una vez haya pasado este tiempo colocaremos la masa en una superficie plana y con la ayuda de un rodillo la esparciéremos dejándola de un grosor de 1 cm, con la ayuda de un cortador en forma de círculo cortaremos la masa, si no tienes un cortador puedes usar un vasito pequeño, en total a mí me salieron 40 círculos, ya que mi cortadora era pequeña luego lo dejaremos reposar durante una hora más.
In a cup or a clean and dry glass bowl add a little bit of oil, spread it very well throughout the mold, place the dough and let it rest for about an hour.
Once this time has passed we will place the dough on a flat surface and with the help of a rolling pin we deworm it leaving it with a thickness of 1 cm, with the help of a circle cutter we will cut the dough, if you do not have a cutter you can use a small glass, in total I got 40 circles, since my cutter was small then we will let it rest for another hour.
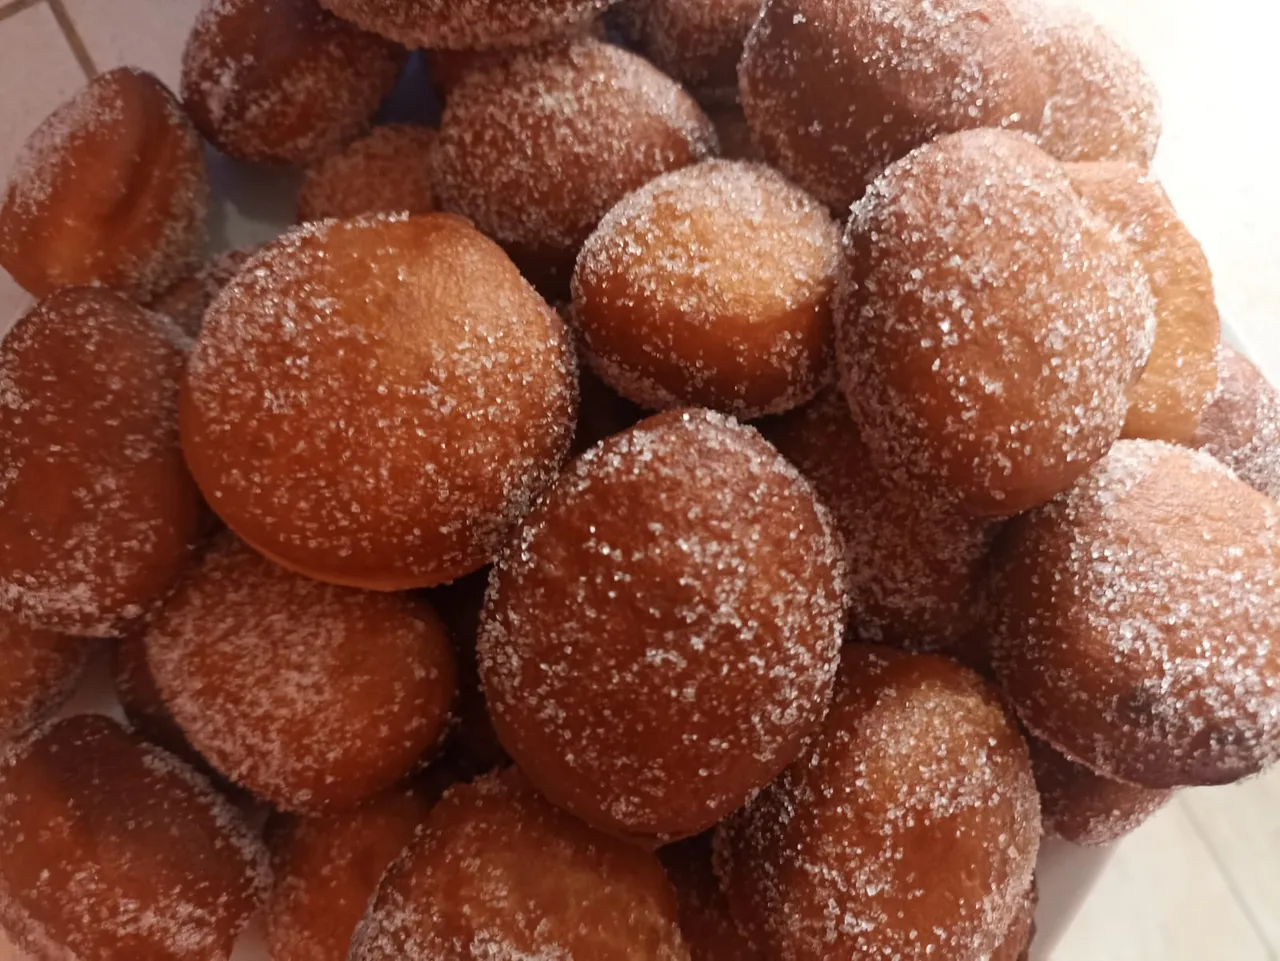
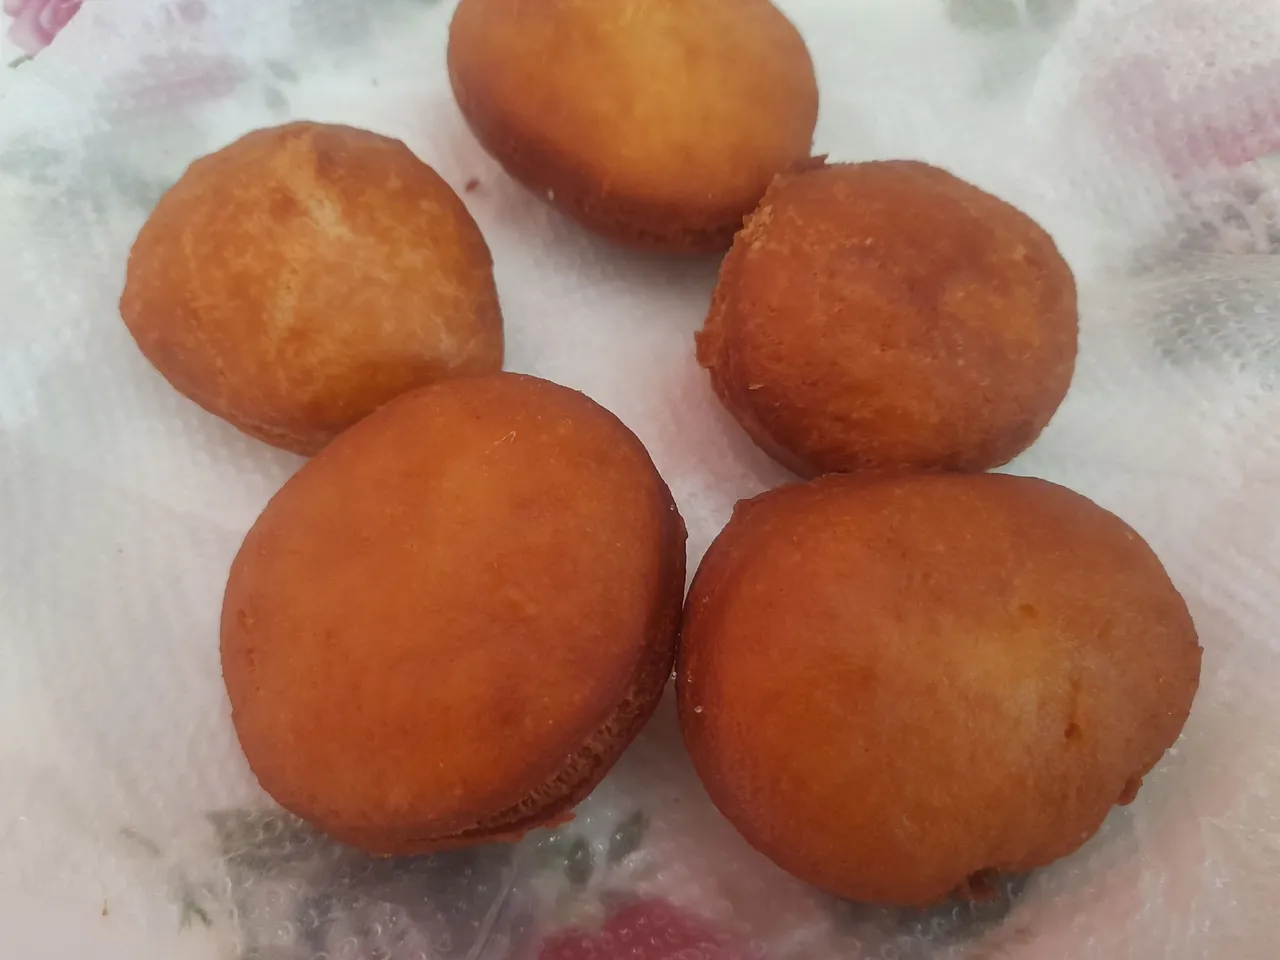
Cuando haya pasado este tiempo en un sartén con suficiente aceite caliente, bueno, no tan caliente comenzaremos a freír nuestras bombas dándole un dorado uniforme por ambos lados, en lo que vayamos sacando las bombas las pasaremos así calentitas por azúcar.
When this time has passed in a frying pan with enough hot oil, well, not so hot, we will begin to fry our bombs giving them a uniform browning on both sides, as we remove the bombs we will pass them warm through sugar.
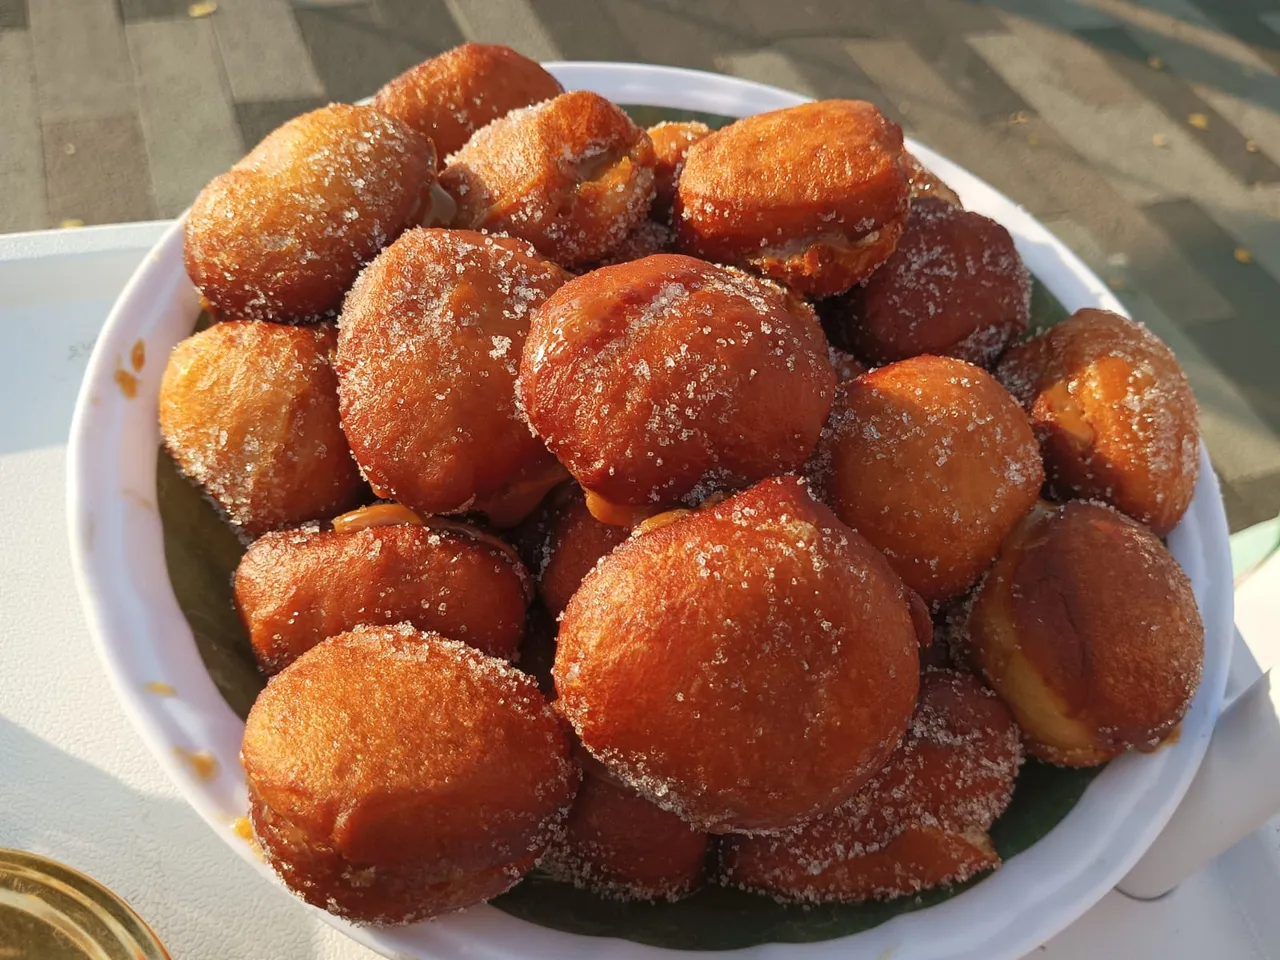
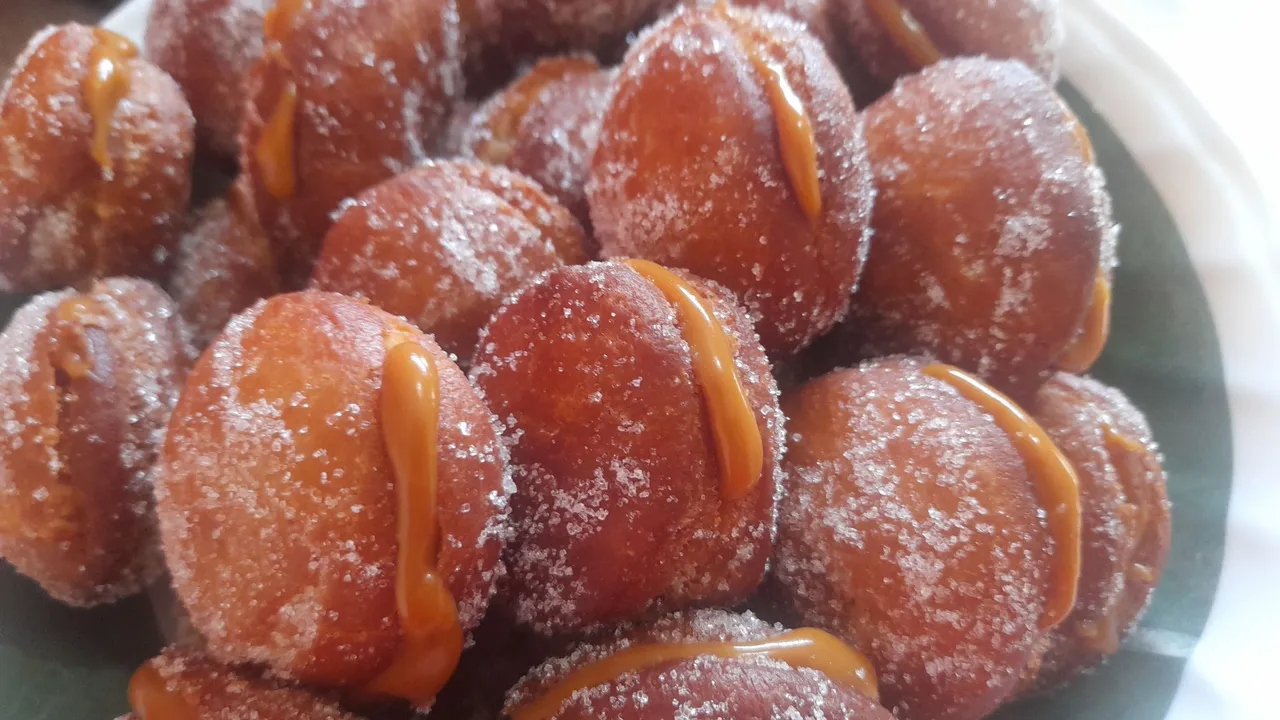
Después que hayamos freído todas las bombas con la ayuda de un cuchillo pequeño, le haremos una apertura en todo el centro hasta abajo y con una manga rellena de arequipe rellenaremos las bombas, y estarán listas para comer y compartir.
After we have fried all the bombs with the help of a small knife, we will make an opening all the way down the center and with a sleeve filled with arequipe we will fill the bombs, and they will be ready to eat and share.
Espero les haya gustado esta receta amigos, nos leemos pronto 😊.
I hope you liked this recipe friends, see you soon 😊.

Todas las imágenes son de mi propiedad, imagen de portada editada en Canva.
All images are my property, cover image edited in Canva.