We were asked a number of times about our small aquaponics set-up that we have referred to a number of times. But first, some background. As you may or may not know, we moved to southern Kentucky a couple years back and I have related a number of times how bad our first year of gardening was, well, it wasn’t bad, it was downright terrible! The older I get, the more I start thinking about retirement from the rat race and getting to a point where I can stay at home and enjoy our permiculture homestead. I don’t ever see myself totally retiring, that would just drive me crazy….

So, on our journey, Colleen and I decided to look into aquaponics, we really like the idea of being able to produce year round, it’s up off the ground which will save our backs, and you just not growing food, your raising fish. Did you know that on a per acre basis you can raise more pounds of protein per acre with fish than with any other animal source…?So, with anything we do here on the homestead we start small, it is always better to make mistakes on a small scale rather than after you have thousands of dollars wrapped up in a green house and aquaponics system. So,Colleen and I built a small system that is in our kitchen. We have grown tomatoes in our system, in fact, the tomatoes we grew over the winter were suckers from the plants from last year’s garden and now they are in this year’s garden producing great, so those tomato plants are two years old! I think we will transplant some suckers of the plant and go for three years!

I did some research and found a gentleman named Travis Hughey. I tell ya he has thought through the design of a small barrel system that works great. He has a complete system which includes a design book, free of charge just email him at aquaponic70@yahoo.com and he will get it out to you. The title of the book is Barrel – ponics, it’s a very informative, not only do you get the system design he gives you all the do’s and don’ts. I would recommend his system for anyone just starting out, and remember start small!
Another person I would like to mention who has been a great inspiration and mentor in aquaponic is Brooklyn Saint Mickell. He is a little different, but knows his stuff when it comes to aquaponics, check him out on You Tube or at his website here.
So let’s get to what we did to get started! We live in a log cabin so space is not an abundant thing in here so it had to be compact, yet have enough room so we could actually grow something, boy, I tell ya we had big plans!!! We crammed the planting beds full and we made our first mistake!
Basically, what you will need to complete this project:
I am not going to give out measurements because ours is custom built to fit in the space it was designed for. I would suggest you do the same, and I would also suggest you build it indoors, we as homesteaders are very busy in the summer and have more time to tinker in the winter months. Aquaponics is something you need to tinker with, it is not an exact science (there are people that will argue with me on this) so make sure you have the time to play with it!
Start a sketch of what you want the system to look like and how it is going to fit in your space, ours rests on a lower counter tucked into a corner next to a cabinet and wall. Build your support systems, it needs to hold the flush tank and the grow beds. Make it beefy… the water and the pea gravel are heavy, make sure you have plenty of support.
Flush Tank:

Install the toilet flush mechanism in the bottom of the flush tank
View inside the Flush Tank:
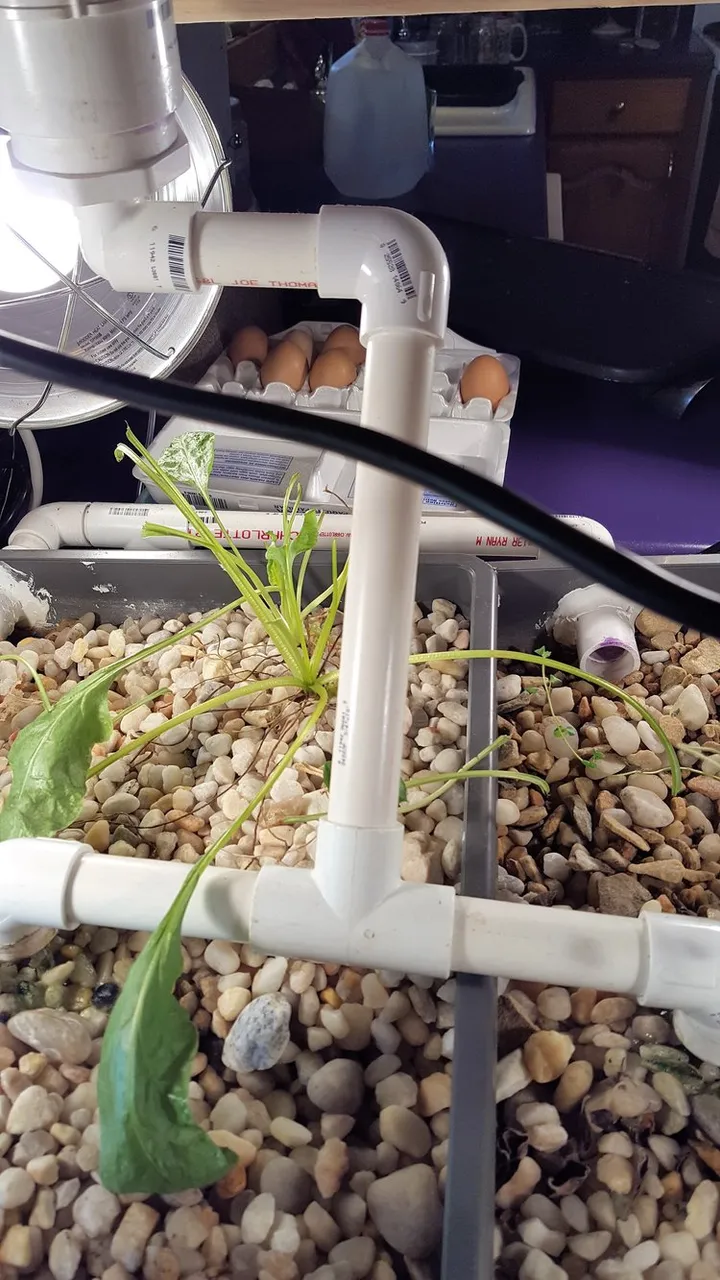
Once the support is in place go ahead and set your flush tank, grow beds and fish tank. The start the plumbing, run a PVC line from the flush tank down to the fish tank with a tee inserted just at the top of the fish tank to accept the flex line ruining from the pump.
Install a valve at the top just before the flush tank and a valve below the tee, this will help regulate the flow of water into the flush tanks (we will cover this later).Install drains in grow beds, I would suggest installing a bell syphon you can see how to build one here.
View of Drain to Grow Beds:
I did not use a bell syphon, I used the drain system in the barrel-ponics system and had some issues with stone getting into the drain and clogging this up. When we go with a larger scale we will definitely be using bell syphons. You could also use a bell syphon instead of the flush system we used, it probably will be easier in the long run to use a bell syphon
View of Drains into the Fish Tank:
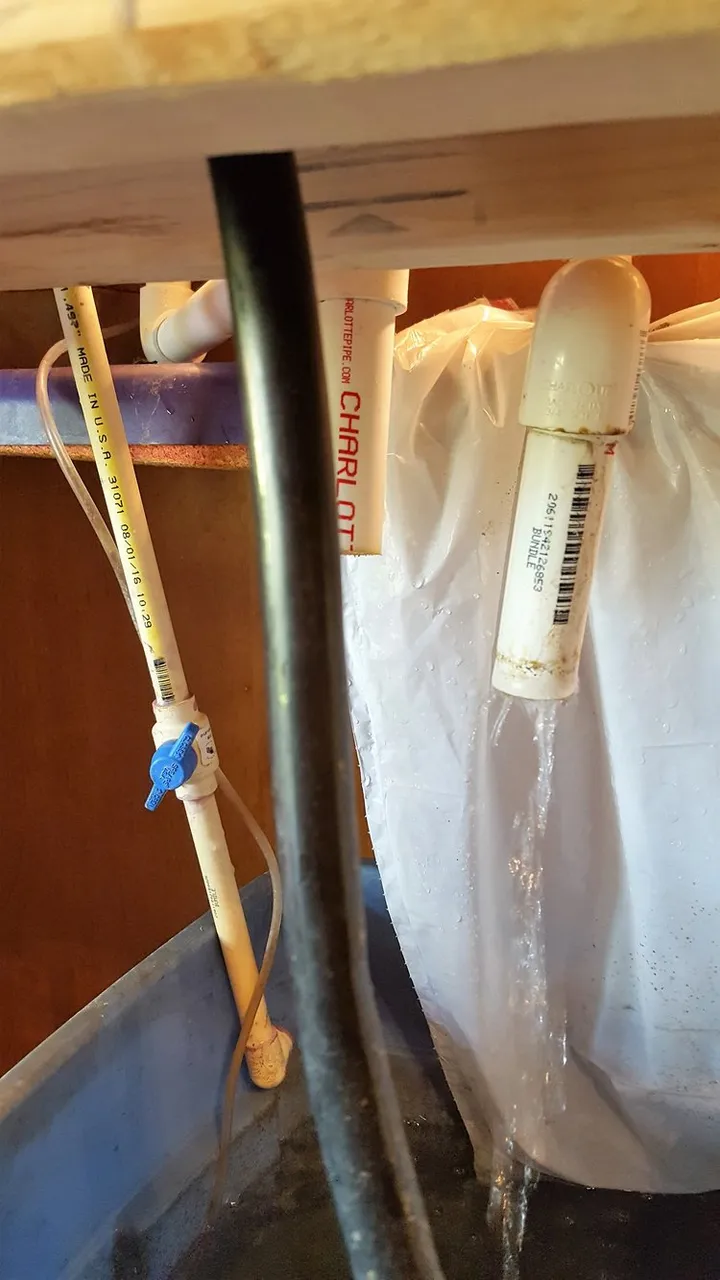
Install emergency overflows, for both the grow beds and the flush tank and pipe them down to the fish tank. The last thing you want is a big mess on your floor, you probably will never need it but if you do you will be happy you installed it! (It’s a Boy Scout thing, Always Be Prepared!)
Now pipe the flush tank drain system, this takes some thought. Cut a piece of heavy gauge wire (I used a coat hanger) bend it so that it has a center point. Drill a small hole near the top of the tanks and slide the hanger though it. On one side, hook up your water bottle (with the bottom removed) and on the other side, hook up the flush mechanism.

Flush Bottle / Fills then the wait of the water in the bottle activates the flush mechanism in the flush tank
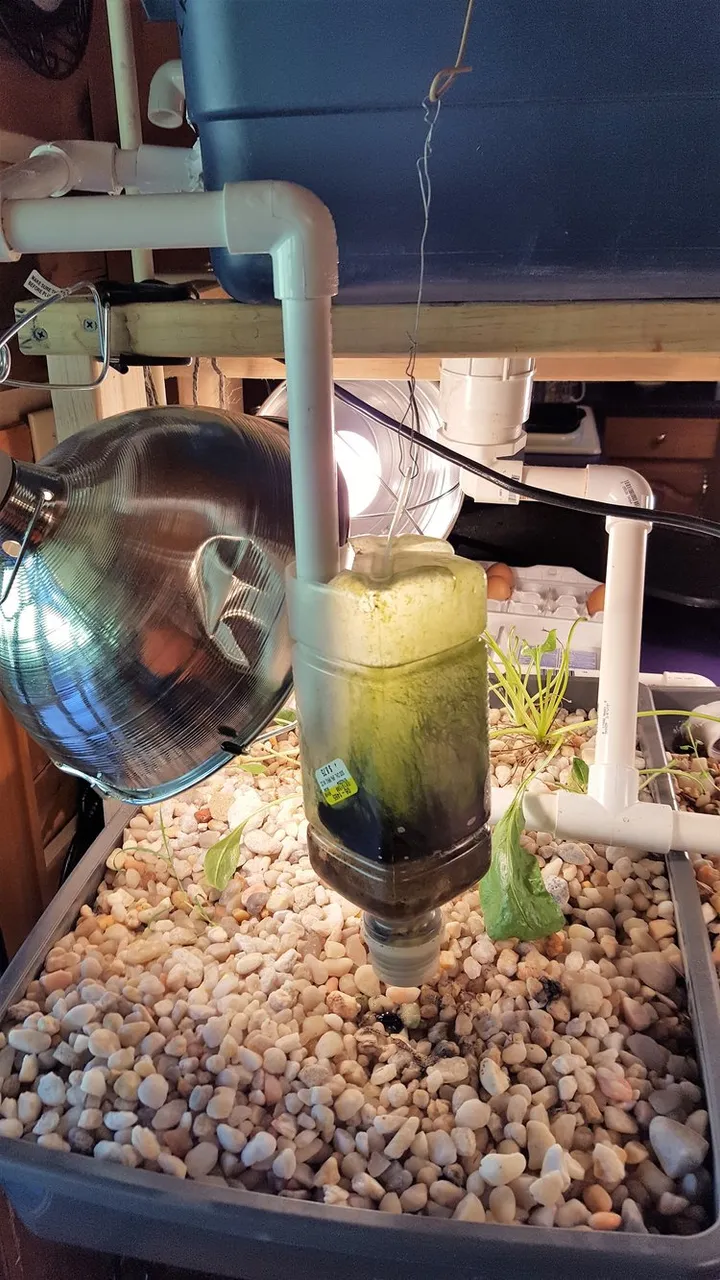
Take the cap off the bottle and drill some holes in it, start small, as this is when the tinkering comes in!Ok, add your pea gravel and water. Fill the fish tank to just about 3” from the top. Fill the flush tank to about 2” below the bottle syphon. Turn on the pump, for now, close the bottom valve and leave the top valve wide open.

The goal is to have the tank flush every 20 to 30 minutes, you need to have enough water flow into the grow bed to come up to 1” below the top of the gravel. It took me 4 or 5 hours to get it just the way I wanted it, but now that I have it there it runs like well-oiled (or should I say, watered) machine!
We planted our seeds and plants right away and added 20 gold fish about two weeks later.
So, in simple terms this is how it works:
Fish poop in the water, poopy water is pumped up to the flush tank, once the flush tank is filled, it flushes into the grow beds to feed the plants, which in turn cleans the water and that clean water is returned to the fish to poop in again. It is a complete cycle of life right in your kitchen!
Have fun with this, I must tell you the taste of the food is great, better than anything you can get in the store! I can’t tell you how cool it is to just take a couple steps and pick some fresh spinach when its 10 degrees outside!
Let us know if you have any questions, there is just no way for me to give every detail on how to do this, but I am more than willing to help if you reach out!
Best of luck and till next time will see ya’ll!!!
Bob & Colleen Browning
Serenity Valley FarmsMonticello, KY
Check us out at…..Follow us on
STEEMIT: https://steemit.com/@svfarms
And Facebook: www.facebook.com/Serenity-Valley-Farms-167719676966401/
And on Instagram: www.instagram.com/serenityvalleyfarmers/
Check out our Website: www.serenityvalleyfarms.us