Hello dear Steemians and Handymen,
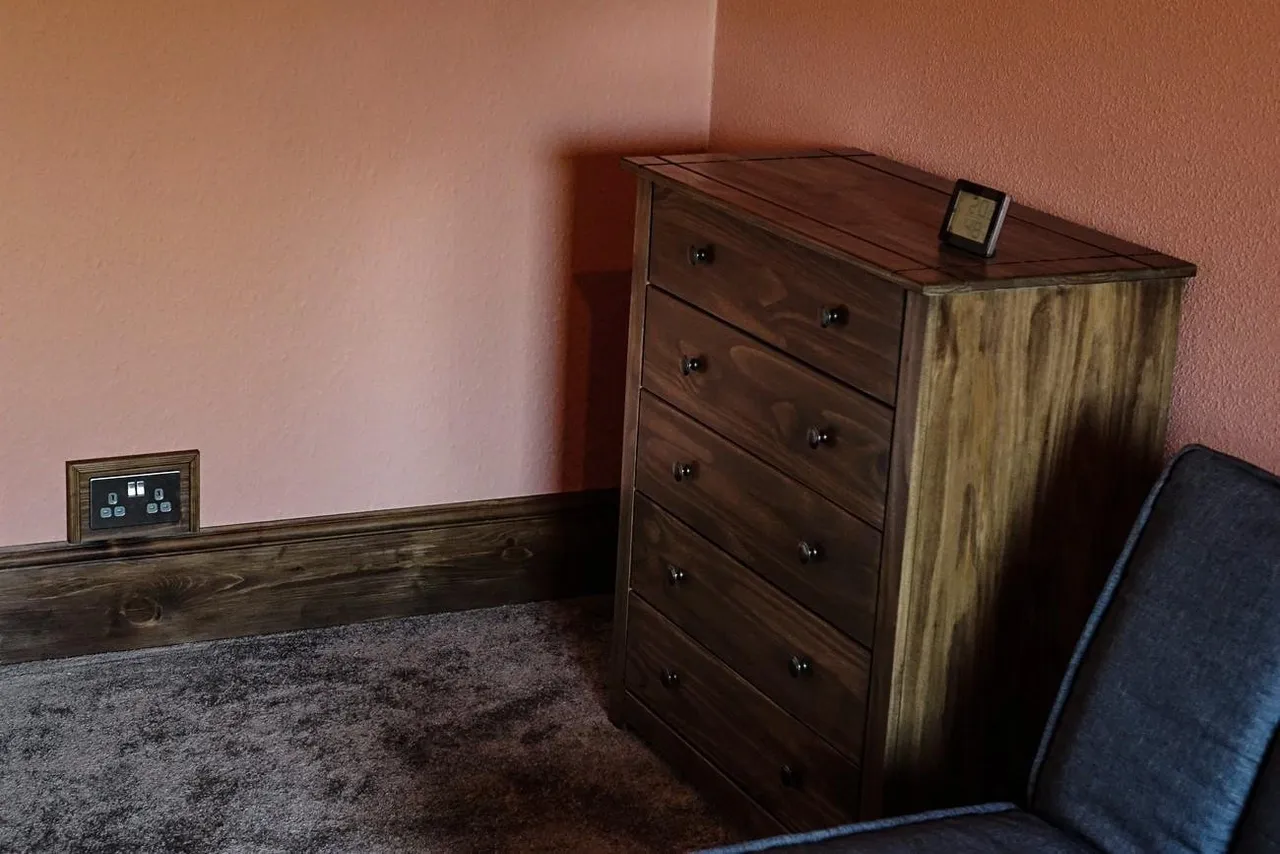
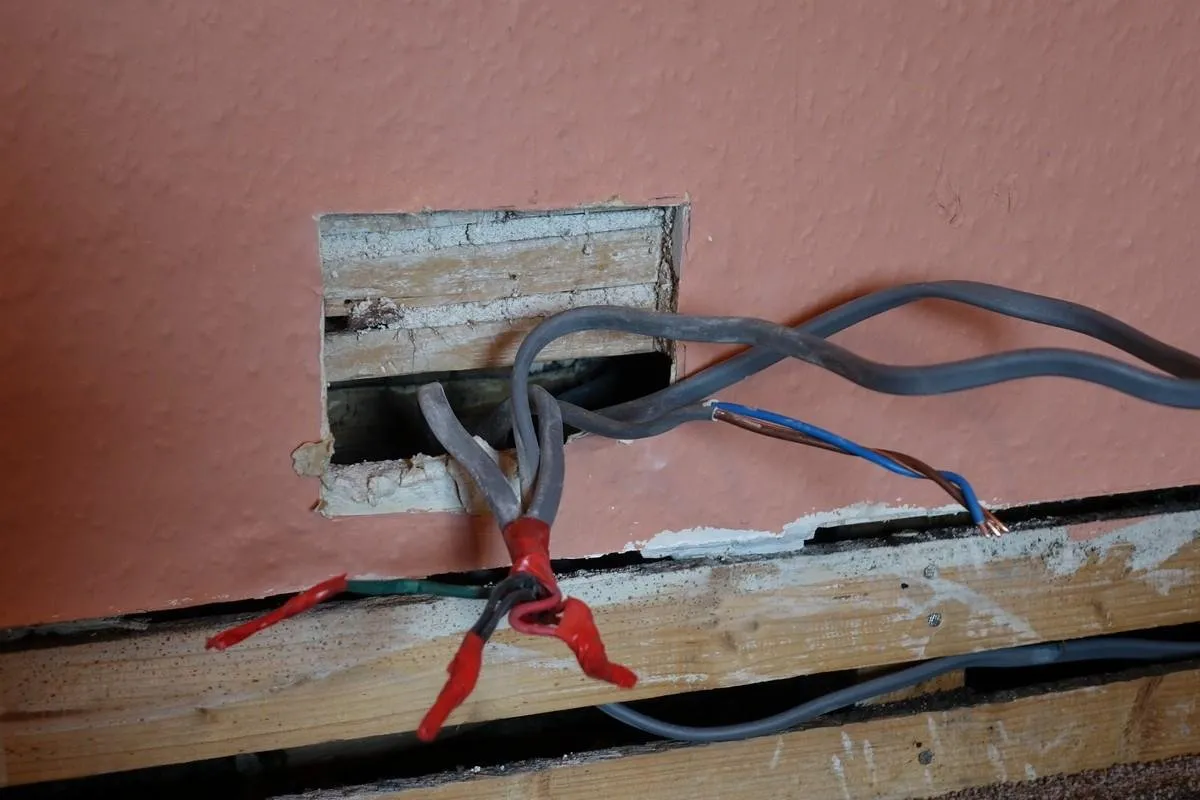
Today I wanted to share my experience of creating my own wall socket. From previous post you may remember the wooden drawer and you may recall the room where it is, that is still on the way of upgrading. Of course, we have already the carpet and the walls are painted the next was skirting board along the walls and that took us 2 weeks until they were delivered, so for now we were almost ready but of course as every room that room needed wall socket, the previous was on the wall but when we removed the old one the wall behind was not really stable and it was a littl gap between actual wall and the first stone wall behind it. That is probably why the previous socket was a bit shaky :)

Problems:
- Behind the socket we found such cable salad, I tracked them from the electric distribution board to that room and used what I needed, one was looking just extra and doing no job so I just divided it. Later that day I found the real role of it, when my wife arrived and wanted to use the telephone charger, the socket in our bedroom that was opposite did not work as well the one socket in our son’s bedroom. So now I new that this extra cable has also its function. Following day I reconnected them and Hooray! We have electricity back!
- The next thing to decide was how to install it if to do it like before on wall I need the firm space, for that I needed to cut large space as then I could use a wooden background that would be fitting and fixed of the wooden board behind the plaster board on the top like you see on picture and the lower one I decided to fix dowel in plaster board.
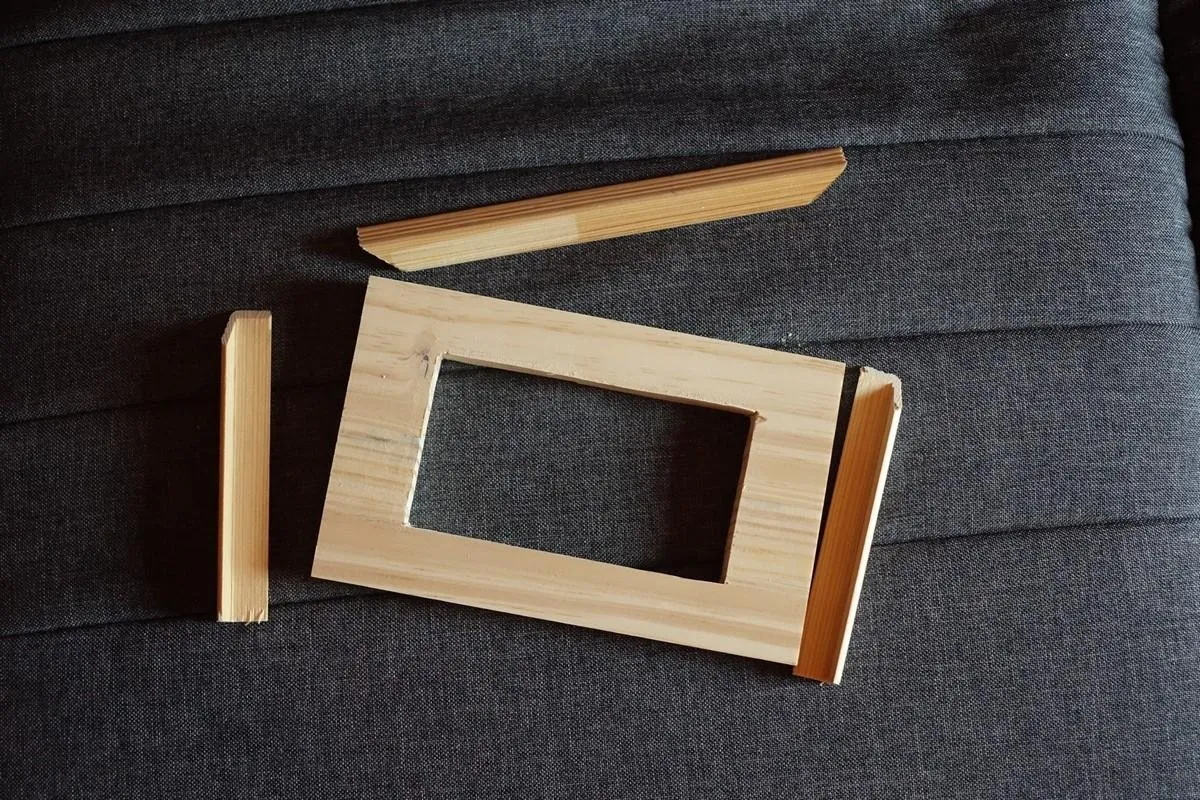
Materials for the Socket board:
So here they are my wooden board with a whole in the middle for the socket itself and few thinner wooden pieces for the edges really decorative. As you remember I used same Wood Varnish like for our drawer and same Semi Gloss finish. The it took about 24 hours to dry up.
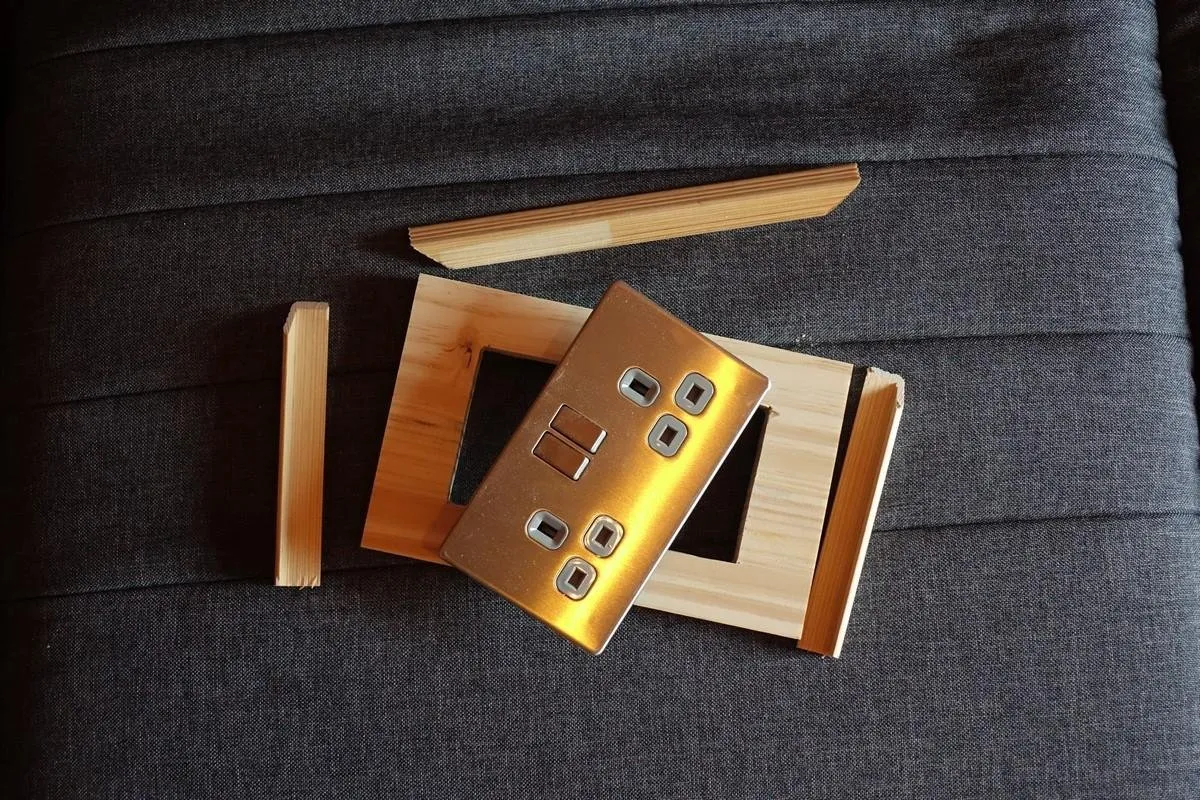
Yesterday it was the day of truth… I screwed my wooden board to the wall and it was really very firm put the socket it and fix it appropriately.
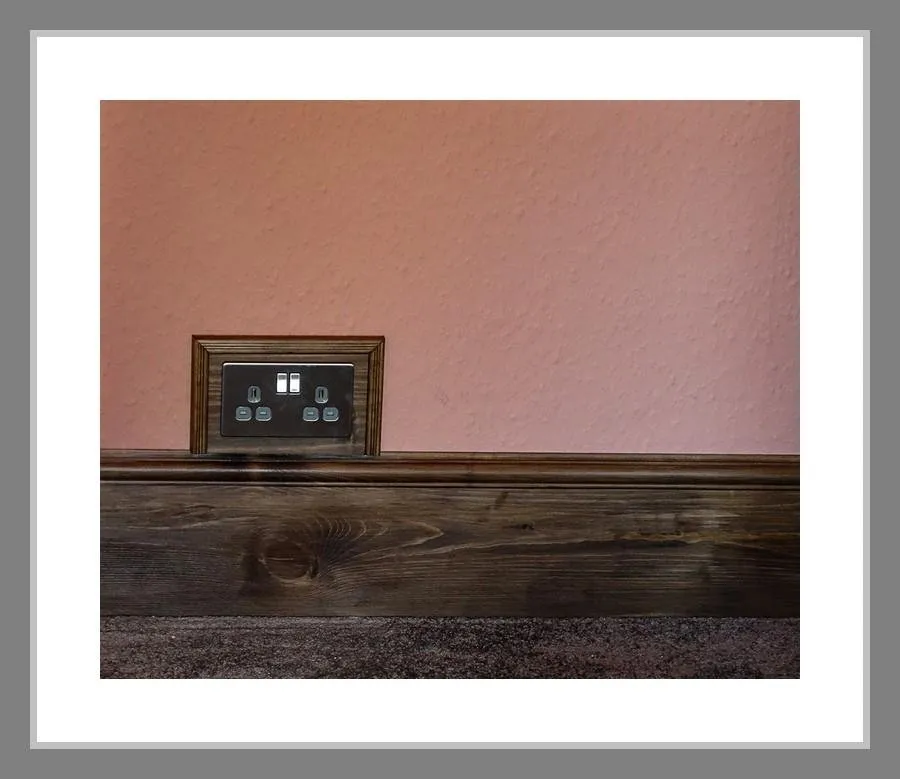
The last the decorative little panels and Voila here it is my wooden wall socket, I decided to make a picture of everything together, the skirting board, socket and my drawer, look like they all come from the same manufacturer.