Hi guys 🙋
Today, I'm here with an update on the drawing of my very able lecturer
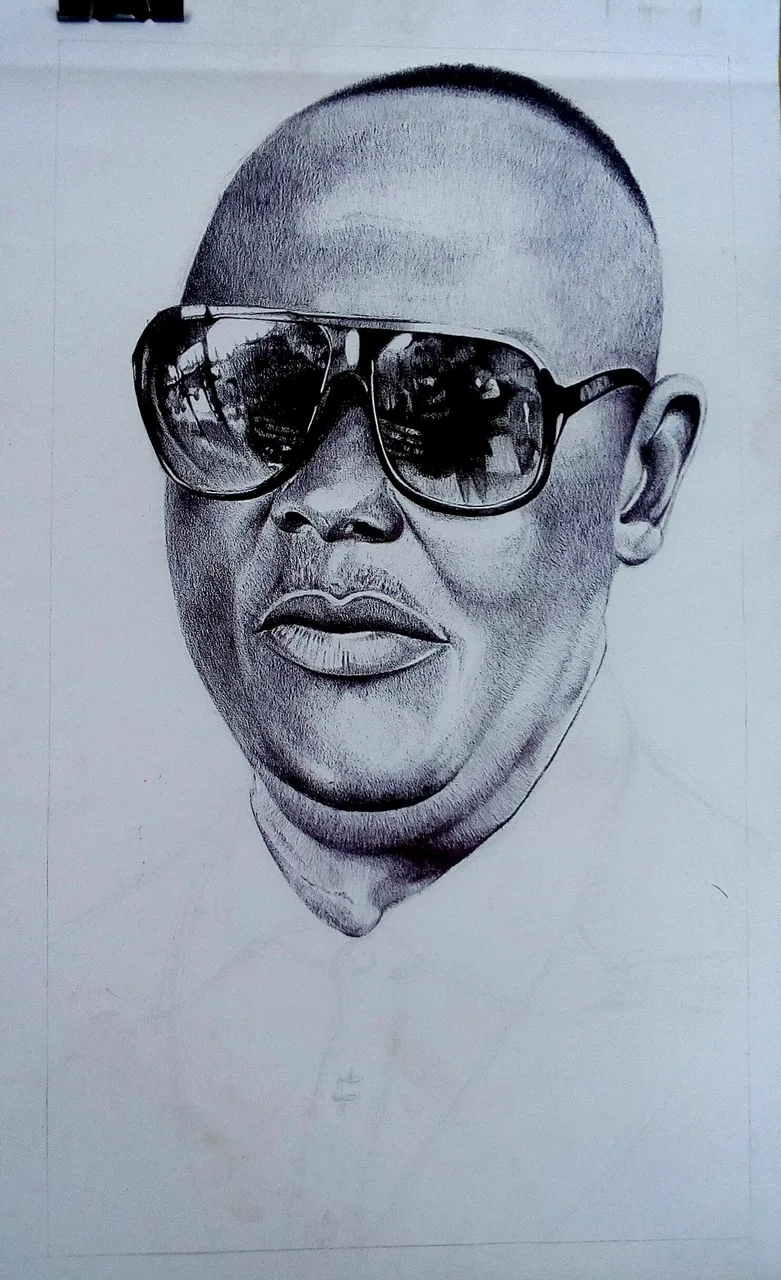
He'd finally decided on patronizing me and yeah that's some load of joy you know; i wouldn't forget to mention that he's the one who makes me rush over my class work in 3 hours 😀..... That has really helped me with accuracy though and I'm glad he works exceptionally hard in helping his students grow.
So now, I'll be sharing the step to step process of making the head; and I'd be sure to keep you updated on the finishing touches which will be done sooner than later.
Here's the reference

Materials used include: pencil, black ballpoint pen and eraser
Pencil for the sketch, ballpoint pen for the actual drawing, eraser for highlights and doing away with errors during the sketching process.
I'd decided to mark this off with the goggles because i found it a bit more interesting being that it had a considerable level of depth and some sort of pictograms in the lens which made it more fun to draw.
starting from where i have the darkest dark, I created some shades while making sure to keep my tones in check so that I'd attain a good 3D effect. Same thing goes for other closer regions.
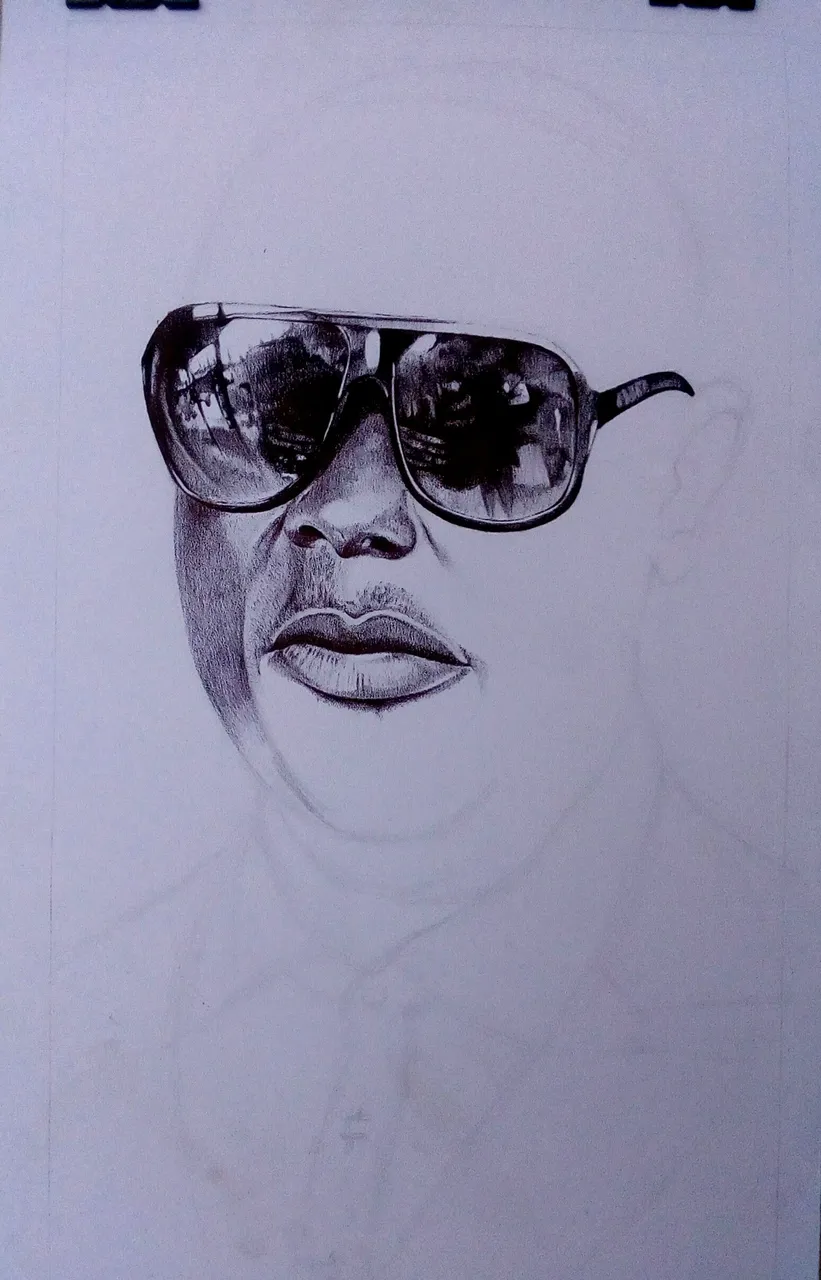
Looking at the reference, you'd notice less concentration of hair in the head region; I'd say that was an advantage as i didn't have to get myself too worked up...... A subtle and careful application of tones on the hair beginning right from the root up to the edge while maintaining a good level of tonal gradation, did the magic.
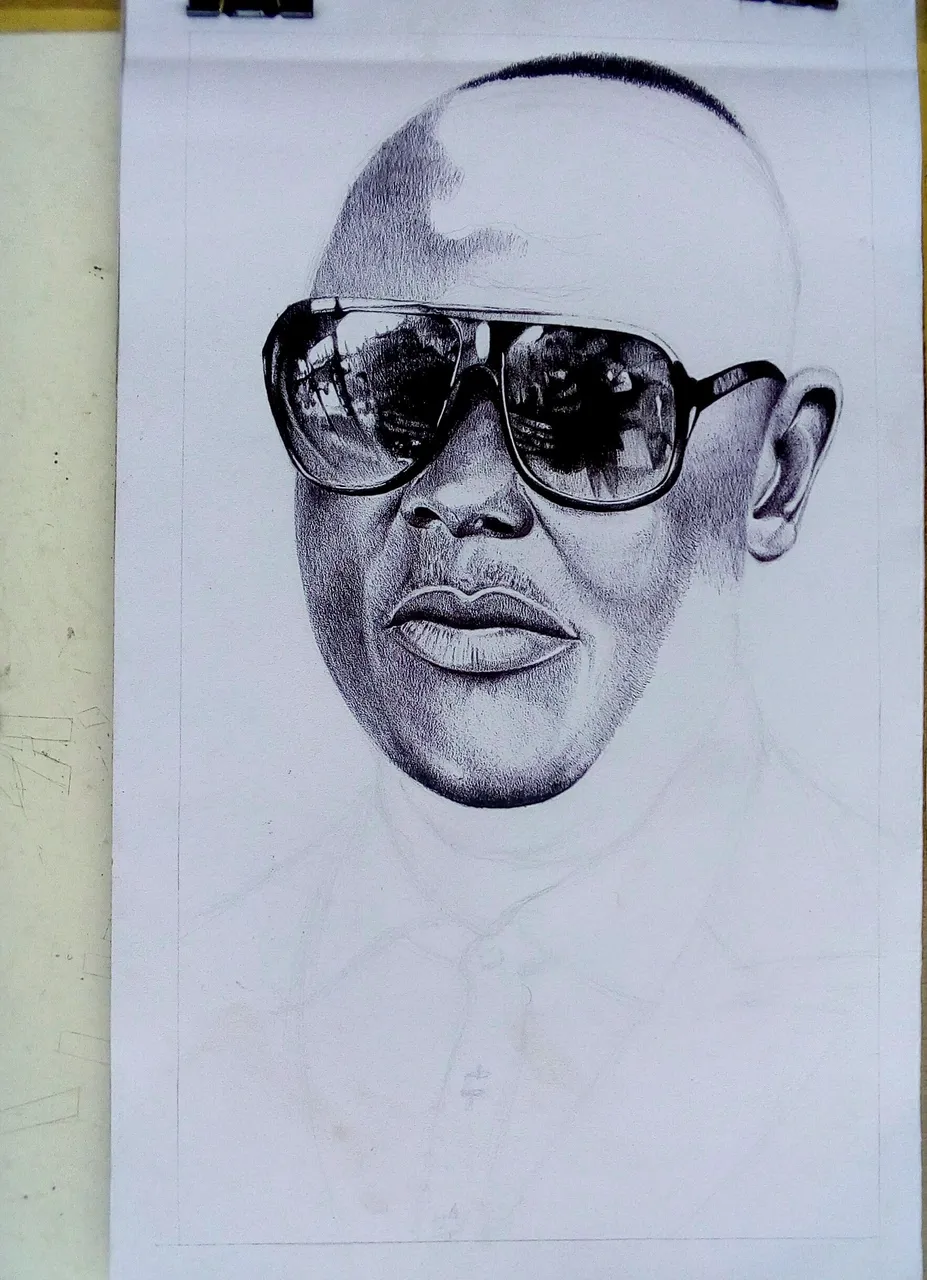
For the forehead, using lighter tones coupled with the cross-hatching technique went a long way in leaving the face with some shades of depth and of course some highlights to maintain a good source of lighting.
And yeah! That's it.... Lookout for the finishing touches which will come your way soon.
Thanks so much for reading; much love

@joyart
Published with: http://busy.org