Last time, I showed you a bit about how I created the set on Daz 3D Studio for my characters, Jerreck and Jilia, whose story will be told very soon. This time, I will take you through some of what I learned about lights and cameras. It turned out to be both harder and easier than what I thought... Let me explain.
Going it alone...
So, I went about trying to create lighting for my two moons. We have a blue boon and a red moon which conjunct monthly (about every 45 days on my planet) for a double full moon. It would be pretty spectacular in person, I would think. We have a fairly purplish light developing, like this.
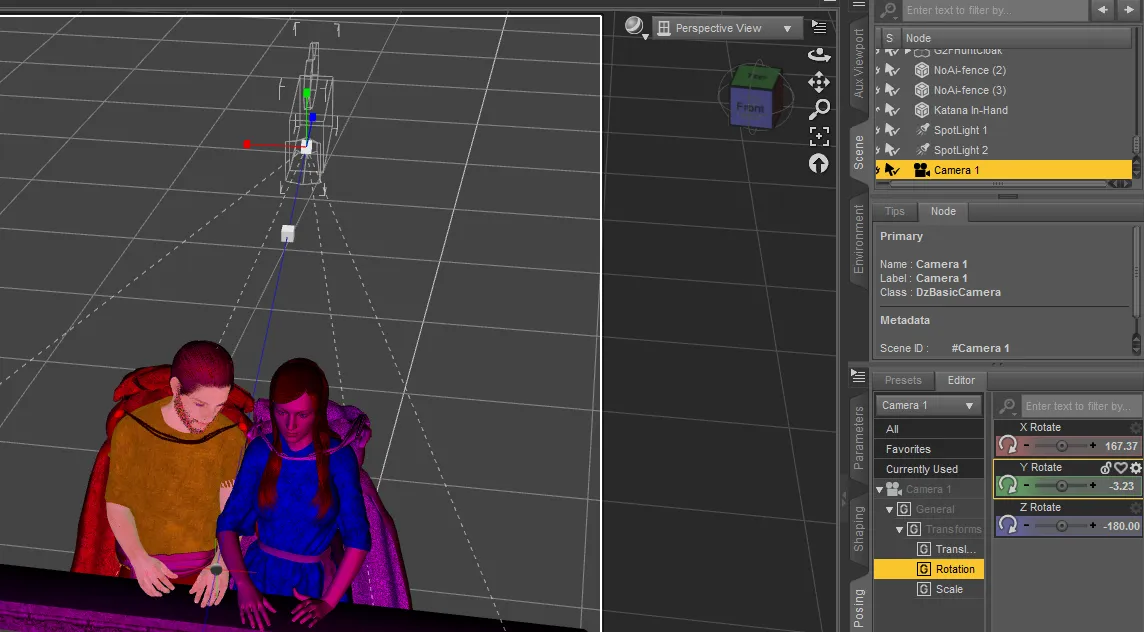
You can also see my camera sitting behind them. I'm trying to create a silhouette with the moons in the background, over the ocean. But when I go to take the picture, I end up with this:
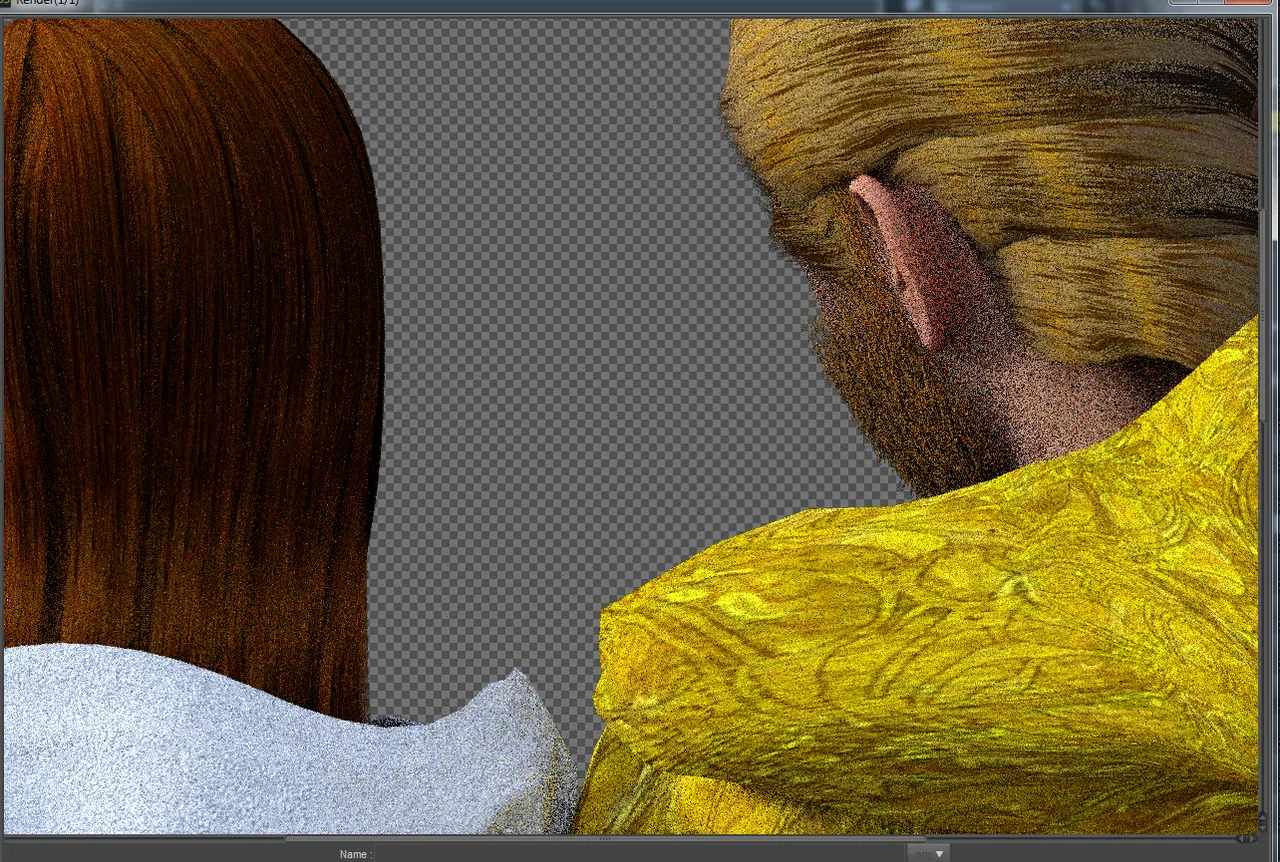
Okay, I forgot to turn of the lamp on the camera... Now, I get this:
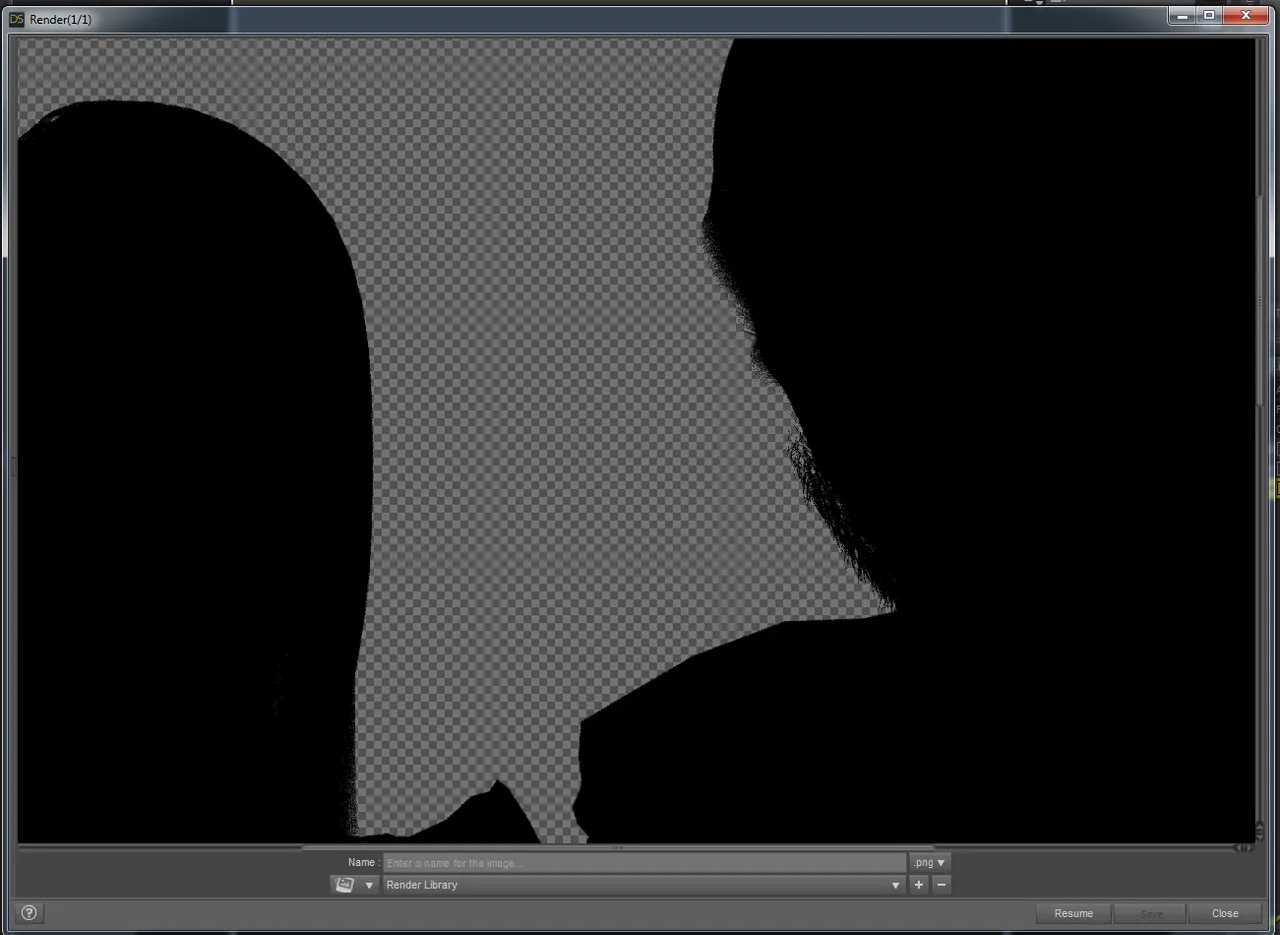
Now, I've got the silhouette, but I have no trace at all of the moon lighting. I took my questions to my Facebook group and thankfully, someone came to my rescue.
As I worked through his steps, I suddenly worked out what my problem was... and the solution was to break down the lighting and camera work into separate entities.
Lighting
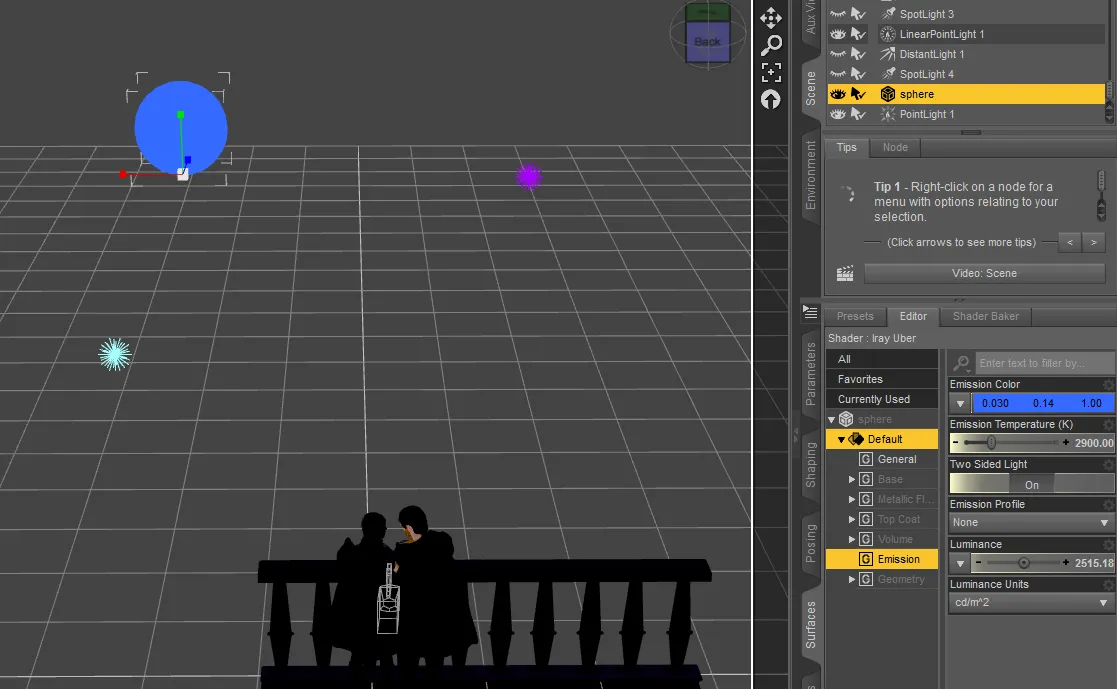
I worked on the lighting first. With the help of one of the people in my group, I used the sphere light which I found in the "primitive" light which looks like a bow tie in the user interface. I played with the settings until it created a light (emission) that was the color I wanted and bright enough to illumine my characters.
I also (as a backup) created two point lights - one is purple, one is blue and concentrated on getting some color to start turning up in my renders.
Here's my lighting set:
The problem is, in order to be sure I know how the lighting is going to behave in the final render, I need to mess with the camera at the same time. The lighting as I see it on DAZ isn't necessarily going to be very similar to my final render.
I'm working in a low light situation, so I need to think of my camera in terms of what I would do if I was using my DSLR to take a similar picture. So, I find the settings for the camera and turn up the ISO and down the speed until we start making better use of the low lights. Here is what I'm looking at:
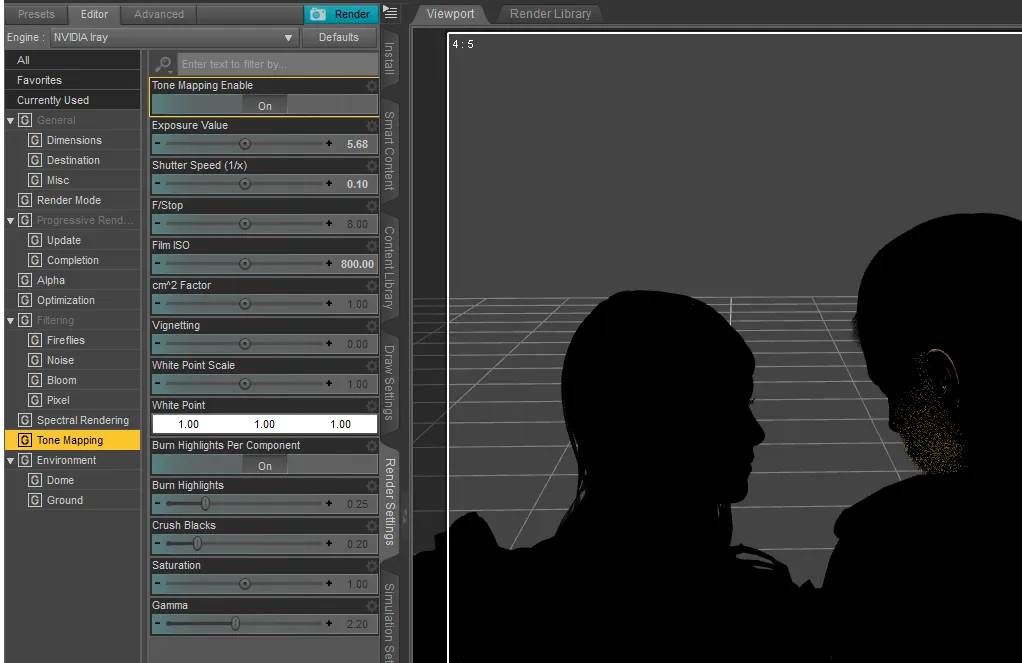
I played with the settings quite a bit while trying to work out what I wanted. Sometimes it was too bright, sometimes, not bright enough. I moved the lights around a bit as well, eventually turned off my two point lights and just went with the sphere. I used an ISO of 800 and an F stop of 1/10.
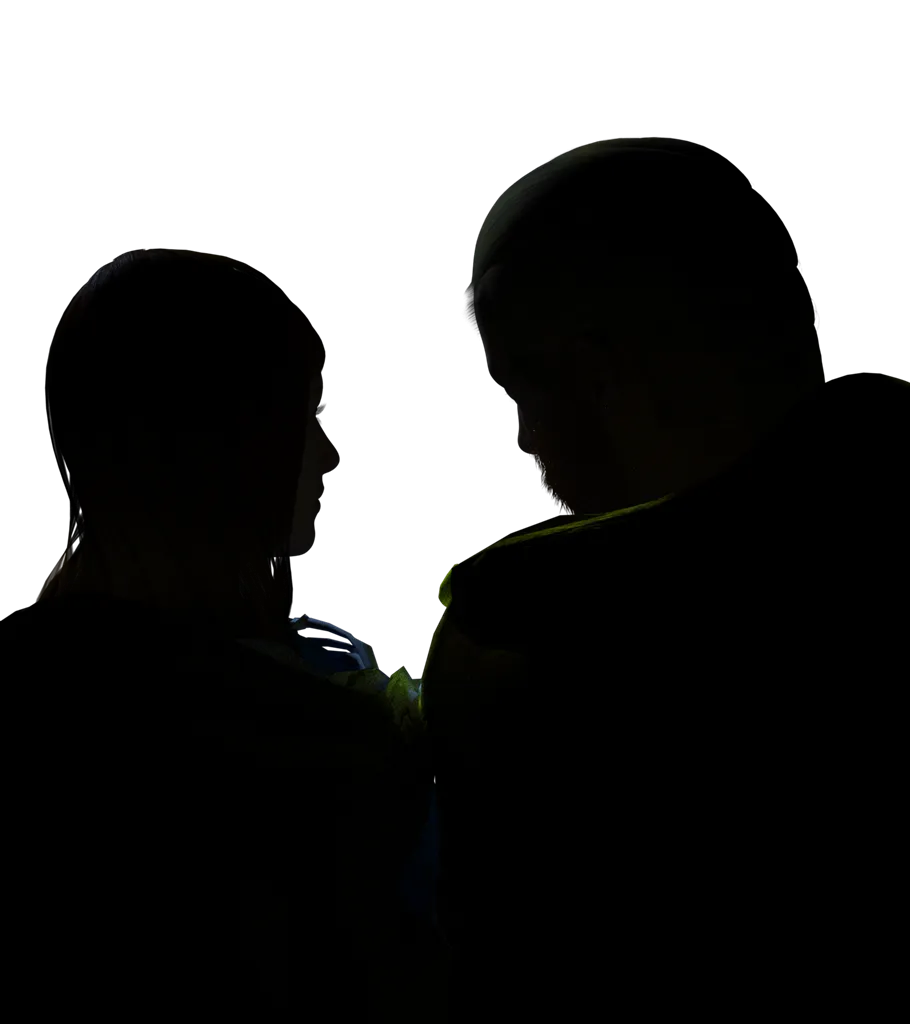
Here is the final render which I decided to use.
Next time, I'll show you my "post-work" - as I take this image and turn it into my cover image for my book. That work will be done on GIMP and then on Photoscape.
Other parts of this tutorial: part 1, part 2, part 3, part 4
Past tutorials:
- Map Development for Alacantis (on GIMP), part 1, part 2, part 3, part 4
- Cover image for Acting the Part
- Cover image for Brighid's Blood (part of the update).
- Cover image for Birth of the Neví, part 1, part 2
- Map Development for Velantia, part 1, part 2, part 3, part 4
- Map Development for Kranisis, part 1, part 2, part 3, part 4
- Cover Image for Name of the Neví, part 1, part 2, part 3, part 4
Photo salvages:
Droplet, Bellis Daisy, Baby Blue Flowers, version 1, version 2, 2-Spot Ladybug, version 1, version 2, Bridge Over River Kennet
Coloring Tutorials & Mini-tutorials:
Zen colouring #43, Zen colouring #39, Zen colouring #38, Zen colouring #37, Zen colouring #36, Zen colouring #35, Zen colouring #34, Zen colouring #33,
Butterfly Colouring #11, Butterfly Colouring #10
Miscellaneous Artwork:
Pumpkin Patch Harvest, Painting Wooded Easter Eggs
Crossposted at Steem, Whaleshares and WeKu.
Lori Svensen
author/designer at A'mara Books
photographer/graphic artist for Viking Visual
verified author on Goodreads
find me on Twitter
also on: Whaleshares, WeKu


Join us in the Official Whaleshares server in the text channel "the-phoenix-project"