This is my tutorial taking you through some of my creative process as I use DAZ 3D Studio, GIMP and Photoscape to create the cover for my new book which will debut in only a couple of weeks, so I'm feeling the deadline now!
I see it's already been a week (!) since I posted part 3.
Today's post is about creating my scene and posing my characters.
One of the coolest things about Daz is being able something already created by something else and tweaking it to fit your needs.
Note: always check to make sure what you use is available for the use you intend - in my case it has to be available for commercial use since I'm hoping to make some money here on Steem/Whaleshares/Weku and hopefully even sell some books. It's great if you can always credit the original creator, but realistically, that's not always possible, to make sure to cover those bases first...
Anyway... on to
Scenery and props
For me, most of my scene will be created by the background picture, but in this case I wanted to start off with a railing that might make me think of the ship that Jerreck and Jilia take between Irola and Towani City.
I found a fairly basic banister wall thing... (Not sure what to call it right now.) I had to scale it in all directions to look the way I wanted it to look. Here is an unaltered prop (front) and two scaled and moved (translated) props.
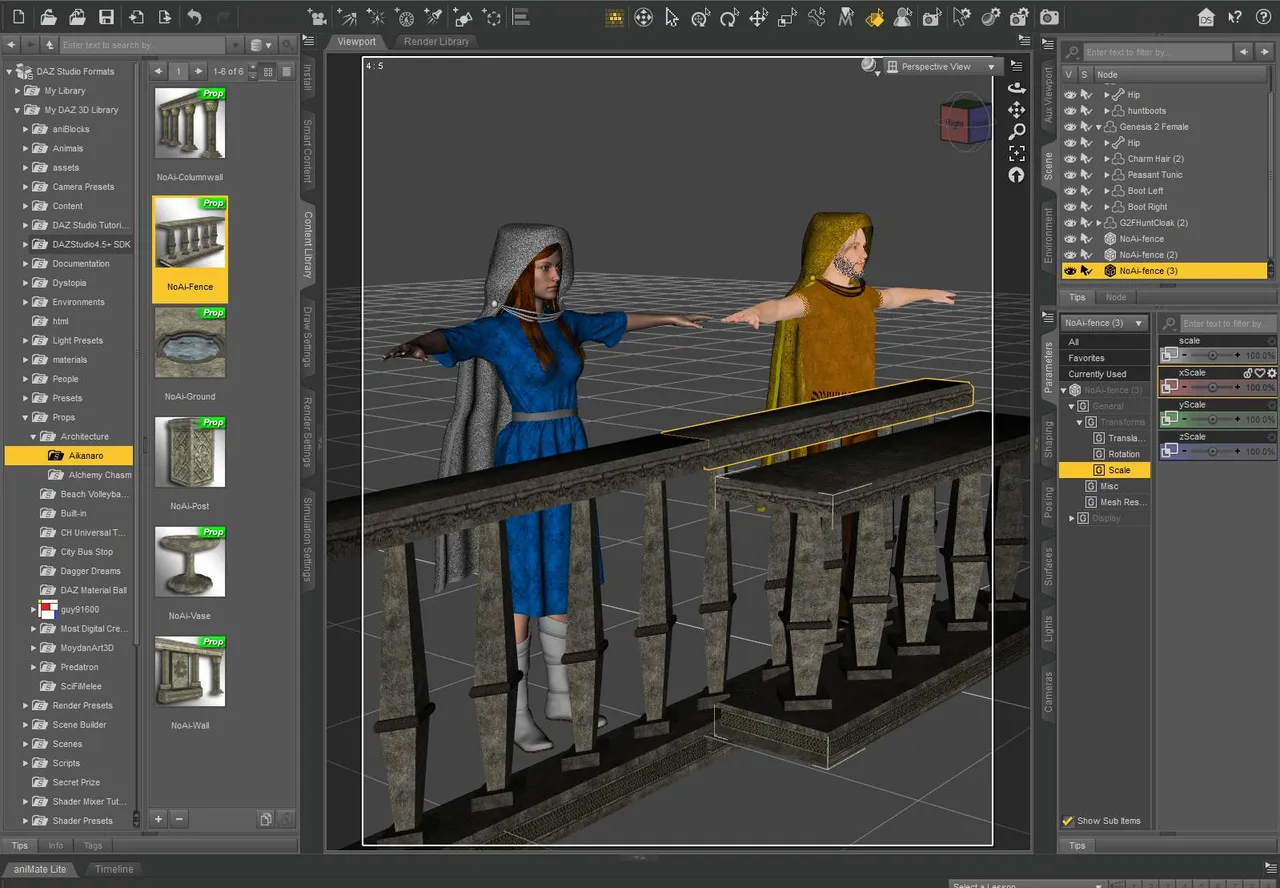
It's slightly hard to look at, but it sort of shows you where I found the item, what it looked like before (wider, shorter, narrower...) and shows you where I found the scale tools (bottom right part of the screen.) The translate (move) tools are in the same area.
At this point, I was fairly happy with my very basic set except that texture doesn't look very much like what you'd find on a ship... so, it was back to altering the surfaces again...
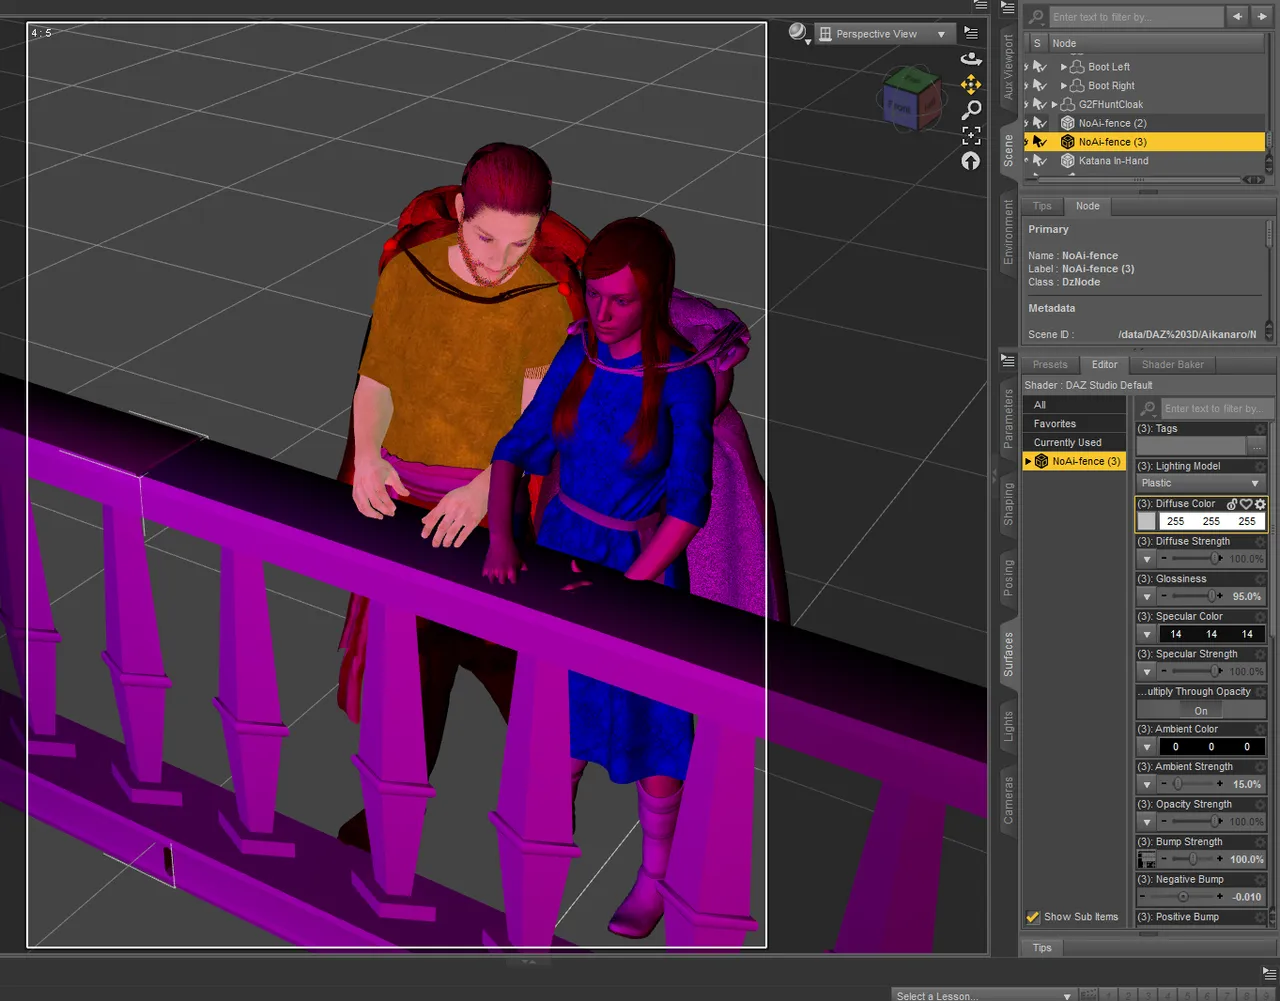
(I did this shot after I started posing my characters - but I was struggling with it to begin with, so ignore the fact that we have some serious collision issues...)
As you can see by my "diffuse" color (lower right section again), I've taken out the special image map and replaced it with white - in this shot, I've already set up some lighting to represent my two moons (red and blue) so it's purple. It looks a tad weird, I admit. If I was planning on taking their picture from this angle, I'd do something more about it, but I'm not.
Next, I used some canned poses to get them close to what I wanted. I also used this time to adjust their heights. Jilia is shorter than Jerreck by around four inches. I'm only guessing here, but it's not essential to be perfect on this.
To do this, all I did was click on Jilia's character and scaled her down. 91% is actually the ratio between the average height of a man (about 5'10 (70 inches) and the average height of a woman (about 5'4, or 64 inches) in the US and UK. Because Jerreck is slightly shorter than average, I think I scaled Jilia down only around 95%.
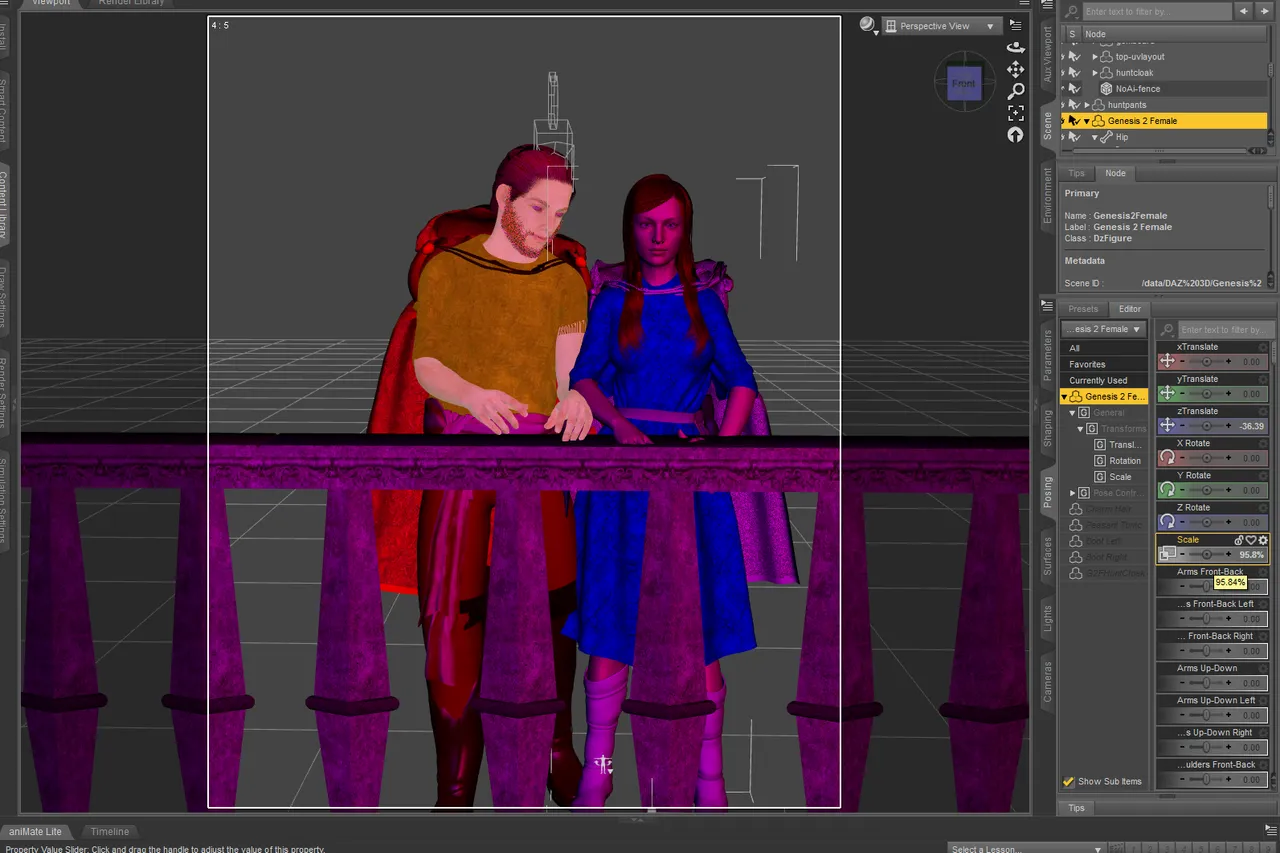
Then I had to click on individual body parts to manipulate their arms so that they wouldn't conflict with the railing or each other.
Moving their bodies this way is quite an education in itself as you have to think about which joint is doing what and whether it needs to bend, twist or flex in order to get it to look right.
At this point (below), I'm reasonably happy with my pose. Because I'll be photographing their backs, I didn't change their facial expressions (there are expressions you can find to download, which really do help a lot.) So, here is what I have.

At this point in the story, they are good, longtime friends, so it's not meant to look particularly romantic, just friendly and tender.
For the purpose of a shot from behind them, I think it's about what I need.
However, as I started the rendering process, I realized I needed to turn their heads so that they were looking at each other a bit - it added a lot more feeling to the scene.
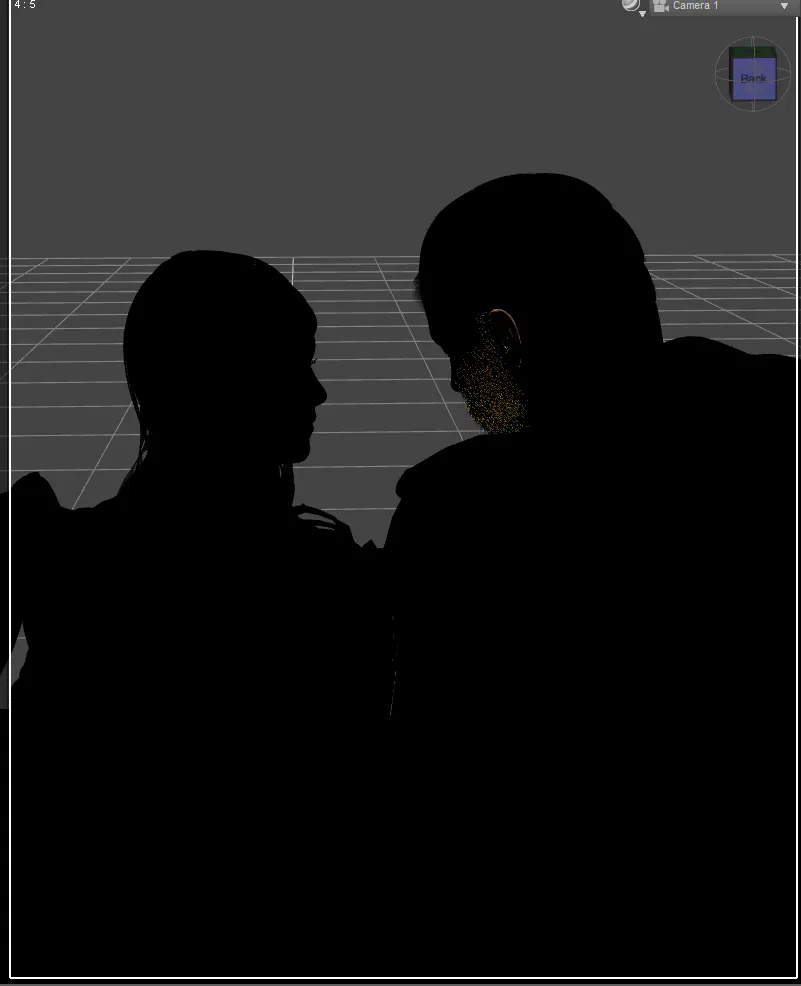
Much nicer, I think.
Next time, I'll show you some of the process involved in capturing the image. Lights and cameras!
Other parts of this tutorial: part 1, part 2, part 3, part 4
Past tutorials:
- Map Development for Alacantis (on GIMP), part 1, part 2, part 3, part 4
- Cover image for Acting the Part
- Cover image for Brighid's Blood (part of the update).
- Cover image for Birth of the Neví, part 1, part 2
- Map Development for Velantia, part 1, part 2, part 3, part 4
- Map Development for Kranisis, part 1, part 2, part 3, part 4
- Cover Image for Name of the Neví, part 1, part 2, part 3, part 4
Photo salvages:
Droplet, Bellis Daisy, Baby Blue Flowers, version 1, version 2, 2-Spot Ladybug, version 1, version 2, Bridge Over River Kennet
Coloring Tutorials & Mini-tutorials:
Zen colouring #43, Zen colouring #39, Zen colouring #38, Zen colouring #37, Zen colouring #36, Zen colouring #35, Zen colouring #34, Zen colouring #33,
Butterfly Colouring #11, Butterfly Colouring #10
Miscellaneous Artwork:
Pumpkin Patch Harvest, Painting Wooded Easter Eggs
Crossposted at Steem, Whaleshares and WeKu.
Lori Svensen
author/designer at A'mara Books
photographer/graphic artist for Viking Visual
verified author on Goodreads
find me on Twitter
also on: Whaleshares, WeKu


Join us in the Official Whaleshares server in the text channel "the-phoenix-project"