Last time, I showed you some of my methodology when it comes to building my mountains for a new continent map - this time for Alacantis - which features in my next book - meant to start on Wednesday, I think.
This time, I'm going to show you how I design my rivers and major bodies of water.
River design
When designing rivers, it is essential that my mountains are already done. You'll see why in a moment.
- I create a new layer called "rivers" which is set above my mountains layer in the layer dialogue box. (I'm using GIMP still.)
- Next, I select a good, solid paintbrush, no fuzzy edges are wanted here. 100% opacity, the size depends on the size of your image. I was using 50 px, but I'm also using a very large map, on purpose.
- Now, I "read" the topography.
Reading the topography
Think about how rivers form... the rain and snow gets blocked up against hills and mountains and the drops are forced to be released from the clouds. Small trickles become creeks which feed into rivers, etc.
- Rivers begin in the mountains
- They find the easiest course to the sea.
- They cause erosion which further entrenches the river to its course (though rivers are also perfectly capable of changing their courses!)
- They join with other streams of water whenever possible.
- Steep rivers tend to form straighter than shallow ones which have the space to meander.
- Don't forget about tributaries, deltas and other water formations.
(Study real-world maps to get more inspiration.)
Here is my map of Tephsa at this point.
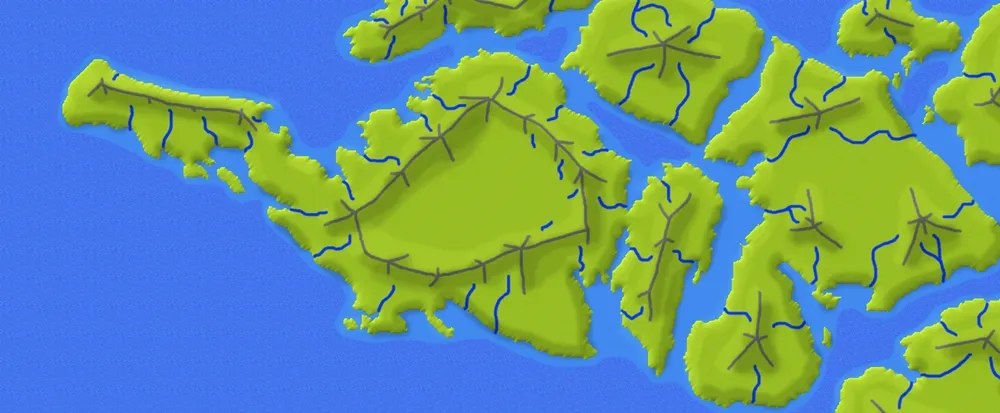
Several points I'll add right here...
- Keep in mind the direction of the prevailing winds. (From the NW on this map.)
- Not all the rivers will show on a map of this scale. Only the major ones.
- Remember that mountains also create "rain shadows" on the lee side. So, in this case, the interior of Tephsa is very dry, but there's a few more drops to squeeze out by the time the clouds hit the other rim. I'm envisioning a land-locked, salty lake here, fed by a small number of streams.
Now that I've got the rivers designed, it's time to think about...
Greenery and vegetation.
First of all, add another layer again - I call this one "forests" which isn't super accurate, but it does the job.
Again, working with the topography, I focus my green areas:
- On the windward sides of mountains and hills
- Along rivers - including swamps
- On the shores - including delta-based swamps and salt marshes
- Agriculture (not really included on this map.)
I used my paintbrush again, using about 50% opacity so that the land underneath is obvious.
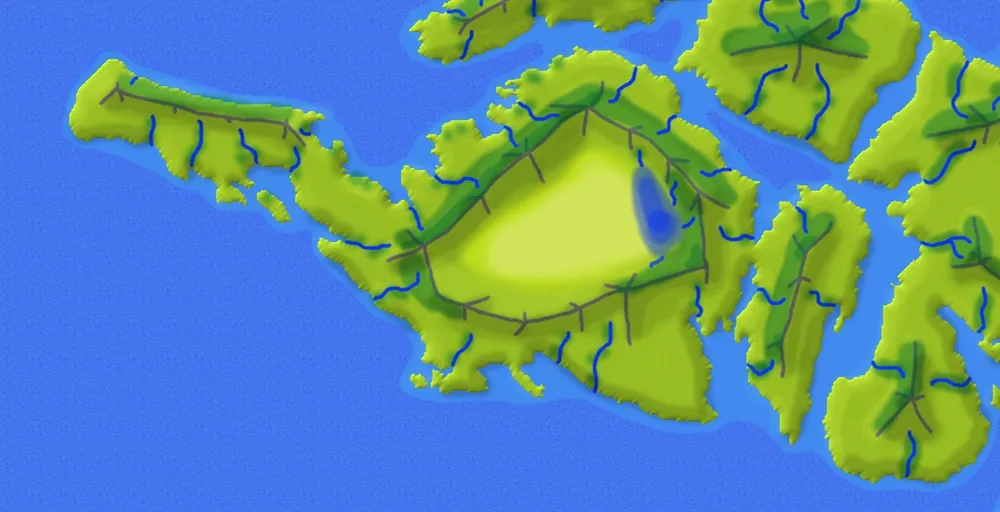
Note: I also made my Interior desert more defined .
Here, again, my map of Tephsa with the green areas added.
Next time, I'll show you how I place my cities, roads and other things.
(This post is crossposted at Steemit, Whaleshares, WeKu and Bearshares.)

Lori Svensen
author/designer at A'mara Books
photographer/graphic artist for Viking Visual
now also on: Whaleshares and WeKu

Banner by @shai-hulud