Full Steem Ahead!
Originally I wrote this guide because the early Windows builds were very slow at mining. Now they are just as fast as Linux mining, but because they are made by volunteers and not officially by the Steem team (at least not yet), some might want to be secure by downloading and compiling the Steem code straight from github while still running Windows. Another reason to run a steemd node in a Linux VM is that the updated Windows builds are not always available past a hard fork. Furthermore, Part 2 of this guide serves as a step-by-step guide to using Ubuntu 16.04 which differs slightly from 14.04 in that we install libboost from the Ubuntu repository instead of compiling it ourselves, which saves time. Now to the guide.
Right click-> View image for any image that you'd like to see bigger.
Part 1: Install Ubuntu Server 16.04 in a VM and connect to it with a terminal
Step 1.
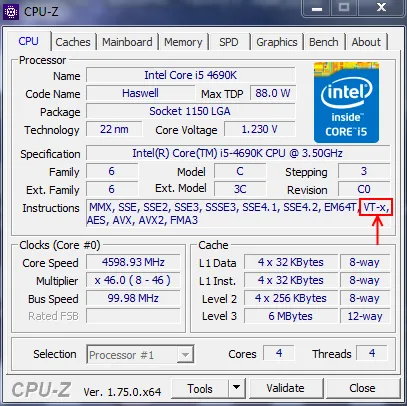
We're going to use a virtual machine (VM) within Windows, so first things first, verify your CPU's virtualization features are enabled. Most CPUs made in the last decade have hardware virtualization but sometimes they are not enabled in your BIOS configuration. Intel calls it VT-x, and AMD calls it AMD-V. To check this, Microsoft provides the Hardware-Assisted Virtualization Detection Tool to check this, and you can also use CPU-Z portable to see if VT-x or AMD-V is enabled as well.
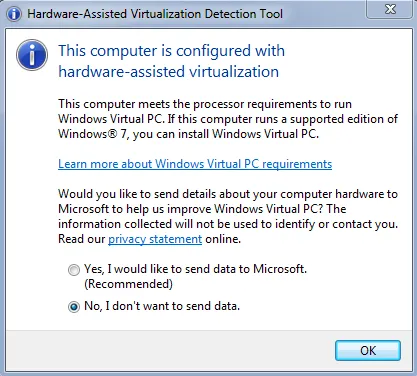
Success, hardware virtualization is enabled
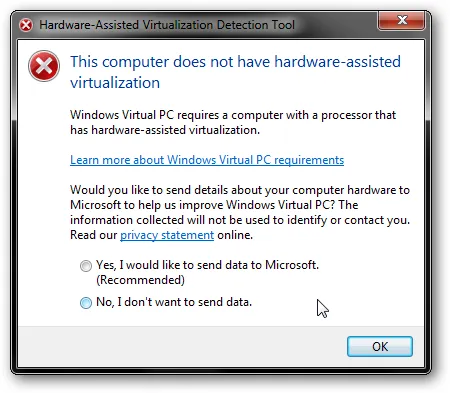
Fail, virtualization needs to be enabled or your CPU does not support virtualization
If your CPU supports it but virtualization isn't enabled, you likely need to enable it in your computer's BIOS/UEFI. Refer to your computer or motherboard manual for how to do this, but it's generally an easy process of rebooting your computer, pressing the Del or F2 key, and hunting around the menus for something that mentions virtualization.
Step 2.
Next, begin downloading the Ubuntu Server 16.04 iso:
ubuntu-16.04-server-amd64.iso (torrent link) [655MB]
SHA256 sum: b8b172cbdf04f5ff8adc8c2c1b4007ccf66f00fc6a324a6da6eba67de71746f6
Then download and install VMware Workstation 12.1.1 Player for Windows [70MB]
Step 3.
With VMware Player installed and the Ubuntu Server .iso fully downloaded, launch VMware Player and click Create New Virtual Machine. The first screen of the wizard asks you for an installer disc image file, navigate to and select the Ubuntu .iso you downloaded. Enter in the user and password for the linux installation, (the pass doesn't have to be particularly strong, also write these down just in case you forget!) [next], and select where you want the virtual machine files to be stored (ensure there's plenty of space on the disk) [next]. Set a maximum disk size, if you have the space 20GB will be fine for a while. You can set it lower to conserve space and if you don't plan on mining long-term [next].

Stop right there! Click Customize Hardware. If you have plenty, set your memory to 2GB. The VM process will only use as much RAM as it needs. Set the number of processors to the number of threads CPU supports. This is equal to the number of cores any AMD or non-i7/Xeon Intel CPU has. If you have an i7 or Xeon you have hyperthreading, so set the processor count to the number of threads your CPU supports. For AMD and Intel, if you're not sure how many cores to set, press CTL+Shift+ESC for the Task Manager, click the Performance tab, and count how many boxed graphs you see under CPU usage history.

When you're done click Close. Leave the "Power on this virtual machine" option checked and click Finish.
Step 4.
The VM will start and the Ubuntu Server installer will boot. VMware will do an "Easy Install" which will breeze through it and reboot the VM. Eventually you will be greeted with a black terminal with the login prompt.
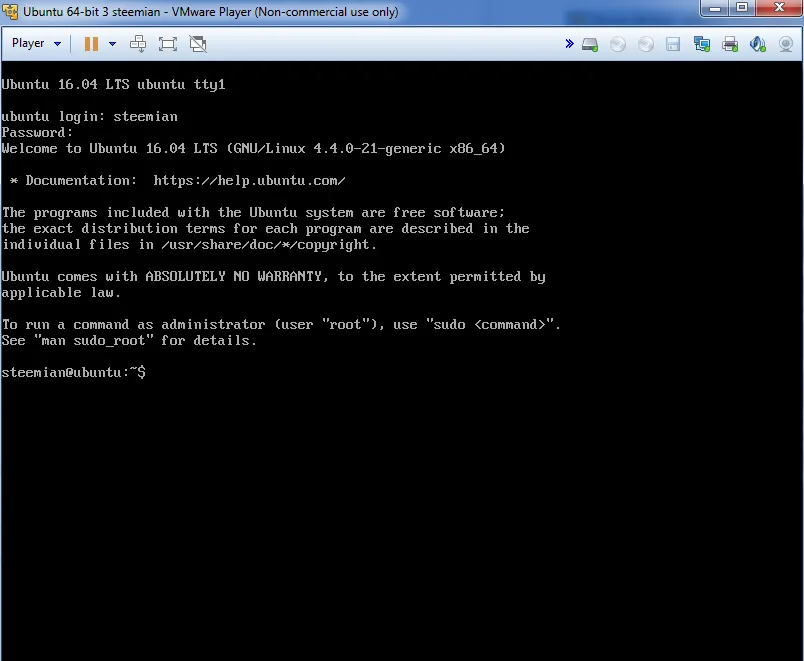
Yay! Installed and ready to go
Step 5.
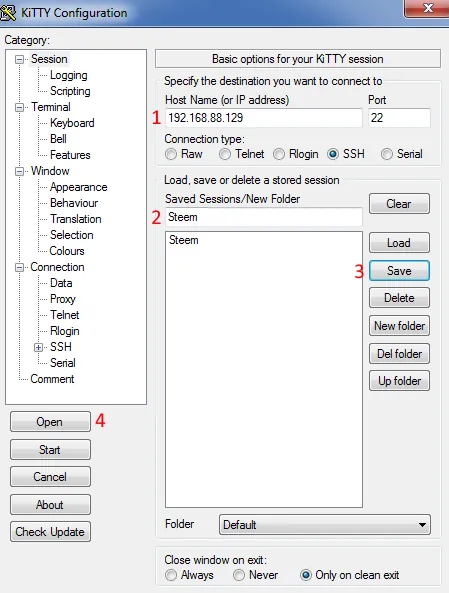
You can run steemd and use cli_wallet straight from the VMware terminal but for a few reasons I recommend using a terminal client. KiTTY is an updated version of PuTTY, a simple but powerful oldschool Windows terminal client. Download it here. Run it, and it will open a Configuration prompt that needs a hostname or IP. To connect to the VM you'll first need to install OpenSSH, go back to your VM terminal and enter sudo apt-get -y install openssh-server and enter your password. Then type ifconfig
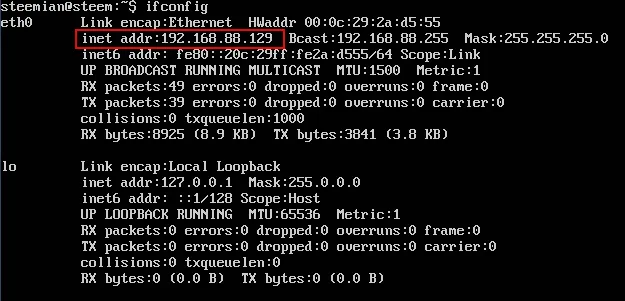
I've highlighted in the red box what you're looking for, the local IP address for your VM. [1] Enter that IP address into the KiTTY configuration and make sure the SSH button is selected. [2] Under Load, save, or delete a stored session type in Steem (or whatever you like) at the top of the box and [3] click Save. Here you can retrieve the session by clicking Load next time. [4] Finally click the Open button.
The first time you connect you will get a "KiTTY Security Alert" prompt regarding the SSH key, click Yes. You will have a terminal screen open that you need to log in to. Enter your username and password.
Part 2. Install and configure Steem
Note with PuTTY/KiTTY and many other terminals, right-clicking will paste text.
Step 6. Update + install dependencies
Logged in to your terminal, enter sudo apt-get update and enter your password. You might see some errors about the CD-ROM, ignore this. Then enter
sudo apt-get -y upgrade && sudo apt-get -y install git cmake g++ python-dev autotools-dev libicu-dev build-essential libbz2-dev libboost-all-dev libssl-dev libncurses5-dev doxygen libreadline-dev dh-autoreconf screen
This downloads all the software that Steem needs to build and run, plus screen which makes interacting with multiple programs easier.
Step 7. Build
Now we're ready to build and run steemd! Next enter this:
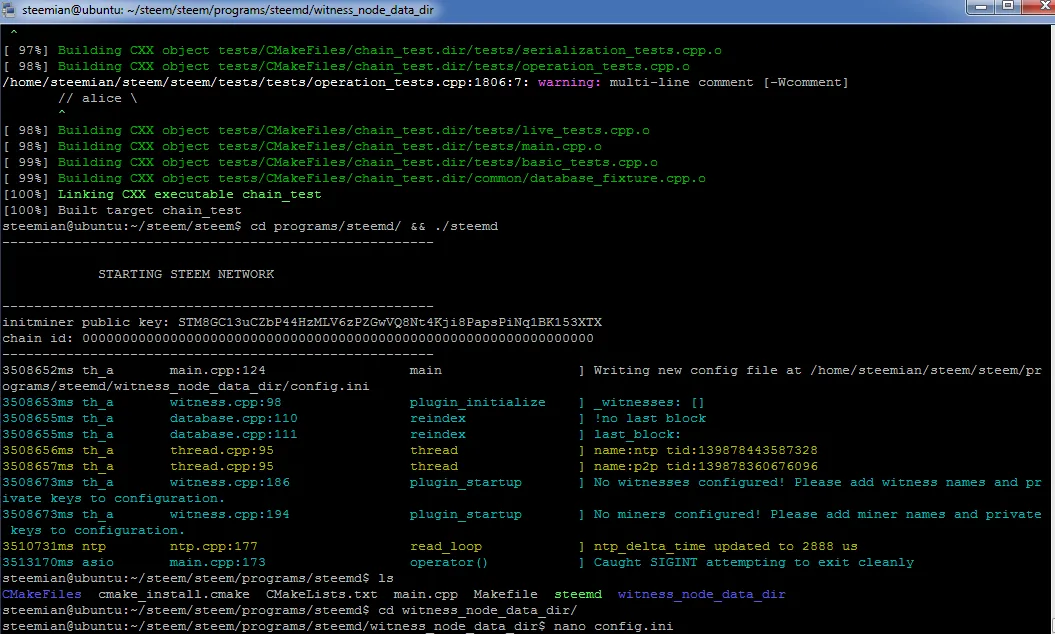
git clone https://github.com/steemit/steem && cd steem && git checkout master && git submodule update --init --recursive && cmake -DCMAKE_BUILD_TYPE=Release -DLOW_MEMORY_NODE=ON . && make && cd programs/steemd/ && ./steemd
You will see some warnings while it's compiling but it's safe to ignore them.
Step 8. config.ini
When the build is done with the above command, steemd (the program that runs the Steem node) will start but it can't do anything without a configuration file yet. Press CTL+C to stop steemd and then enter cd witness_node_data_dir.
Optional but recommended: Witness @steemychicken1 offers an up-to-date blockchain download here: http://steemitup.eu/ which can make syncing much faster. If you somehow find yourself out of it, navigate to your data dir cd ~/steem/programs/steemd/witness_node_data_dir then wget http://steemitup.eu/witness_node_data_dir.tar.gz && tar xvzf witness_node_data_dir.tar.gzand the blockchain will be in the right place.
To edit your config.ini file type nano config.ini which opens it in the command line text editor nano. Tip: the terminal will auto-fill the directory or filename when you press Tab. So to perform the above commands you can simply type cd wit [tab] [enter] nano con [tab] [enter] or even abbreviate the names to just the first letter.
Within nano you can navigate using your arrow keys, home, end, page up/down etc. Again you can paste with right-click. Here's what you'll want to enter in config.ini:
First copy and paste the whole list of Steem seed-nodes, available from steem-id's post here https://steemit.com/steemhelp/@steem-id/updated-steem-seed-node-list
Then add rpc-endpoint and witnesses:
rpc-endpoint = 127.0.0.1:8090
witness = "youraccountname"
witness = "yourotheraccountname"
witness = "etc.etc"
Because of the mining queue system, you will want to make at least a few accounts for mining. Once a miner account gets queued, the machine can't mine for it anymore and will otherwise sit idle, so you have a handful of accounts as secondary, tertiary, etc accounts for when the above accounts are already queued. Something to keep in mind is steemd prioritizes accounts by alphabetical order. So if you want your primary account to mine the most SteemPower, make sure your secondary accounts come after it in alphabetical order. In the example above, the etc.etc account would be first to be submitted when steemd solved a proof-of-work despite being listed last. If you are making a new account by mining, make sure it is not already taken by visiting https://steemd.com/@your-desired-account and seeing "Page not found".
When mining, for every witness account you set, you need a miner = line as well.
miner = ["youraccountname","5WIFKEY"]
miner = ["yourotheraccountname","5WIFKEY"]
miner = ["etc.etc","5WIFKEY"]
You may use the same keys for different accounts as long as you are mining them on the same machine. Personally I use different keys for every account.
For all of your keys be sure to back them up, print them, etc.
If you have an account already, made with a Facebook or Reddit verification, you can get the key you need to mine to that account with by going to your Permissions page on your Steemit profile: https://steemit.com/@yourusername/permissions and clicking show. Side note on Steemit password security: How to login to Steemit with your posting key (and why this is important).
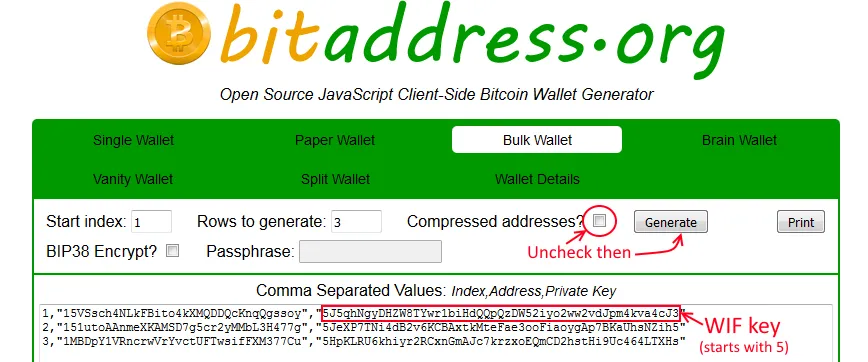
For new accounts, you can obtain secure WIF keys by going to https://bitaddress.org and saving the HTML to your computer. You then open it locally, do the mouse entropy, then click Bulk Wallet, uncheck the compressed address option then click Generate. The WIF keys are on the right, below.
Finally you must set mining-threads = X where X is the number of threads your CPU supports discussed earlier. Don't set it for less, we're going for max performance remember?
mining-threads = X
Press CTL+O to save, press enter to keep the same config.ini filename, then press CTL+X to exit.
Part 3: Run steemd and mine!
Step 9.
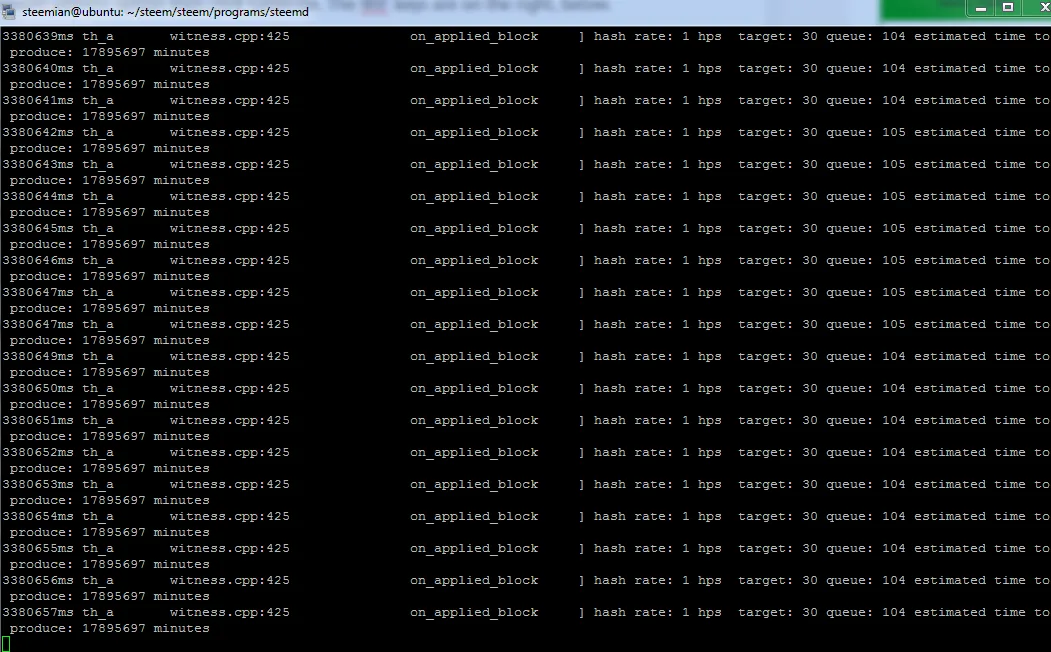
You'll be in witness_node_data_dir so type cd .. to go back to the steemd/ directory and then enter screen -t steemd ./steemd and hit enter. If all goes well steemd will start and it will begin to sync or replay if you downloaded the blockchain via .zip. You will see many messages scroll by that include hash rate: 1 hps. When scrolling fast, this means it is syncing the blockchain.
From here you can either wait or if you want to check on the progress on the sync you can make another screen by pressing CTL+A then C. Then start the cli_wallet with cd ~/steem/programs/cli_wallet/ and ./cli_wallet. If you wish to use the command line wallet you can make a password, but it's useful just to see where you are in the sync. Type info and look at the line near the bottom that says "head_block_age":. This is how far behind in the chain you are. Once that time is down to the seconds, you should be synced. To navigate to the previous screen in console, press CTL+A twice in a row. For navigating more screens, press CTL+A then " and select from the list.
Once synced, your node should start mining and look something like this:
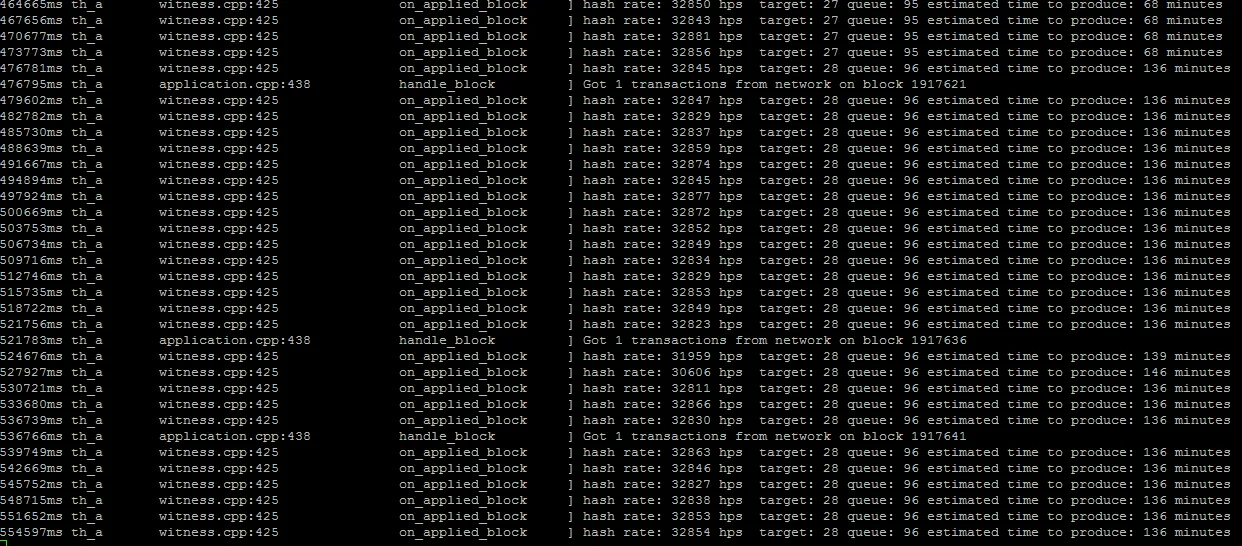
Yay mining!
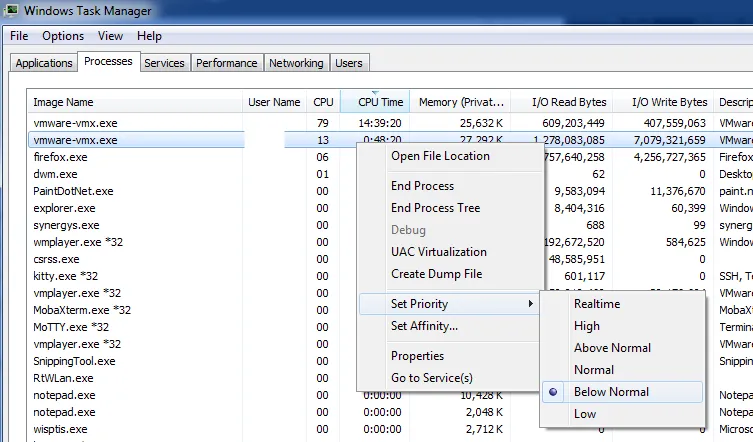
Step 10. Optionally set CPU priority
To keep your Windows machine more usable when running a mining node, you can optionally set the CPU process priority for the virtual machine process. Press CTL+Shift+ESC to open Task Manager. Find the virtual machine process then right-click -> Set Priority -> Below Normal (or) Low. When idle, your machine will mine as fast as it can, but when programs need the CPU, lower priority will allow them a little more breathing room.
That's it! Easy huh? :P
When you solve proof-of-work you are entered into the mining queue. You must leave your node on while queued to actually get the SteemPower reward when you generate the block and leave the queue. To track your mining you can visit your user page on steemd.com and also see the https://steemd.com/witnesses page to view the whole miner queue. Be sure to track how many SteemPower you accumulate on your mining accounts as well to make sure they are actually generating the blocks.
Thanks to the many Steem users who helped me accumulate the knowledge of this process and thanks to @tuck-fheman for prompting me to write this guide.
If you found this or my other posts helpful, click here for my blog page and hit the  button in the upper right!