Hello diyhub community! I hope you are all doing great and creating geniuses.
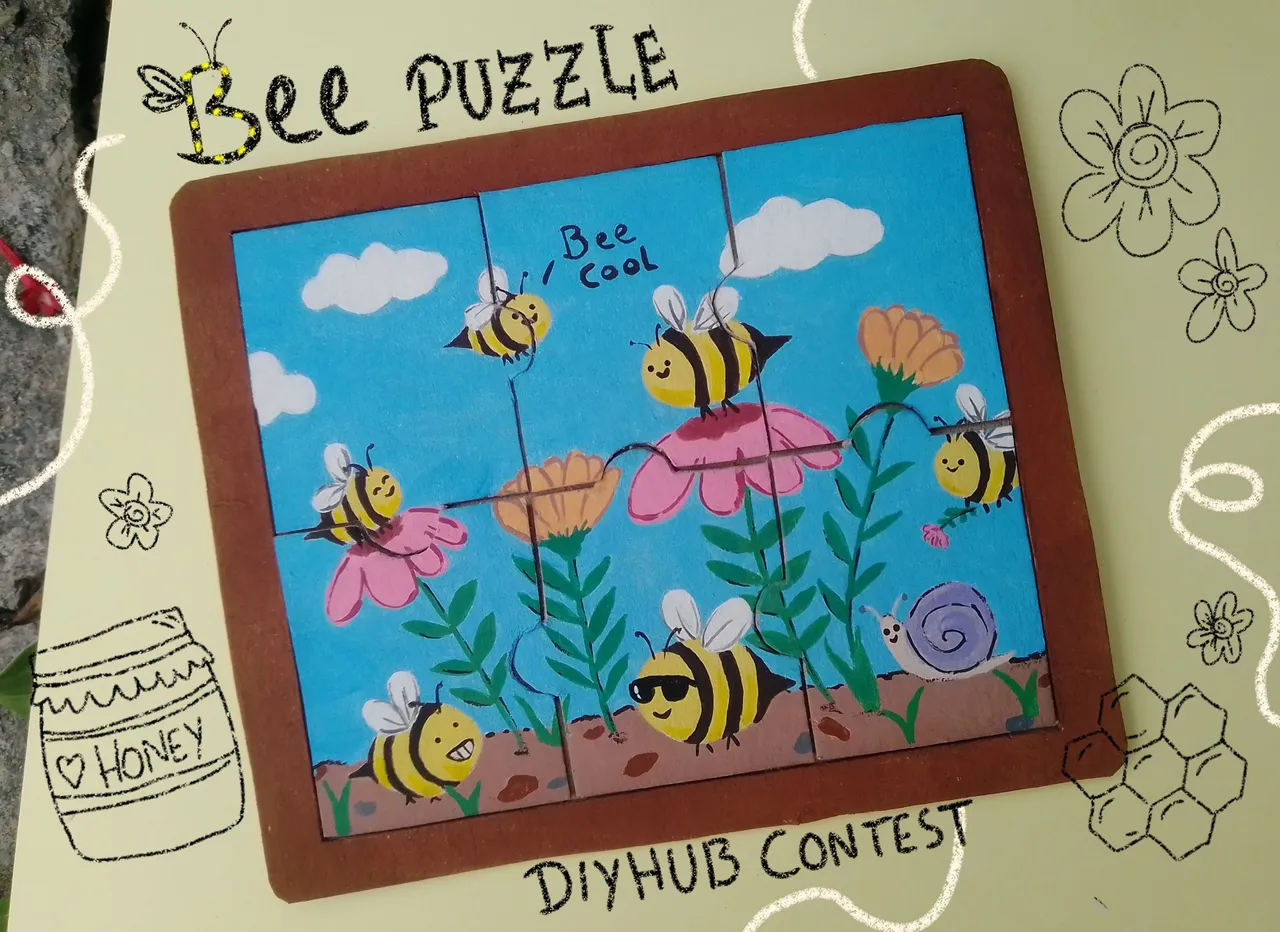
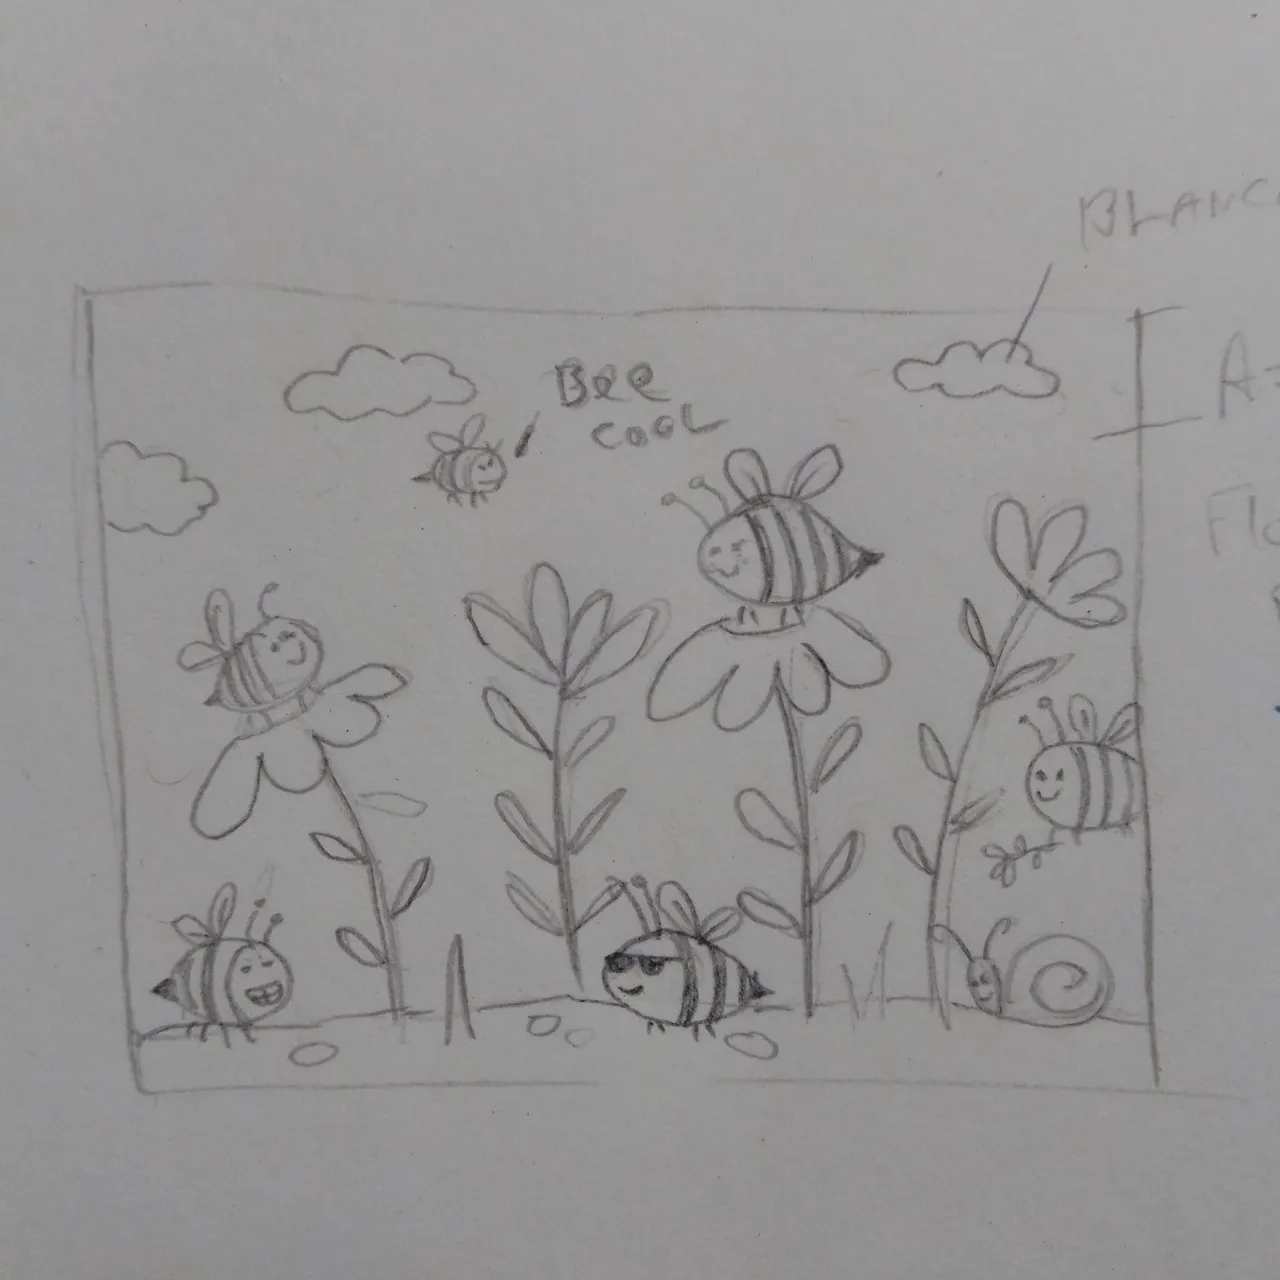
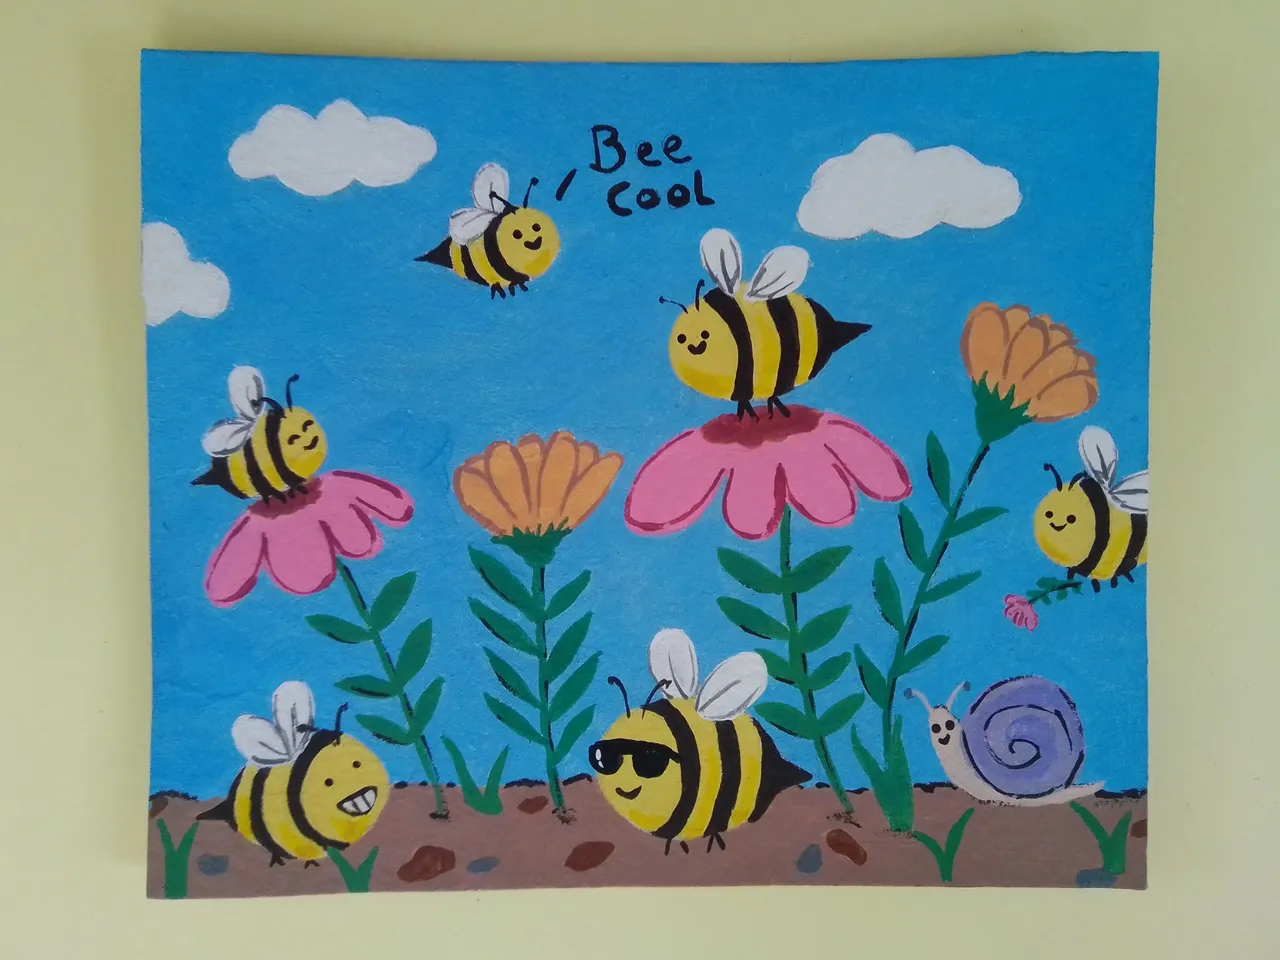
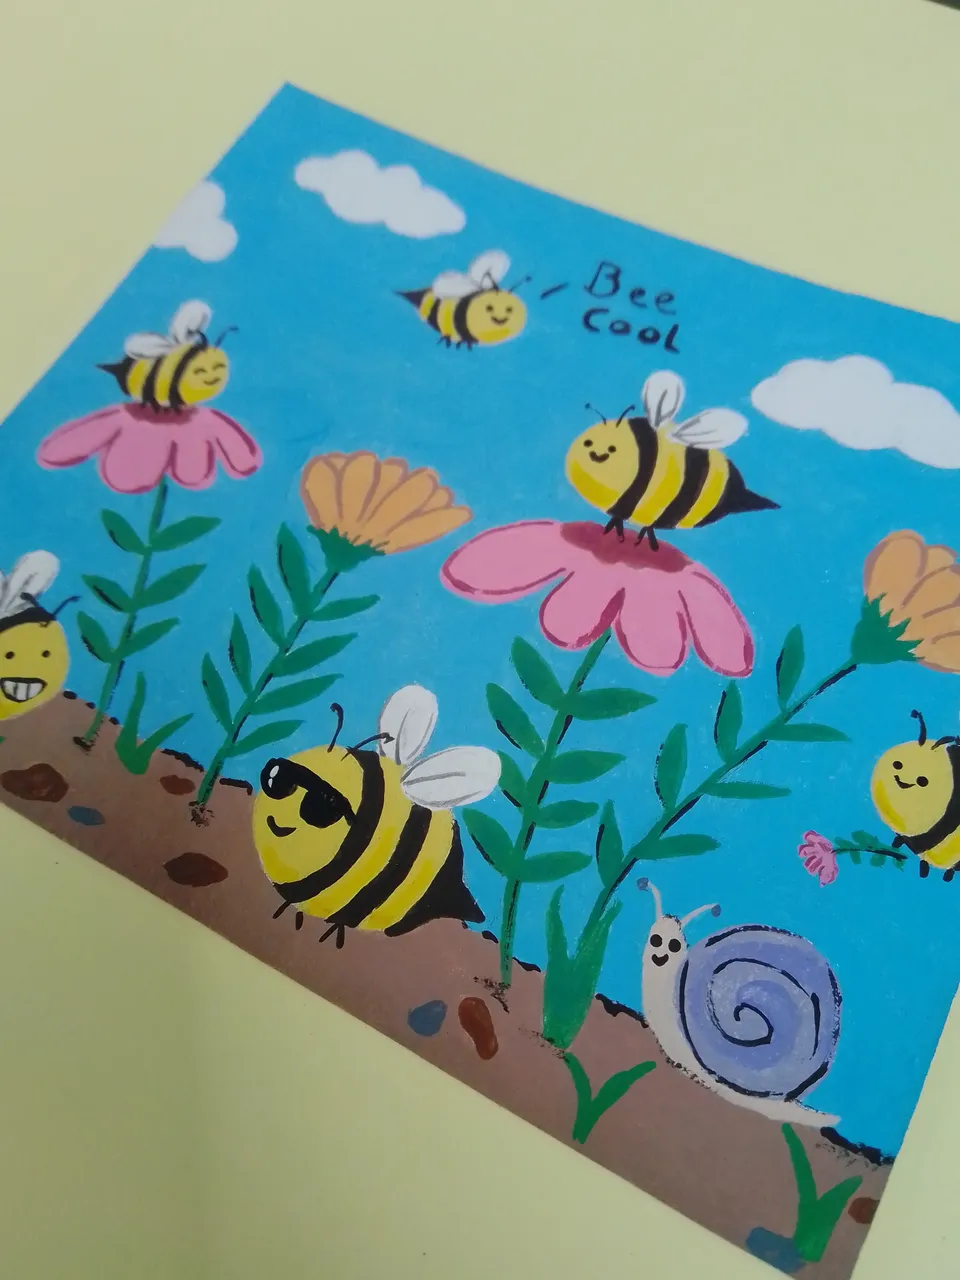
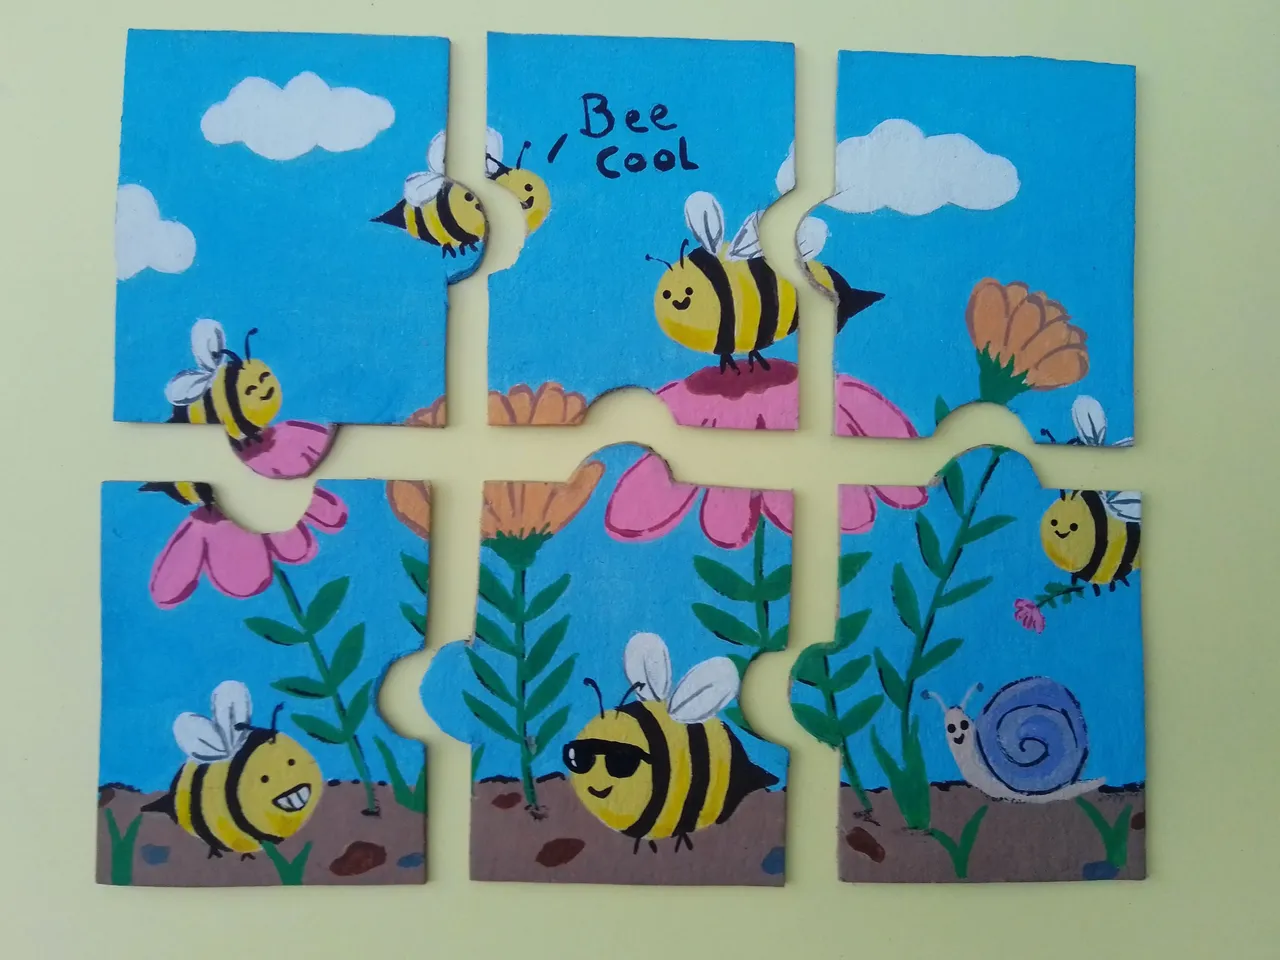
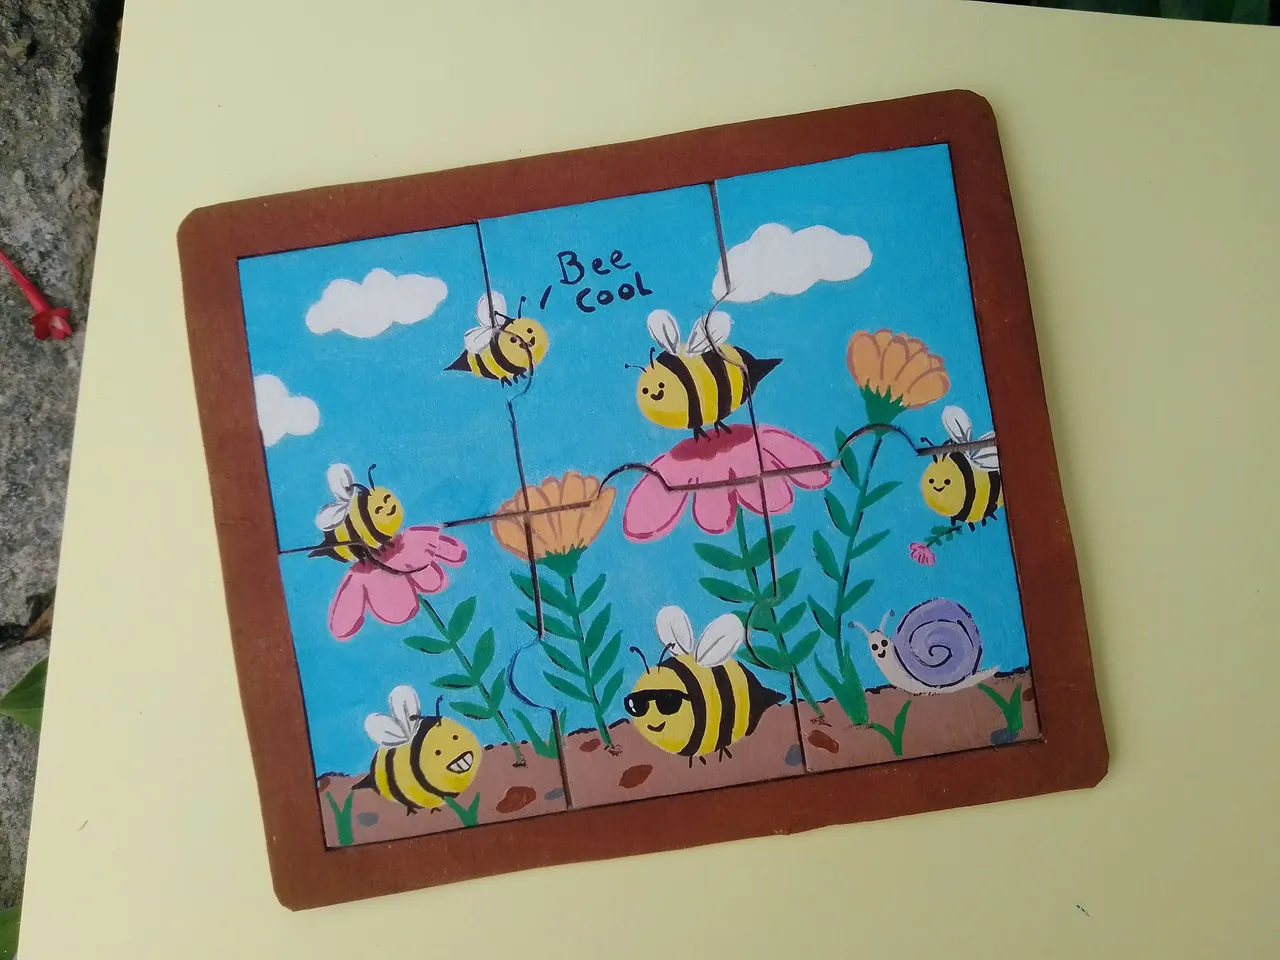
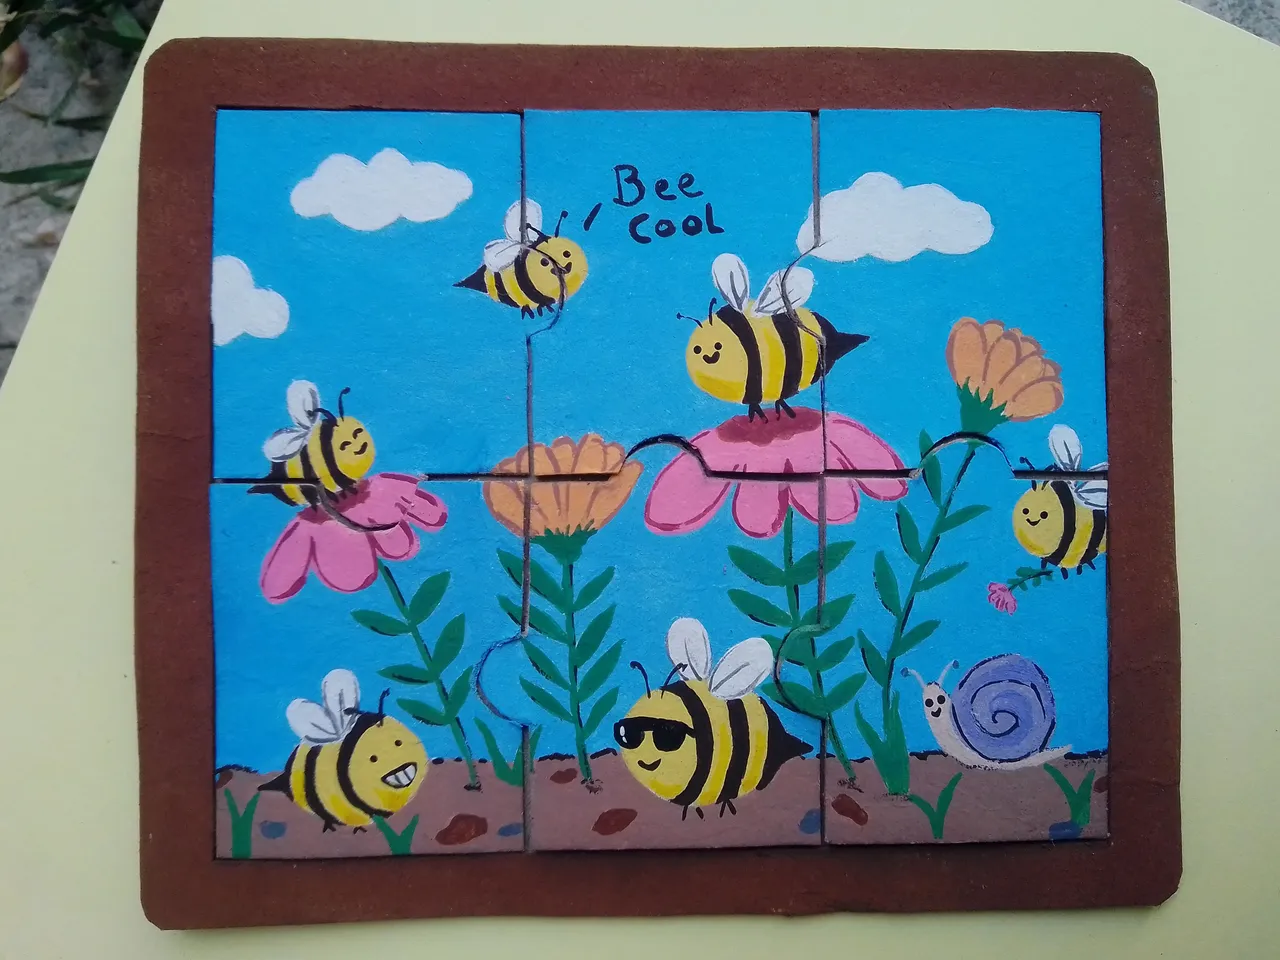
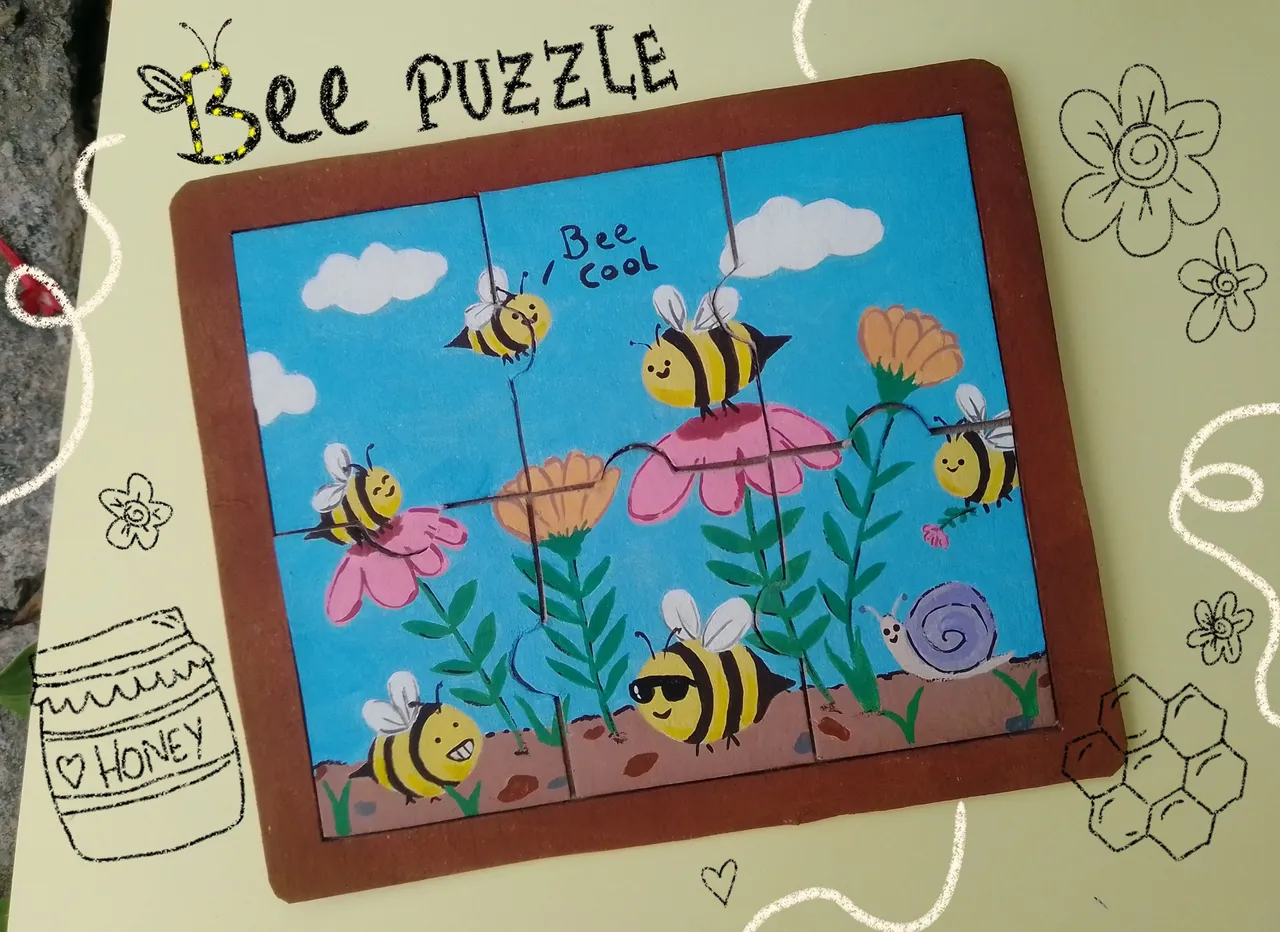
Today I want to show you this puzzle, which you can do to exercise your children's minds at home or at school. It is illustrated with a typical day of working bees. While one is collecting pollen, another one is collecting flowers 🤭 who is that little flower for? A travelling snail is also passing by, coming to cheer up his bee friends and remind them how important they are for the whole ecosystem. And maybe he wanted some honey too, but forgot to take a jar 🍯
That's the story behind the puzzle. It has 6 pieces because it has been designed for little ones aged 3 or 4 years old. And made with material I had to spare, i.e. cardboard 😁. I didn't work too much on the shadows so that it has a cartoon feel.
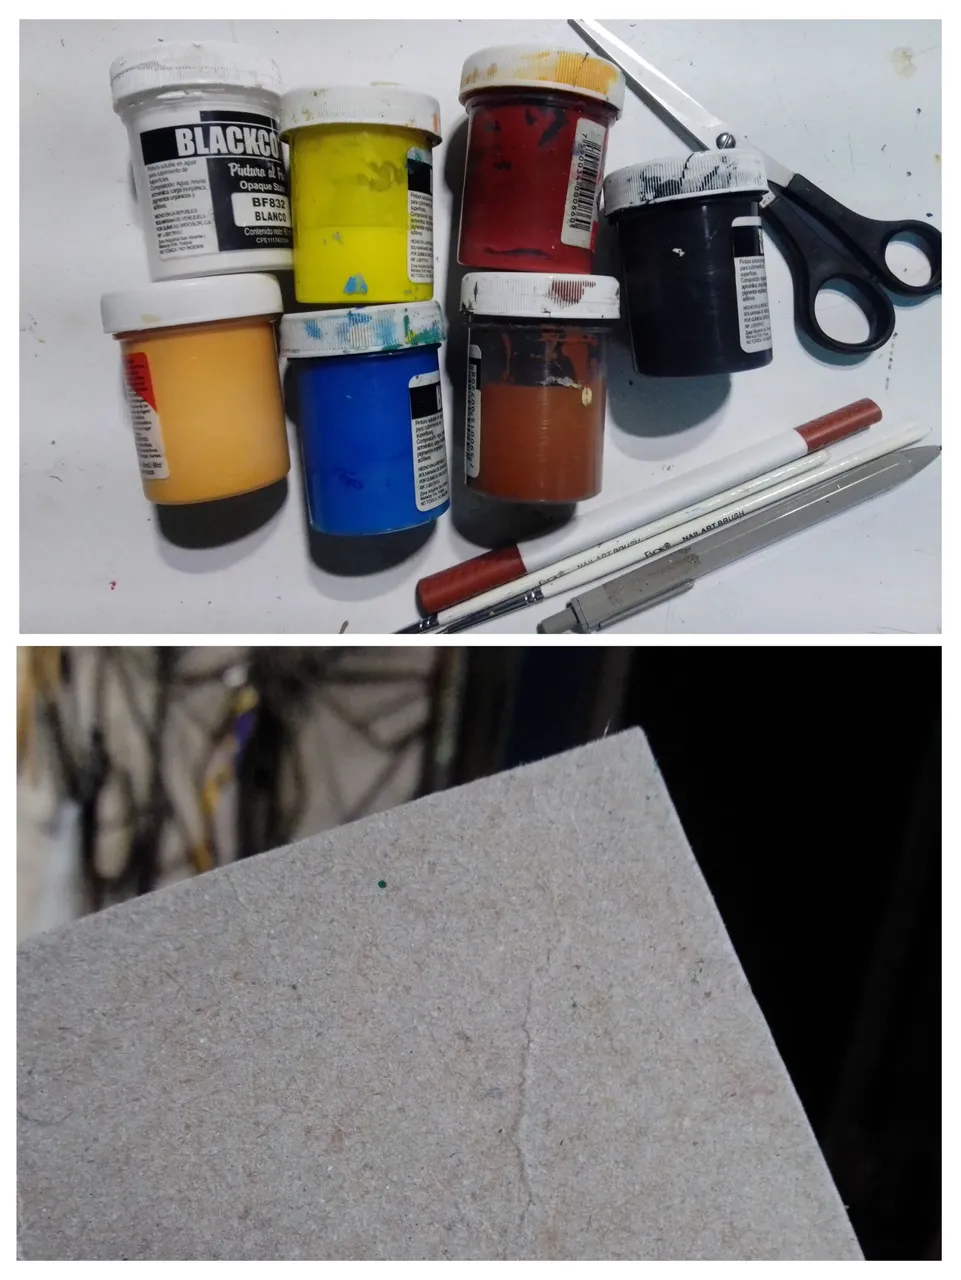
These are all the materials needed:
Cardboard.
Scissors.
Ruler.
Glue.
Cutter.
Marker pen.
Number 6 brush.
Liner brush.
Coloured cold paints: yellow, blue, red, white, black, brown, salmon.

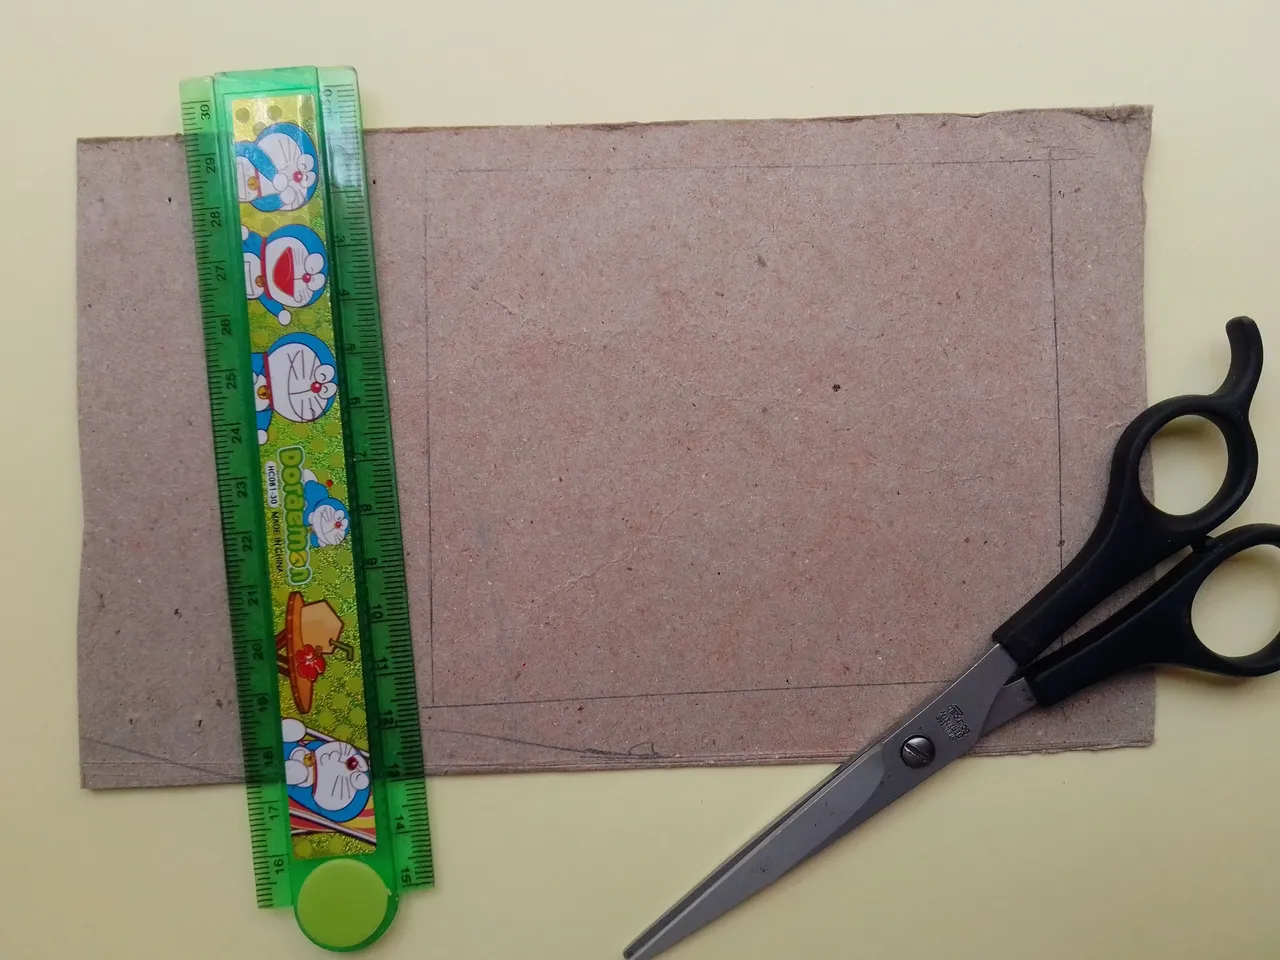
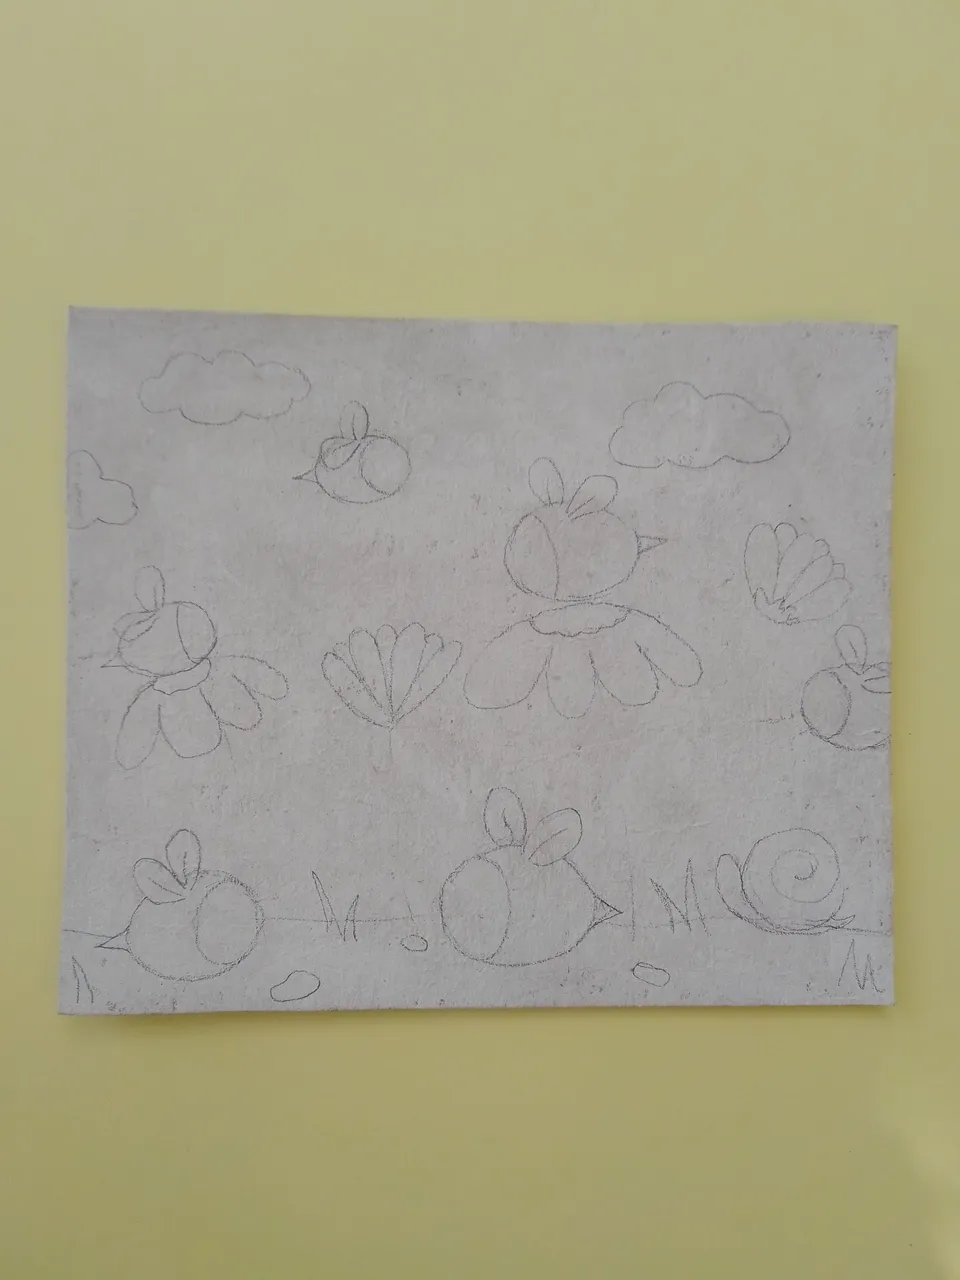
Draw a rectangle with the following dimensions: 12 cm wide by 10 cm high. We paint this rectangle white so that we can work better.
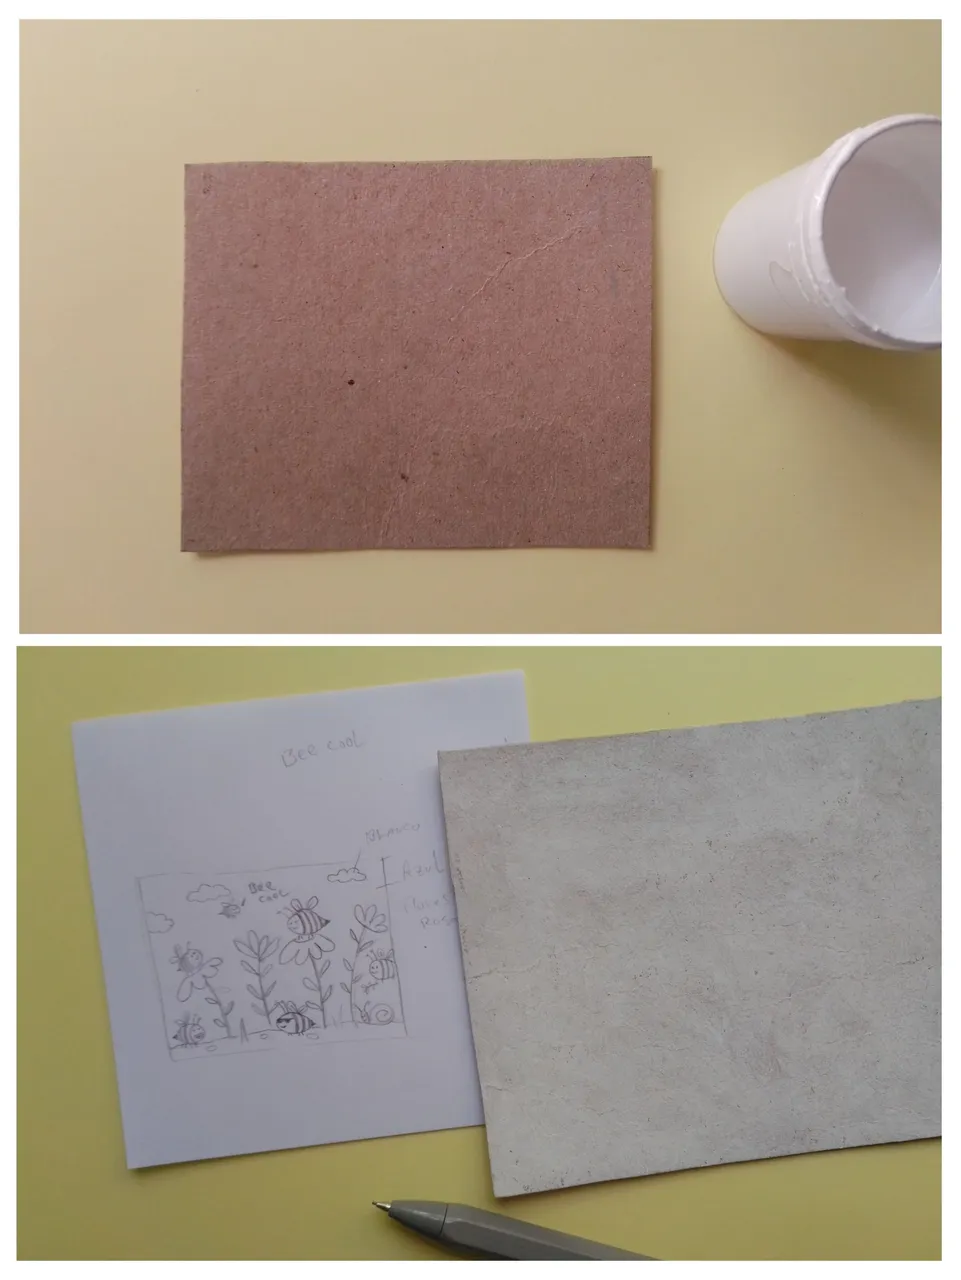
We'll do the sketch and move on to the next step, so get your brushes ready 😁.
We continue with a blue layer for the background, that's all we'll paint, we won't touch anything else, you'll see how it comes to life little by little.

Brown for the floor, one layer is more than enough.
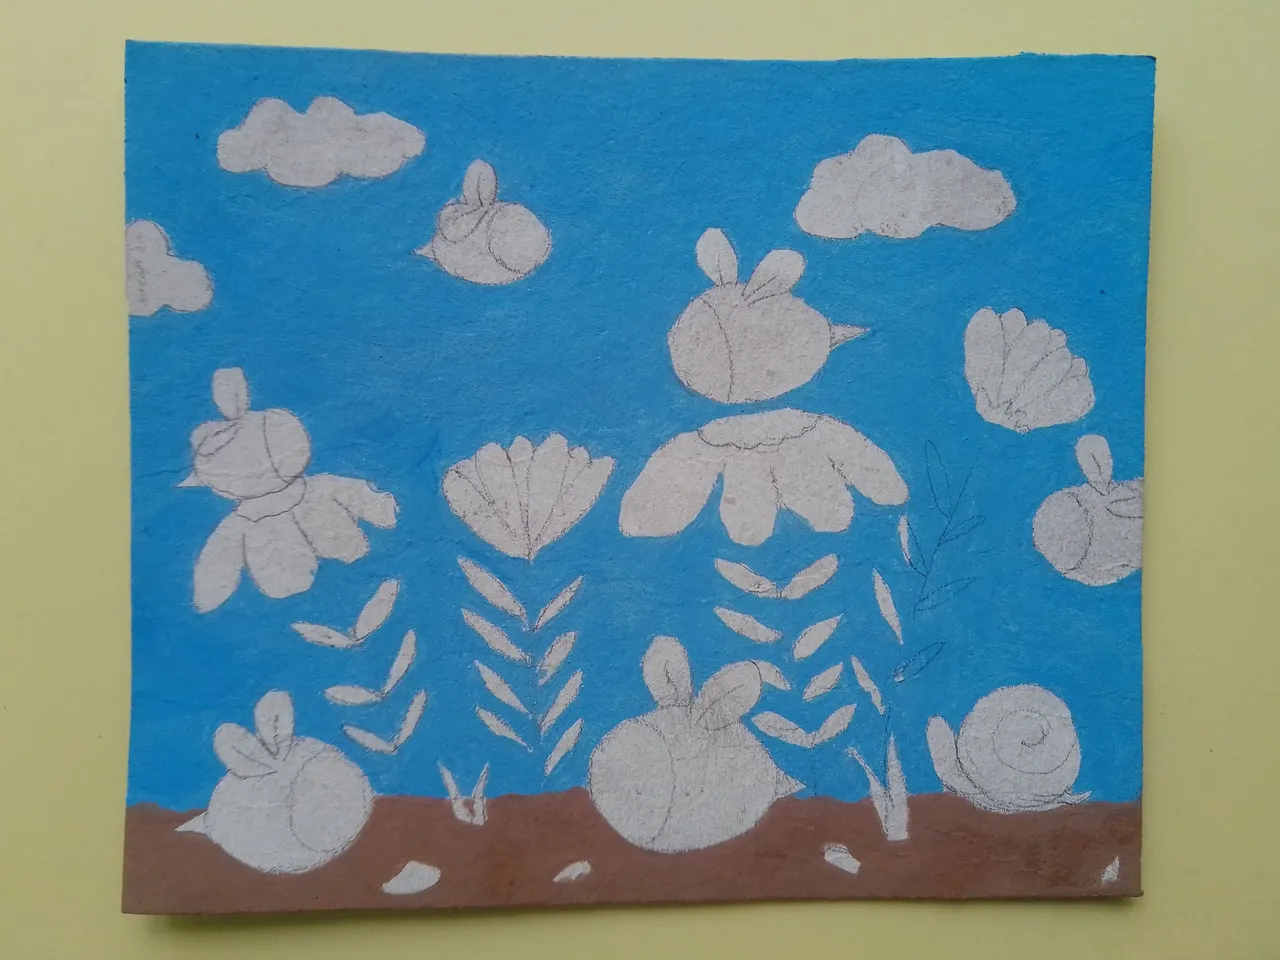
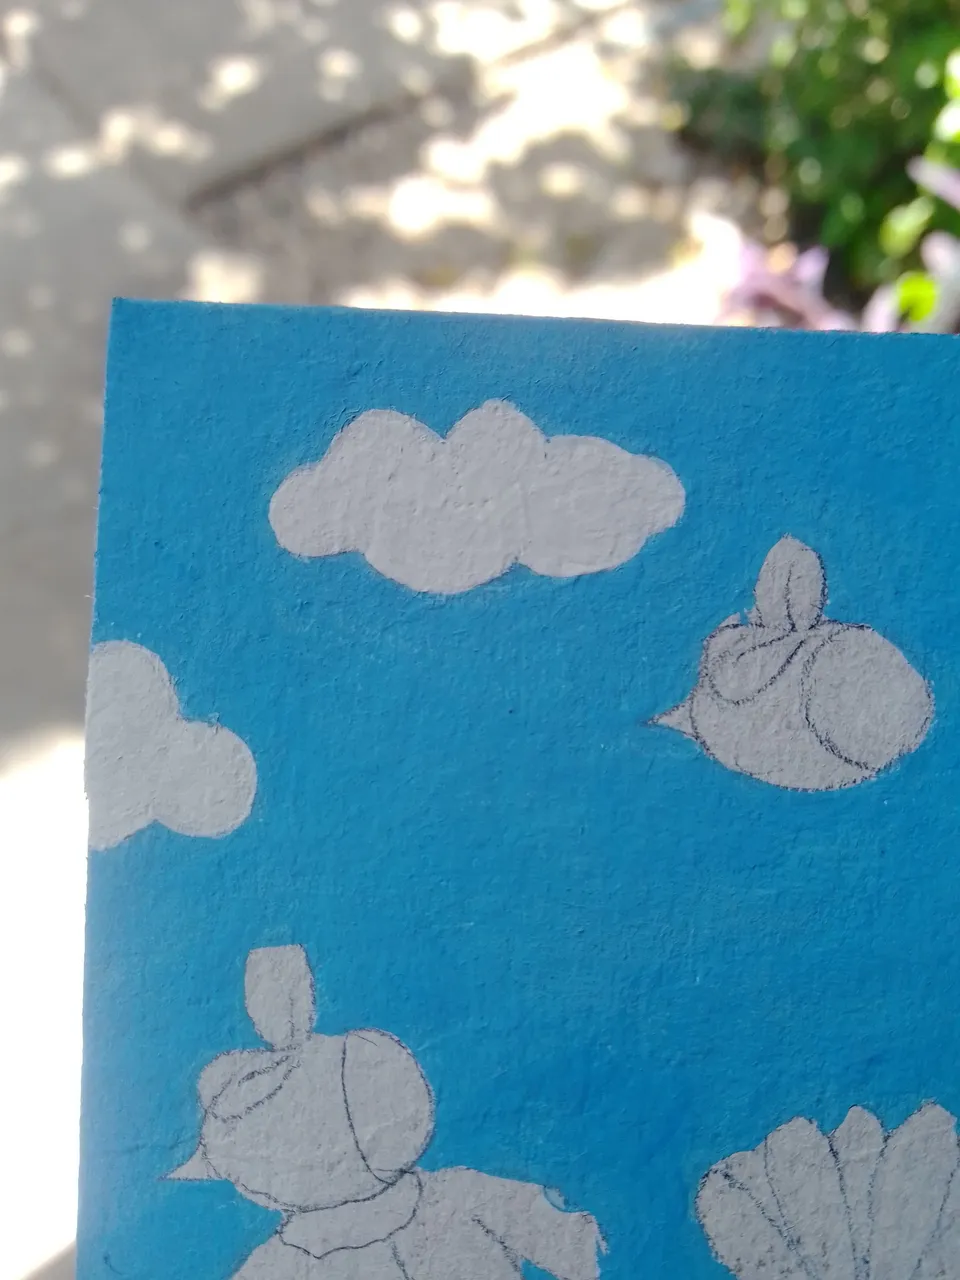
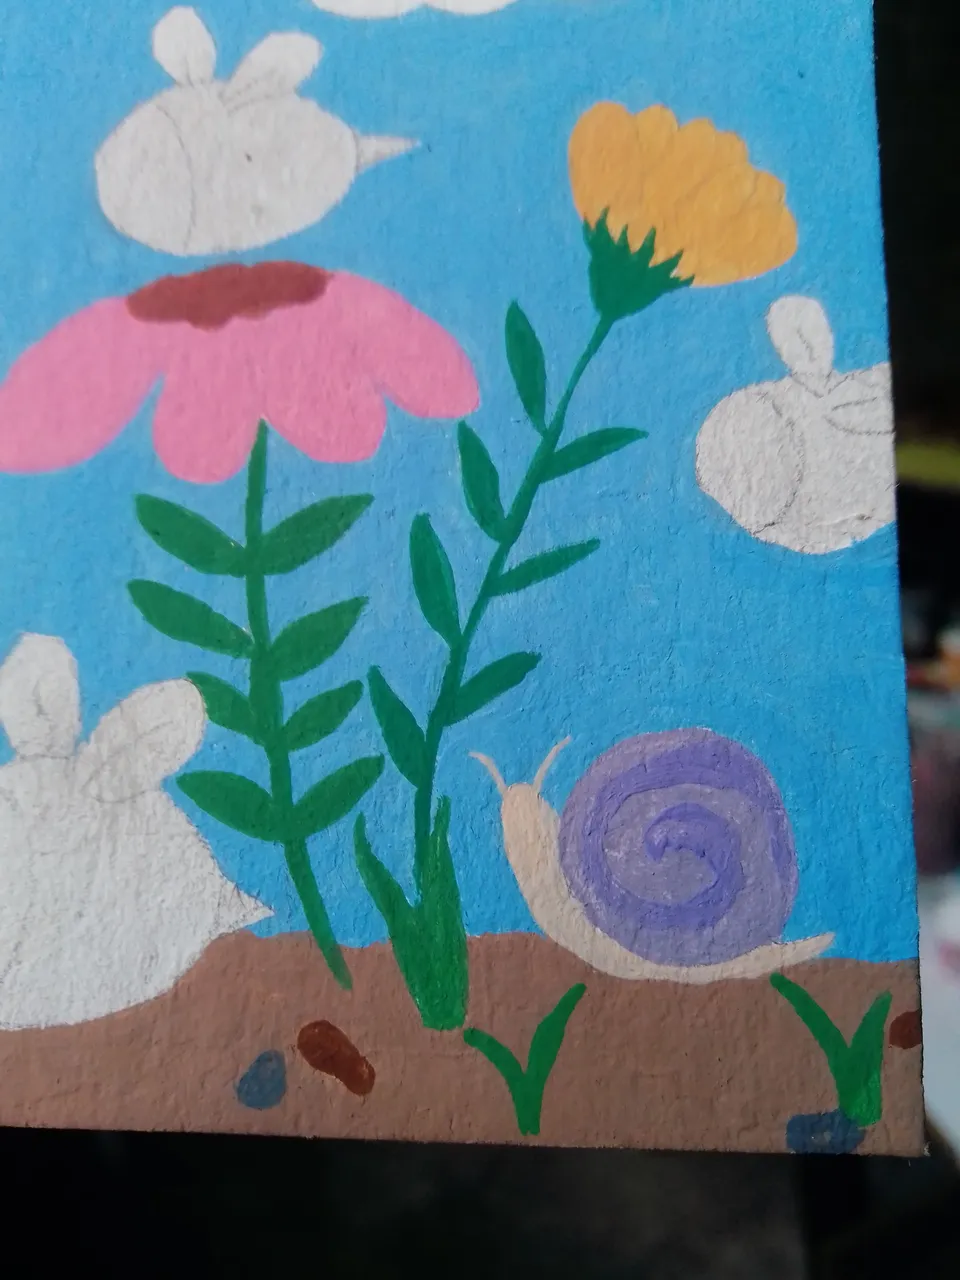
White for the clouds and the colour of your choice for the flowers, I opted for pink and salmon.
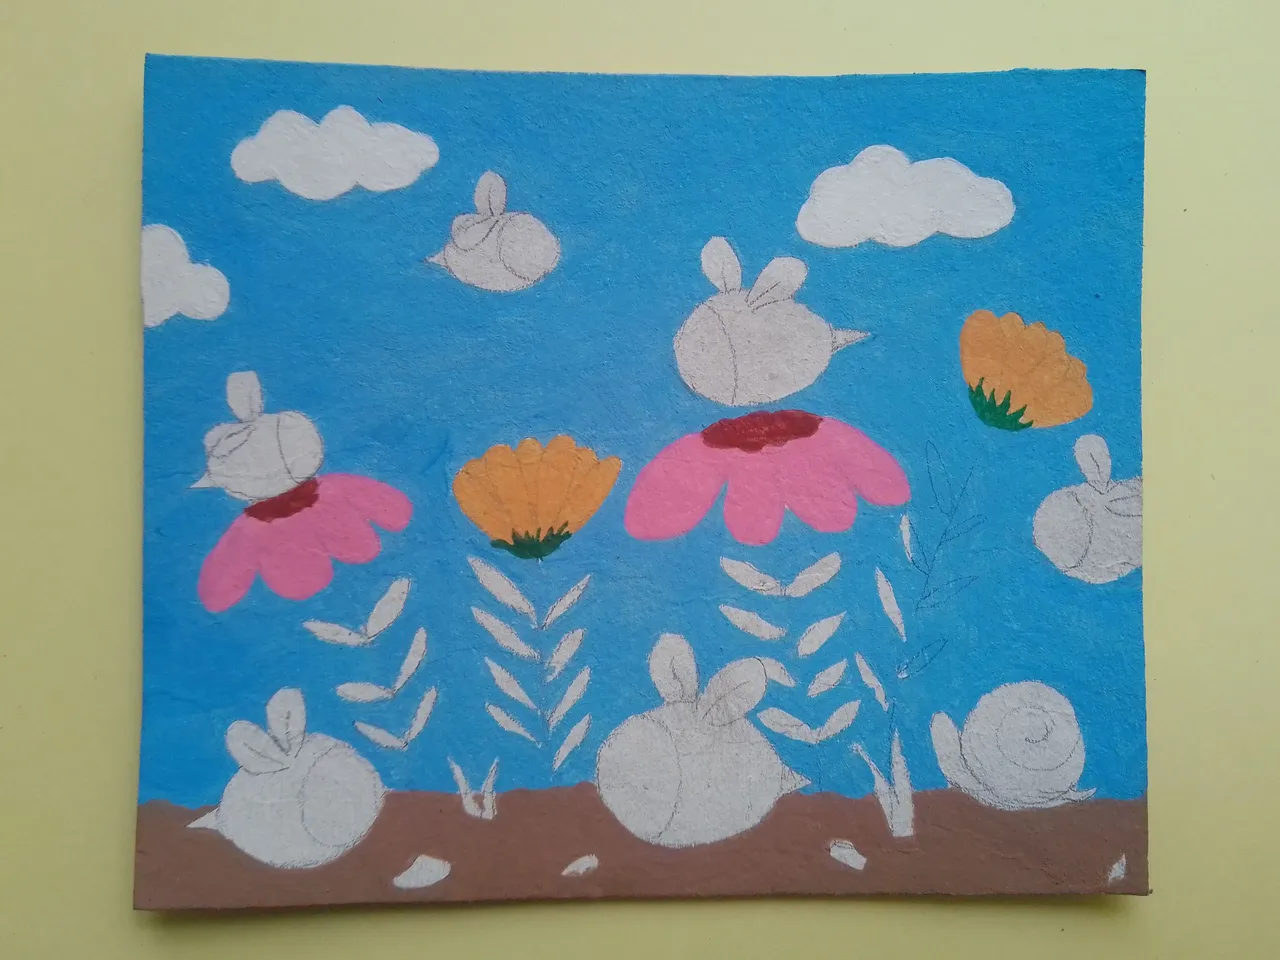
A little green for the leaves and shoots coming out of the ground. And darker brown and grey for the rocks.
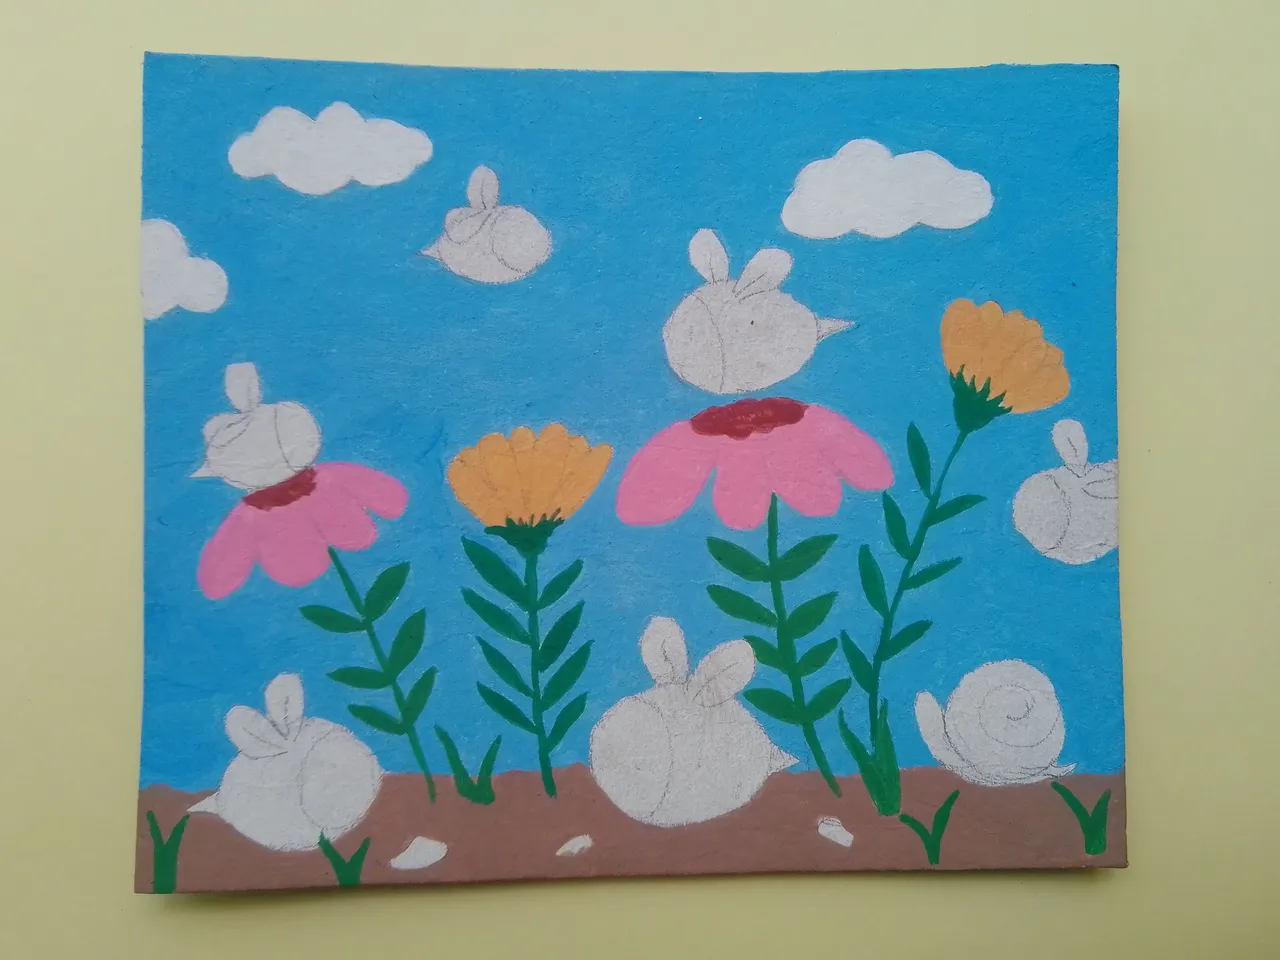
The snail has a very light violet shell.
It's the turn of today's protagonists, you can paint them with the finest brush you have, in my case it's the liner.
I used a yellow colour, but a bit pastel, to get that colour I just added white and with a lot of concentration and holding your breath (an effective method if your pulse trembles a lot 😅) paint the corresponding stripes and the face.
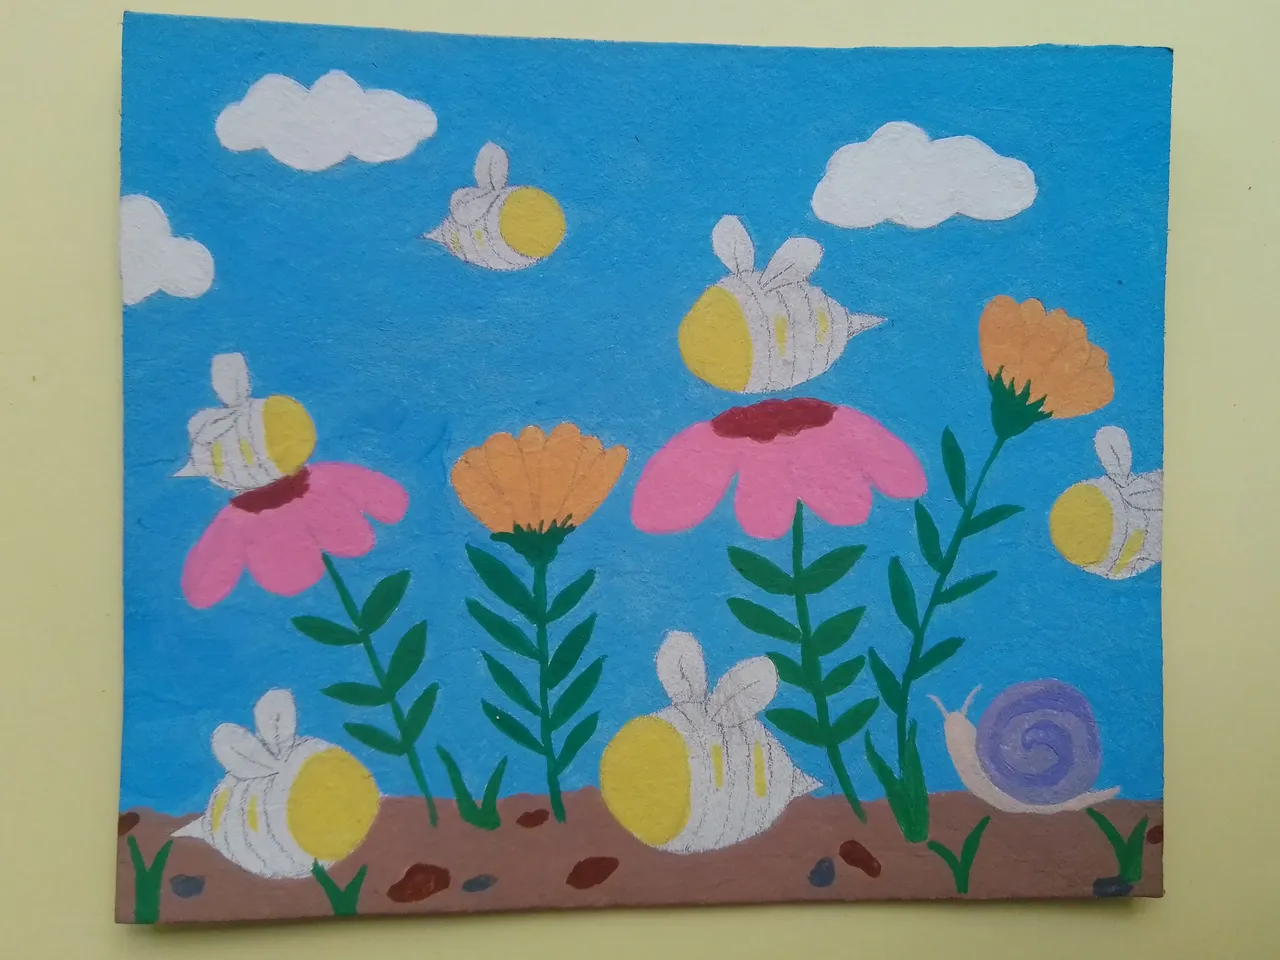
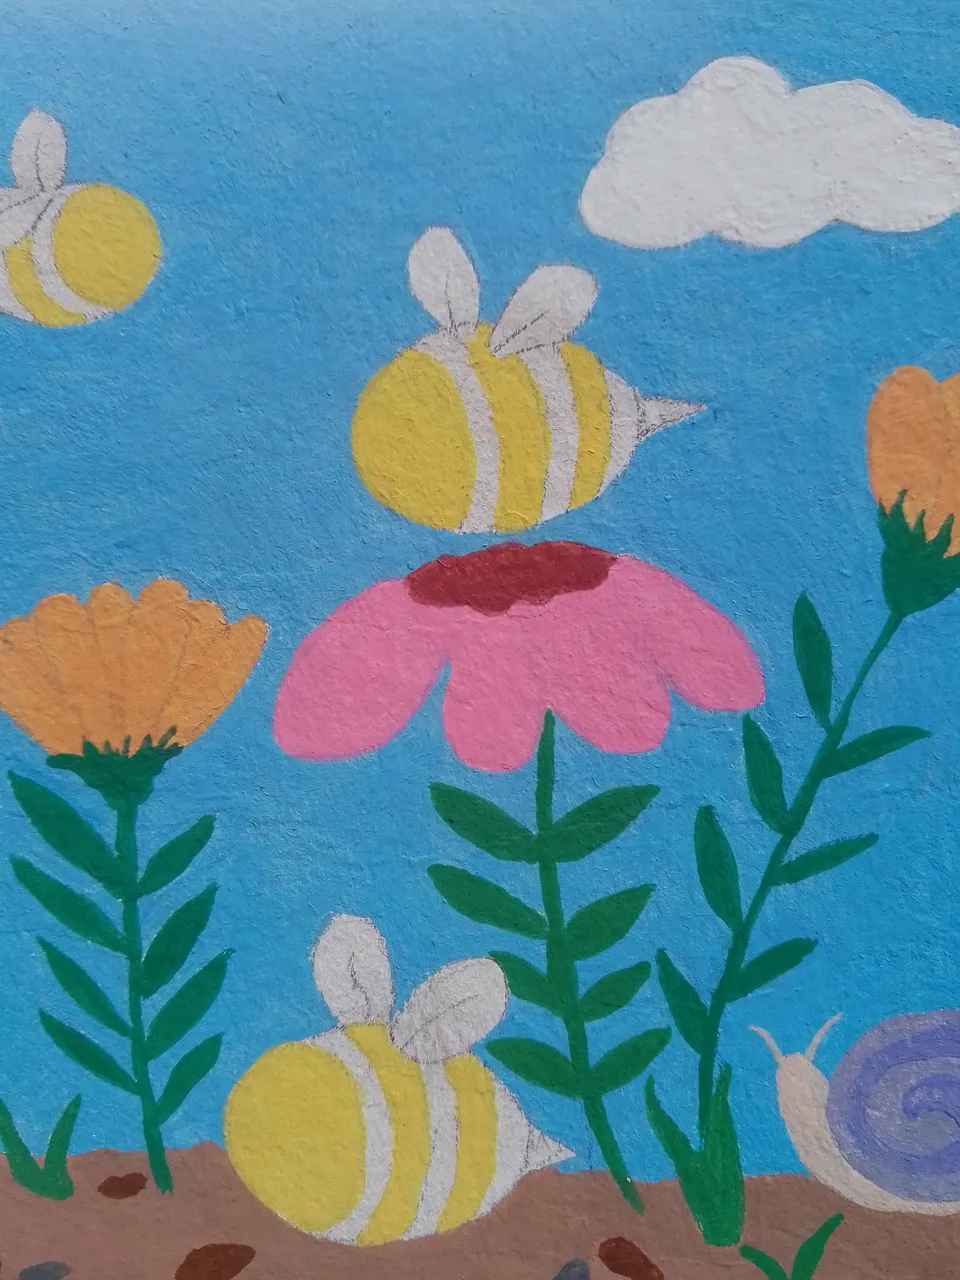
With the black colour the other stripes.
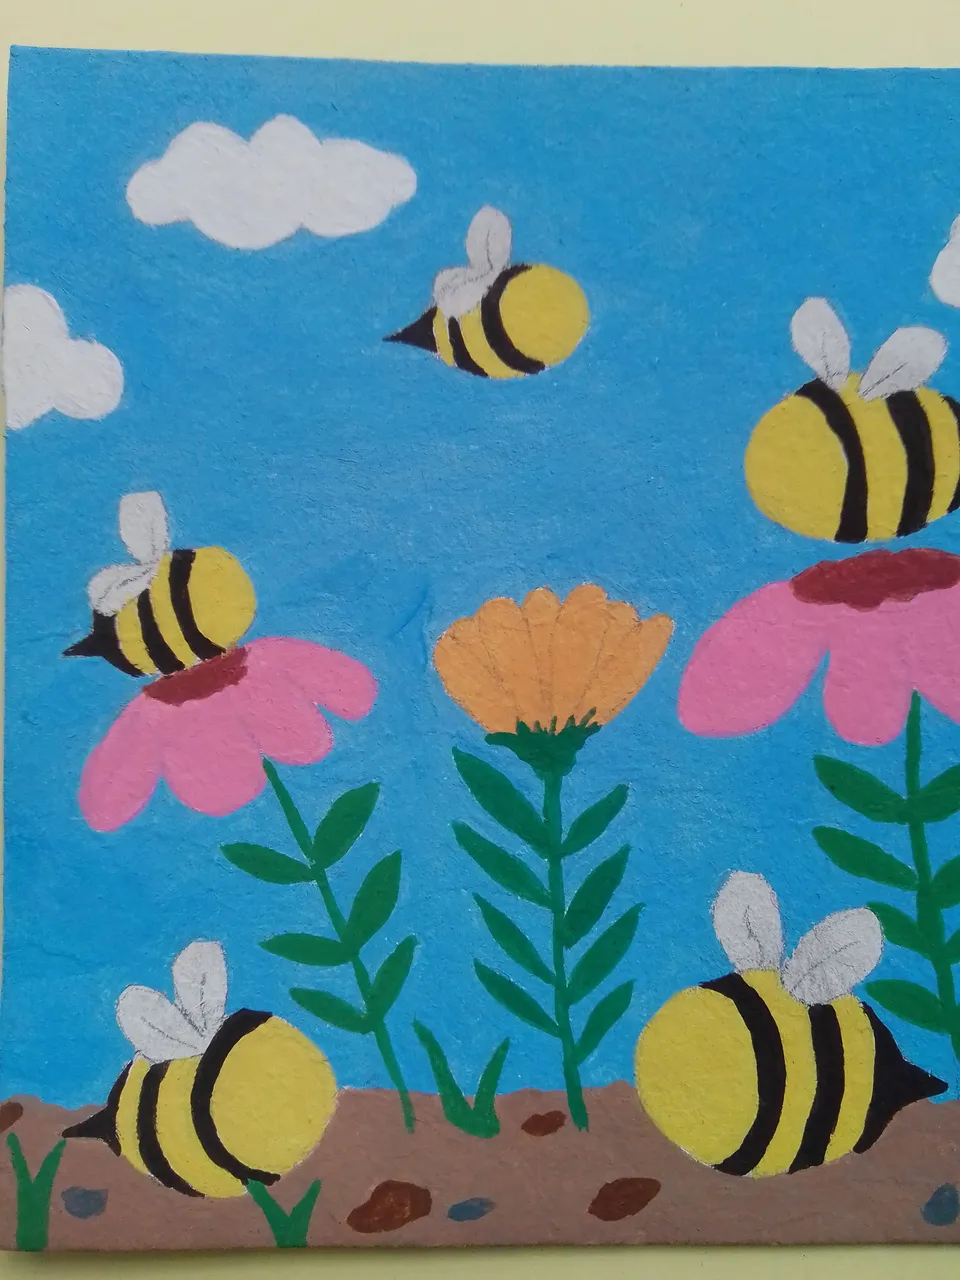
Now it's time for the detailing party. For the wings you only have to give a few strokes of white and with the grey colour a few lines and that's it.
On the flowers I have outlined with a stronger pink, on the leaves with black, as well as on the ground.
There are only a few glasses left for this little bee to work with style and we can put the paints away for now 😅
There are several ways to cut the pieces for the puzzle, choose the one you like best.
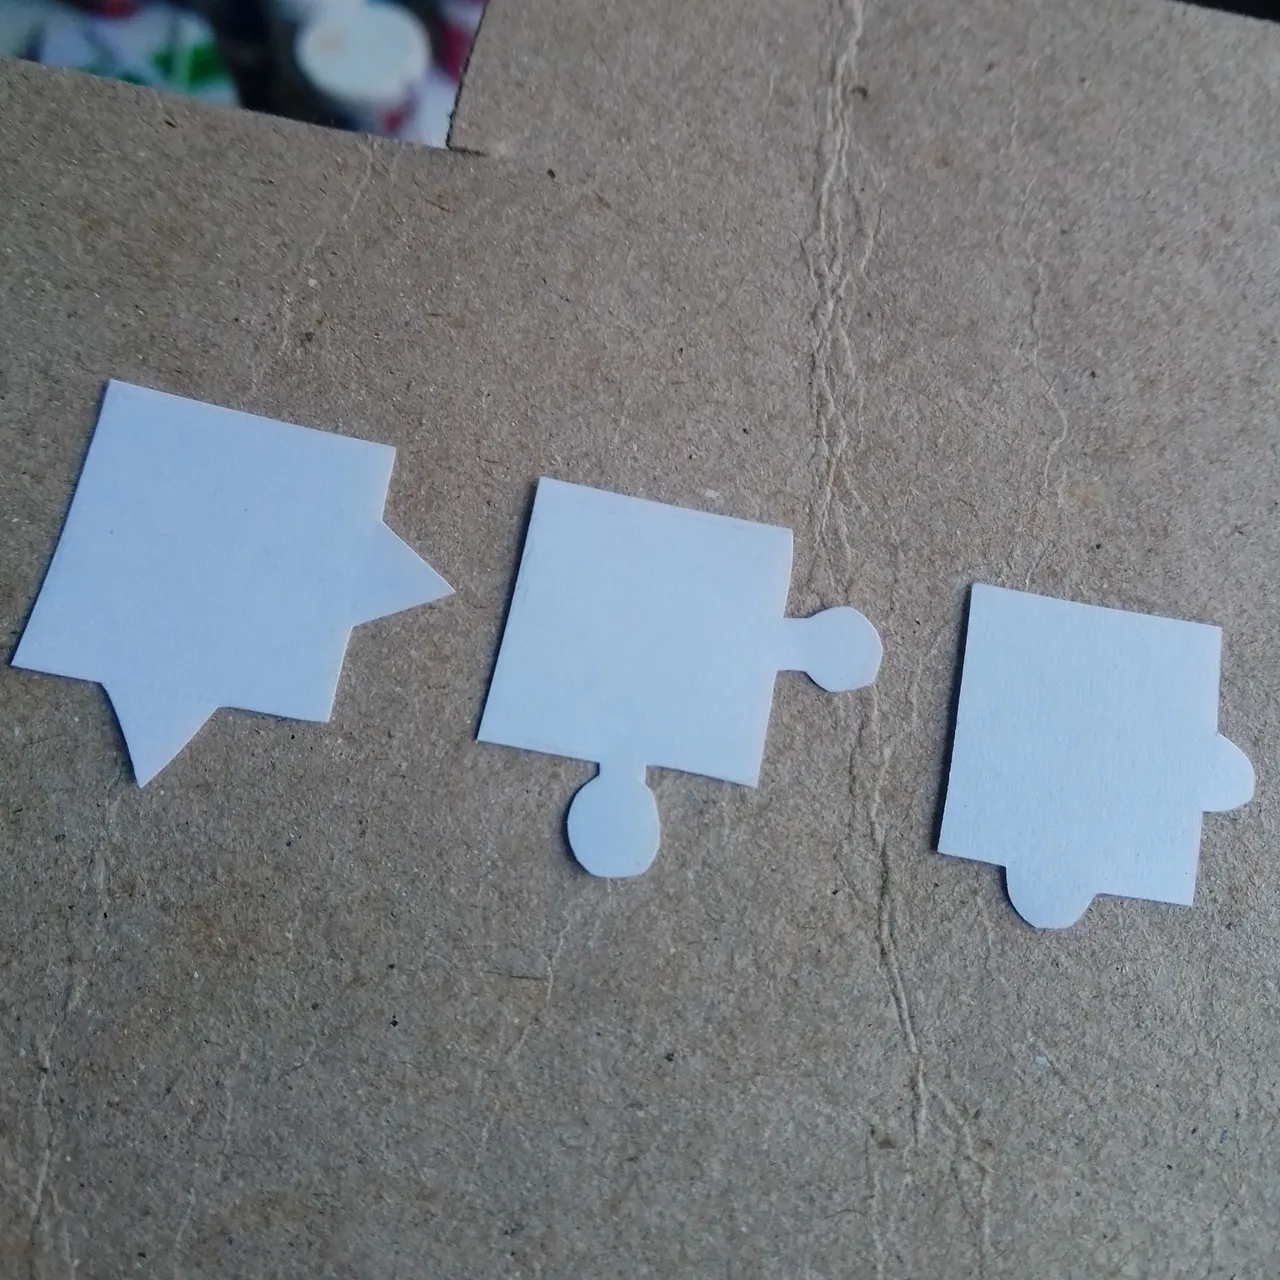
Have you made your choice? Let's continue.
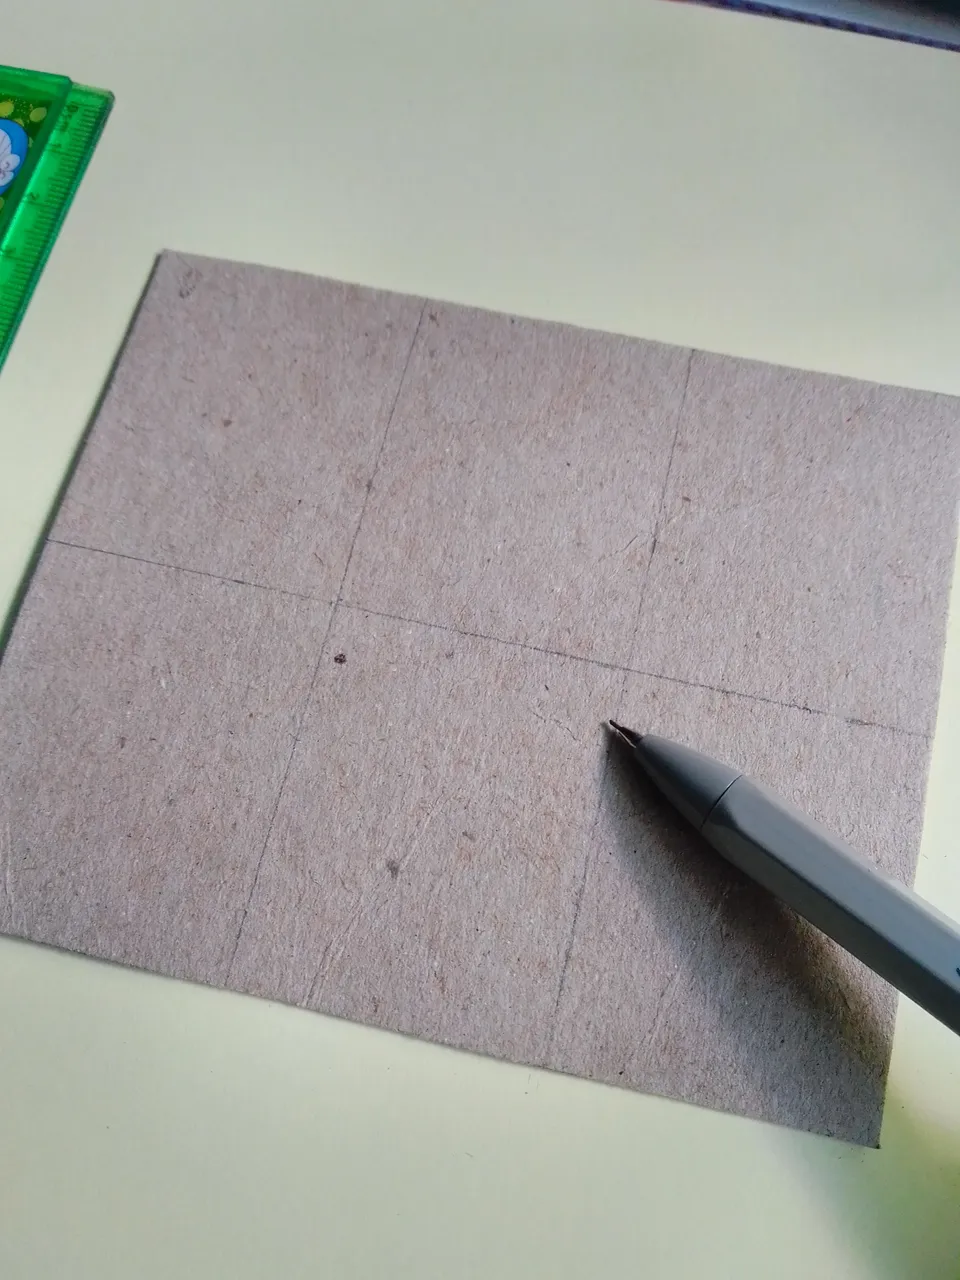
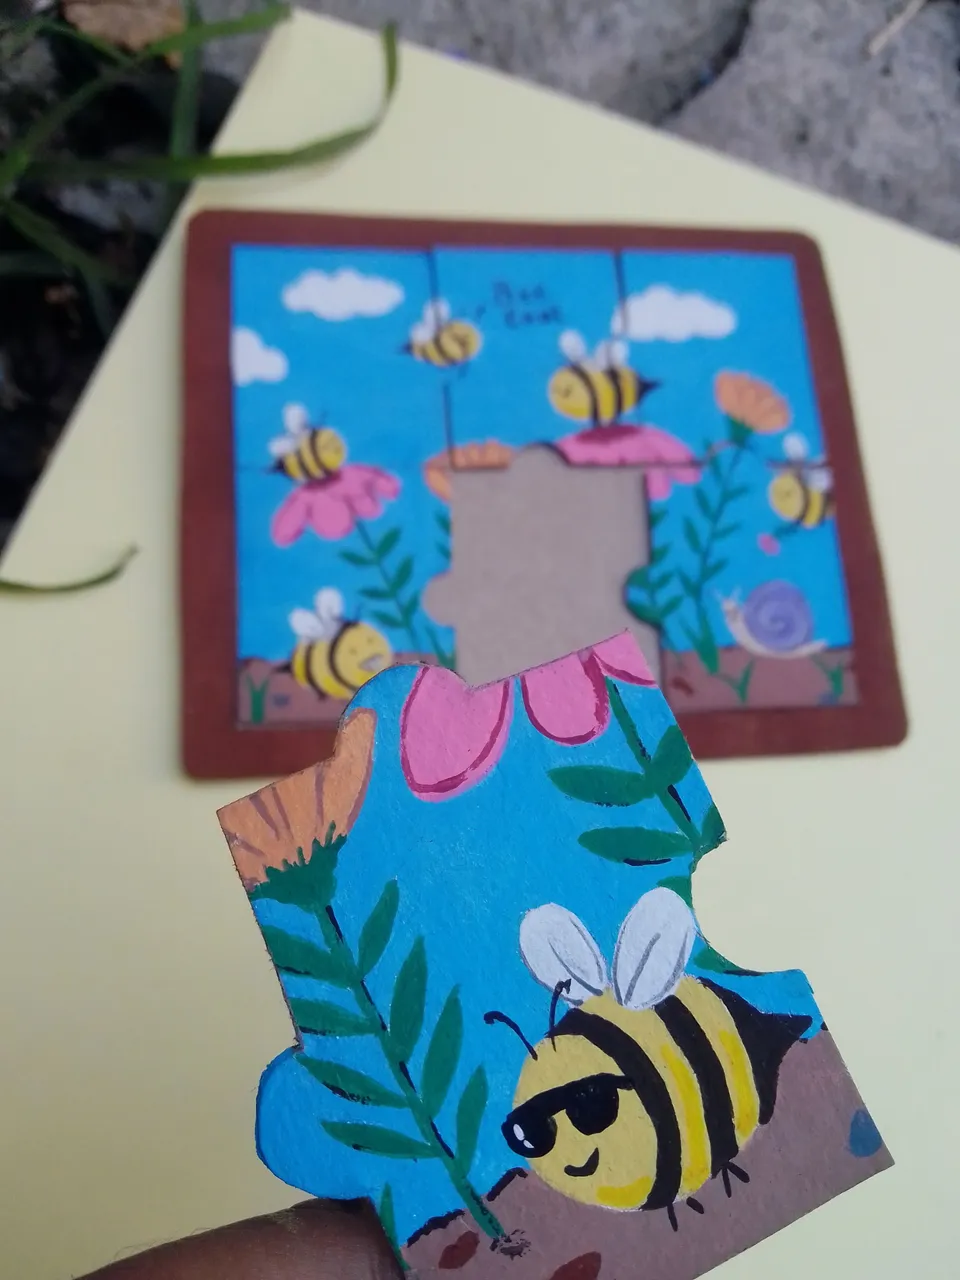
For the back of our bee landscape we will make 6 rectangles of 4 cm by 5 cm. That will leave us with 6 equal pieces.
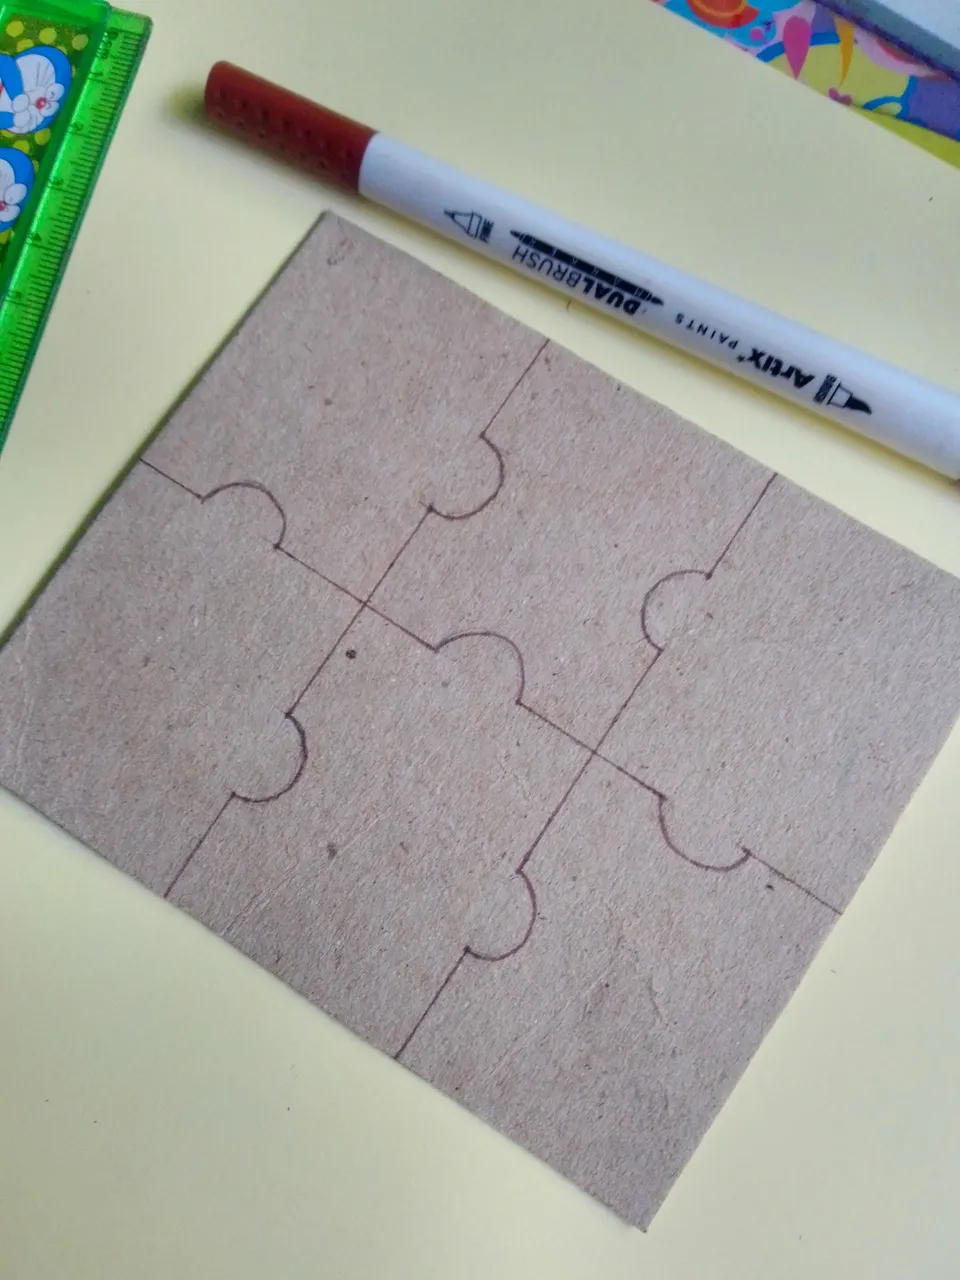
On these pieces we will draw the chosen shape to fit each piece and then cut them out.
To make the puzzle much easier to use and store. You can do the following, although this is optional.
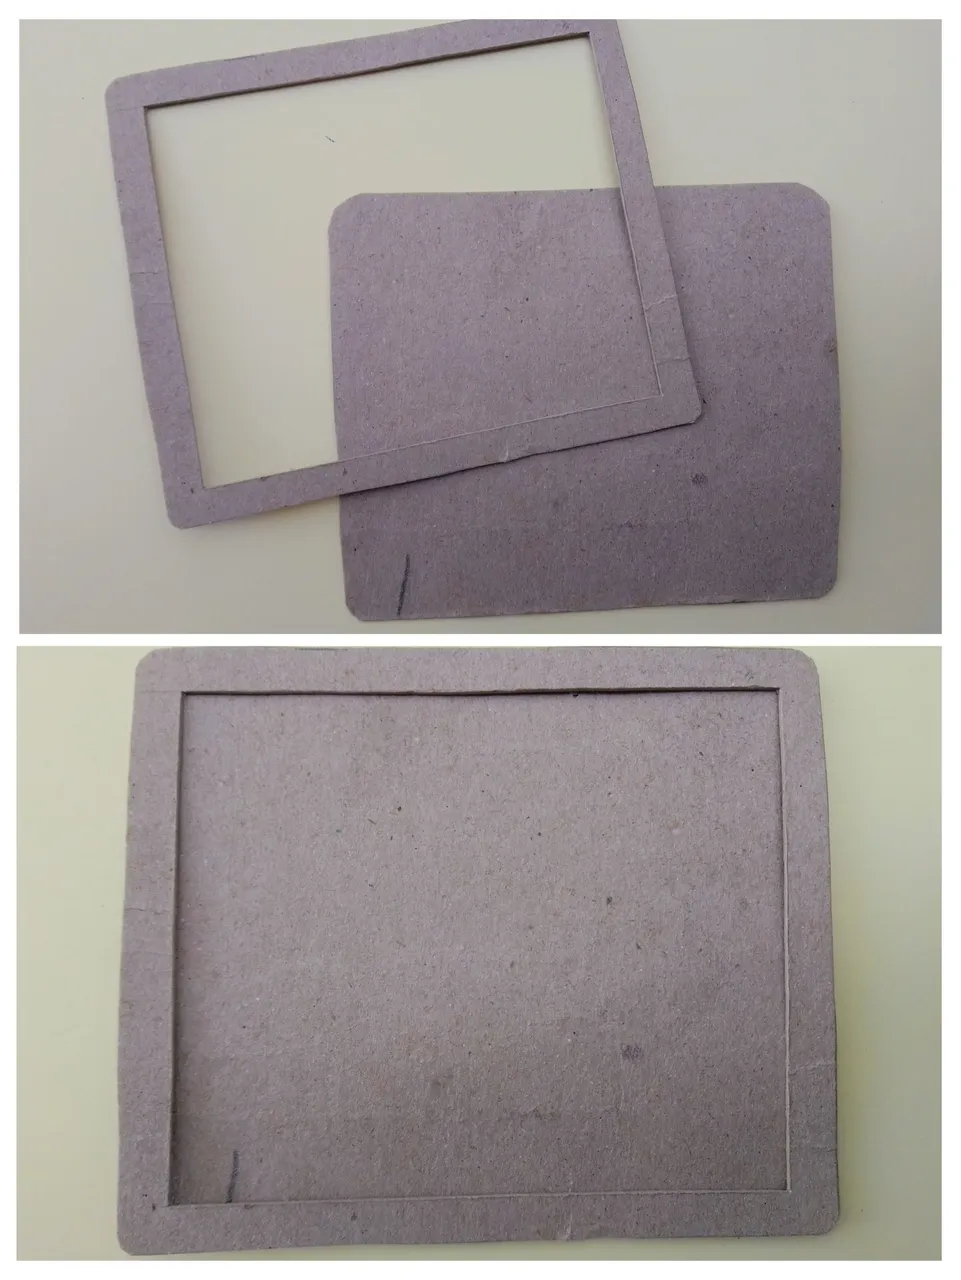
Draw a rectangle measuring 14 cm wide by 12 cm high and also a frame of the same size. As shown in the image.
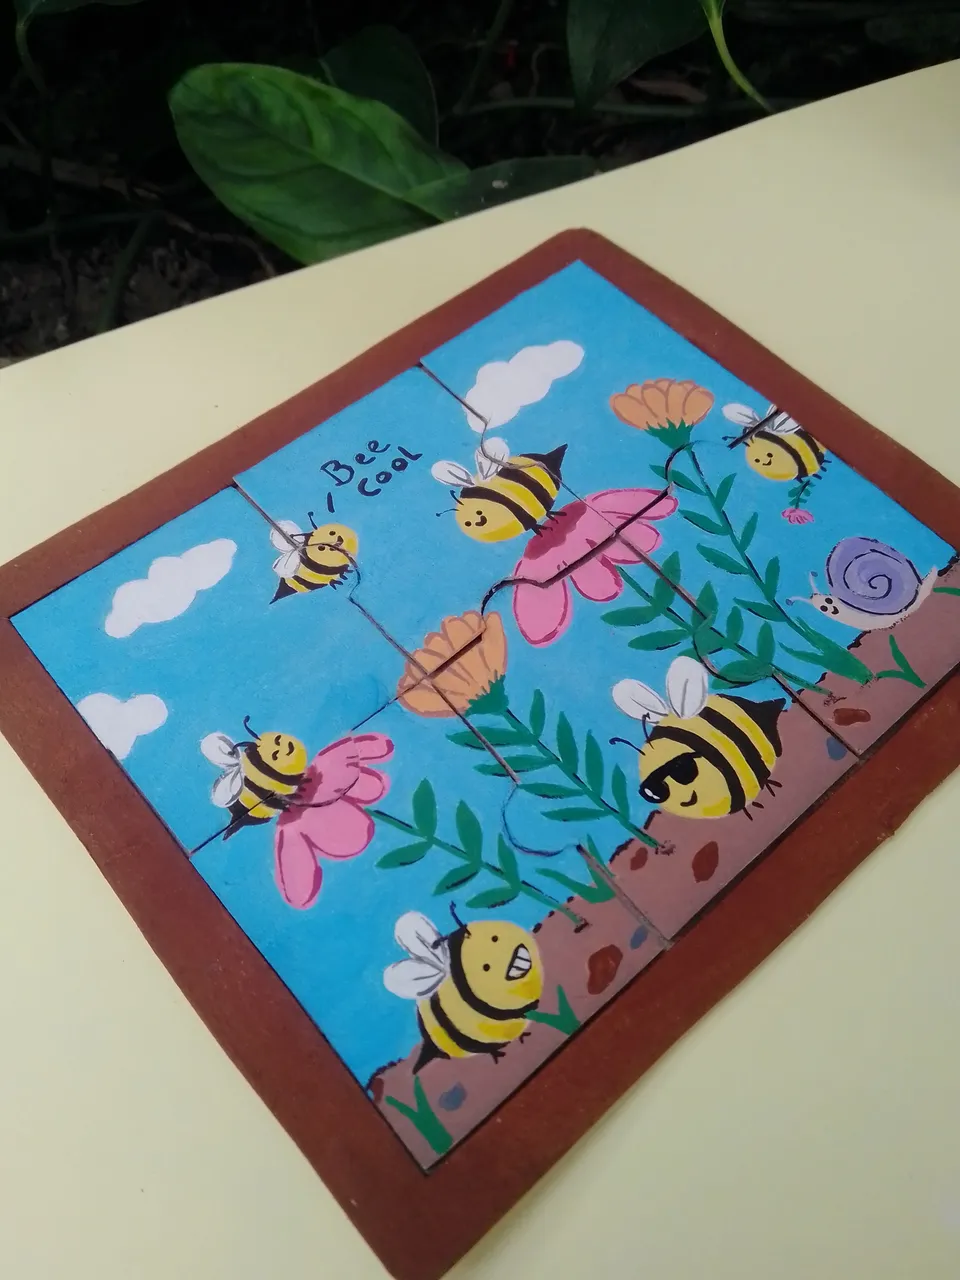
It's done! So bee cool and get to work 🤭. Go ahead and make this cute puzzle 😁.
Credits
¡Hola comunidad diyhub! Espero que todos se encuentren muy bien y creando genialidades.
Hoy quiero mostrarte este rompecabezas, que puedes hacer para ejercitar la mente de tus niños en casa o en la escuela. Está ilustrado con el típico día de unas abejitas trabajadoras. Mientras unas recolectan polen, otra recoge flores 🤭 ¿para quién será esa florecilla?. También está de paso un caracol viajero, llega a animar a sus amigas abejas y a recordarles lo importante que son para todo el ecosistema. Y quizás también quería un poco de miel, pero olvidó llevar un tarro 🍯
Esa es la historia detrás del rompecabezas. Es de 6 piezas porque ha sido pensado para pequeños de 3 o 4 años de edad. Y hecho con material que tenía de sobra, o sea cartón 😁. No trabajé mucho las sombras para que tenga un aire de caricatura.
Estos son todos los materiales necesarios:
Cartón.
Tijera.
Regla.
Pega.
Cutter.
Marcador.
Pincel número 6.
Pincel liner.
Pinturas al frío en color: Amarillo, azul, rojo, blanco, negro, marrón, salmón.
Dibujaremos un rectángulo con las siguientes medidas: 12 cm de ancho por 10 cm de alto. Ese rectángulo lo pintamos de color blanco para que podamos trabajar mejor.
Haremos el boceto y pasaremos al siguiente paso, así que prepara los pinceles 😁
Continuamos con una capa azul para el fondo, solo eso pintaremos, no tocaremos nada más, ya verás como cobra vida poco a poco.
Marrón para el suelo, con una sola capa es más que suficiente.
Blanco para las nubes y el color de tu preferencia para las flores, yo opté por el color rosa y el color salmón.
Un poco de verde para las hojas y los brotes que salen de la tierra. Y marrón más oscuro y gris para las rocas.
El caracol tiene su caparazón en un color violeta muy clarito.
Es el turno de las protagonistas del día de hoy, estas puedes pintarlas con el pincel más fino que tengas, en mi caso es el liner.
Usé un color amarillo, pero un poco pastel, para obtener ese color solo le agregué blanco y con mucha concentración y aguantando la respiración (un método efectivo si les tiembla mucho el pulso 😅) pintan las franjas que corresponden y la cara.
Con el color negro las otras franjas.
Ahora sí, la fiesta de los detalles. Para las alas solo debes dar unas pinceladas de color blanco y con el color gris unas pocas líneas y listo.
En las flores he delineado con un rosa más fuerte, en las hojas con el color negro, al igual que en el suelo.
Solo faltan unos lentes para que esta abejita trabaje con mucho estilo y podemos guardar las pinturas por ahora 😅
Hay varias formas de cortar las piezas para el rompecabezas, elige la que más te guste.
¿Ya elegiste? Continuemos.
Por la parte de atrás de nuestro paisaje de abejas haremos 6 rectángulos de 4 cm por 5 cm. Eso nos dejará como resultado 6 piezas iguales.
En estas piezas dibujaremos la forma elegida para que encaje cada pieza y luego recortamos.
Para que el rompecabezas sea mucho más fácil de usar y guardar. Puedes realizar lo siguiente, aunque esto es opcional.
Dibujamos un rectángulo que mida 14 cm de ancho por 12 cm de alto y también un marco con la misma medida. Como se muestra en la imagen.
¡Ha quedado listo! Así que bee cool y manos a la obra 🤭. Anímate a hacer este lindo rompecabezas 😁
Creditos